Owner’s Manual #513532-5 Rev.1 3 E111I/F111I Model Machines
SECTION 2
INSTALLATION INSTRUCTIONS
2.1 SAFETY PRECAUTIONS
Do not attempt to operate the machine until the safety
precautionsand operating instructions inthismanual are
read completely and are thoroughly understood.
Take notice of all warning labels on the machine. The la-
bels have been put there to help maintain a safe working
environment.Thelabelshavebeendesignedtowithstand
washing and cleaning. All labels must remain legible for
thelifeofthemachine.Labelsshouldbecheckedperiodi-
callytobesuretheycanberecognizedaswarninglabels.
If danger, warning or caution labels are needed, indicate
thepartnumber,typeoflabel,locationoflabel,andquantity
required along with your address and mail to:
STOELTING
ATTENTION: Customer Service
502 Hwy. 67
Kiel, Wisconsin 53042
2.2 SHIPMENT AND TRANSIT
Themachinehasbeenassembled,operatedandinspected
at the factory. Upon arrival at the final destination, the
entire machine must be checked for any damage which
may have occurred during transit.
With the method of packaging used, the machine should
arriveinexcellentcondition.THECARRIERISRESPON-
SIBLE FOR ALL DAMAGE IN TRANSIT, WHETHER
VISIBLE OR CONCEALED. Do not pay the freight bill
until the machine has been checked for damage. Have
the carrier note any visible damage on the freight bill. If
concealeddamageand/orshortageisfoundlater, advise
the carrier within 10 days and request inspection. The
customermustplaceclaimfordamagesand/orshortages
in shipment with the carrier. Stoelting, Inc. cannot make
any claims against the carrier.
2.3 MACHINE INSTALLATION
WARNING
Installation must be completed by a qualified
electrician/refrigeration specialist.
Incorrect installation may cause personal injury,
severe damage to the machine and will void fac-
tory warranty.
Installation of the machine involves moving the machine
close to its permanent location, removing all crating, set-
ting in place, assembling parts, and cleaning.
A. Uncrate the machine.
B. Accuratelevelingisnecessaryforcorrectdrainage
of machine barrel and to insure correct overrun.
Placeabubblelevelontopofthemachineateach
corner to check for level condition. If adjustment
is necessary, level the machine by turning the
bottom part of each leg in or out.
C. The machine has a base gasket that must be
installed. Separate the gasket and install it with
theseam totheback.Make suretheangledside
of the gasket is facing up.
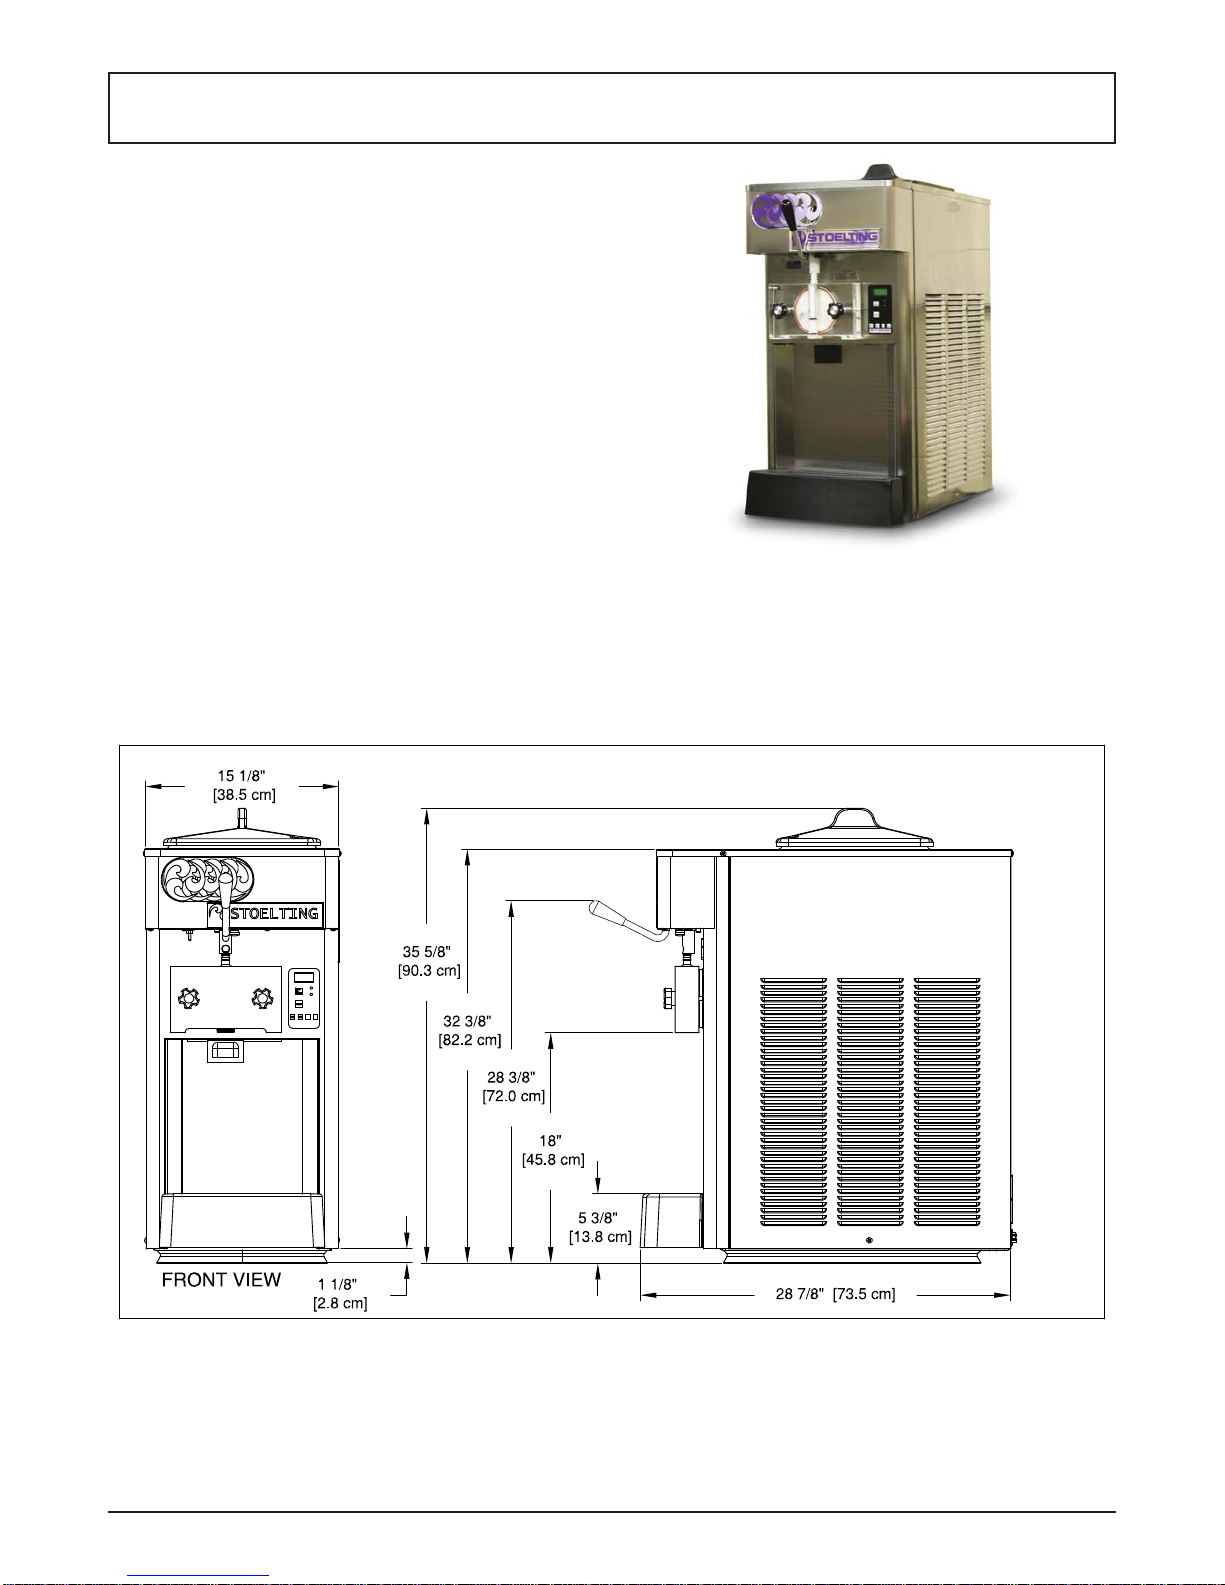
D. Correct ventilation is required. The right side of
the machine is the air intake and left side is the
discharge. Both sides must have 3” clearance.
CAUTION
Failure to provide adequate ventilation will void
warranty.
E. Place the Main Freezer Power Off/On switch in
the OFF position.
F. Connect the power cord to the proper power
supply. The E111 has a NEMA5-20P and the
F111hasaNEMA6-15P.Checkthenameplateon
yourmachineforpropersupply.The unitmustbe
connectedtoaproperlygroundedreceptacle.The
electrical cord furnished as part of the machine
has a three prong grounding type plug. The
use of an extension cord is not recommended,
if necessary use one with a size 12 gauge or
heavier with ground wire. Do not use an adapter
to circumvent the grounding requirement.
WARNING
Do not alter or deform electrical plug in any way.
Alteringthe plug to fit intoan outletof different con-
figuration may cause fire, risk of electrical shock,
product damage and will void warranty.
Figure 2-1 Space and Ventilation Requirements