Stonegate BELL User manual

BELL TENT
INSTRUCTION MANUAL
1
1.2

IMPORTANT
1. Avoid camping near places where prone to floods, rockslides,
thunder, snow-slides or other disasters.
2. Do not pitch the tent near an open fire.
3. Make sure that the floor and fly straps are secured by ropes
and staked down to avoid injury.
4. To clean: Spray and wash with water, always leave to dry in
the sun before packing away.
Remove stains with a soft bristle brush or a sponge with our canvas
cleaner. Leave it in the sun to dry and apply our reproofing water
repellent spray if necessary.
IMPORTANT FACTS ABOUT
YOUR TENT:
WWW.STONEGATEINDUSTRIES.COM.AU accept no liability to any party
for loss or damage incurred from the misuse of our products.
1. Cotton Canvas Bell Tents are flammable therefore should not be in
direct contact which heat from appliances or heating accessories due
to serious injury or death. (The same applies to fire retardant tents).
Fire Retardant tents are treated with chemicals to delay the effect or
ease of spreading of flames
PLEASE DO CHECK THESE IMPORTANT POINTS BELOW.
2
2. Stonegate Outdoors do not prohibit the use of heating equipment
to be used inside our Bell Tents. We hold no liability for accidental
damage, accidents that may occur from the use of such equipment in-
side our Bell Tents. Owners who choose to operate stoves, wood burn-
ers, heaters of any type do so at their own risk!
3. For those wanting to operate a stove/wood burner in the correctly
treated environment should never do so without having a working and
tested fire alarm; Carbon monoxide alarm and fire extinguisher on site
at all times. Always keep a sharp blade, knife, pocket pen in case of
emergency exiting of the tent, persons inside can use the knife to cut
the fabric as an alternative escape route.
3

SETTING UP
1. Never put too much pressure on the zip parts (groundsheet)
as this may cause damage to the zips.
2. Ensure that all zips are covered by the overhanging flaps as
water will leak through the zips and cause floods inside your tent.
If the overhanging flaps do not cover the zips, this is usually due to
the tent being set up incorrectly.
4

PACKING AWAY
1. Always ensure that your tent is dry before packing away.
2. Always clear away or prevent stains from food, drinks where
possible, as fungus and mould may occur. Always clean immediately
if liquid is spilt.
CARING FOR YOUR TENT
Always ensure that your tent is thoroughly dried out before packing
away as mould and fungus will grow in the fabric.
Tip: If in doubt simply roll your tent out on the floor of a warm room
overnight to dry out completely.
WATERPROOFING
Apply a waterproofing agent like Nikwax after 1 year of constant use.
This will prolong the life of the canvas whilst improving the water-
proof features.
PREVENTION OF LEAKAGE
In very extreme weather conditions, Bell Tents can occasionally
leak slightly around the zippers positioned at the doors, windows,
or groundsheet depending on which way the wind is blowing. You
can prevent this by simply brushing/spraying on extra waterproofing
agent to the fabric located either side of the zippers.
5

WEATHERING CANVAS
BELL TENTS
We advise for all tents to be tested/ weathered before planning a
camping trip. If your tent does leak, don’t be worried as this is
normal if the canvas has not yet been weathered.
Cotton tents need to go through a weathering process to become
watertight, it is the same for all bell tents and all canvas tents.
When the canvas gets wet, the weave will tighten, making the
material watertight and able to resist water more effectively.
In addition to this, the seams of the tent also need to weather. When
the tent is being assembled, the needle makes many holes in the
canvas for the thread to hold the fabric together securely. These
needle holes will also tighten and become water resistant over time.
The canvas itself will be the first to weather, usually in the first
couple of heavy soakings with the seams usually taking longer. Not
only does the tent need to get heavily soaked for the weathering
process to be effective, it also needs to dry thoroughly (bone dry)
between soakings. Some bell tents will need a couple of weathering
procedures before every water inlet has gone. You should weather
your bell tent before your camping trip.
6
METHODS OF WEATHERING
YOUR BELL TENT :
By far the best method for weathering is simply leaving your tent
out in mother nature for a few days.. This is the method preferred by
nearly all sellers and manufacturers.
You can also weather your tent by giving it a light soak with a hose,
(Do not use a jet washer).
7

INSTRUCTIONS TO SET UP A
BELL TENT:
The order in which you set up your Bell Tent is really important. Nev-
er assume that you may remember the order each time you pitch
your tent, and hence carry this manual with you at all times.
BEFORE YOU START
Open the carton, then unpack the carrier bag and the tent, then lay
out the groundsheet.
Lay out the groundsheet as flat as possible, with the cotton fly on
top.
Find the door and rotate the groundsheet, so that it faces the
direction you want. Make sure you have the entrance facing the right
direction.
1. Zip the groundsheet and the tent
fly together all the way around if they
come separately.
(Apart from the doorway zipper, ignore
this step if your tent is not zipped
groundsheet design)
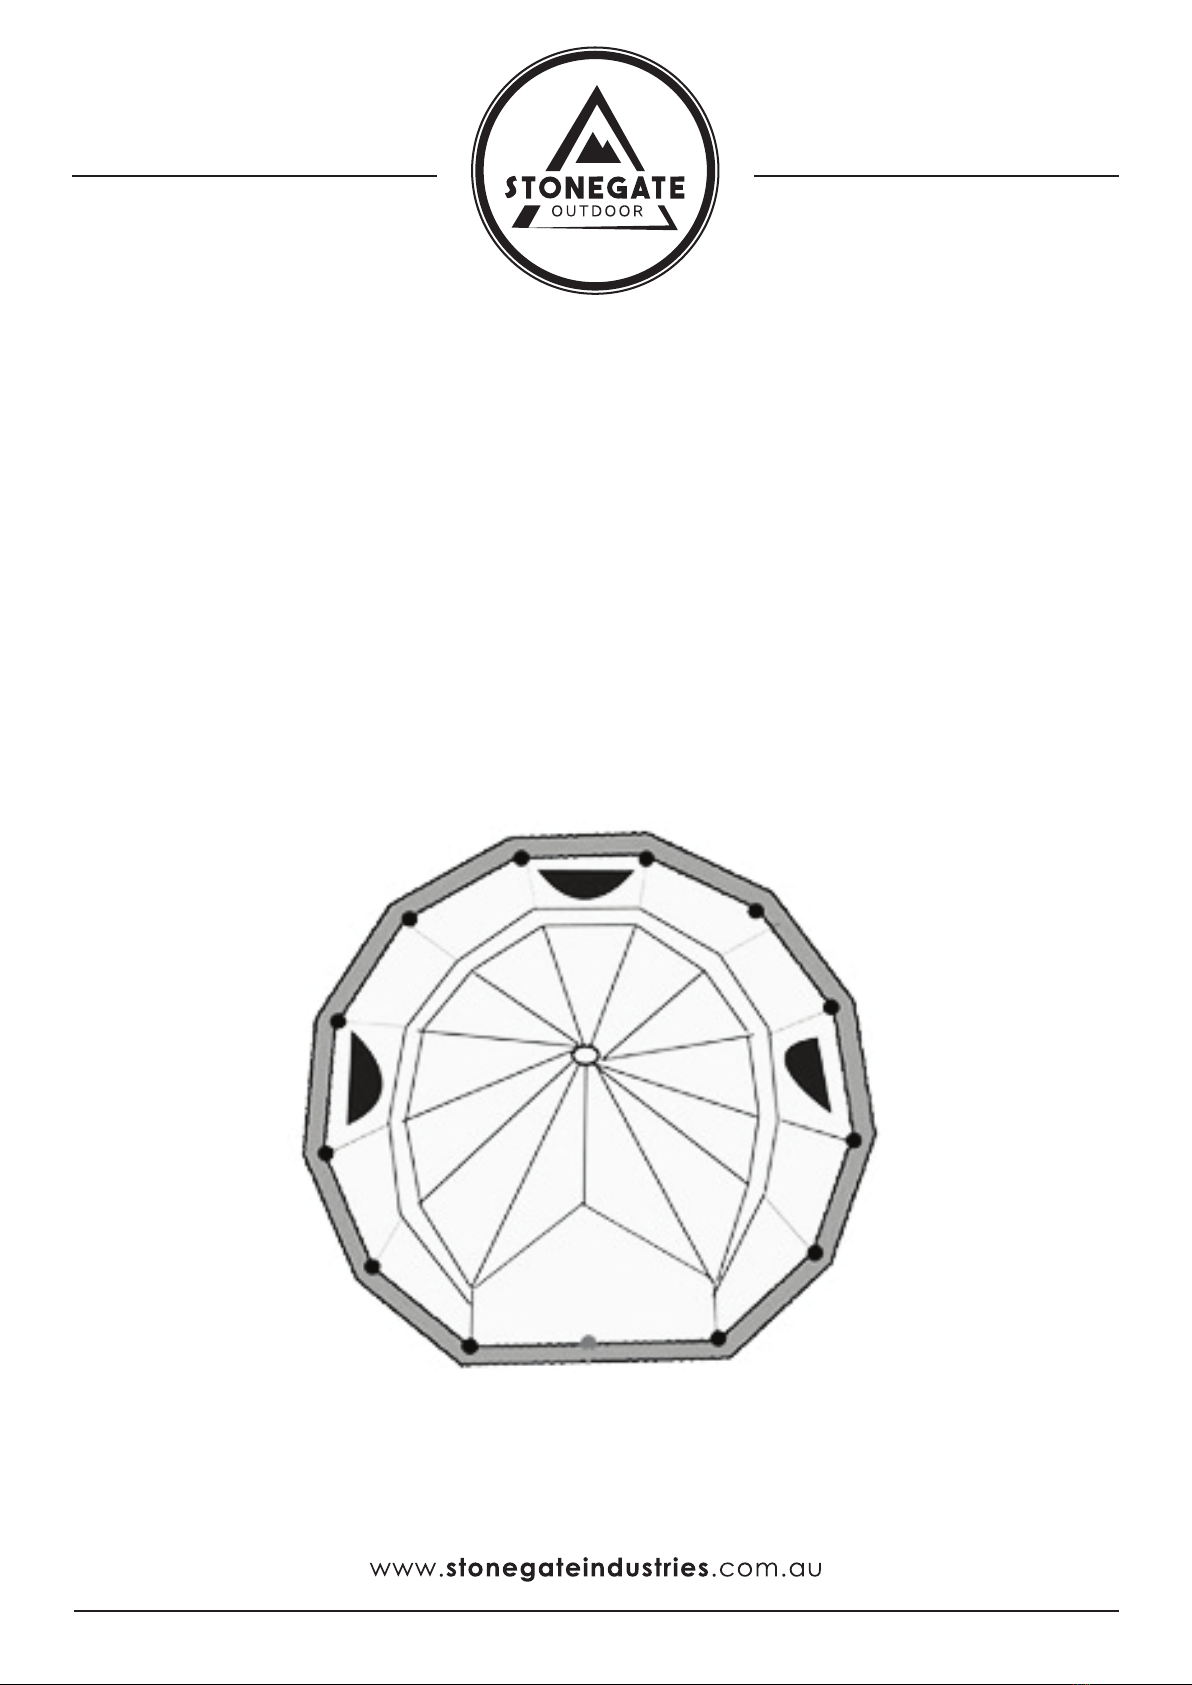
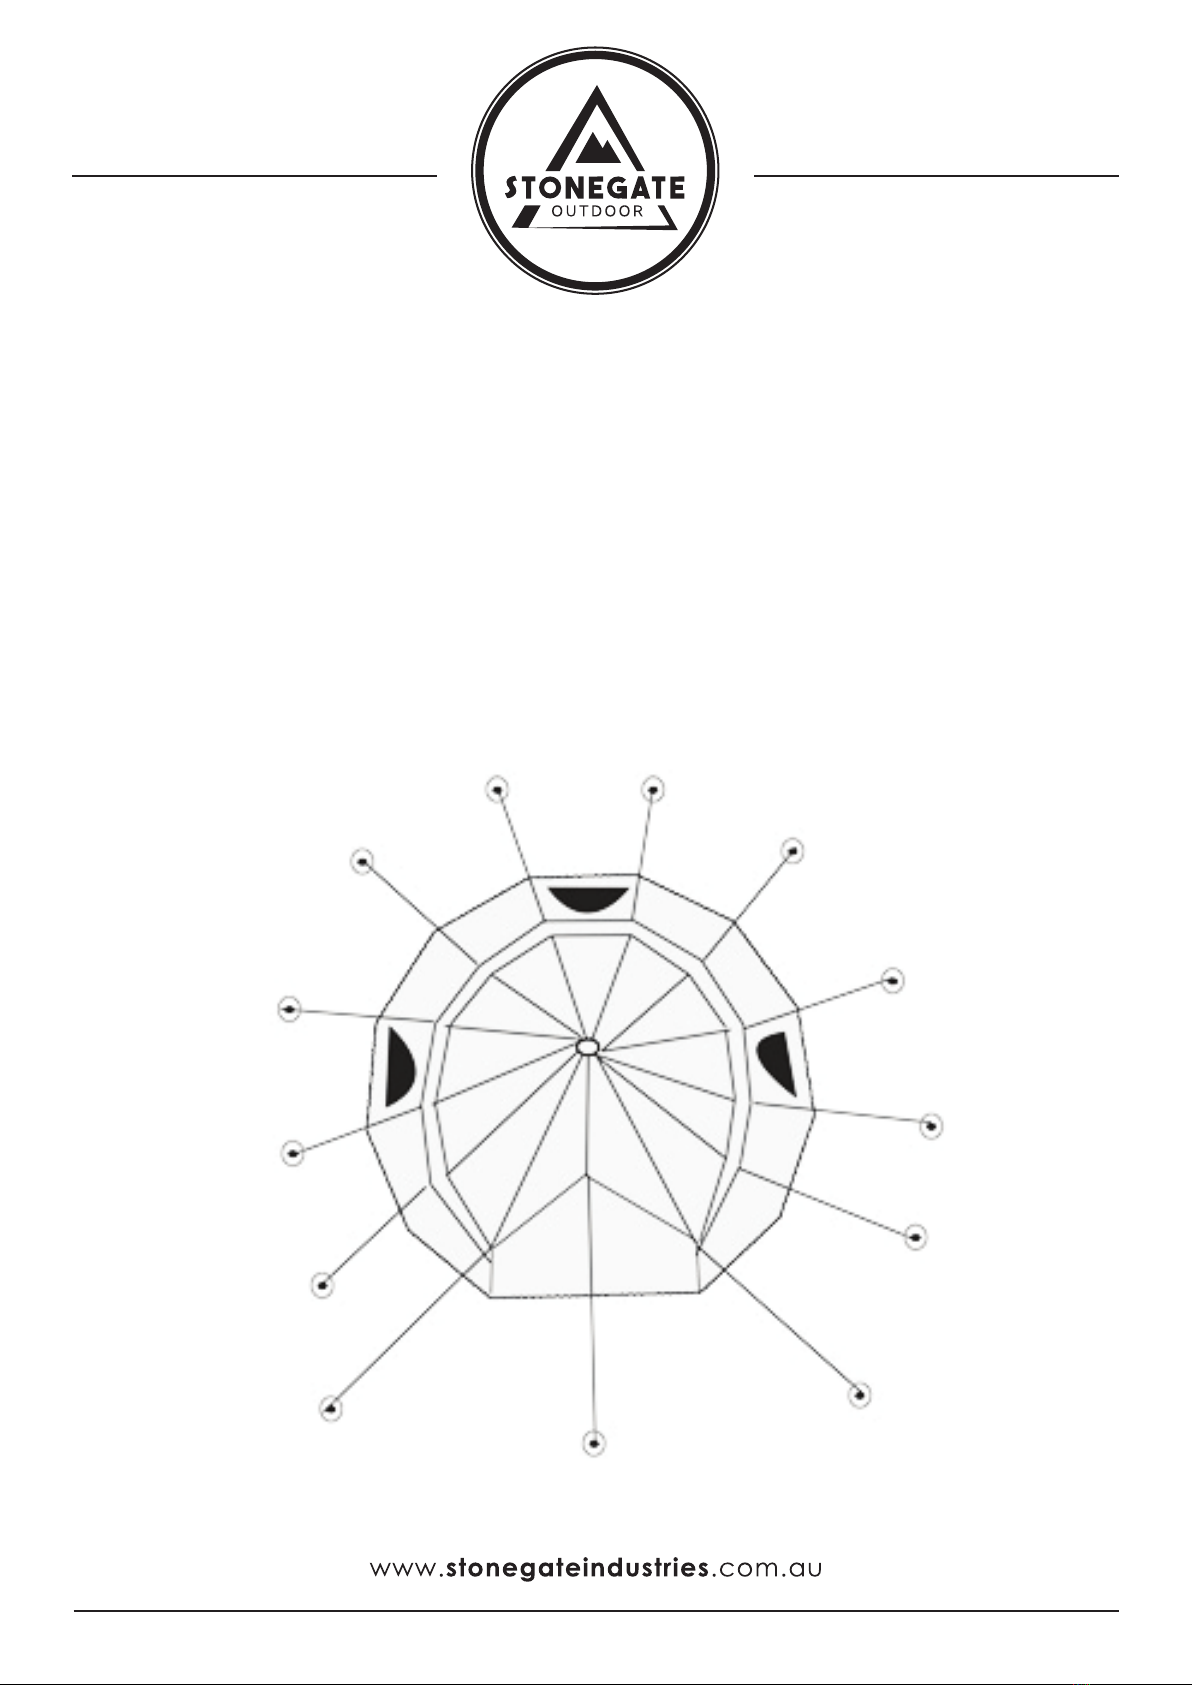
2. Think of your tent as a huge
clock. Each number on a clock rep-
resents a pegging point. With that in
mind this is what you should do.
8

Peg the groundsheet. Start with one peg positioned at 12 o’clock,
then go across to the opposite side 6 o’clock and place another peg.
Be sure to pull tight. Now move to position 9 o’clock and again go
across to the opposite side at 3 o’clock. Now you can place pegs in
all the points in between.
3. Take the main central pole through the door ensuring that the
rubber stoppers are inserted into the top and bottom parts of the
pole. Find the middle point of the cone and insert the pole so that
the tent stands vertically.
4. Make the central pole stand as vertical as possible, in the
centre of the groundsheet.
5. Place the A Frame pole inside the door, and attach it with the
canvas, install the rainproof cap. Be-careful not to rip the canvas
with the A-frame spike.
6. Zip the door, attach the top door strap with the long guy line
and peg it down. Then, attach the rest of the guy lines around the
tent following the previous clock strategy that we used when
inserting the pegs. Do not put too much tension on the guy ropes at
this point. Be sure to follow the seam lines direction when placing
the guy lines to give a neat and even finish. The aim is to set up your
tent to look smooth overall like a nicely ironed shirt. Creases will
appear in the canvas when the guy lines have not been positioned
correctly. This is an important step as water will gather in creases
which can cause leaks in heavy rain.
7. Once all the tent guy lines are in place, adjust the guy lines one
by one to get the required tension. Remembering our o’clock strategy,
go around tightening the guy lines. The aim is to keep your centre
pole as straight as possible. Too much tension on one side will make
your Bell Tent look lopsided
9

8. For tents that have a zipped-in groundsheet. You can roll up the
sides of your bell tent on a hot day. Simply do this by unzipping the
groundsheet zippers all the way around. You will see cotton wicks
positioned on the inner side of your bell tent. Simply roll your tents
sides up and secure using the wicks.
STORING YOUR BELL TENT:
Post glamping, it is important to dismantle your tent carefully and
store it properly to prevent damage.
1. Make sure your tent is thoroughly dry so as to avoid growth
of mould and fungus on the fabric.
2. Apply a waterproofing agent after 1 season of constant usage
to increase and maintain the durability of the canvas and its
waterproof features.
3. Avoid storing the tent in a damp or hot location like a
basement, an attic or a car boot. If a damp place is your only
option, then place your dried tent inside a sealed plastic bin or
other container.
4. When your tent is brand new the cotton might let in some
air that will leak around the seams. However, after the canvas has
been wet once this will no longer happen because of the cotton
expanding.
5. We suggest spraying the canvas after considerable amount
of usage, which can preserve the water resistance of your tent
and prolong its life.
10
Table of contents


