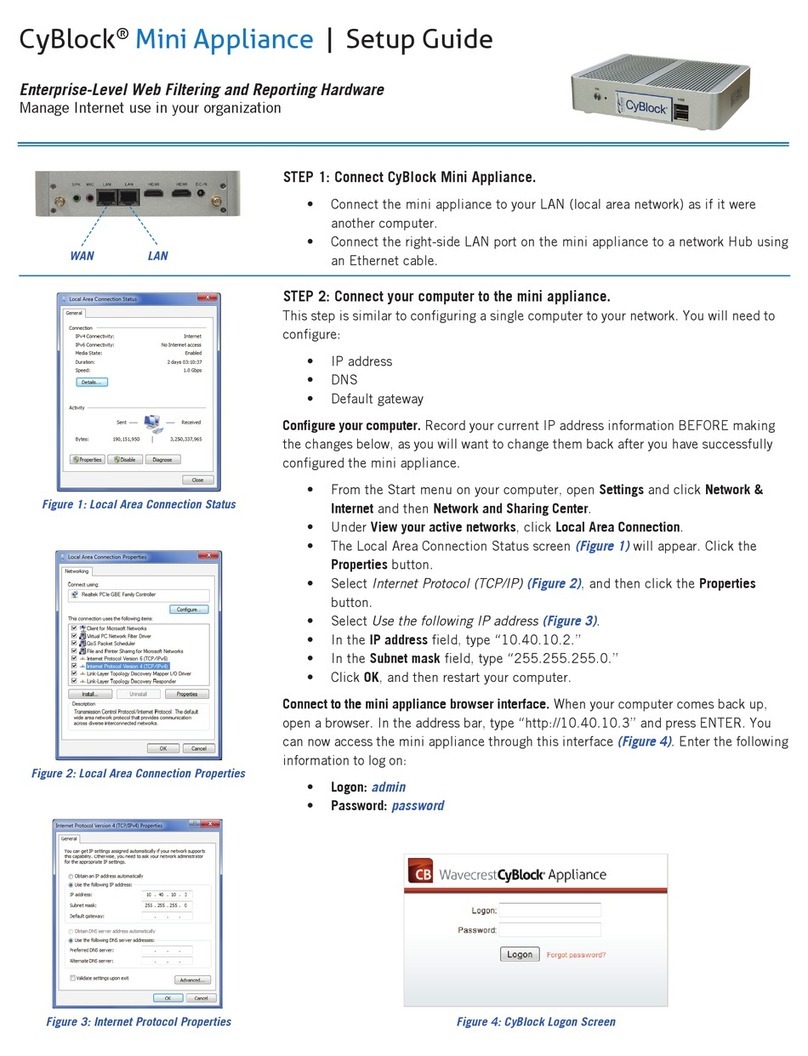
Stonesoft 3201 User manual

Appliance Installation Guide
Stonesoft 3201 and 3205

2
Legal Information
End-User License Agreement
The use of the products described in these materials is subject to the then current end-user license
agreement, which can be found at the Stonesoft website:
www.stonesoft.com/en/support/eula.html
Third Party Licenses
The Stonesoft software includes several open source or third-party software packages. The appropriate
software licensing information for those products at the Stonesoft website:
www.stonesoft.com/en/support/third_party_licenses.html
U.S. Government Acquisitions
If Licensee is acquiring the Software, including accompanying documentation on behalf of the U.S.
Government, the following provisions apply. If the Software is supplied to the Department of Defense
(“DoD”), the Software is subject to “Restricted Rights”, as that term is defined in the DOD Supplement to
the Federal Acquisition Regulations (“DFAR”) in paragraph 252.227-7013(c) (1). If the Software is supplied
to any unit or agency of the United States Government other than DOD, the Government’s rights in the
Software will be as defined in paragraph 52.227-19(c) (2) of the Federal Acquisition Regulations (“FAR”).
Use, duplication, reproduction or disclosure by the Government is subject to such restrictions or successor
provisions.
Product Export Restrictions
The products described in this document are subject to export control under the laws of Finland and the
European Council Regulation (EC) N:o 1334/2000 of 22 June 2000 setting up a Community regime for the
control of exports of dual-use items and technology (as amended). Thus, the export of this Stonesoft
software in any manner is restricted and requires a license by the relevant authorities.
General Terms and Conditions of Support and Maintenance Services
The support and maintenance services for the products described in these materials are provided pursuant
to the general terms for support and maintenance services and the related service description, which can be
found at the Stonesoft website:
www.stonesoft.com/en/support/view_support_offering/terms/
Replacement Service
The instructions for replacement service can be found at the Stonesoft website:
www.stonesoft.com/en/support/view_support_offering/return_material_authorization/
Hardware Warranty
The appliances described in these materials have a limited hardware warranty. The terms of the hardware
warranty can be found at the Stonesoft website:
www.stonesoft.com/en/support/view_support_offering/warranty_service/
Trademarks and Patents
The products described in these materials are protected by one or more of the following European and US
patents: European Patent Nos. 1065844, 1189410, 1231538, 1231754, 1259028, 1271283, 1289183,
1289202, 1304830, 1304849, 1313290, 1326393, 1361724, 1379037, and 1379046 and US Patent
Nos. 6,650,621; 6,856,621; 6,912,200; 6,996,573; 7,099,284; 7,127,739; 7,130,266; 7,130,305;
7,146,421; 7,162,737; 7,234,166; 7,260,843; 7,280,540; 7,325,248; 7,360,242; 7,386,525;
7,406,534; 7,461,401; 7,573,823; 7,721,084; and 7,739,727 and may be protected by other EU, US, or
other patents, or pending applications. Stonesoft, the Stonesoft logo and StoneGate, are all trademarks or
registered trademarks of Stonesoft Corporation. All other trademarks or registered trademarks are property
of their respective owners.
Disclaimer
Although every precaution has been taken to prepare these materials, THESE MATERIALS ARE PROVIDED
"AS-IS" and Stonesoft makes no warranty to the correctness of information and assumes no responsibility
for errors, omissions, or resulting damages from the use of the information contained herein. All IP
addresses in these materials were chosen at random and are used for illustrative purposes only.
Copyright © 2012 Stonesoft Corporation. All rights reserved. All specifications are subject to change.
Revision: AIG_Stonesoft_3201_and_3205_20121030

Introduction 3
Introduction
Thank you for choosing a Stonesoft™ appliance. This guide provides
instructions for the initial hardware installation and the maintenance of
the Stonesoft 3201 and 3205 appliances. See Product Documentation
(page 5) for information on other available documentation.
The use of the appliance is subject to the acceptance of the End User
License Agreement, which can be found at the Stonesoft website.
Contents
Installation Procedure .................. 4
Product Documentation ................ 5
Safety Precautions ....................... 5
Unpacking the Appliance .............. 8
Front Panel .................................. 9
Back Panel .................................. 12
Installing the Solid State Disk ....... 13
Installing Interface Modules.......... 14
Rack-Mounting............................. 15
Connecting the Cables ................. 21
Initial Configuration ...................... 25
Command-Line Management......... 34
Maintenance Operations............... 35
Disposal Instructions ................... 40
Caution – Read the Safety Precautions (page 5) before you conduct
any installation or maintenance operations on the appliance.

4Installation Procedure
Installation Procedure
The appliance installation involves the following mandatory steps:
1. Configure the Security Engine element (Firewall, IPS, or Layer 2
Firewall) in the Management Client, and save the initial
configuration on a USB memory stick. See the Firewall Installation
Guide or the IPS and Layer 2 Firewall Installation Guide.
2. If the Solid State Disk (SSD) is not pre-installed in the appliance,
install the SSD. See Installing the Solid State Disk (page 13).
3. Install an interface module in each slot on the appliance. See
Installing Interface Modules (page 14).
4. Install the appliance into a rack and connect the cables. See
Rack-Mounting (page 15) and Connecting the Cables (page 21).
5. Insert the USB memory stick in a USB port on the appliance, and
turn on the appliance to import the initial configuration. See Initial
Configuration (page 25).
Note – You must have a working Management Center on a separate
server to bring the appliance(s) operational. See the Stonesoft
Management Center Installation Guide.
Management
Client
Management
Server
Initial
Configuration
File
USB Memory
Stick
ApplianceSSD
ApplianceInterface Modules
ApplianceUSB Memory
Stick

Product Documentation 5
Product Documentation
Press F1 in any Management Client window to view the Online Help.
All PDF guides are available:
• On the Management Center CD-ROM (in the Documentation folder)
• At the Stonesoft website at http://www.stonesoft.com/en/support/
technical_support_and_documents/manuals/
Install the free Adobe Reader program to view the PDF documents
(available at www.adobe.com/reader/).
Safety Precautions
Follow these safety precautions whenever working with electronic
equipment.
Electrical Safety Precautions
Basic electrical safety precautions should be followed to protect yourself
from harm and the appliance from damage:
• Be aware of the location of the power on/off switch as well as the
room's emergency power-off switch, disconnection switch, or
electrical outlet. If an electrical accident occurs, you can then quickly
cut power to the system.
• Do not work alone when working with high-voltage components.
• Before removing or installing main system components, be sure to
disconnect the power first. Turn off the system before you disconnect
the power cord.
• Use only one hand when working with powered-on electrical
equipment. This is to avoid making a complete circuit, which will
cause electrical shock. Use extreme caution when using metal tools,
which can easily damage any electrical components or circuit boards
they come into contact with.
• Do not use mats designed to decrease electrostatic discharge as
protection from electrical shock. Instead, use rubber mats that have
been specifically designed as electrical insulators.
• The power supply cord must include a grounding plug and must be
plugged into a grounded electrical outlet. Use only the cord supplied
with the appliance.
• The power cord plug cap that plugs into the AC receptacle on the
power supply must be an IEC 320, sheet C13, type female connector.

6Safety Precautions
• If you have to replace the motherboard battery, install it the same way
as the original battery. Make sure that the positive side faces up on
the motherboard. This battery must be replaced only with the same
or an equivalent type recommended by the manufacturer. Dispose of
used batteries according to the manufacturer's instructions.
• Do not open the enclosures of power supplies or SSD Drive to avoid
injury.
General Safety Precautions
Follow these rules to ensure general safety:
• Keep the area around the appliance clean and free of clutter.
• The appliance weighs approximately 13 kg (29 lbs.) when fully
loaded. When lifting the appliance, two people at either end should
lift slowly with their feet spread out to distribute the weight. Always
keep your back straight and lift with your legs.
• We recommend using a regulating uninterruptible power supply (UPS)
to protect the appliance from power surges, voltage spikes and to
keep your system operating in case of a power failure.
Power Supplies
Appliances with DC Power Supply
• The appliance must be used in a Restricted Access Location and the
users must be well-trained to operate it.
• The socket-outlet for pluggable equipment must be installed near the
equipment and must be easily accessible.
• Appliance inlet must have SPS approval or have min. 15 AWG wire
provided for the power supply.
• The Mains Supply plug on the power supply cord is the disconnect
device of the appliance. To disconnect the appliance, you must first
disconnect the mains and then disconnect the ground.
Appliances with AC Power Supply
• The appliance inlet is the disconnect device.

Safety Precautions 7
ESD Precautions
Electrostatic discharge (ESD) is generated by two objects with different
electrical charges coming into contact with each other. An electrical
discharge is created to neutralize this difference, which can damage
electronic components and printed circuit boards. Use a grounded wrist
strap designed to prevent static discharge.
Laser Precautions
Class 1 Laser Product
Operating Precautions
Care must be taken to assure that the appliance cover is in place when
the appliance is operating to ensure proper cooling. If this rule is not
strictly followed, the warranty may become void. Do not open the power
supply casing. Power supplies can only be accessed and serviced by a
qualified technician of the manufacturer.
Operating and Storage Temperatures
The allowed operating temperature of the appliance is +5...+35ºC. The
allowed storage temperature is -20...+65ºC. Do not operate or store the
appliance in temperatures outside these limits. If the appliance or the
interface modules have been stored in temperatures below 0ºC or above
+40ºC, allow for 2 hours to bring the appliance and the modules to
normal operating temperature before turning on the appliance.
Otherwise, the appliance or the modules may be damaged.
Note – Use a UPS (Uninterruptible Power Supply) in critical
environments with your Stonesoft appliance. If after a brief power
outage your appliance only partially starts up (for example, the power
light is on, but the NIC LEDs are off and the appliance does not
connect) turn the appliance off for five seconds and then back on.
Caution – Invisible laser radiation is emitted from the end of fiber
cable and from aperture of the port when no fiber cable is connected.
Do not stare into the beam and avoid direct exposure to the beam.

8Unpacking the Appliance
Lithium Battery Precautions
For California:
Perchlorate Material - special handling may apply. See www.dtsc.ca.gov/
hazardouswaste/perchlorate.
This notice is required by California Code of Regulations, Title 22,
Division 4.5, Chapter 33: Best Management Practices for Perchlorate
Materials. This product/part includes a battery that contains Perchlorate
material.
Unpacking the Appliance
Inspect the box the appliance was shipped in and any other boxes
included in the delivery. If the Solid State Disk (SSD) is not pre-installed
in the appliance, the SSD is delivered in a separate box. The interface
modules are always delivered in separate boxes. Note if any of the
boxes are damaged in any way. If the appliance itself or any components
delivered with the appliance show any damage, file a damage claim with
the carrier who delivered the appliance or the components.
Do not remove the anti-tamper tapes on any part of the appliance.
Caution – The battery must be replaced by authorized service
personnel only. Danger of explosion if battery is incorrectly replaced.
Replacement battery must be same or equivalent type recommended
by the manufacturer. Used batteries must be discarded according to
the manufacturer’s instructions. Short-circuiting the battery may heat
the battery and cause severe injuries.

Front Panel 9
Front Panel
On the front panel, there are slots for the interface modules, a Solid
State Disk (SSD) Drive, two USB ports, and a serial port. There are two
more USB ports on the back panel of the appliance. See Back Panel
(page 12).
The front panel also has six LED indicators and the Power button. The
status of the Power button and all the indicators on the front panel
(including the indicators for the SSD Drive) are explained below. See the
separate Interface Module Guide delivered with the appliance for
information on the port indicators for the interface modules.
Power Button
Table 1 Power Status
Status Explanation
Green
Indicates power is being supplied to the system's
power supply unit. This LED is illuminated when the
system is operating normally.
Slots for Interface
Modules
USB Ports
Serial Port
SSD Drive
Power
Button
LED
Indicators

10 Front Panel
LED Indicators
The front panel has six LED indicators in the upper right corner. The
LEDs provide you with critical information related to different parts of the
system.
Table 2 Front Panel LEDs
Indicates that a power supply cable is detached.
When flashing, indicates a fan failure.
When continuously on, indicates an overheat condition,
which may be caused by cables obstructing the airflow in
the system or the ambient room temperature being too
warm.
Indicates network activity on the onboard Ethernet
interface 1 when flashing (the interface is on the back
panel of the appliance).
Indicates network activity on the onboard Ethernet
interface 0 when flashing (the interface is on the back
panel of the appliance).
Indicates Solid State Disk (SSD) activity when flashing.
Indicates power is being supplied to the system's power
supply units. This LED is illuminated when the system is
operating normally.

Front Panel 11
SSD Drive Indicators
The indicators for the Solid State Disk (SSD) Drive are explained below.
Table 3 SSD Drive Indicators
Indicator Status Explanation
Power Blue A Solid State Disk is in the drive.
Disk Unlit This indicator is not currently used.
Disk
Power

12 Back Panel
Back Panel
The connectors and ports on the back panel are explained in Connecting
the Cables (page 21).
The LED indicators for the two fixed Ethernet ports are explained below.
Fixed Ethernet Ports
Table 4 Indicators for Fixed Ethernet Ports
Indicator Color Explanation
Activity Yellow Link ok, blinks on activity.
Link
Unlit No link or the speed is 10 Mbps.
Green Speed is 100 Mbps.
Amber Speed is 1 Gbps.
AC or DC Power
Connectors
Fixed Ethernet PortsVGA PortTwo USB Ports
Serial Port
(Not used)
IPMI Port (Use
not supported
Activity Link

Installing the Solid State Disk 13
Installing the Solid State Disk
If the Solid State Disk (SSD) is not pre-installed in the appliance, you
must first install the SSD.
To install the Solid State Disk
1. Locate the Solid State Disk included in the delivery package.
2. Locate the Solid State Disk Drive on the appliance’s back panel
(see the illustration in Back Panel (page 12)).
3. Press the release button on the Solid State Disk to release the
lever on the disk.
4. Insert the disk into the drive.
5. Press the lever down to lock the disk into position.
Proceed to Installing Interface Modules (page 14).
Caution – We recommend using a grounding strap when handling an
SSD. Uninstalled SSDs are sensitive to ESD damage.
Release buttonLever

14 Installing Interface Modules
Installing Interface Modules
This section provides information on installing Stonesoft interface
modules into the appliance. You must install an interface module or a
placeholder module in each slot before you can make the appliance
operational. The process of installing an interface module is the same
for all module types.
Read the Safety Precautions (page 5) before proceeding.
To install an interface module
1. Make sure that the appliance is turned off and that no cables are
connected to the appliance or to wall outlets.
2. (Recommended) Fasten a grounding strap to your wrist so that it
contacts your bare skin and attach the other end of the strap to
the appliance.
3. Select the slot where you want to install the interface module.
4. Push the module into the slot the sticker side up until the front
panel of the module is even with the front panel of the appliance.
5. Repeat steps 3 and 4 until you have installed an interface module
in each slot.
•You must install an interface module in each slot before you can
configure the appliance.
Proceed to Rack-Mounting (page 15).
Caution – Do not install or remove interface modules if the appliance
is powered on to avoid damaging modules and modular appliances.
Caution – Do not insert the interface module upside down. Inserting
the modules incorrectly may damage the appliance and the modules
and will void the warranty.

Rack-Mounting 15
Rack-Mounting
This section provides information on installing the Stonesoft appliance
into a rack unit. You can install the appliance into a two-post or a four-
post rack unit.
Preparing for Rack-Mounting
The appliance delivery includes the rail assemblies and the mounting
screws you need to install the system into the rack.
Read the sections below before you begin the installation.
Choosing a Setup Location
Decide on a suitable location for the rack unit that will hold the
appliance:
• The appliance must be situated in a clean, dust-free area that is well
ventilated.
• Avoid areas where heat, electrical noise and electromagnetic fields
are generated.
• Leave enough clearance in front of the rack to enable you to open the
front door completely (~63 cm/25 inches).
• Leave enough clearance in the back of the rack to allow for sufficient
airflow and ease in servicing (~76 cm/30 inches).
Rack Precautions
• Ensure that the leveling jacks on the bottom of the rack are fully
extended to the floor with the full weight of the rack resting on them.
• In single rack installation, attach stabilizers to the rack.
• In multiple rack installations, couple the racks together.
• Always make sure the rack is stable before extending a component
from the rack.
• Extend only one component at a time—extending two or more
simultaneously may cause the rack to become unstable.
Appliance Precautions
• Determine the placement of each component in the rack before you
install the rails.
• Install the heaviest components on the bottom of the rack first, and
then work up.
Caution – Read the Safety Precautions (page 5) before proceeding.

16 Rack-Mounting
• The appliance must be connected to a grounded power outlet.
• Use a regulating uninterruptible power supply (UPS) to protect the
appliance from power surges, voltage spikes and to keep your system
operating in case of a power failure.
• Always keep the rack's front door and all panels and components on
the appliances closed when not servicing to maintain proper cooling.
Before Installing the Appliance Into a Rack
• Make sure that the rack is securely anchored onto an unmovable
surface or structure before installing the appliance into the rack.
• Unplug the power cord(s) of the rack before installing the appliance
into the rack.
• Make sure that the system is adequately supported. Make sure that
all the components are securely fastened to the appliance to prevent
components falling off from the appliance.
• Be sure to install an AC power disconnect for the entire rack
assembly. This power disconnect must be clearly marked.
• The rack assembly shall be properly grounded to avoid electric shock.
• The rack assembly must provide sufficient airflow to the appliance for
proper cooling.
Installing the Appliance into a Rack
This section provides information on installing the appliance into a rack
unit. There are a variety of rack units on the market, so the assembly
procedure may differ slightly from what is instructed. If necessary, refer
to the instructions that came with the rack unit you are using.
If you are installing the appliance into a Telco-type rack, follow the
general directions below. The main difference in the installation
procedure is whether you are installing the appliance into a two-post
rack or a four-post rack. Proceed to one of the following:
•Installing the Appliance Into a Two-Post Rack (page 17)
•Installing the Appliance Into a Four-Post Rack (page 18)
Note – Do not install the appliance upside down.

Rack-Mounting 17
Installing the Appliance Into a Two-Post Rack
To install the appliance into a two-post rack
1. Locate the two rack-mounting brackets that are meant for the two-
post rack installation.
2. Locate the three pairs of supports on the side of the appliance
and the corresponding holes on the brackets.
3. Align the holes against the two supports towards the rear of the
appliance and push the bracket under the supports.
•The brackets are marked with “L” for left and “R” for right.
4. Secure the bracket to the appliance by inserting a screw through
the hole at the end of the bracket (see the illustration above).
5. Repeat steps 3 and 4 on the other side of the appliance.
6. Attach each bracket to the rack with two screws through the holes
in the front of the bracket.
Proceed to Connecting the Cables (page 21).

18 Rack-Mounting
Installing the Appliance Into a Four-Post Rack
There are two sets of rails that you can use for installing the appliance
into a four-post rack. The only difference is the length of the rails. This
section explains the installation for both types of rails.
To install the appliance into a four-post rack
1. Locate the two pairs of brackets in the delivery package: two inner
rails that attach to the appliance and two outer rails that attach to
the rack.
2. Detach the inner rails from the outer rails (press the locking tab to
release the inner rails as shown in the illustration above).
•The rails are marked with L for “left” and “R” for right.
3. Locate the rail buttons on the side of the appliance and the
corresponding holes on an inner rail.
Outer Rail
Inner Rail
Locking Tab

Rack-Mounting 19
4. Align the holes against its corresponding button. Once all are
aligned, push the holes toward their corresponding buttons.
5. Secure the rail to the appliance with a screw.
6. Repeat steps 3-5 on the other side of the appliance.
7. Insert the outer rails to the rack. If necessary, push the locking
tab on the rail to retreat the outer rails.
8. Attach the outer rails to the rack with two screws through the
holes at the ends of the rails.

20 Rack-Mounting
9. Line up the rear of the inner rails with the front of the extended
outer rails.
10. Slide the inner rails into the outer rails, keeping the pressure even
on both sides (you may have to press the locking tabs when
inserting). When the appliance has been pushed completely into
the rack, you should hear the locking tabs “click” as the rails lock.
Proceed to Connecting the Cables (page 21).
This manual suits for next models
2
Table of contents
Other Stonesoft Firewall manuals

Stonesoft
Stonesoft StoneGate FW-1020 User manual

Stonesoft
Stonesoft StoneGate SG-250 User manual

Stonesoft
Stonesoft FW-105 series User manual

Stonesoft
Stonesoft StoneGate FW-5000 Series User manual

Stonesoft
Stonesoft FW-1030 User manual
Stonesoft
Stonesoft SSL-3200 Series User manual
Stonesoft
Stonesoft StoneGate FW-5105 User manual