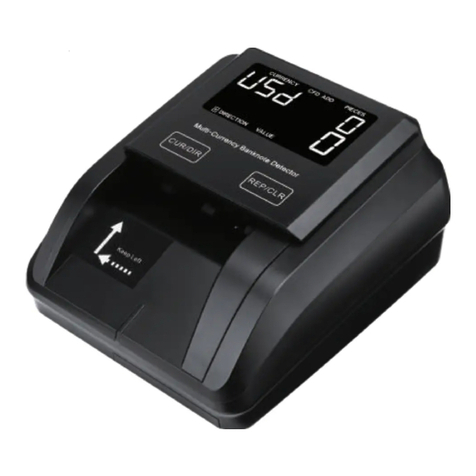
Striker Z60 User manual

User’s Manual
Model# Z60

2
Warranty/Services
Table of Contents
Terms
Contents
Assembly
LCD Display
Category Value
How it Works
Detector Modes
How to Detect
Courtesy
Warning
Tone Recognition
Trouble Shooting
FCC Statement
3-4
5-6
7-9
10
11
12-14
15-16
17-18
19
20
21
22
23-24
25

3
TERMS TO KNOW
DISCRIMINATION
IRON
PINPOINT
PULL-TABS
Discriminating allows you to choose the metals you want to detect and
the ones you want to “eliminate” or not look for. Discrimination makes
it easier to avoid trash or other undesirable objects. Once it detects a
metal it will categorize it to one of the metals you chose to detect for.
Iron is the most common metals. It has been used since ancient times
because of its abundance. Ferrous metals are made up of iron. Objects
that are ferrous metals are; nails, bolts, stainless steel, and cast iron.
A narrow zone of detection that tells you the exact location of the
object by increasing sensitivity and reducing the detection cone.
The terms below are standard words found within this manual and the
detector.
Also known as “pop tops.” Discarded pull-tabs come from beverage
cans. They can be all different shapes and sizes. They are primarily
made of aluminum; they can be bothersome to many treasure hunters
.

4
GROUND GRAB*
All soils contain minerals. Signals from ground minerals interfere with
the signals from metal objects. If metal is detected in this mode it will
make a sound. It doesn’t detect any of earth’s natural minerals so you
can get a more accurate reading on what you find. Put simply, Ground
Grab analyzes the signature of the natural minerals and local
conditions and compensates for their frequencies so that only actual
targets register a hit.
*our clever name for ground balancing

5
CONTENTS
Coil
Bracket
Bottom Rod
Lock
Bracket
Top Rod
Battery
Compartment
LCD Display
Handle
Arm cuff
Stand
Wire
Pinpoint
Button

this page intentionally left blank
6

Connect The Rods
1
7
ASSEMBLY
Assembling the coil unit
2
Unscrew the bracket from the bottom rod. Fit
the bottom rod inside the coil and replace the
bracket. Then tighten. Please be careful not to
overtighten. NOTE: The large hole faces down.
Connect the Top Rod to the Bottom Rod by
sliding the Top Rod with the Locking Bracket
end down. Note: The groove on the Top Rod
needs to face away from you. Align grooves to
one another to ensure rods stay in place. Slide
the Top Rod to the desired length and tighten
the Locking Bracket by turning it to the left.

8
Connecting the Wiring
Connecting the Handle Unit
3
4
Unscrew the bracket from the bottom rod. Fit
the bottom rod inside the coil and replace the
bracket. Then tighten. Please be careful not to
overtighten. NOTE: The large hole faces down.
Take the cord that is connected to the coil and
wrap it around the rods. Continue wrapping up
around the rods and then plug it into the back
of the LCD display.

9
Batteries
Replace the battery compartment back when finished.
3
2
1
Take the cord that is connected to
the coil and wrap it around the rods.
Continue wrapping up around the rods
and then plug it into the back of the LCD
display.
Insert 6 AAA batteries according to
the markings within the compartment.
Caution: Never mix old and new batteries.
Never mix alkaline, carbon-zinc or
rechargeable batteries.

10
(7 SLOTS)
(4 SLOTS)
(1-8)
(0-4)
SETTINGS MENU/DETECTION MODES
TWO DIGIT DEPTH DISTANCE
LCD NAVIGATION DISPLAY

11
CATEGORY VALUE

12
HOW IT WORKS
GROUND GRAB
and RIGHT
ARROW Button
LEFT ARROW
Button
POWER Button SETTINGS Button
ENTER and
PINPOINT Button

13
HOW IT WORKS
Ground Grab
- Press to Ground Grab (ground balance)
Discrimination
- Press and then (This mode uses your last Settings to detect)
- Press to enter “Discrimination” Mode
- Use to move to desired setting
- Press to begin detecting in the selected option
Pin Point
- Press and hold to enter “Pin Point” Mode

14
Settings
- Press to enter “Settings” Mode
- Press to move between Volume, Sensitivity and Discrimination
- Press while Volume is selected to enter Volume options
- Press to change the Volume
- Press while Sensitivity is selected to enter Sensitivity options
- Press to change the Sensitivity
- Press to detect in current settings

15
DETECTOR MODES
Ground Grab steps are as follows: (ground balance)
Ground Grab
Discrimination
All soils contain minerals. Signals from ground minerals interfere with the signals
from metal objects. All soils differ, and can differ greatly in the type and amount of
ground minerals present. This detector incorporates ground balancing algorithms
which eliminate interference caused by the ground minerals found in most soils. We
therefore recommend that you use GROUND GRAB to most accurately
calibrate the detector to the specific ground conditions where you are
hunting. This process will maximize the detector’s target identification
accuracy and depth detection capability. This step is critical.
1. Find a patch of ground which is free of metal. Use the DISCRIMINATION mode, with no targets
discriminated out.
2. Hold the detector with the search coil about 6 inches above the ground ,then press the GG button
to activate the ground grab process, then lower the coil down to within 2 inches off the ground.
3. Repeat to lift up and lower down the search coil several times until the LCD shows “GRAB OK”. If
‘GRAB ER’ appears, maybe the ground is too dirty with metal trash or just wet salt soil. Find another
place and repeat the ground grab again until you see GRAB OK. Ground grab results are crucial to
the performance and especially of PP mode.
Pick the discrimination mode you want to detect in. Keep the coil parallel to the
ground moving it from left to right with a stable speed. Out of the metals
highlighted it will categorize the metal detected so you are aware of what metal is
buried. It will inform you in two ways;
1. by highlighting the metal detected and
2. a tone response. Discrimination identification accuracy can be
influenced by moisture and temperature. The coil sweeping speed can
also affect discrimination, generally faster sweeping motion has a higher
sensitivity.

16
Pinpointing
Notch Modes
Pinpoint does a narrow search that will give you the exact location of a buried
object. It will identify an object by a signal and tone response. Hold the PP
button to activate the pinpoint function. Once activated, sweep the coil over
the target area in an “X” pattern. Make a visual note of the place on the
ground where the strongest signal is identified. Then dig in the center of
the “X.” When the button is released the metal detector will return back
to the previous mode. NOTE: Normally, the detector takes about 5 minutes
to stabilize after it powers on, it is not recommended to do pinpointing
during this period of time. The sensitivity of the detector will drift over
time. If sensitivity drifts upward, the detector will sound off spontaneously. If
sensitivity drifts downward, the detector will become less sensitive. Drift is
exacerbated by the environment condition change especially the temperature
change. In case the sensitivity drifts simply perform a Ground Grab again.
When in Notch there are three options:
Coin: When using this mode it will show you the metals found in coins. It is designed
to find all types of coins and eliminate trash objects such as iron and foil.
Jewelry: When in this mode it will show you the metals common in jewelry. It is
designed to find jewelry such as rings, bracelets, watches and necklaces. When an
object is detected it will highlight the name of the metal found as well as use a tone
that identifies the metal.
All Metals: Use this mode if you are looking for a wide range of objects. It is designed
to find all metal objects

17
HOW TO DETECT
Power ON by pushing the “POWER” button.
OPTION 3: Use the “<” and “>” arrow keys to the Discrimination
option and press the “PP” button to select. While in Discrimination
you can eliminate certain metals by selecting either All Metal,
Jewelry or Coin. Use the “<” and “>” arrow keys to scroll to the
option you want. Press “PP” to save.
Press the “SETTINGS” button. There will be three options to
choose from:
OPTION 1: Use the “<” and “>” arrow keys to the Sensitivity
option and press the “PP” button to select. While in Sensitivity you
can change the sensitivity by using the “<” and “>” arrow keys.
Press “PP” to save.
OPTION 2: Use the “<” and “>” arrow keys to the Volume option
and press the “PP” button to select. While in Volume you can
change the volume by using the “<” and “>” arrow keys. Press “PP”
to save.
POWER SETTINGS
“<” “>” & “GG”
“PP”

18
When a metal is detected, hold the “PP” button to
activate Pinpoint function. Sweep the coil over the target
in an “X” pattern. While in PinPoint it will show you the
depth of the metal found. So you can accurately know
how far down to dig.
Press the “GG” button to perform a Ground Grab see p15.
Display will show “OK” when ground grab is completed. If
“ERROR” shows, there may be a metal object
underground, find another clean area nearby to retry
ground grab.
While in Discrimination Mode keep the coil parallel to the
ground moving it from left to right with a stable
speed. If it finds something it will highlight the
metal found and give off a certain tone (refer to
page 11).
Dig objects out.
Once the object is found, fill the hole back up to the way
you found it.

19
COURTESY
• Pick up after yourself, do not leave trash
• Fill holes
• Obey NO TRESPASSING signs
• Respect private and public property
• Obey all laws
• Do not cause any willful damage to property
• Do not destroy property
PLEASE

20
WARNING
When searching for treasure, first observe these precautions:
•Do not use a detector where you think there might be electrical lines or pipes
buried below the surface.
• Avoid striking any lines that are or could be electrically powered. Keep away
from pipelines they could be carrying flammable gas or liquid.
All metal detector’s may discover objects that can cause personal injury if
struck. For example; power lines, explosives, gas lines, etc.
•Do not use a detector in a military area where bombs or other explosives were
once buried.
Table of contents
