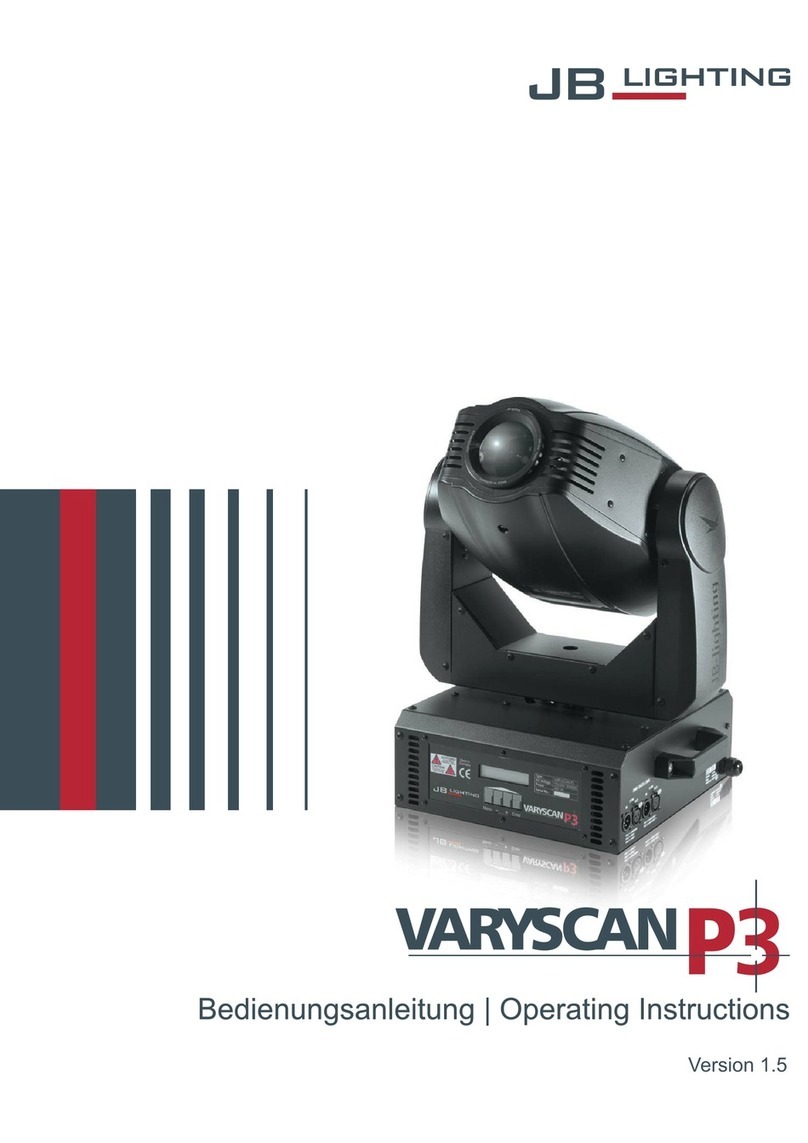
Strong International SUPER TROUPER II User manual

SUPER TROUPER II
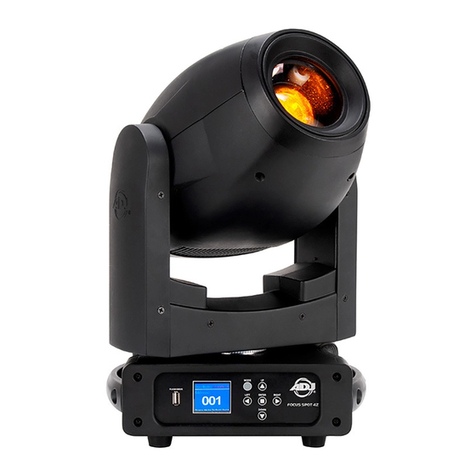
Xenon Follow Spotlight
Rev. January 2003
STRONG
INTERNATIONAL
a division of Ballantyne of Omaha, Inc.
4350 McKinley Street
Omaha, Nebraska 68112 USA
Tel 402/453-4444 • Fax 402/453-7238
24000-5 (2 kW)
24000-6 (1, 1.6 kW)


PREFACE
THE STRONG SUPER TROUPER II SYSTEM consists of an advanced design lens mecha-
nism and direct current xenon lamphouse constructed and aligned on a common base rail. Operator controls are
easily accessible from either side of the unit. The spotlight head includes a six-color, self-canceling color
boomerang, and mounts to a collapsible base stand and yoke assembly. A switching type, solid-state xenon
power supply with a keyed quick-disconnect lamphouse cable receptacle completes the follow spotlight system.
ONLY THE SPECIAL POWER SUPPLIES manufactured by Strong International can be
used with the xenon spotlight. Current level adjustments (DC output to the xenon bulb) are made at the power
supply by means of (2) output potentiometers. For information regarding installation and operation of the
xenon power supply, see the instruction manual furnished separately.
THE XENON LAMPHOUSE utilizes a deep ellipse dichroic metal reflector designed to oper-
ate in a fixed position with a horizontally mounted xenon bulb as the light source. The DC Pulse Igniter requires
no AC control circuit. A coated glass heat filter is located at the front opening of the lamphouse to reduce the
radiant heat at the optical system and color boomerang.
THE LAMPHOUSE INSTRUMENT PANEL is equipped with a LCD digital display volt/
ammeter and running time meter. The display continuously indicates the operating DC current (A), voltage at
the arc (V), and the actual wattage (W). The lower line of the LCD display reads out the elapsed hours of the
currently-installed xenon bulb (BLB) and the total number of hours the spotlight has operated (HR). In the
event of an ignition failure, the display screen reads out sequential diagnostic messages.
ONLY XENON BULBS designed for horizontal operation should be used in this spotlight.
The presently approved ratings for bulbs used in this spotlight are 1000, 1600, and 2000 watt. See the listing in
this manual for the approved types and necessary adapters.
ADJUSTMENT CONTROLS for positioning the xenon bulb inside the elliptical reflector are
located above the instrument panel at the rear of the lamphouse. The adjustments control the horizontal, verti-
cal, and focal position of the bulb.
THE BULB is ignited and extinguished through use of the LAMP switch mounted on the
instrument panel. A MODE switch provides circuitry required for remote or automatic bulb ignition control.
THE LAMP BLOWERS, internally wired in the lamp, operate on 115 V.AC and are required
to keep the seals on the bulb at a safe operating temperature. These blowers will operate continuously until
power is turned off at the main line switch to the xenon power supply. An air flow switch at the rear lamphouse
blower prevents operation of the xenon lamp if the blower is not operating, or if the airflow is inadequate. The
Super Trouper II lamphouse, when using a factory-approved, ozone-free xenon bulb, requires no external
exhaust system.
AN ARC STABILIZATION MAGNET, as required by bulb manufacturers for the operation
of 2000 watt bulbs, is mounted to the base of the lamphouse below the reflector. The magnet may be left in place
for operation of 1000 and 1600 watt bulbs. The SOUTH pole of this permanent magnet is marked with paint,
and must be pointed toward the left (off-operator) side of the lamphouse.
ST2/001

THE LAMPHOUSE is supplied with a 13 foot (4 meter) cable assembly containing the two
DC leads, the ground wire, and all AC control leads. The cable assembly is terminated with (2) multiple pin,
keyed MS connectors which mate to receptacles on the lamphouse and xenon power supply cabinet. The AC
hook-up to the xenon power supply is detailed in the power supply manual; AC connectors must comply with all
local electrical codes.
THE OPTICAL SYSTEM incorporates a newly-designed lens mechanism. Spotlight opera-
tors familiar with earlier type Strong spotlights are urged to study the section following in this manual entitled
OPERATION OF THE OPTICAL SYSTEM and to practice the operation of the Super Trouper II prior their
first performance. The spot size control (“trombone”) handle is drawn back to “spot” and pushed forward to
“flood,” which is the reverse of earlier type Strong optical systems. The spot edge is focused by rotating the
focus knobs located behind the boomerang on the left and right sides of the optical system.
FADE-OUT, CHOPPER, AND IRIS CONTROLS are positioned in the same configuration as
earlier Strong spotlights. All optical system controls are accessible for right- or left-hand operation. The color
boomerang is easily reversed to position the color arms on either side. Operation of the self-canceling boomer-
ang remains unchanged, and standard Strong nine-inch gel frames are used.
WHEN TRANSPORTING the spotlight, it is recommended that the xenon bulb be removed
and placed in its original shipping carton with the cover on the bulb to insure against breakage. The bulb, after
cooling to room temperature, may remain mounted in the lamphouse if moving the spotlight from one position
to another within the arena or auditorium. Reasonable care should be exercised; breakage caused in handling is
not covered by the xenon bulb warranty.
IF AT ANY TIME you have a suggestion, or desire aid in securing anticipated results, please
feel free to write directly to STRONG INTERNATIONAL, 4350 McKinley Street, Omaha, Nebraska 68112.
ST2/002
PREFACE (continued)

ST2/003
1. Cover, Lamphouse Compartment 9. Mounting Bracket, Leveling Foot
2. Fade-Out Control Lever 10. “T” Bolt, Folding Leg
3. Masking Blade Control Lever 11 Horizontal Swing Friction Adjust
4. Iris Control Lever 12. Horizontal Tilt Friction Adjust
5. Cover, Optical System 13. Spto Size Control (Trombone) Handle
6. Disc Housing, Color Boomerang 14. Lifting Strap
7. Color Selector Lever, Boomerang 15. Hand Rail
8. Height Adjusting Pin 16. Arc Viewing Port
1
2
3
4
5
6
7
8
9
10
11
12
13
14
15
16

LAMPHOUSE - POWER SUPPLY
Interconnection Diagram
LAMPHOUSE
(Connections Pre-wired)
MS CONNECTOR
Pin Wire No,
A DC-
B DC+
C 2
D 3
E 4
F 5
G 6
I 7
J 8
M Grnd
Lamphouse
Cable Assembly
Conduit
Remote - Auto
Sustained 5 Amp.
Dry Contact
(by Installer
as req’d.)
XENON
POWER
SUPPLY
MS Connector (pre-wired)
DC+
DC-
SYSTEM MUST BE GROUNDED
All wiring must conform to local codes;
shield lamphouse cable in conduit if
required.
Check Slide Switch (below) on Power
Supply for correct positioning.
ST2/004
Slide to LEFT

INSTALLATION AND SETTING UP SPOTLIGHT
THE SUPER TROUPER II is shipped in sections which must be assembled. Lifting straps
mounted to the yoke pivot studs (see Figure 6, Item 2) are designed to bear the weight of the spotlight and base.
This permits assembling the spotlight on the floor and later hoisting it to an overhead spotlight position.
THE FOLDING BASE ASSEMBLY is shipped collapsed, and requires only folding the base
legs down and pinning the legs using the four T-bolts (Figure 6, Item 17) supplied. Screw the four leveling feet
and locknuts (Figure 6, Item 15) into the brackets at the end of each leg.
WHEN INSTALLED in a permanent location, the leveling feet and casters must be removed,
and the holes in the base leg brackets used for hardware (lag screws or bolts; user supplied) to secure the base
to the floor or platform. If it is desired to have the unit portable, when operating, the four leveling feet must be
adjusted down until the entire weight of the spotlight has been shifted from the casters to the leveling feet.
THE INNER TUBE below the support yoke is drilled with three holes to permit adjusting the
height of the spotlight. The three holes are on four-inch centers and will allow an optical height of approxi-
mately 53 inches, 57 inches, and 61 inches above floor level to the optical center of the lamphouse and lens
system. Insert the height location pin through the hole in the outer tube of the base column and one of the holes
in the inner tube. The leveling feet may be adjusted through an additional two-inch range.
THE HORIZONTAL PAN and vertical tilt locking knobs are on the right hand (from rear) side
of the yoke assembly. The yoke saddle is marked to indicate FRONT. Tighten both of these locking devices
securely before attempting to place the spotlight head (lamphouse and lens system) on the support yoke.
PLACE THE LAMPHOUSE and lens system on the yoke assembly, with the operator’s side of
the lamphouse (with arc viewing port) to the right side of the yoke saddle, the same as the yoke locking controls.
Line up the four mounting holes in thebottom plate of the support brace with the four slotted holes in the saddle
of the yoke assembly. Secure using the four 5-16/18 wing head screws and flatwashers. After mounting the
boomerang, loosen the tilt lock and test the spotlight balance at the desired projection angle. Loosen the (4) wing
head screws and slide the spotlight head in the slotted holes in the yoke saddle to achieve optimium balance.
MOUNT THE COLOR BOOMERANG to the front of the optical system with the color arms
facing the desired operation side. Align the three keyholes in the boomerang housing to the three mounting studs
on the front of the optical system housing. Lower the boomerang housing to engage the slots. Secure the bottom
of the boomerang housing to the support bracket on the bottom of the base rail using the thumbscrew provided.
ATTACH THE LAMPHOUSE CABLE CONNECTORS to the mating receptacles on the
lamphouse and power supply. The lamphouse and power supply connectors are keyed for correct pin alignment;
make certain pins are seated before tightening the locking ring. DO NOT energize the xenon power supply
before the xenon bulb is correctly installed into the lamphouse.
THE SUPER TROUPER II is wired for operation with the “compact” model Strong xenon
power supply Equipment Type 62-80106. If installing the Super Trouper II with an older model or type Strong
xenon power supply, a ground wire must be connected to the power supply’s MS connector Pin M. Operation
of the Super Trouper II with a xenon power supply other than a Strong 62-80106 will void UL compliance.
ST2/005

SAFETY PROCEDURES
THE XENON BULB is highly pressurized. When ignited, the normal operating temperature
of the bulb increases the pressure to a level at which the bulb may explode if not handled in strict accordance to
the manufacturer’s operating instructions. The bulb is stable at room temperature, but may still explode if
dropped or otherwise mishandled.
REFER ALL BULB REPLACEMENT and service to QUALIFIED PERSONNEL with
adequate protective clothing (face shield, clean cotton gloves, welder’s jacket). For routine lamphouse service,
observe the following rules:
1. Allow the bulb to cool to room temperature before opening the lamphouse. Put on protective clothing
described above.
2. De-energize the xenon power supply at the AC source before opening the lamphouse compartment.
3. When possible, encase the bulb in its protective cover when cleaning or servicing the lamphouse
interior. The bulb, when outside the lamphouse, must be encased in the cover.
4. Clean the bulb after it has cooled to room temperature. Do not touch the quartz envelope of the bulb;
fingerprints will burn in and create hot spots which may shorten bulb life. If fingermarks are made,
they should be carefully removed with methyl alcohol and cotton prior to bulb operation.
5. Never view an ignited bulb directly. BLINDNESS OR PERMANENT EYE DAMAGE MAY BE
INCURRED.
6. Use only xenon bulbs designated as OZONE FREE. When possible, vent the lamphouse exhaust to
outside atmosphere.
7. Maintain the lamphouse blower in good operating condition. Keep the blower inlet clean for unre-
stricted air flow.
8. To insure maximum bulb life, operate the lamphouse blower and the exhaust system for at least ten
minutes after extinguishing the bulb.
9. If returning a bulb for warranty adjustment, pack it in its original shipping container. Complete and
return all required warranty information.
10. Dispose of expired bulbs that are beyond warranty in the following manner: Wrap the bulb tightly in
several layers of canvas or heavy cloth. Place it on a hard surface and shatter the envelope with a sharp
hammer blow. DO NOT place an unshattered bulb in an ordinary refuse container.
11. DO NOT PERMIT UNAUTHORIZED PERSONNEL TO PERFORM OR ATTEMPT ANY PHASE
OF XENON BULB HANDLING OR SERVICE.
Anode End Cap
Envelope
Anode Pin
Seal Anode
Cathode
Seal
Cathode End Cap
Trigger Wire
Cathode
Pin
ST2/006

BULB INSTALLATION
CAUTION: OBSERVE ALL SAFETY PROCEDURES. Put on protective face mask. Wear
clean cotton gloves to prevent marking the quartz envelope of the bulb with fingerprints. Turn the circuit
breaker on the side of the xenon power supply cabinet OFF.
REMOVE THE LAMPHOUSE ACCESS COVER by removing the (3) phillips head screws
and finish washers; (2) near the arc viewing port, and (1) adjacent to the front door louvers. Open the key lock
after removing the hex head security screw.
THE SUPER TROUPER II SYSTEM is shipped from the factory complete with a xenon bulb
and a compatible xenon power supply. The desired bulb wattage and desired input voltage of the spotlight
system shipped is specified by the customer when placing the original equipment order. Three wattages are
available (1000, 1600, or 2000 watt). The 115 V.AC xenon power supply (62-80114) is capable of operating
1000 and 1600 watt bulbs throughout their specified current ranges, and the 220 V.AC supply (62-80106)
operates all three available wattages. Bulbs approved by Strong International for use in the Xenon Super
Trouper II include:
HANOVIA OSRAM LTG. TECH. INT’L. Nominal DO NOT
Wattage Part No. Part No. Part No. Current EXCEED
1000 XH1000HS XBO1000W/HS OFR LTIX-1000W-HS 50 A. 58 A
1600 XH1600HS XBO1600W/HS OFR LTIX-1600W-HS 65 A. 70 A.
2000 XH2000STII XBO2000W/HS OFR LTIX-2000W-HS 75 A. 90 A.
THE ABOVE XENON BULBS are designated OZONE FREE, and replacement bulbs other
than the above must be certified by their manufacturer as being 100% interchangeable. The warranty on the
xenon bulb supplied is administered by the bulb manufacturer and is separate from the spotlight warranty issued
by Strong International. Retain the warranty documentation packed with the xenon bulb.
WHEN ORDERED for 1000 or 1600 watt operation, the adapters required to install either of
these smaller bulbs in the Super Trouper II lamphouse are supplied in the accessory kit. The front bulb support
for the 1000 and 1600 watt lamphouses is a cast yoke (65117) which holds the stem of the cathode adapter. A
retainer plate (65151) and two thumb screws (65152) clamp the stem of the cathode adapter into the yoke.
THE 2000 WATT type “HS” bulb mounts into the lamphouse without adapters. The front bulb
support for the 2000 watt bulb (83747) is a cushioned ring which encircles the cathode (-) end cap of the bulb.
The negative contact (24269) clamps either on the end of the 1000/1600 watt cathode adapter (as shown) or
mounts directly to the .312" (8mm) cathode pin of the 2 kW “HS” bulb. A trigger wire, encircling the bulb
envelope and attached to the anode end cap (as illustrated on the facing page), must be present.
IF IT IS DECIDED subsequent to the initial installation to change bulb wattages, it is neces-
sary to verify that the original xenon power supply will operate the replacement bulb throughout its range. The
115 volt, Type 62-81000 power supply is not recommended for use with a 2000 watt bulb, and should be
replaced with a 220 volt, Type 62-80000 unit. Make certain that the correct front bulb support is installed;
65117 Yoke for 1000 and 1600 watt, or 83747 Ring Support for 2000 watt. The rear bulb support collet
(24266) accommodates either the anode pin of the 2000 watt “HS” bulb or the stem of the anode adapter.
ST2/007

XENON BULB INSTALLATION
NO ADAPTERS REQUIRED FOR 2000 WATT TYPE “HS” BULB
See Parts List, Figure 2 for 2000 Watt Bulb Mounting
ST2/008
POSITIVE
CONTACT
CLAMP
XENON BULB
REFLECTOR NEGATIVE
CONTACT
CLAMP
HEAT FILTER

1000, 1600 Watt Bulb Installation
ASSEMBLE THE REQUIRED ADAPTERS to the 1000 or 1600 watt bulb as illustrated
prior to inserting the bulb into the lamphouse. Be very careful not to apply any mechanical strain to the quartz
envelope when installing adapters. Note the (2) different anode adapters; the longer anode adapter (24271) is
for the 1000 watt Hanovia XH1000HS bulb only.
SCREW THE CHROMED, THREADED CATHODE ADAPTER (24270) onto the bulb stud
so it seats firmly against the shoulder of the cathode (-) end cap. Slip the correct brass anode adapter with set
screw over the stud of the positive end cap in contact with the shoulder of the anode (+) end cap. Tighten all
threaded fasteners securely to insure firm mechanical fit and good electrical conduction.
LOOSEN THE THUMB SCREWS on the top of the front bulb support yoke and swing the
retainer plate clear of the yoke. Slide the contact clamp of the igniter lead over the brass socket of the rear bulb
support collet.
REMOVE THE PLASTIC PROTECTIVE COVER from the bulb after putting on the face
shield. DO NOT touch the clear quartz envelope of the bulb with bare fingers. Natural skin oils will rapidly
burn into the quartz and shorten bulb life. The xenon bulb warranty does not cover damage of this nature. If the
quartz is accidentally fingermarked, thoroughly remove the fingerprints with isopropyl alcohol before igniting
the bulb.
INSERT THE BULB into the lamphouse, between the reflector support and the front of the
lamphouse. Pass the anode (+) end of the bulb into the reflector and through the center hole of the reflector.
Take care not to touch or scratch the surface of the reflector.
INSERT THE ANODE ADAPTER STEM into the rear support collet. The stem must be
inserted as far into the socket as possible to insure good conduction and to permit full focus travel of the bulb.
Place the cathode adapter stem into the bulb support yoke, pivot the retaining plate to its closed position, and
tighten both thumb screws. Using a 9/64" allen wrench, firmly tighten the socket head clamping screw in the
positive (+) contact to insure a good electrical contact.
INSTALL THE NEGATIVE (-) LEAD CONTACT CLAMP over the end of the cathode adapter.
Slide the contact up to seat its shoulder firmly against the tip of the cathode adapter. Dress the negative lead
directly in front of the bulb support yoke to minimize the shadow. Tighten the socket head clamping screw
securely using a 9/64" allen wrench.
2000 Watt Bulb Installation
REMOVE THE PLASTIC PROTECTIVE COVER from the xenon bulb only if necessary.
Slide the contact clamp of the igniter lead over the brass socket of the rear bulb support collet. If the bulb is
supplied by the manufacturer with an anode lead attached, cut off or otherwise remove the factory-installed
anode lead. Remove any fingermarks from the bulb envelope with alcohol.
INSERT THE 2000 WATT BULB into the lamphouse, passing the anode (+) end through the
hole in the reflector. Handle the bulb by the metal end caps only. Pass the anode pin as far as possible to the rear
of the lamphouse to allow clearance between the cathode (-) pin and the front bulb support. Take care not to
touch or scratch the surface of the reflector; do not touch the quartz envelope of the bulb. Slide the cathode
(-) end cap through the spring-cushioned ring of the bulb shock mount.
ST2/009

2000 Watt Bulb Installation (continued)
NOTE THE TWO NOTCHES at the center hole of the reflector. These notches allow addi-
tional clearance between the grounded reflector and the energized bulb trigger wire. Rotate the bulb to align the
trigger wire with one of these two notches to prevent the trigger wire from arcing to the grounded reflector.
INSERT THE ANODE (+) PIN of the bulb into the rear support collet. The pin must be
inserted as far into the socket as possible to insure good conduction and permit full focus travel of the bulb.
Make certain the bulb’s trigger wire is aligned to the upper or lower reflector notch, and firmly tighten the socket
head clamping screw. Slide the negative contact clamp over the cathode (-) pin and dress the negative lead
directly in front of the front bulb support to minimize the shadow. Securely tighten the negative clamp.
AN ALTERNATE METHOD of installing the 2000 watt bulb is to dismount the shock mount
ring and cushion spring from the front bulb support assembly by removing the socket head screw. Slide the ring
over the cathode (-) end cap of the bulb, and install the bulb by inserting the anode (+) end cap through the
reflector center hole and seating the anode pin into the rear support collet. Re-mount the ring to the base bracket
of the front bulb support using the socket head screw. Secure the anode (+) clamping screw; install and tighten
the cathode (-) contact clamp.
THE SOCKET HEAD SCREW which mounts the bulb support ring to its support bracket
must be tightened securely enough to clamp the upright bulb support ring in a vertical (90°) position and prevent
its tilting forward or back as the bulb is focused. The end cap of the bulb should touch only the coils of the shock
mount spring to allow the bulb to slide forward and back with a minimum of friction and no stress on the
envelope.
All Bulb Wattages
INSERT THE STRIP HEAT FILTER into the bracket in front of the xenon bulb. This filter is
a narrow glass strip that covers only the center portion of the beam. One surface of the glass is coated, and
marked “XX” and/or imprinted “This Surface Toward Bulb.” The coated glass surface must face the bulb or
damaging radiant heat energy will be transmitted to the optical system. DO NOT operate the spotlight with the
glass strip heat filter missing or reversed.
CHECK THE ARC STABILIZATION MAGNET mounted to an “L” bracket below the re-
flector. The SOUTH pole of the magnet is marked with paint, and should be pointed toward the off-operator
side of the lamphouse (left side, as viewed from rear). If the magnet is reversed, the arc will burn high on the
face of the anode electrode, creating severe light flicker and causing ignition problems. This magnet is required
for 2000 watt operation, and is in no way detrimental to the operation of 1000 and 1600 watt bulbs.
REMOVE THE PLASTIC COVER from the xenon bulb. Do not ignite the lamp with the
cover on the bulb. Retain the plastic cover and store in a secure location at or near the spotlight.
REPLACE THE LAMPHOUSE COVER. Replace and tighten all (3) phillips head retaining
screws and washers. The lamphouse cover must be correctly installed and secured to close the cover interlock
switches and enable bulb ignition and operation.
IT IS RECOMMENDED to establish a routine for periodically checking all electrical connec-
tions for tightness, particularly those at the bulb. A loose connection in the DC circuit may cause overheating
of contacts and leads, and may damage or destroy the bulb. The xenon bulb warranty does not allow credit for
heat-related damage of this nature.
ST2/010

BULB ALIGNMENT & LAMPHOUSE OPERATION
PRIOR TO OPERATING THE SPOTLIGHT, verify the following conditions:
The plastic protective cover has been removed from the xenon bulb.
The strip heat filter is installed with the coated surface facing the bulb.
The lamphouse access cover is in place and secured using all (3) phillips
head screws; key lock secured and hex head security screw installed.
SEE THE PRECEDING “BULB INSTALLATION” SECTION for instructions detailing the
above. Failure to remove the plastic bulb cover will damage or destroy the xenon bulb. A missing or reversed
heat filter will cause damage to the lens system. The lamphouse cover must be installed correctly and secured
to actuate the interlock switches and permit lamp ignition.
ENERGIZE THE XENON POWER SUPPLY by switching the circuit breaker on the side
panel ON. The red light adjacent to the circuit breaker will glow, indicating that the power supply is ready for
operation. The lamphouse blowers will start and actuate the blower interlock switch to permit bulb ignition.
The lamp blowers will operate continuously until the xenon power supply is de-energized. Place the lamphouse
MODE switch in the “MAN.” (manual) position. This is the normal setting for the MODE switch, as it permits
ignition control of the spotlight at the unit, and not from a remote location. REMOTE/AUTO operation is
outlined in the section following, and illustrated on the Lamphouse-Power Supply Interconnection Diagram.
PLACE THE LAMP SWITCH in the ON position and the bulb will ignite. Allow a few
minutes for the current to stabilize, and read the lamphouse ammeter. The bulb must be operated within the
current range specified by the bulb manufacturer. The ranges for the xenon bulb supplied are as follow:
Nominal DO NOT
Wattage Current EXCEED
1000 50 A. 58 A.
1600 65 A. 70 A.
2000 75 A. 90 A.
ADJUST THE XENON POWER SUPPLY as instructed in the power supply manual for the
correct operating current. A new xenon bulb is normally operated at “nominal” current. After prolonged use,
the light output will decrease because of normal bulb aging. At this time, the current output setting may
periodically be increased to compensate for bulb aging, but do not, at any time, exceed the maximum current
level specified.
DISMOUNT THE COVER PLATE located above the lamphouse instrument panel by
removing the three black phillips head screws and finish washers. This exposes the control mechanism for
adjusting the position of the xenon bulb.
THE CENTER SECTION of the control is a threaded member that focuses the bulb in relation
to the reflector. Turning this adjustment moves the bulb on the horizontal plane, into or out of the reflector.
Rotating this section clockwise moves the bulb away from the reflector. The small knurled screw to the left of
this section can be tightened to lock the focusing mechanism in place after the bulb alignment procedure has
been completed.
ST2/011

THE TWO LARGE THUMB SCREWS to the left and right of the focusing control secure the
horizontal and vertical position of the bulb. These two large thumb screws are spring-loaded to provide a degree
of friction against the cast section of the control mechanism.
BULB ADJUSTMENT CONTROLS
Focus Control
Focus Lock Screw
Thumb Screw
THE FOLLOWING METHOD is recommended to position the xenon bulb inside the reflector
in order to project the best light to the stage.
SLIDE THE SPOT SIZE CONTROL HANDLE (“Trombone”) back to its stop at the the
rearmost position to project the smallest spot possible. Place the iris, choppers, and dimming controls in their
full open positions. Project the spot to a wall or similar flat perpendicular surface opposite the spotlight.
TURN THE CENTER “FOCUS CONTROL” section of the bulb adjustment control, as illus-
trated above, fully clockwise until a small dark spot is projected on the wall (Spot “A”). At this point, the bulb
is defocused at its extreme forward position. Then rotate the focus control counterclockwise until a center “hot”
spot is defined (Spot “C”).
LOOSEN THE TWO THUMB SCREWS to the left and right of the focus control just enough
to permit manual motion of complete control assembly. Move the control assembly around the two thumb
screws and observe the movement of the brighter “hot” area within the projected spot.
MOVE THE CONTROL ASSEMBLY around the thumb screws until the brightest portion of
the “hot” area is at, or slightly above, the center of the projected spot. It may be necessary to again rotate the
bulb focus control to clearly define and identify the “hot” spot. Positioning the brightest light above the center
of the spot highlights the head and shoulders of a live performer. This effect is particularly desirable for
television and video taping.
ST2/012

AFTER THE “HOT” SPOT is correctly positioned, tighten the two thumb screws to lock this
adjustment in place. To verify that the bulb is at the optical centerline, turn the focus control clockwise to again
project Spot “A.” The dark spot should remain centered in the spot projection as shown.
ROTATE THE BULB FOCUS CONTROL (center section) to obtain the brightest light with
even, flat light distribution (Spot “B”). To sharpen the edge of the spot, rotate the spot fine focus control (large
knurled knob) located immediately behind the color boomerang.
A SECOND METHOD of aligning the xenon bulb is to project the spot to the stage, and using
the bulb adjustment controls, obtain a “hot” spot in the projected spot. Center this “hot” spot in the projected
spot by moving the entire control section around the two thumb screws. Once the “hot” spot is centered, or
slightly above center in the projected spot, lock the adjustment control in position with the two thumb screws
and rotate the focus control (center section) to obtain a bright spot with an even distribution of light. To sharpen
the edge of the spot, rotate the knurled focus control knob located on the side of the lens mechanism.
THIS BULB POSITIONING ADJUSTMENT should not be disturbed until the xenon bulb is
either rotated or replaced. At this time it will be necessary to repeat the above bulb alignment procedure.
REPLACE THE REAR COVER PLATE over the bulb adjustment control mechanism.
Secure in place with the (3) phillips head screws and finish washers.
BECAUSE OF MANUFACTURING TOLERANCES and normal bulb aging, it may be nec-
essary to operate one lamp at slightly higher or lower current than others to obtain equal light balance between
two or more units. These current adjustments are made at the xenon power supply.
TO EXTINGUISH THE ARC, place the LAMP switch in the OFF position. The blowers in
the lamphouse will continue running until the xenon power supply is de-energized. Allow the blower to operate
and cool the bulb for at least ten minutes after extinguishing. This measure is required to comply with the bulb
manufacturer’s warranty conditions.
TO PROLONG BULB LIFE, and to encourage rapid bulb starts, it is recommended to douse
out using the choppers or the fade-out blades rather than extinguishing the bulb during “dark” periods between
cues. Multiple ignition pulses and “warm” re-starts consume more power and cause more bulb electrode wear
than sustained operation. While repeated ignitions are frequently unavoidable, and within design parameters, a
(20) minute delay between ignitions is desirable.
COMPLY WITH THE BULB MANUFACTURER’S INSTRUCTIONS regarding rotation of
the xenon bulb at specified intervals. To rotate the bulb, loosen both the positive and negative clamps. Grasping
the metal end caps, rotate the bulb 180° and align the trigger wire to the opposite reflector notch. Securely re-
tighten both clamps. Adjust the xenon power supply to increase the DC current to a setting at or just below the
maximum level specified for the bulb. Project a white spot to check for an even field; correct the bulb position-
ing as required. Operate the xenon bulb at this higher current level for one or two performances, and then return
the power supply setting to its previous level. This temporary operation of the xenon bulb at high current
following bulb rotation will restore the cathode tip and enhance ignition at the new arc position.
RETURN BULBS upon which a warranty claim is being made to the theatre equipment dealer
through whom the unit was purchased. Pack the bulb in its original shipping carton with the protective cover
over the bulb. Complete and enclose all warranty forms supplied by the bulb manufacturer.Warranty credit will
not be allowed if the bulb failure is related to mishandling, incorrect installation, faulty supporting equipment,
or abuse.
ST2/013

DIGITAL DISPLAY
UPON ENERGIZING the LAMP circuit, the backlighting will illuminate the LCD screen.
When the blower is operating and all access covers are closed and correctly secured, the display will appear as
shown:
000V 000A 0000W
1234BLB 12345HR *
FOR PURPOSES OF ILLUSTRATION, the above display indicates a non-operating bulb
with 1,234 hours of use installed into a spotlight with 12,345 hours of operation. The asterisk (*) at the end of
the second line, when flashing, indicates that the display is active and awaiting input. Upon bulb ignition, the
upper line will display the arc voltage (V), the DC current (A), and the operating wattage (W) of the bulb. The
figures will shift for the first few moments of bulb operation, but will stabilize after the bulb reaches normal
operating temperature and pressure. A plus sign (+) will replace the asterisk.
IN THE EVENT of an open interlock switch, the lower line will display the appropriate
diagnostic measure, i.e. CHECK COVER or CHECK BLOWER. The diagnostic messages are sometimes
abbreviated, and defined as follows:
CHECK TOP COVER: Make certain the lamphouse top cover is correctly positioned and secured using all
(3) phillips head screws.
CHK COVER (LEFT): The interlock switch below the left (off-operator) side of the top cover is open;
check tightness of locking screws.
CHK COVER (RIGHT): The interlock switch below the right (operator) side of the top cover is open; check
tightness of locking screws.
CHECK BLOWER: Make certain the squirrelcage blower below the lamphouse is energized and operat-
ing, and that the ducting to the bulb compartment not obstructed.
WHEN THE INTERLOCK CIRCUIT is complete, closure of the LAMP switch, or the
remote/auto closure, will energize the contactor of the xenon power supply. The high open circuit (“no load”)
DC voltage will be displayed. When the open circuit voltage reaches 140 V.DC, the igniter will generate a RF
pulse to bridge the gap between the bulb electrodes. This pulse, coupled with the high open circuit DC voltage,
will ignite the bulb. The voltage reading (V) will then fall to the bulb’s sustaining level, and the DC amperes (A)
and wattage (W) will be displayed continuously until the bulb is extinguished.
ELAPSED HOURS will begin counting upon bulb ignition. Bulb hours (BLB) are limited to
four digits, and are re-set when the xenon bulb is replaced. To re-set bulb hours, press the RESET button
accessible through marked hole below the LCD screen. The 5/64" allen wrench supplied with the accessory kit
is the correct diameter to clear the hole.
NOTE: WHEN RECORDING start-up and removal hours on the Xenon Bulb Record, use the
total elapsed hours (HR) figures. The (BLB) figure, re-set upon installation of the bulb, is a convenience
feature ONLY. Basing records of the lamp system on the total hours (HR) figures permits an accurate and
ongoing history of bulb usage.
ST2/014

IF THE XENON BULB fails to ignite, additional diagnostic messages will display on the
lower line of the LCD screen:
CHECK PWR SUPPLY: If no DC current is sensed, and voltage does not exceed 125 V.DC, check the xenon
power supply. Repair or replace as required.
CHECK IGNITER: If the DC open circuit voltage reaches and exceeds 140 V.DC and the igniter fails to
pulse, replace the igniter.
CHECK XENON BULB: Look through the arc viewing port. If the high voltage is shorting to ground, and
not arcing between the bulb electrodes, locate and correct (insulate) the short cir-
cuit. If the high voltage arc appears between the bulb electrodes, and the bulb fails
to ignite, replace the bulb.
DIAGNOSTIC MESSAGES serve as prompts and suggestions but do not replace traditional
troubleshooting procedures. If the top cover is closed and secured but transmits an error message, check the
subject cover interlock switch with an ohmmeter and replace if defective. Dirt or dust fouling an air vane switch
will cause a “blower” error message. A “power supply” or “igniter” error message might be caused by a loose
or oxidized connection.
ST2/015

HANDLING THE SPOTLIGHT
THE SUPER TROUPER II can be operated from either side. Generally, the best position for
the operator to stand is near the center of the spotlight, on the right hand side. The angle of tilt and the size or
location of the porthole may alter the position for the most convenient operation. Each operator will, after a few
minutes of operation, generally develop his or her own system and position for operating the unit.
POSITION THE COLOR BOOMERANG with the color arms facing the desired operating
side. The boomerang housing can be reversed by removing the thumb screw securing the bottom of the housing
to the base rail bracket, lifting the housing out of the three keyed studs, and pulling the boomerang forward.
Reverse the boomerang, and re-mount using the (3) keyholes on the opposite side. Replace and secure the
thumb screw. It is advisable to check the sequence of color filters and to place the more dense colors (red, green)
in the front positions of the boomerang (furthest away from the arc). See the following OPERATION OF THE
COLOR BOOMERANG section for detailed instructions.
THE HORIZONTAL PAN and vertical tilt tension adjustment levers are located on the yoke
assembly. Each can be separately set to give the desired degree of friction on spotlight swing, from complete
release to total lock-down, to suit the spotlight’s application and the individual operator.
THE LENS SYSTEM “ZOOM” BRAKE, which controls the degree of force required to slide
the spot size control handle (“trombone”), is located on the outrider of the movable projection lens carriage.
Alternately tightening or loosening the nylon brake tension screw will increase or decrease the force required to
operate the spot size control handle. Requirements may vary, and the braking can be adjusted to both accommo-
date the angle of tilt and to suit the individual operator. See the following OPERATION OF OPTICAL
SYSTEM section for details regarding accessing and setting the friction brake.
REMOTE/AUTO OPERATION
TO OPERATE THE SPOTLIGHT from a remote location or an automation controller, the
lamphouse must be equipped with a rocker switch labeled MODE. With the MODE switch in the “AUTO”
position, and the LAMP switch “ON,” the lamp will ignite by means of a dry contact across switching terminals
3 and 6 in the lamphouse or power supply. Do not apply voltage to these terminals; use only a dry contact rated
at 5 amperes as illustrated on the Lamphouse-Power Supply Interconnection Diagram.
THIS TYPE OF INSTALLATION is intended for use only if the spotlight is “locked down”
and to be used as a fixed spot without an operator at the unit. Manual operation is restored by placing the
MODE switch in the “MAN.” position. Likewise, placing the MODE switch in “MAN.” and switching the
spotlight ON or OFF using the LAMP switch will override a faulty remote contact or defective automation
controller.
ST2/016

OPERATION OF OPTICAL SYSTEM
THE IRIS CONTROL is the front lever which projects through the slots on the top of the
optical system housing. When this lever is to the left (as viewed from the rear of the unit), the largest aperture
is provided. Smaller apertures are obtained as the lever is moved to the right.
THE SPOT SIZE CONTROL HANDLES (“Trombone”) are located on the right and left sides
of the optical system just above the base rail. A variation of spot sizes from full flood to small spot can be
obtained by moving the spot size control handle from one extreme to the other. Beam intensity is increased by
this optical system when reducing from flood to spot, and maximum intensity is reached when the trombone
handle is in the extreme rear position.
THE MAXIMUM FLOOD SPOT is obtained with the iris control lever to the left (away from
the normal operating side) for the largest aperture and with the trombone handle moved as far forward as
possible.
SMALLER SIZED SPOTS are projected as the trombone handle is pulled back. Most of the
spot sizes needed will be produced with the iris in its maximum open position. A “diffused” spot (reduced
intensity with a soft edge) is projected by moving the trombone handle forward toward “flood” while closing the
iris control.
TO ADJUST the degree of force required to slide the spot size control handle, the nylon brake
screw in the outrider of the projection lens carriage must be loosened or tightened. The lens mechanism housing
(see Figure 3, Item 27) must be dismounted to perform this adjustment.
TIGHTEN THE YOKE TILT LOCK and dismount the color boomerang. Remove the (2) spot
size control handles and the (2) focus knobs. These items are mounted using socket head screws which can be
removed using a 3/16" allen wrench. Unscrew the (3) plastic knobs from the optical system control levers.
Remove the (6) phillips head screws retaining the lens mechanism housing. Lift the housing from the spotlight,
slightly spreading the bottom of the cover to clear the protruding shafts.
THE FRICTION BRAKE is a hex head nylon screw (see Figure 3, Item 4) which bears against
the slide rod. Tightening the screw applies tension and loosening the screw relieves tension. A spotlight
operated at an extreme down angle will require more brake tension than one operated at a more level angle.
Furthermore, the preferred degree of tension may vary between individual operators. Secure the lock nut after
setting the desired brake tension; re-install the lens mechanism housing and the color boomerang.
THE EDGE OF THE PROJECTED SPOT is focused by rotating the focus control knob.
This focus control alters the relative distance between the lenses to adjust the optical system for differing lengths
of throw. The degree of torque required to rotate the focus control is adjustable by tightening or loosening the
friction screws (Figure 4, Item 17) on the off-operator side of the focus mechanism. When making an focus
adjustment, observe the spot and rotate the focus knob until the sharpest edge on the projected spot is obtained.
FOR A “HEAD” SPOT, or any spot smaller than can be obtained with the trombone handle in
its extreme rear position, shift the iris control lever to the right (toward operating side) for a smaller aperture.
The iris control lever should always be returned to its extreme left (open) position before the spot size control
(trombone) handle is again moved forward to obtain larger spots.
ST2/017

THE MASKING SHUTTER (chopper) lever is the middle lever projecting through the top of
the optical system housing. The masking shutter blades are operated by this lever to shape the projected spot to
a rectangle, strip spot, or dousing out to full cutoff. The disengaged (full open) position of the masking shutter
lever is to the extreme right (viewed from rear). Varying degrees of masking to complete cutoff are obtained by
moving the lever to the left.
THE ANGLE of the masking shutter blades closure is adjustable and can be set to compensate
for an offset horizontal projection angle, for example, if the spotlight is positioned to the left or right of center
stage. An unbalanced condition will exist while adjusting the blades; lock down the spotlight tilt clamp before
preceding.
REMOVE THE COLOR BOOMERANG and lens mechanism housing as instructed on the
preceding page. Loosen the slotted head screws holding each of the masking shutter blades enough to allow
adjustments. Ignite the bulb and project a spot. Adjust the angle of the bottom blade by tapping it with a
screwdriver so its projected edge lies parallel to the footlights. Tighten the screw. Operate the masking shutter
lever to close the blades. Adjust the upper blade to close against the bottom blade, and tighten the screw.
THE FADE-OUT MECHANISM AND DOUSER CONTROL is the rear lever projecting
through the top of the optical system cover. This lever controls the intensity of light from complete fade-out
(douse) when the lever is to the left, to full intensity when the lever is to the right.
ROTATING THE LARGE KNURLED KNOBS located on the sides of the optical system
immediately behind the boomerang adjusts the fine focus of the lenses and sharpens the edge of the spot. It may
be necessary to re-focus the edge of the spot after zooming from flood to small spot, and from spot to flood.
OPERATION OF COLOR BOOMERANG
THE COLOR BOOMERANG is equipped with six two-part filter holders (51928 gel frame
with slide channel and 51376 cover plate). Six sheets of assorted color gels are included in the spotlight
accessory kit. Additional colors and filter holders can be supplied by your Strong International Dealer. Specify
ROSCOLUX®or equivalent high temperature gels.
TO OPERATE INDIVIDUAL COLOR FILTERS, lower the desired filter selector lever. A
rocker catch located in the color disc housing holds the filter in position. To release a color, push the filter
release arm in or engage another color, thus releasing the previous color automatically.
TO REPLACE FILTER HOLDERS, open the front cover of the color disc housing by remov-
ing the thumb screw on the top of the housing. The upper portion of the housing is hinged to allow access to the
color holders. Slide the filter holders up and off the color arms. Replace gel frames as required and secure the
front cover of the disc housing cover when finished.
NOTE: WHEN PLACING COLOR FILTERS in the boomerang, the less dense colors (pink,
amber) should be placed in the holders toward the rear of the boomerang (toward the arc), and those of greater
density (red, green) should be placed in the holders toward the front of the boomerang (away from the arc).
Remember to reverse the gel sequence if reversing the boomerang for left/right operation.
COLOR TEMPERATURE CORRECTION FILTERS, required for use with television and
videotape, can be installed in place of one or more colors. They are available from theatrical supply dealers.
ST2/018
Other manuals for SUPER TROUPER II
2
Table of contents
Other Strong International Spotlight manuals

Strong International
Strong International RADIANCE 72-00800 User manual
Strong International
Strong International SUPER TROUPER II User manual

Strong International
Strong International SUPER TROUPER II User manual

Strong International
Strong International TrussTrouper 1.2 User manual

Strong International
Strong International XENON GLADIATOR IV User manual
Strong International
Strong International XENON GLADIATOR III User manual

Strong International
Strong International FOLLOW SPOTLIGHT 48057 User manual
