StuntCams PV-RC200W User manual

PV-RC200W
HD WI-FI Keyfob DVR(Black)
Quick Guide
A. Regarding the Device
1. Key Eject / Retract button
2. Power On/Off & REC Button
3. WI-FI On/Off & Client Button & WI-FI Reset
4. Snapshot Button
5. Memory Card Slot
6. Charge LED
7. USB Charge
8. Camera Lens
B. Power Charging
1) Press ○
1eject key.
2) Connected the USB cable to ○
7then connected the cable to USB Plug.
3) The ○
6will showed Orange LED light on, The Orange LED light will off when the device is fully charged.
4) Hold down the ○
1key and back depressed key.
C. Insert the SD Card
1) Place the SD Card into SD Card Slot, Press the SD Card
for take out the SD Card.
D. Button Function
1) Power On:Hold the button○
2till it vibration, the device will vibration on 3 times.
2) Power On finish:The device will vibration on 2 times when it finish power on.
3) Power Off:Hold the button(2)till it vibration, the device will vibration on long times.
4) Power Off finish:The device will vibration on 2 times when it finish power off.
5) REC On/Off:Press button○
2to turn on REC or stop REC.
(REC will vibration on 1 times;Stop REC will vibration on 2 times)
6) WI-FI On/Off:Press button○
3to turn on WI-FI or turn off WI-FI.
(The WI-FI is on when the device is power on.)
7) Reset WI-FI Default:Hold the button○
3for 10 sec.
8) Snapshot 拍照:Press the button○
4take a one photo and vibration 1 time.
E. LED Light
1) Orange LED Light On:Power Charging
Orange LED Light Off:Fully Charge
H. APP download QR Code (Scan the QR code to download the APP or directly type &
search “SecurePro” in App store or Google play for installation)

I. Establish WIFI connection (Android)
1) Start your smartphone APP.
1) Choosing the device’s WI-FI which you need to connect.
1) Enter the password.

(The factory initial password is 123456878.)
1) WI-FI connection.
1) Enter WI-FI connection.
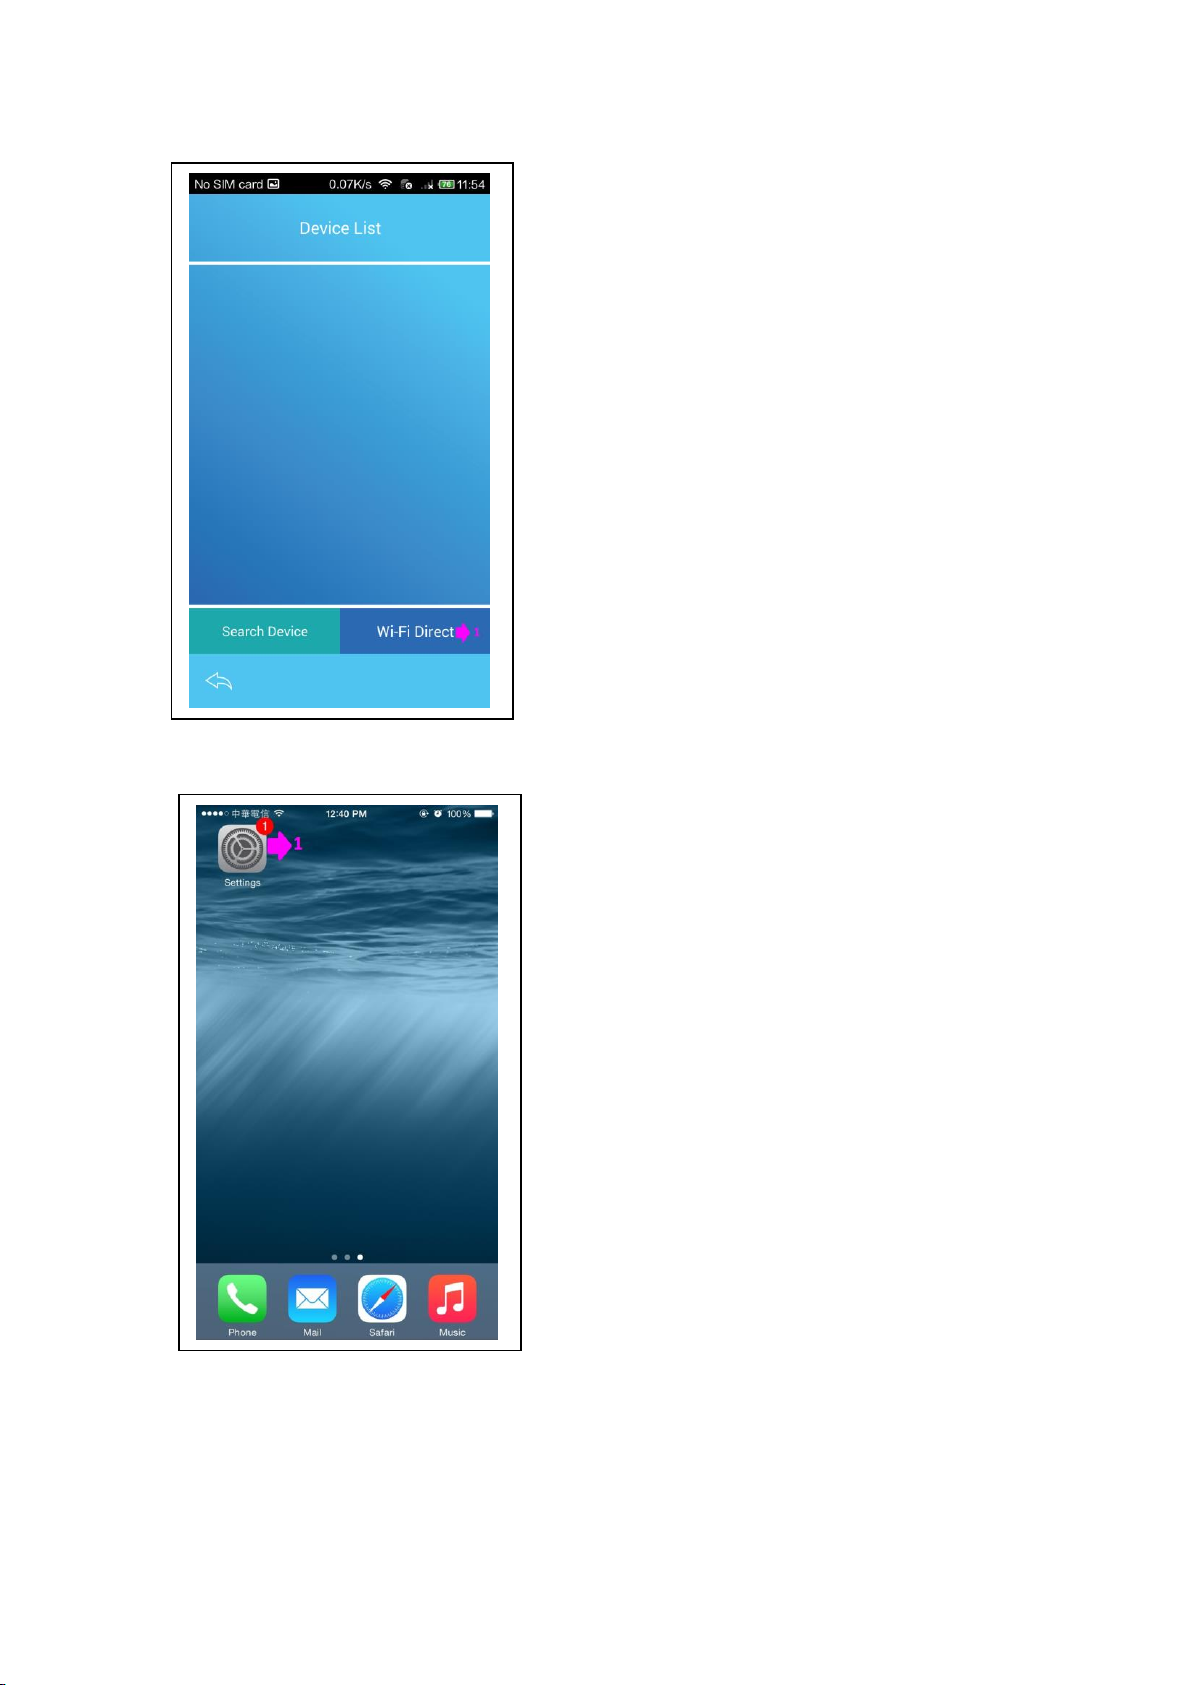
* Establish WIFI connection (iOS)
1) Chose settings.
1) Chose Wi-Fi.
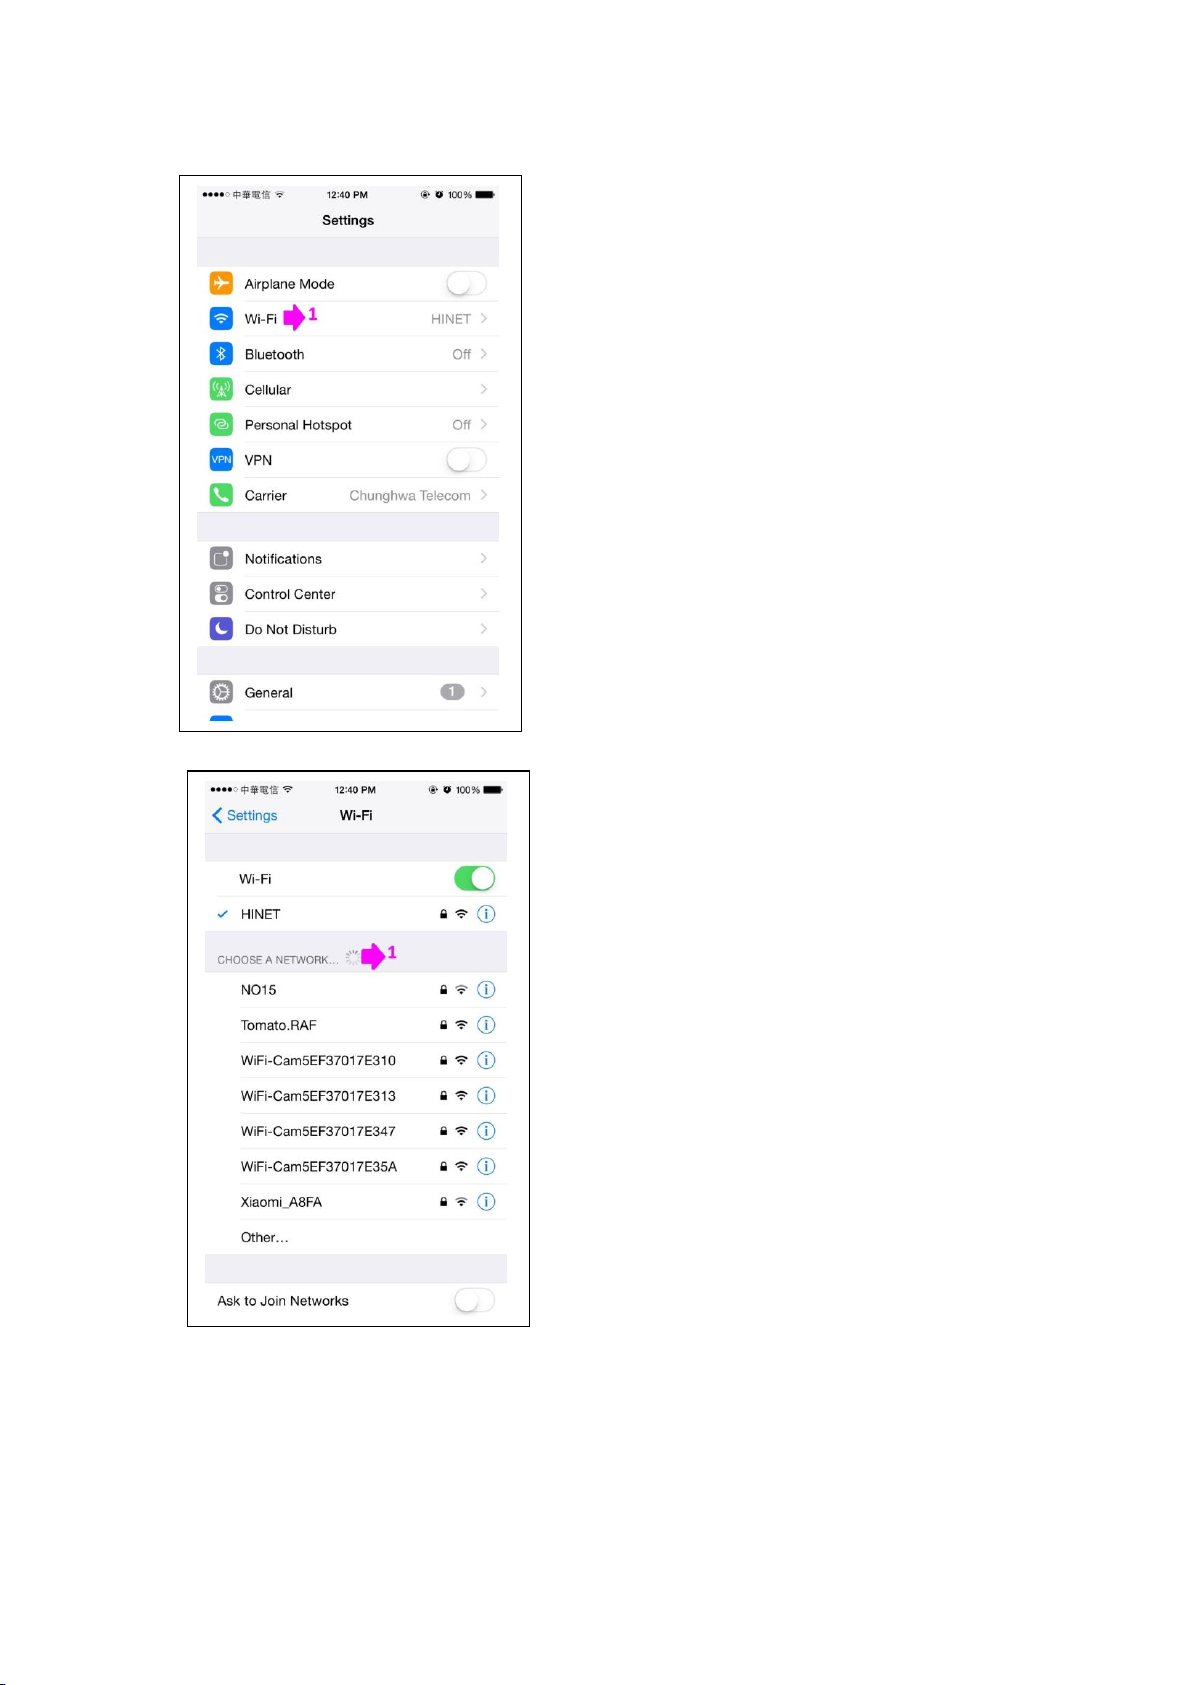
1) Choosing the host’s WI-FI which you need to connect.

1) Enter the password.
(The factory initial password is 12345678)
1) Confirm WI-FI has been connected.
II. APP UI description
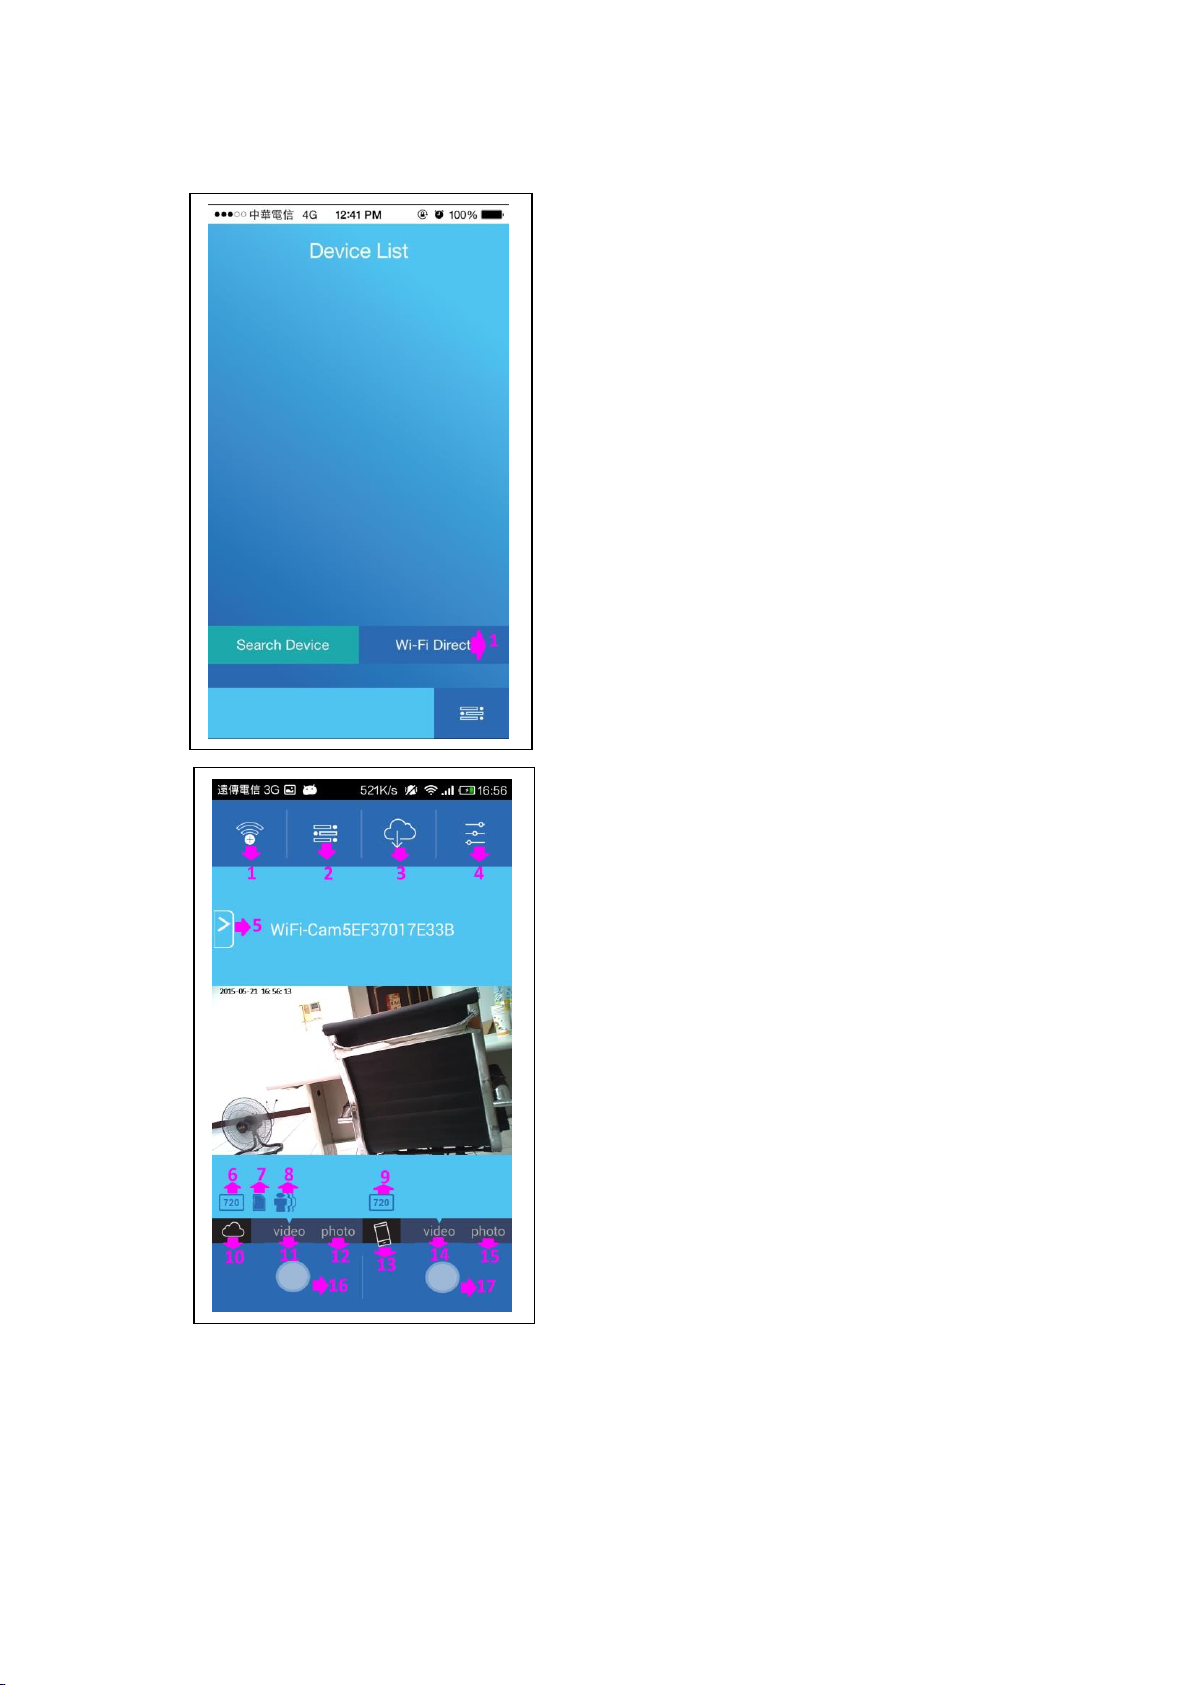
1) Push WI-FI Direct to enter into the preview mode
1) Back to WI-FI which you need to connect device list.
2) Cell phone video and Photo archive folder.
3) SD card video host and Photo archive folder.
4) Setting.
5) Quick setting.
6) Host SD card resolution when recording.
7) SD card reminder.
8) Motion detection recording.
9) Resolution when recording.
10) Host SD card recording icon.
11) Host SD card recording.
12) Host SD card photograph.
13) Smartphone recording icon.
14) Smartphone recording.
15) Smartphone photograph.
16) Host SD card recording button.
17) Smartphone recording button
1) Host SD card red light constant lighting while recording
2) Smartphone recording red light blinking.
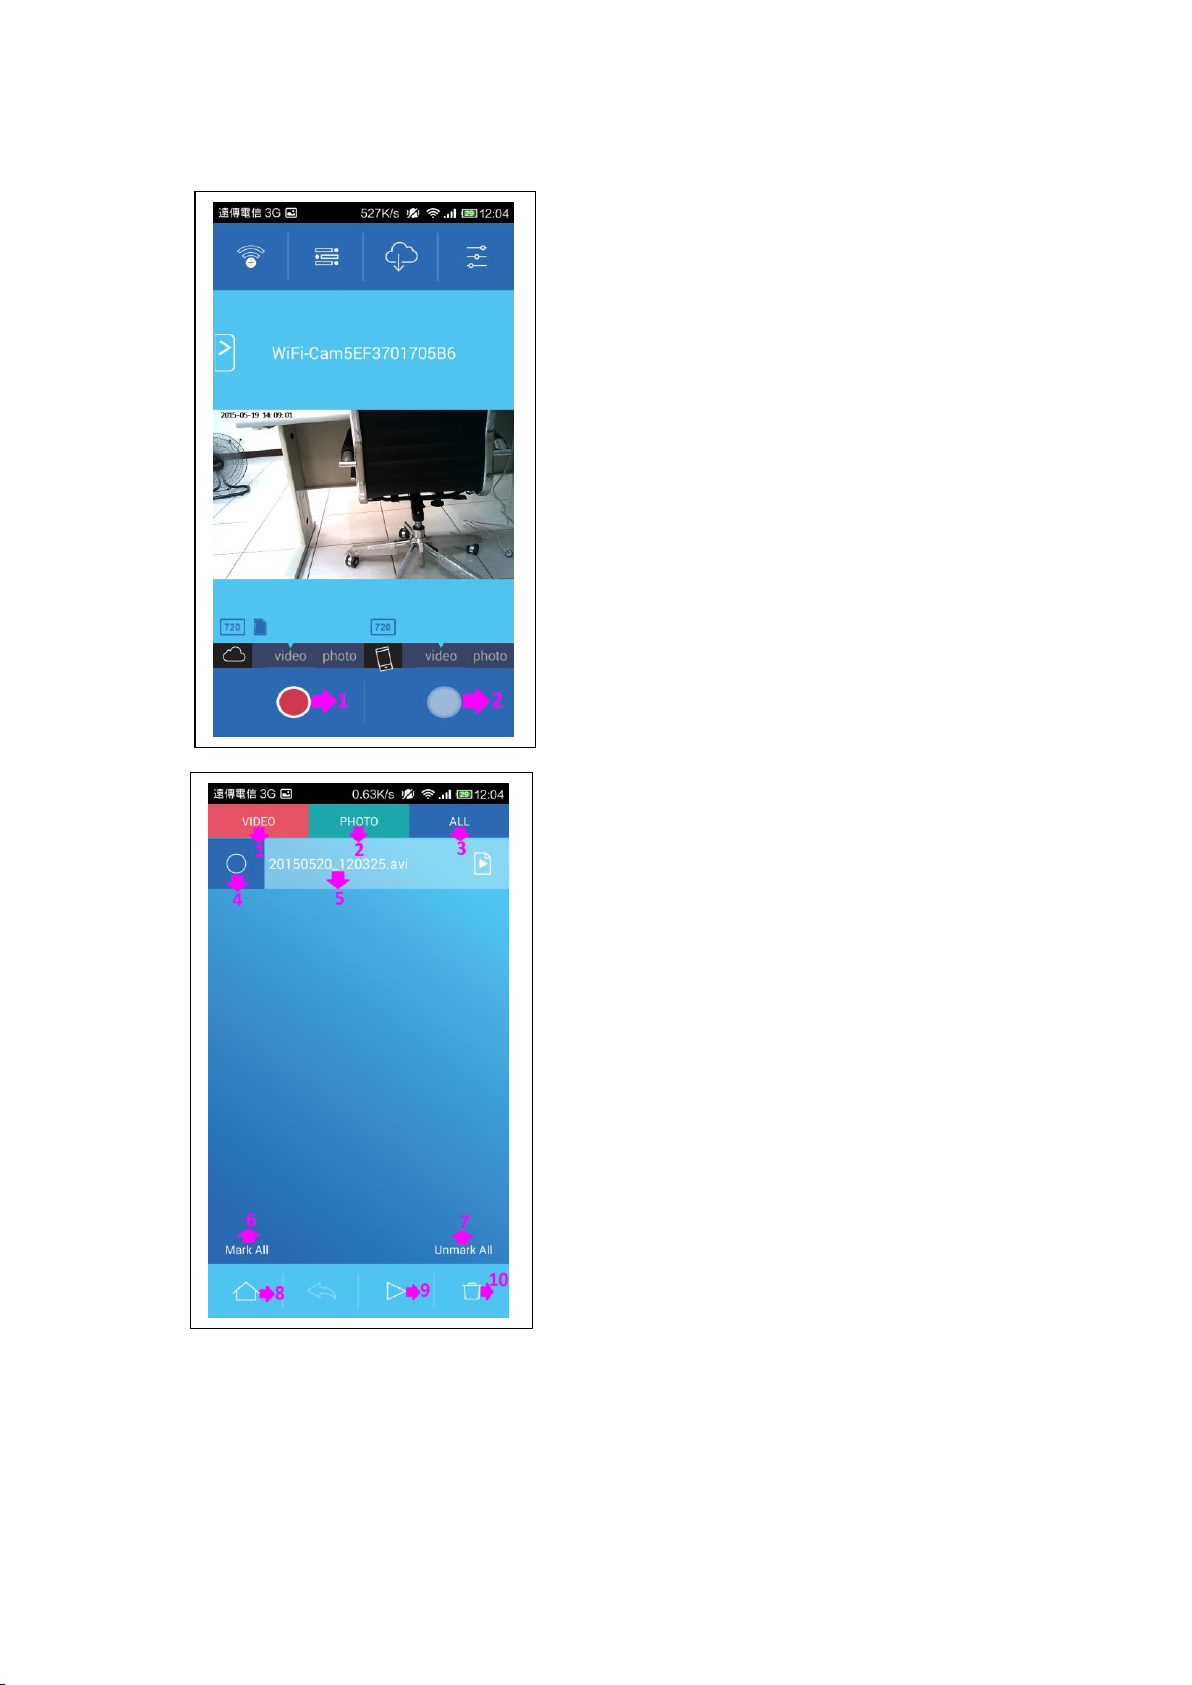
Browsing Mobile Video and Photo Archive Information.
1) Film archives.
2) Photographic archives.
3) Film and photo all archive.
4) Mark archive what you need.
5) File name.
6) Mark all archive.
7) Unmark all archive.
8) Back to homepage.
9) Play button.
10) Delete button.
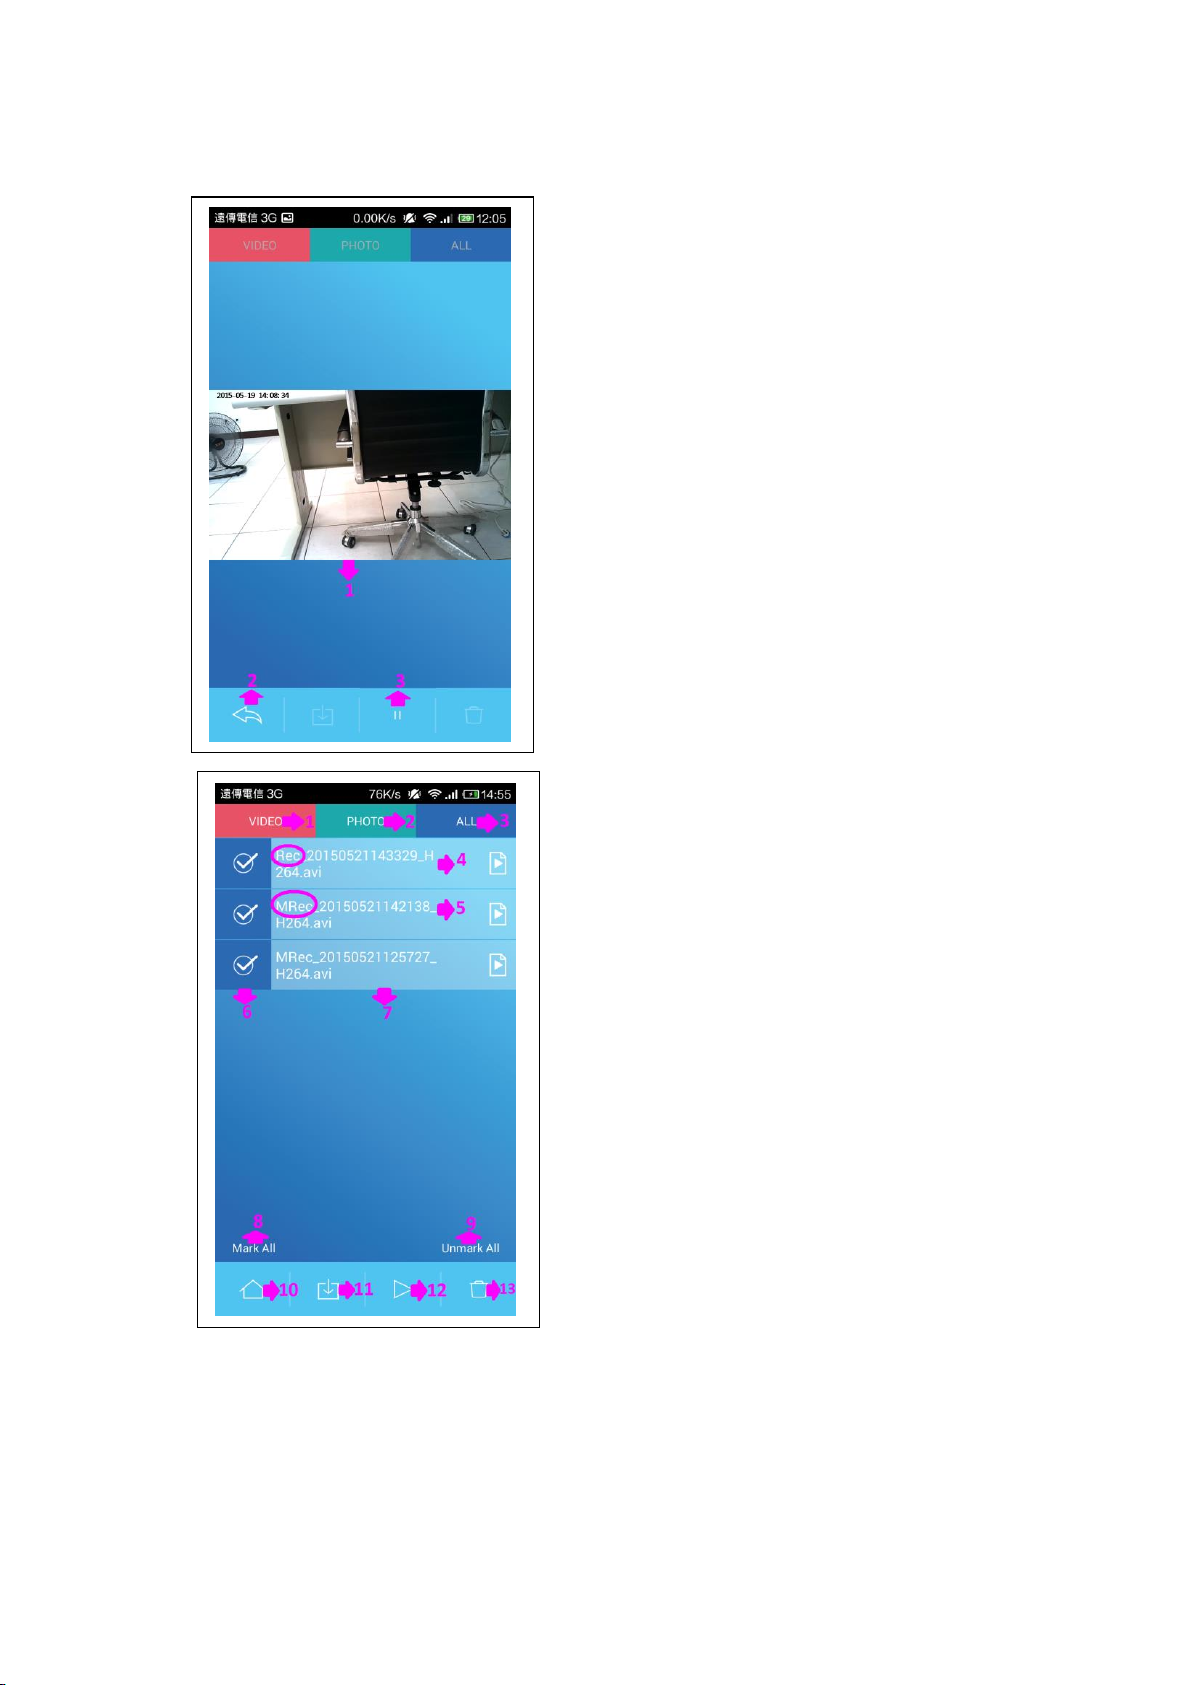
Play The Video File.
1) Video playback window.
2) Back to last page.
3) Pause button.
Browsing the Host SD Card Video and Photo Archive
Information.
1) Film archives.
2) Photographic archives.
3) Film and photo all archive.
4) Continuous video file named beginning with Rec.
5) Motion detection recording named beginning with
MRec.
6) Mark archive what you need.
7) File name.
8) Mark all archive.
9) Unmark all archive.
10) Back to homepage.
11) Download archive of SD card to smartphone.
12) Play button.
13) Delete button.
Other StuntCams DVR manuals


