CUS
D
MODEL 75-103
LED DIMMABLE LIGHTED MIRROR
LED DIMMABLE LIGHTED MIRROR
1、Make certain the wall is solid, and use the flexible rule to measure the centre distance
between two
2、Use the flexible rule to measure the centre distance between two hardy holes on the wall (“a” and
3、Choose the churn drill with an appropriate drill bit to make two holes at the marked
places, and use a
4、Use the hammer to strike the expansion rubber plug in accessory bag into the holes on
the wall, and
then use the screwdriver to tighten the screws into the holes (exposure for 8 – 12mm).
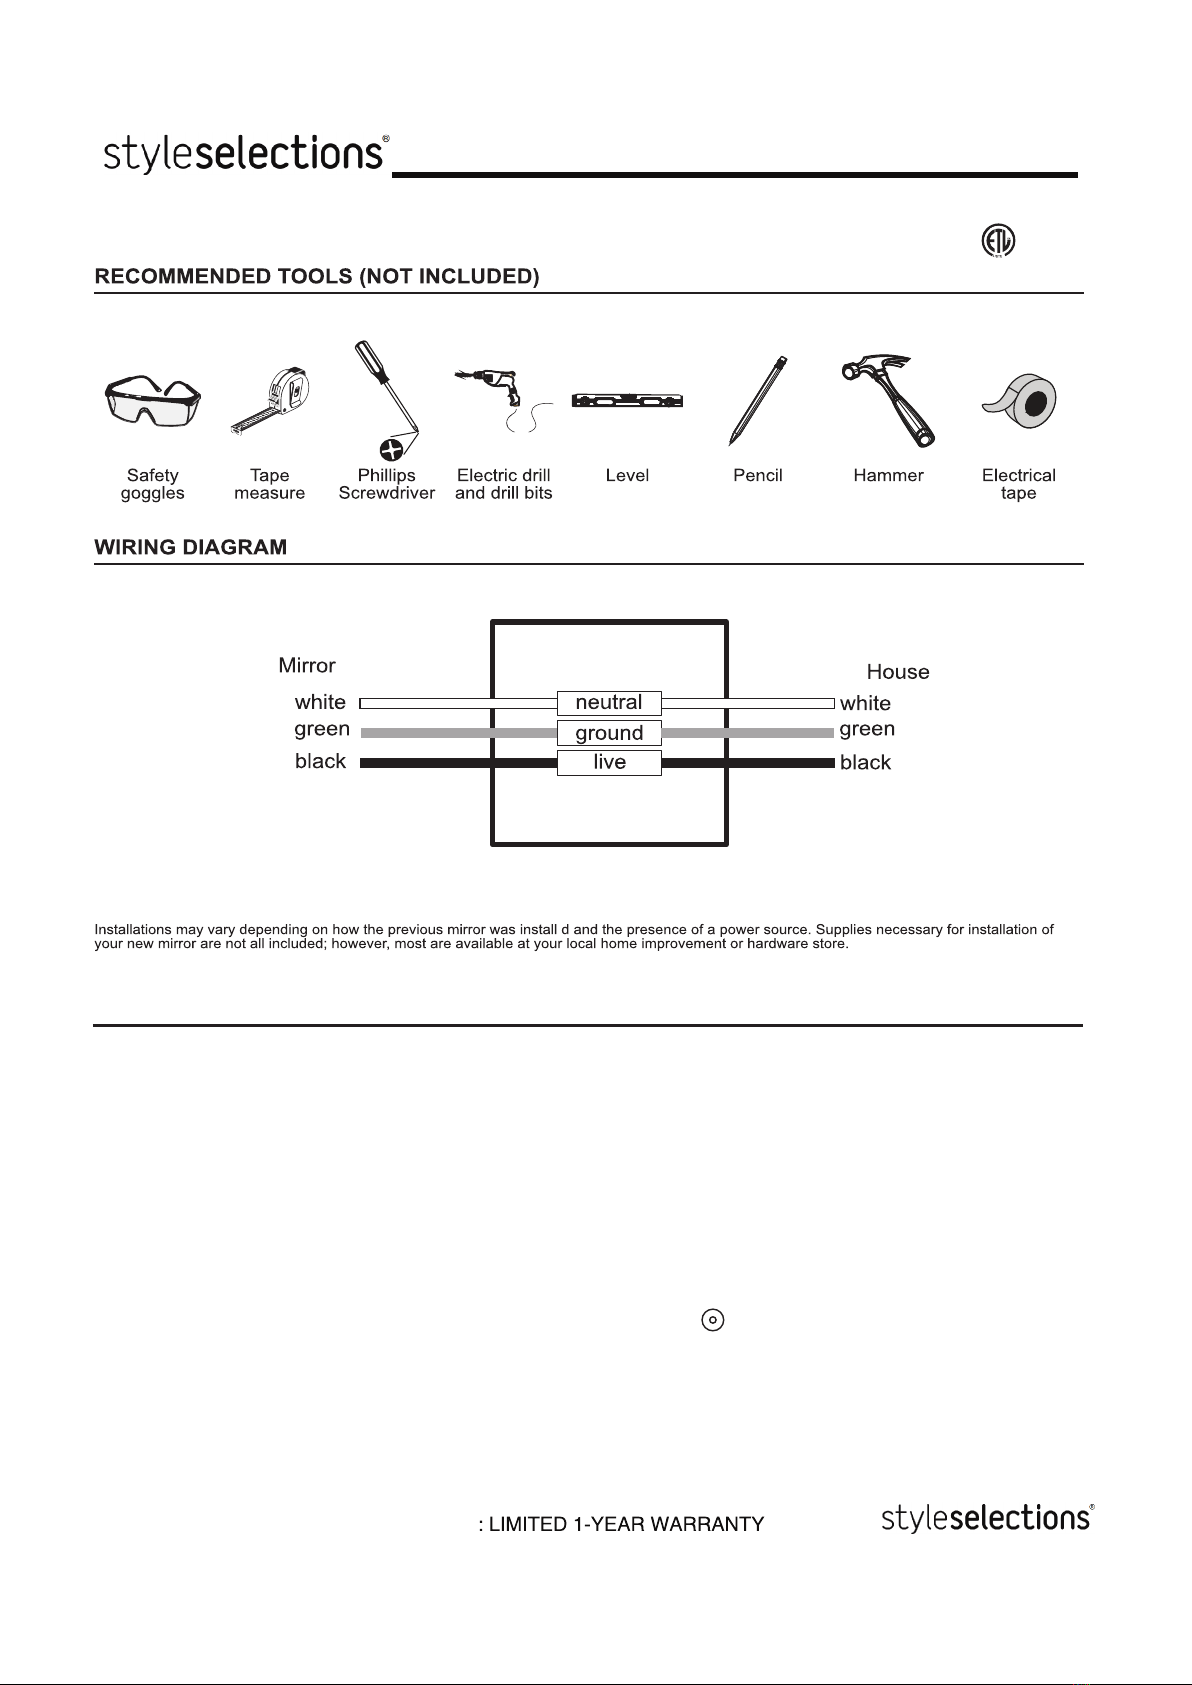
5、Switch off the power, and then use a terminal block to connect the three-core exposed
wires with those
6、Hang the product on the screw crossing two hardy holes to fix it.
7、Finally, switch on the power, and then touch the “Switch” sign with a finger on the lens to test
your desired brightness,
continue pushing the sensor, the light will turn from100% to10%,repeat until desired brightness is discovered.
hardy holes on the mirror frame (“a” and “b” in Fig. 1).
“b” in Fig. 1), and mark them out with a pencil.
special ceramic drill if the wall surface is made of ceramic tiles.
reserved on the wall (see details in wiring Diagram)
the products to turn the mirror light ON, push the Sensor on the mirror, to find .
INSTALLATION INSTRUCTIONS


