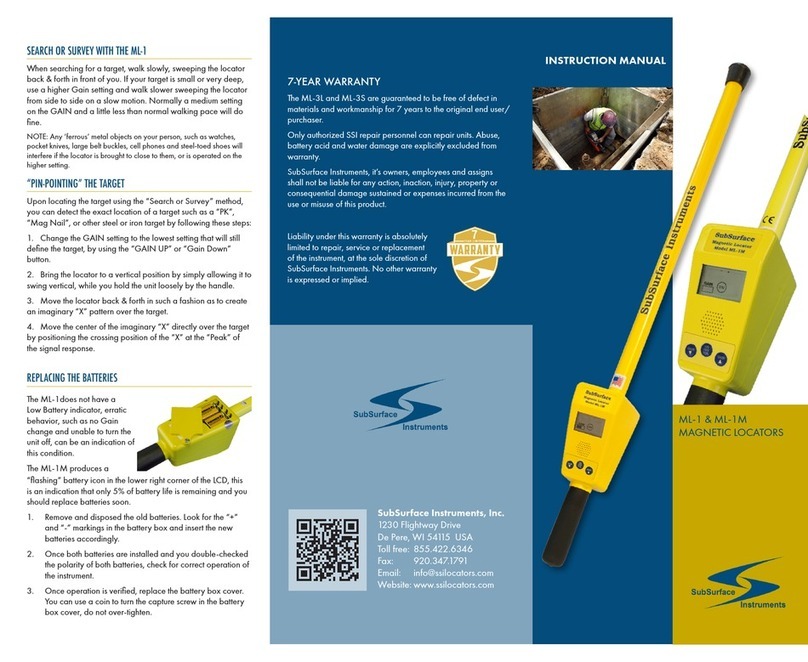
SubSurface Instrument AML PRO Series User manual

Operator’s Manual
•
Originally designed by NASA engineers for use
in lunar exploration
•
Re-designed to find buried objects and pipes of
all kinds including PVC, PE, Rubber, Steel, etc.
•
Patented, Radio Frequency Technology
•
Lightweight, Durable Construction

AML PRO SERIES
READ & OBSERVE ALL INSTRUCTIONS
Save these instructions for future reference.
INSPECTION OF THE AML PRO
DO NOT open the housing of this unit; doing so will damage
the transmission and receiving antennas. There are no user
serviceable parts inside. Opening the sealed case will void the
warranty.
If maintenance, tuning or repair becomes necessary, contact:
SubSurface Instruments, Inc.
Email: info@ssilocators.com
Telephone: 920-347-1788 or
Toll free: 1-855-422-6346
Or by mail:
SubSurface Instruments, Inc.
1230 Flight Way Drive
De Pere, WI 54115 USA
SAFETY INFORMATION
2

AML PRO SERIES 3
READ & OBSERVE ALL INSTRUCTIONS
Save these instructions for future reference.
LASER
This product uses a Class II/2M laser. Avoid direct exposure to
the beam.
Do not direct the laser beam at people or animals. Do not stare
into the laser beam. The AML Pro produces Laser Class II/2M
laser radiation according to IEC 60825-1.
Looking directly into the laser beam - especially with optical
instruments such as binoculars or magnifiers - can permanently
damage the eye.
This is a professional tool, not a toy. It should not be used by
children.
OPERATION
Only use this equipment for the purpose specified by the
manufacturer. Any misuse may void the warranty.
SAFETY INFORMATION
VOID
VOID

AML PRO SERIES
A powerful 2.45 Ghz radio frequency locates density
differences through the transmission and reception of UHF
signals.
The unit locates objects by analyzing differences in material
densities, which are then interpreted by the highly advanced
circuitry.
The signal can travel, on average, around 20’; but the
maximum depth is directly related to the type of substrate
you are working on.
USER REFERENCE - SCANNING QR CODES
The AML Pro has several QR Codes placed on the blade’s face. Scan these
codes for more operator information and for continuing updates provided by
the manufacturer. AML Pro additional information can be accessed from your
smart phone using a standard QR code App. For more information on how
to download and/or use a QR code App., visit the App. store on your smart
phone. Reference materials can also be accessed by visiting the SSI website
at www.ssilocators.com
HOW THE AML WORKS?
4
Locates Density Changes Between Materials

AML PRO SERIES
AML PRO PARTS OVERVIEW
12
9
12
3
4
5
6
7
8
10
1311
THREADED BATTERY CAP
ERGONOMIC HANDLE
PUSH KEYPAD
TARGET INDICATOR LIGHTS
BACKLIT LCD DISPLAY
UHF RF SIGNAL TRANSMITTER
LASER POINTER
UHF RF SIGNAL RECEIVERS
3.5mm HEADPHONE JACK
MINI USB PORT/CONNECTOR
LITHIUM EXTERNAL BATTERY
9V BATTERY PACK
NOISE REDUCING HEADPHONES
1
2
3
4
5
6
7
8
9
10
11
12
13
5

AML PRO SERIES
6
POWERING OPTIONS.
Powered by either a convenient 9v battery
system or by a rechargeable lithium battery
pack.
Remove used 9v batteries by unscrewing the
battery cap and sliding the battery sleeve
out. Install fresh new 9v batteries. Make sure
to insert the sleeve back in with the silver lead
end first and tighten the battery cap.
CONTROL PANEL.
Gives you access to the many features of the
AML Pro and allows you to navigate through
the AML Pro’s menu screens. There are six
function buttons; ON/OFF, TX (Transmitter),
MENU, DOWN ARROW, UP ARROW, SEL
(Select).
TARGET INDICATORS.
Right and Left LED target indicators identify
when an object has been located. Digital
target indicators are displayed at the bottom
of the LCD display and work in unison with
the right and left receivers to indicate an
object’s presence.
2
1
3
1
2
3

AML PRO SERIES
AML PRO FEATURES
UHF RADIO TRANSMITTER/RECEIVERS.
The transmitter emits high frequency radio
waves. The receivers capture the reflected
waves with antennas on both ends of the
unit.
LASER TARGET INDICATOR.
A red laser indicator identifies the target
position when an object has been detected;
an audible signal is emitted when both
indicators are on.
USB PORT.
The USB Port has several functions such
as connecting the external lithium battery
supply to the USB Port for extended
power, and for uploading or downloading
diagnostic information including GPS log
files.
DO NOT connect the AML Pro
directly to an AC outlet through the
USB Port.
This will result in permanent damage
to the internal circuitry of the unit.
4
5
6
4
6
5
7

AML PRO SERIES
CONTROL PANEL FUNCTIONS
There are six function buttons on the AML
Pro control panel:
On/Off - Press and hold the On/Off Button
to turn the unit On or Off.
TX (Transmitter) - Press the TX Button to turn
the transmitter On or Off.
Menu - Press the Menu Button to bring up
the Menu Screen. There are two pages of
Menu Screens.
Down Arrow - Use the Down arrow to either
adjust the sensitivity level down or to move
the cursor down once inside of the menu
screens.
Up Arrow - Use the Up arrow to either
adjust the sensitivity level up or to move the
cursor up once inside of the menu screens.
SEL - Press the SEL button to either activate
the GPS Functions or to Select the Menu
option once inside of the menu screens.
CONTROL PANEL
8
1
1
2
2
3
3
4
4
5
5
6
6
Ver 4 2
5
Press and hold the On/Off Button until the SSI Logo
appears on the screen. It takes about 3 seconds for the
AML Pro to perform a self-check; after that it will display the
current revision on the start up screen.
When the self-check is completed, the MAIN SCREEN will
appear.
AML Pro Control Panel Keypad Functions
Control Panel Keypad
Opening Screen - Current Firmware Installed
Current
Revision

AML PRO SERIES
MAIN SCREEN INTERFACE
9
RTC (Real Time Clock). Is set to 24-hour
Military Time. Adjust it to your area’s time
utilizing the Time Zone Chart in
page 15
.
GPS (Global Positioning System). Digits on
the screen are read in degrees, minutes and
seconds. Latitude: N for North of the equator
or S for South of the equator. Longitude: E for
East of the Prime Meridian or W for West of
the Prime Meridian.
SATS (Satellites). refers to the number of
satellites communicating with the AML Pro.
DEG (Degree). As referenced from the blade
face angle (0°) of the AML Pro.
SEN (Sensitivity Level). shows the current
Level of Sensitivity (1 to 32 with 32 being the
most sensitive).
Digital Target Indicators. They appear at the
bottom of the screen. Both bars will come
together when a target is positively identified.
TX (Transmitter) Press the TX Button
to turn the transmitter ON or OFF.
When the transmitter is OFF, a
STANDBY message on the right
side of the screen will appear.
When the transmitter is turned back
on, the message will change to
OPERATE.
RTC sats
DEG
SEN
09
86
17
27 5716
044 44927
088 6298 W07
4N
4N
RTC OPERATE
DEG
SEN
86
17
27 5716
044 4494 N27
088 6298 W07
RTC STANDBY
DEG
SEN
86
17
27 5716
044 4494N27
088 6298W07
This screen is displayed when the AML Pro is in Operate Mode.
Digital Target
Indicators
Status Messages
Angle °
Sensitivity
Latitude
Longitude
GPS
Location
Time
Main Screen

AML PRO SERIES
GENERAL STATUS MESSAGES
All status messages are displayed on the
top right corner of the LCD Display. Every
time there is a new event, a message will be
displayed for 10 seconds and then go back
to OPERATE status.
POWER EVENTS
Directly related to power consumption,
power source and auto shut off setting in
the AML Pro. The unit will emit a sound and
display the related message.
Use the POWER EVENTS flow chart as a
reference for all events descriptions. The low
battery event applies only to the internal 9v
battery pack.
A rechargeable coin battery is located
within the unit, the CLK BAT message
indicates low voltage on it. Keep a fresh
9v battery pack in the unit to recharge the
internal battery.
STATUS MESSAGES FLOW CHART
10
STATUS MESSAGES
OPERATE
STANDBY
RF transmitter on
RF transmitter off
L STGENERA TUS MESSAGESA
BAT PWR
LOW BAT
AML OFF
AUTO OFF
LOW BAT
AUTO SLEEP
Low battery warning
SLEEP Wake up by moving the unit
5 seconds to shutdown
CLK BAT Internal clock battery low
POWER EVENTS
USB PWR External battery plugged in
Internal battery plugged in
HOST PC Transfering data to PC
RTC sats
DEG
SEN
09
86
17
27 5716
044 4494N27
088 6298 W07
Status Messages
Angle º
Sensitivity
MAIN SCREEN INTERFACE
Status Messages - Close-Up

AML PRO SERIES
CALIBRATION EVENTS
STATUS MESSAGES FLOW CHART
11
GPS EVENTS
(See the GPS downloads section for detailed information).
Display the GPS coordinates on the screen
by pressing the SEL button, a minimum of 3
satellites is needed to display coordinates
on the screen. Continue pressing SEL every
time you want to record a GPS coordinate.
The AML’s memory will store up to 300 logs.
The unit will emit a sound and show SATS ##
message every time a new satellite has been
acquired or dropped. We recommend
having at least 7 satellites locked for more
accurate coordinates. The accuracy of
the coordinates will increase with a higher
number of satellites.
CALIBRATION EVENTS
Perform the Calibrate option on the AML
Pro’s menu to re-calibrate your unit and
restore original values to the RF circuit
board.
Go to page 17 for more details about the
calibration process.
Note:
This process does not restore other
factory settings.
GPS EVENTS
SATS
LOGGED
NO LOCK
Number of GPS Satellites
Log record filed to memory
No GPS satellites found
FULL
DISCARD
No room for new logs
Erase records from memory
Repeat calibration
System ReadyPASS
FAIL
WAITRF CAL

AML PRO SERIES
Press the MENU Button to display the AML
Pro settings.
This symbol will mark the menu setting
you want to adjust.
Use the UP and DOWN arrows to
navigate through the menu settings.
Press the SEL button to adjust the
setting. Continuing to press SEL (select)
button will loop the selection until
reaching desired setting.
Press the MENU Button to save the
setting and exit the MENU screen.
NOTE: The MENU will time out after 30 seconds if
no changes are made. Either press the Menu button,
or let the MENU time out to save changes. If the unit
is turned off while in the menu screen, it will NOT
save the changes recently made.
MENU SETTINGS
12
The AML Pro has 8 menu settings listed on 2 screen pages
Menu Screen 1
Menu Screen 2
Cal ib rate
backli ght off/on
0
1
>
speaker volum e
phones volum e
auto sleep sec
auto off m in
2
2
>
Ti me zone se t 00
0
0
factory set ti ngs 0

AML PRO SERIES
speaker volum e
phones volum e
auto sleep sec
auto off m in
2
2
>
Ti me zone se t 00
0
0
factory set ti ngs 0
MENU SETTINGS
13
SPEAKER VOLUME. Controls the built-in
speaker volume. Set it to 0 to mute and 3 for the
highest volume level.
PHONES VOLUME. Controls the headphones
volume. Set it to 0 to mute and 3 for the highest
volume level.
AUTO SLEEP SEC. Automatically places the
unit in STANDBY mode after inactivity. Set it to
10, 20 or 30 seconds or to 0 to disable it. A
SLEEP message will display and an audible alert
will sound when it activates. The unit will resume
OPERATE status when it senses movement.
AUTO OFF MIN. Automatically shuts off the
unit after inactivity. Set it to 5, 20 or 30 minutes
or to 0 to disable it. A STANDBY message will
display and an audible alert will sound when it
activates. The unit will shut off immediately after.
FACTORY SETTINGS. Returns the unit to its
original factory settings. This will erase the GPS
Logs stored in the memory.
TIME ZONE SET. See next page for full
description.
>
>
>
>
>
>
Use the UP and DOWN arrows to
navigate through the menu settings.
Press the SEL button to adjust the
setting. Continuing to press SEL button
will loop the selection until reaching
desired setting.
Menu Screen 1

AML PRO SERIES
MENU SETTINGS
14
TIME ZONE SET. Sets the clock to local time.
Use the following OFFSET table to find the
corresponding CODE for your Coordinated
Universal Time (UTC) zone.
Enter the corresponding CODE and save your
adjustment. The RTC (Real Time Clock) will be
updated right after a GPS communication has
been made. If you are in a location without GPS
signal the RTC won’t be updated.
UTC Time Offsets Code
UTC ± 00.00 00
UTC + 01.00 01
UTC + 02.00 02
UTC + 03.00 03
UTC + 04.00 04
UTC + 05.00 05
UTC + 06.00 06
UTC + 07.00 07
UTC + 08.00 08
UTC + 09.00 09
UTC + 10.00 10
UTC + 11.00 11
UTC Time Offsets Code
UTC ± 12.00 12
UTC - 11.00 13
UTC - 10.00 14
UTC - 09.00 15
UTC - 08.00 16
UTC - 07.00 17
UTC - 06.00 18
UTC - 05.00 19
UTC - 04.00 20
UTC - 03.00 21
UTC - 02.00 22
UTC - 01.00 23
>
Use the UP and DOWN arrows to
navigate through the menu settings.
Press the SEL button to adjust the
setting. Continuing to press SEL button
will loop the selection until reaching
desired setting.
Reference the Time Zone World Map on the next page for more information.
ENTER
THIS
CODE
ENTER
THIS
CODE
Menu Screen 2
speaker volum e
phones volum e
auto sleep sec
auto off m in
2
2
>
Ti me zone se t 00
0
0
factory set ti ngs 0

AML PRO SERIES
TIME ZONE WORLD MAP
Visit our website www.ssilocators.com for a detailed version.
15

AML PRO SERIES
16

AML PRO SERIES
Cal ib rate
backli ght off/on
0
1
CALIBRATE. Re-calibrates your unit and
restore original values to the RF circuit board.
Note:
Does not restore other factory settings.
Use the following procedure to calibrate the unit:
Move to an outdoor location.
Select CALIBRATE from the menu.
Keep the AML Pro positioned at an
approximate 90° angle in front of you.
Change the value from 0 to 1and save the
selection by pressing MENU.
You have 10 seconds from this point to finish the process.
If you exceed this time, the process will time out and
you’ll have to restart it.
Point the AML to an unobstructed sky. Raise
the AML slowly until it reaches 45° and the
screen displays a WAIT message.
Hold the AML for approximately 7 seconds
until the PASS or FAIL message is displayed.
Pass - Unit is calibrated and ready to use.
Fail - Repeat the process. Contact SSI if
the Fail message persists.
2
35
6
4
MENU SETTINGS
17
>
Menu Screen 2
Calibration Screen 1
Status Messages Flow Chart
Calibration Screen 2
Repeat calibration
Wait
Deg 45
RF Cal
Deg 90
System ReadyPASS
FAIL
WAITRF CAL
~90°
45°
2
3
4
5
6
1
>

AML PRO SERIES
USING THE AML PRO
18
The proper operation of the AML Pro requires
a lot of practice. We advise that you practice
on a known buried object like a culvert pipe
or other partially exposed objects. Once
the principles of operation are understood,
acquiring a technique is relatively simple with a
little practice. Factory training is available and
highly recommended.
The depth of the AML Pro transmission signal
varies with the type of soil. This unit can be
used in various material types such as water,
snow, red-clay, and does not have some of the
restrictions of ground penetrating (GPR) radar.
The AML Pro has 32 sensitivity settings with
setting 32 being the strongest. The transmission
signal will penetrate deeper through high density
materials such as concrete, clay, asphalt, or
highly compacted soil; and less deep in sand,
granular soil, or recently backfilled soil which
tends to absorb some of the return signal
strength
IMPORTANT: The AML Pro is water-resistant,
not water-proof.
Practice on a Known Object
Signal Penetrates Deeper Through High Density Materials

AML PRO SERIES
LOCATING AN OBJECT WITH THE AML
Do not hold the unit above the handle finger
knurls as it will produce false readings. Hold
the handle parallel to the ground at waist
level and at a minimum of 18 inches out in
front of your body. The blade face of the
unit is designed with a 10° degree outward
projection to eliminate interference with the
operator’s feet .
When an object is detected, the left LED or
the right LED will illuminate. When both LED
target indicators illuminate, an audio tone will
sound, and the laser indicator will activate
identifying the position of your target.
Lower the sensitivity level to the lowest
setting that will still identify the object; this
will prevent most false readings from being
identified.
Continue to scan the target holding the
handle parallel to the ground and scan the
area with a slow and deliberate back and
forth “W” movement.
PLEASE SCAN
TO WATCH
TUTORIAL VIDEOS
USING THE AML PRO
10°
19
2
4
1
3
1
2
3
4

AML PRO SERIES
MARKING THE EXACT LOCATION OF AN
OBJECT WITH THE AML PRO
Remember that the 10° forward projection of the
blade will make the object appear closer than it
actually is.
Once the object is found, pivot the handle of the
AML Pro upward until the screen displays 0°
and the blade of the unit is directly above the
area of the signal.
You can now scan the ground for the entire
length of the object. Identify its diameter or
width, location and run direction as you track the
object.
To prevent most false readings from being
identified, decrease the sensitivity level to the
lowest setting that will still identify the object.
USING THE AML PRO
10°
10°
Laser Mark Laser Mark
Actual
Location
Actual
Location
SEARCHING POSITION:
Objects are further than they appear
when in the searching position.
LOCATING POSITION:
Tilt the handle upward until the screen
displays 0°.
20
Table of contents
Other SubSurface Instrument Measuring Instrument manuals