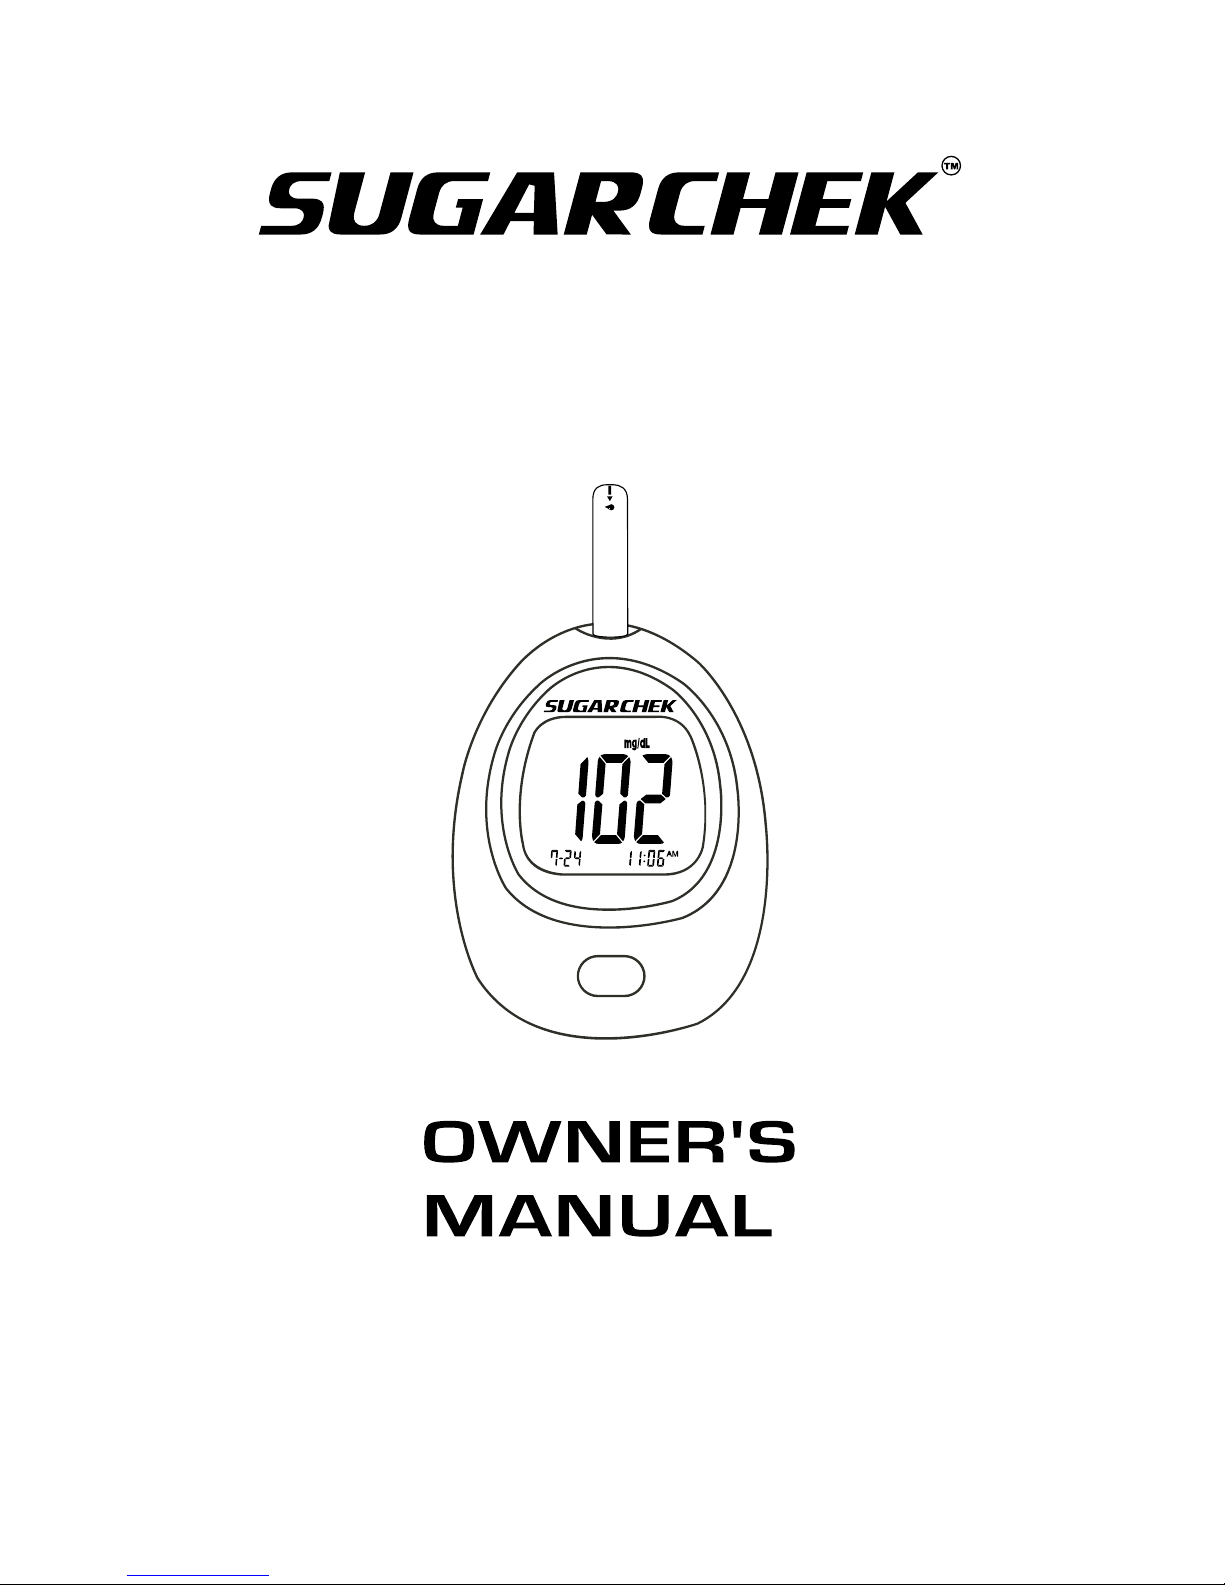
Sugarteck TD-4207B User manual
Ver 2.0
2011 June
311-4207200-002
BLOOD GLUCOSE
MONITORING SYSTEM

2
Dear System Owner:
This manual contains important information that you must know about your
system. Please read it carefully and keep it for future reference.
For other questions regarding this system, please contact your local
customer service. At all other times, you should contact your health care
professional for assistance.

3
IMPORTANT SAFETY INSTRUCTIONS
READ THIS BEFORE USING
The following basic safety precautions should always be taken.
1. Close supervision is necessary when the device is used by,
on, or near children, handicapped persons or invalids.
2. Use the device only for the intended use described in this
manual.
3. Do not use accessories which are not supplied by the manu-
facturer.
4. Do not let the equipment come into contact with surfaces
which are too hot to touch.
5. Do not use the equipment where aerosol sprays are being
used, or where oxygen is being administered.
6. Do not use device if it is not working properly, or if it has suf-
fered any damage.
7. Before using product to test your blood glucose, read all
instructions thoroughly and practice the test. Do all qual-
ity control checks as directed and consult with a diabetes
healthcare professional.

4
TABLE OF CONTENTS
IMPORTANT SAFETY INSTRUCTIONS 03
IMPORTANT INFORMATION 06
ABOUT ATERNATIVE SITE TESTING (AST) 07
INTRODUCTION OF THE SYSTEM 09
Intended Use 09
Principle of Measurement 09
Contents of the System 10
Appearance and Key Function of the Meter 11
Meter Display Segments 12
Appearance of the Test Strip 13
PREPARATION BEFORE USE 14
Battery Replacement 14
Setting the Meter and Deleting the Memory 16
BEFORE TESTING 20
Coding the meter 20
Checking the System with SUGARCHEK Control Solutions 20
TESTING YOUR BLOOD 21
Testing Procedure 22
Expected Test Results 28
Special Messages 29
COMPARING METER AND LABORATORY RESULTS 30
USING THE METER MEMORY 32
Viewing Results on the Meter 32

5
CARING FOR YOUR METER AND STRIP 34
Cleaning 34
Storage 34
PROBLEM-SOLVING GUIDE 37
Error Message 28
Problem in Operation 39
SPECIFICATIONS 41
SUMMARY OF OPERATION 42
SYMBOL INFORMATION 44

6
IMPORTANT INFORMATION
Severe dehydration and excessive water loss may cause false low re-
sults. If you believe you are suffering from severe dehydration, consult a
healthcare professional immediately.
If you get your blood glucose results lower or higher than usual, and do
not have symptoms, rst repeat the test. If you have symptoms or con-
tinue to get results higher or lower than usual, follow the treatment advice
of your healthcare professional.
Apply only capillary whole blood sample to the absorbent hole. Applying
other substances to the absorbent hole will cause inaccurate results.
If you are experiencing symptoms that are not consistent with your blood
glucose test results and you have followed all instructions described in
this owner’s manual, call your healthcare professional.
Inaccurate results may occur in severely hypotensive individuals or pa-
tients in shock. Inaccurate low results may occur for individuals expe-
riencing a hyperglycemic-hyperosmolar state, with or without ketosis.
Critically ill patients should not be tested with blood glucose meters.
Please refer to your test strip package insert for additional important
information.
7
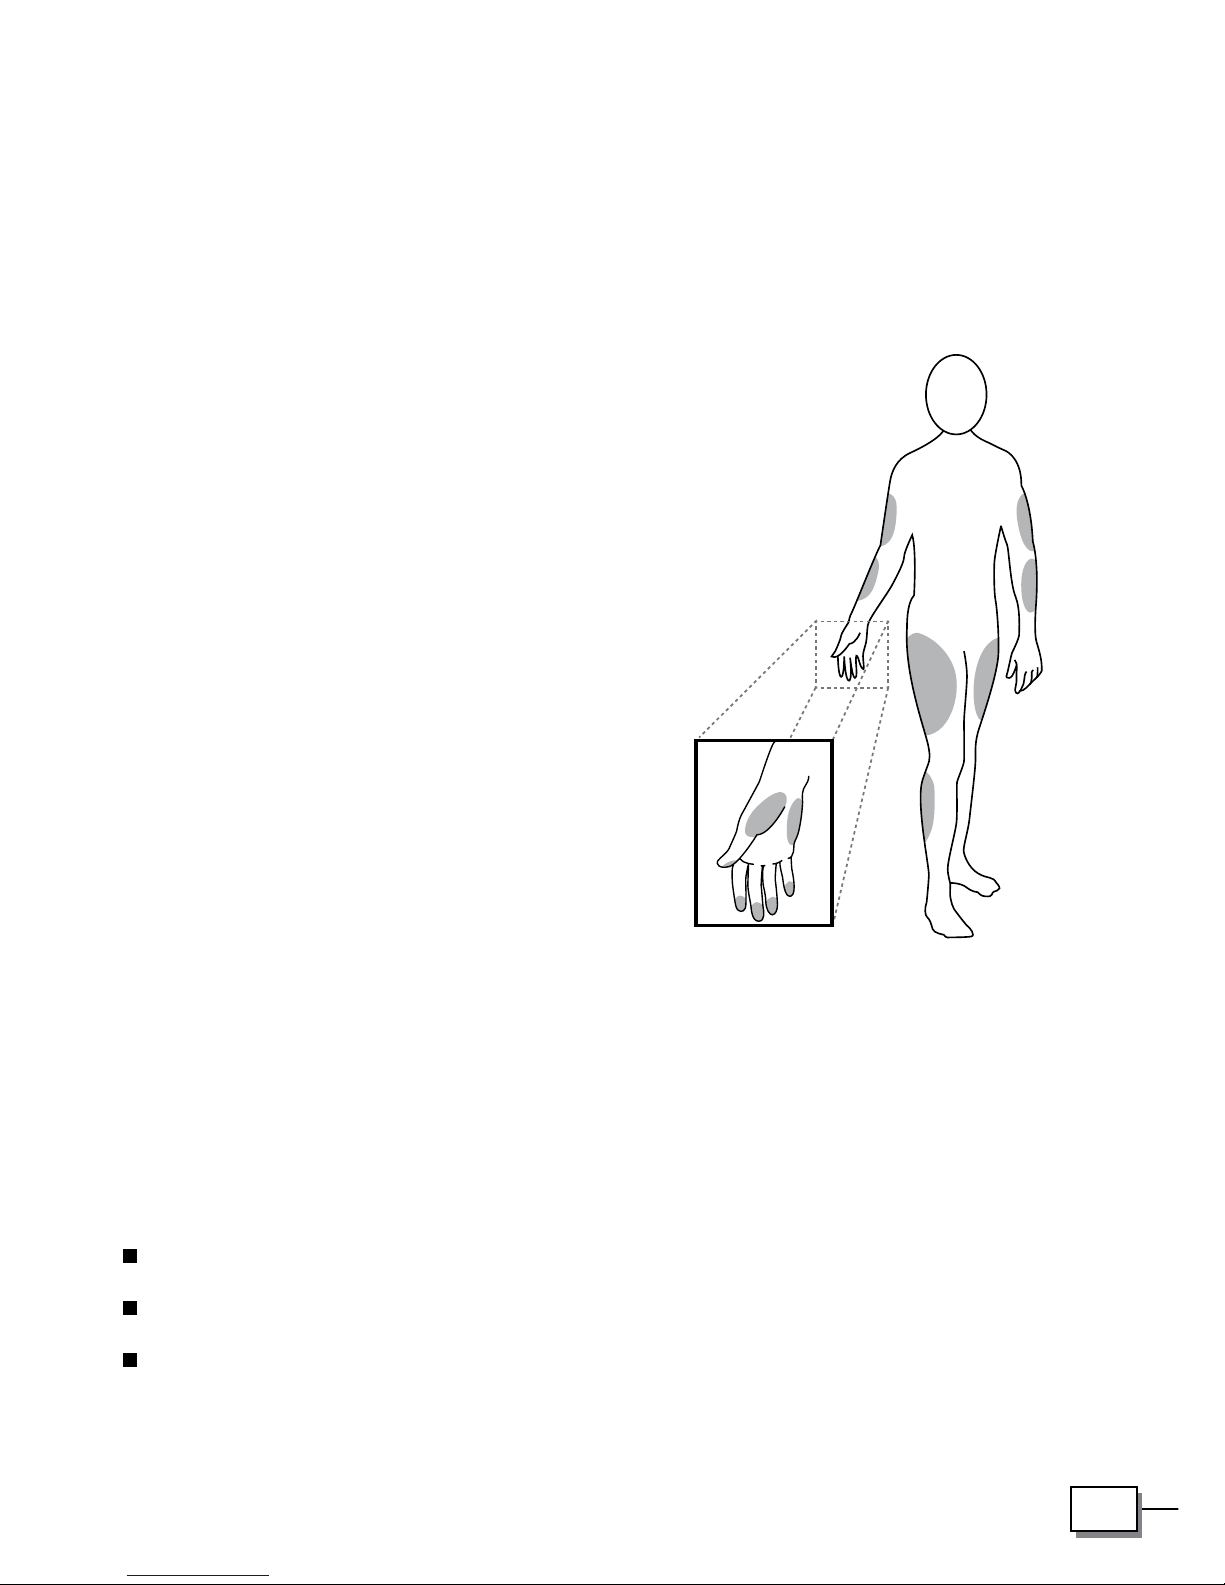
ABOUT ALTERNATIVE SITE TESTING (AST)
Important: There are limitations for doing AST.
Please consult your healthcare professional before you do AST.
What is AST?
Alternative site testing (AST) means
use of body parts other than ngertips
to check their blood glucose levels.
This system allows you to test on the
palm, the forearm, the upper arm, the
calf, or the thigh with the results equiv-
alent to ngertip testing.
What’s the advantage?
Fingertips feel pain more readily be-
cause they are full of nerve endings
(receptors). At other body sites, since
nerve endings are not so condensed,
you will not feel as much pain as at
the ngertip.
When to use AST?
Food, medication, illness, stress and exercise can affect blood glucose
levels. Capillary blood at ngertip reects these changes faster than capil-
lary blood at other sites. Therefore when testing blood glucose during or
immediately after meal, physical exercise, or any other event, take blood
sample from your nger only.
We strongly recommend you do AST ONLY in the following intervals:
In a pre-meal or fasting state (more than 2 hours since the last meal).
Two hours or more after taking insulin.
Two hours or more after exercise.

8
Do NOT use AST if:
You think your blood glucose is low.
Your AST results do not match the way you feel.
Your routine glucose results are often uctuating.
You are pregnant.
How to increase the accuracy?
Stimulating blood perfusion by rubbing the puncture site prior to blood ex-
traction has a signicant inuence on the glucose value obtained. Blood
from the site without rubbing exhibits a measurably different glucose con-
centration than blood from the massaged nger. When the puncture site is
rubbed prior to blood extraction, the difference is signicantly reduced.
Please follow suggestions below before getting a drop of
blood:
Rub the puncture site about 20 seconds before penetration.
Use a clear cap (included in the kit) instead while setting the lancing
device.

9
INTRODUCTION OF THE SYSTEM
Intended Use
The system is intended for use outside the body (in vitro diagnostic use).
It should be used only for testing glucose (sugar) and only with fresh capil-
lary whole blood samples taken from the nger and the alternative sites
including the palm, the forearm, the upper arm, the calf and the thigh. The
system is intended for use in the home and in clinical settings. It should not
be used for the diagnosis of diabetes or for the testing of newborns.
AST in this system can be used only during steady-state blood glucose
conditions described in the section of “About AST”.
Principle of Measurement
The test is based on the measurement of electrical current generated
by the reaction of glucose with the reagent of the strip. The meter mea-
sures the current and displays the corresponding blood glucose level. The
strength of the current produced by the reaction depends on the amount of
glucose in the blood sample.
10
Contents of the System
The system consists of two main products: the blood glucose meter and
test strips. The test strips should be bought separately which is available
in vial pack of 15s. These products have been designed, tested, and prov-
en to work together as a system to produce accurate blood glucose test
results. Use only SUGARCHEK test strips with the SUGARCHEK blood
glucose meter.
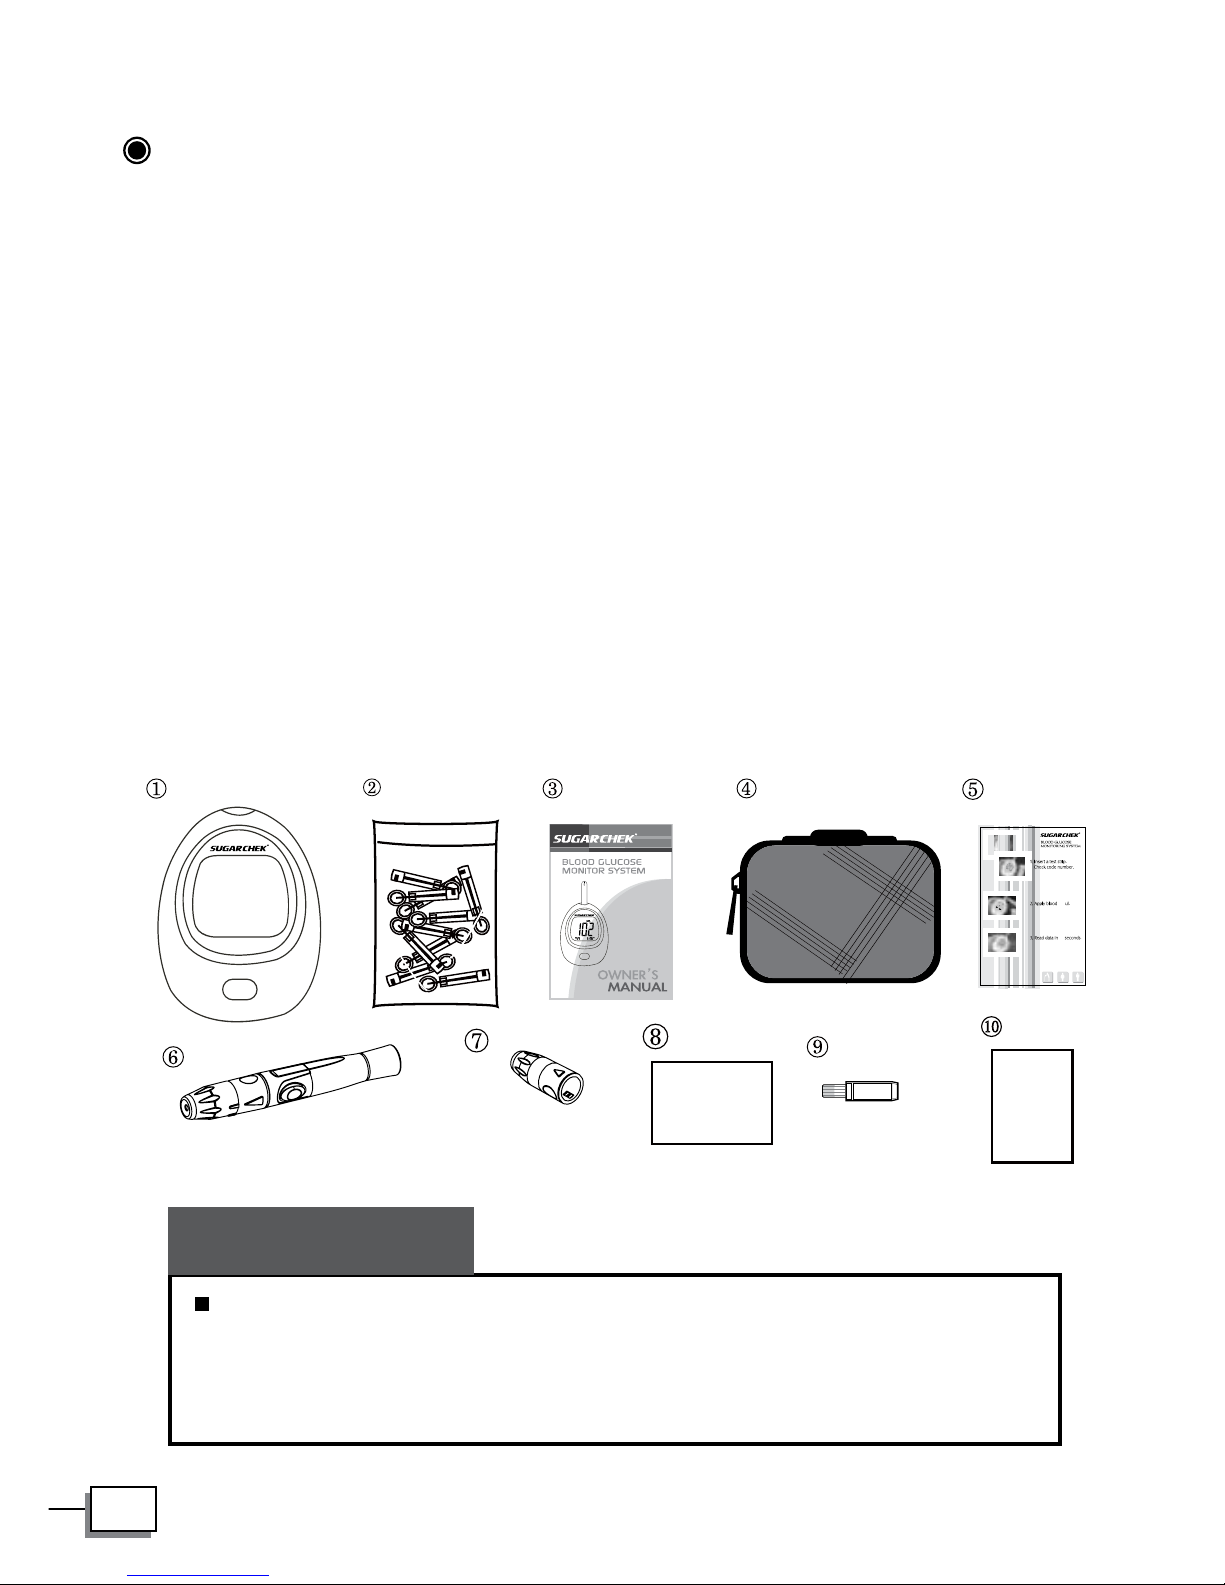
Your system includes:
j A meter o Lancing device
k 5 Lancets p A clear cap
l Owner’s manual q Warranty card
m Sporty carrying case Code strip
n First-use guide Log book
Check your system to be sure that it is unopened prior to use
and that it contains all parts listed above. If either of these
conditions occurred, please return your system to the place
of purchase.
PLEASE NOTE
0.7
7
Warranty Card
1513 Log book

11
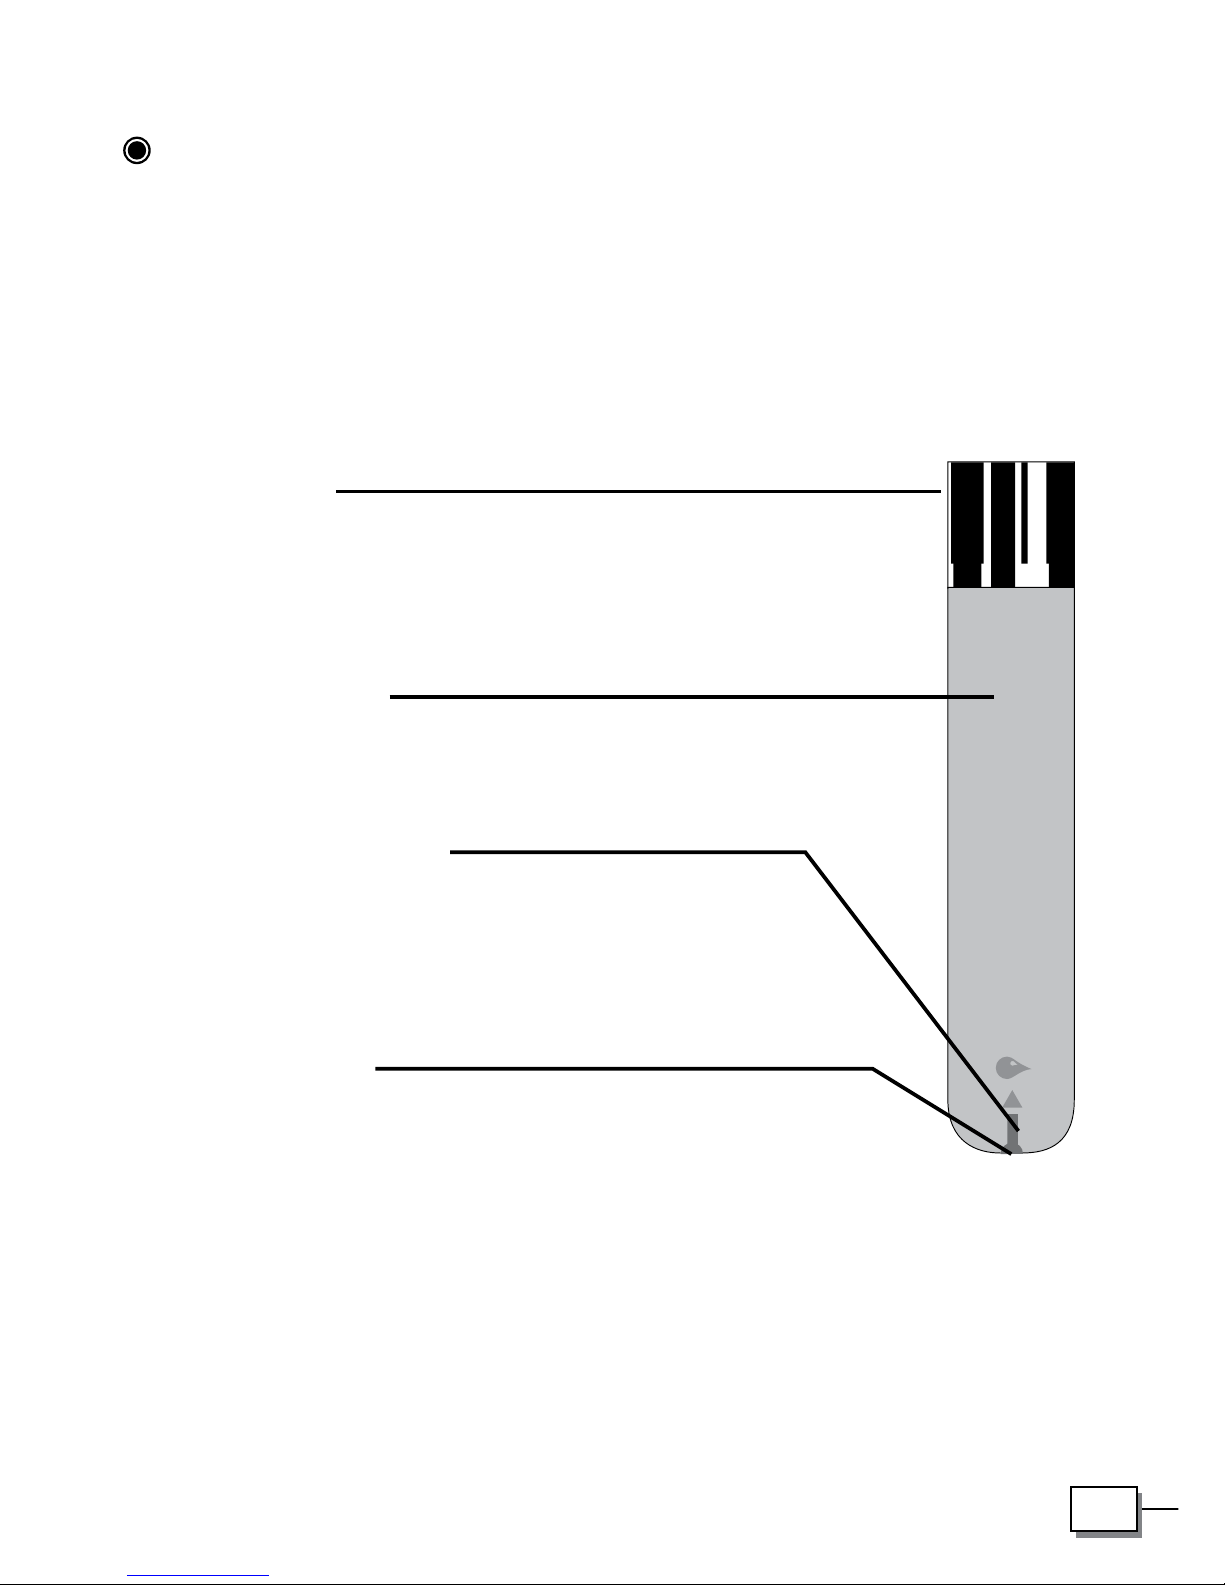
Appearance and Key Function of the Meter
TEST PORT
The test port is where you insert
the test strip for testing. The meter
will turn on automatically when you
insert a test strip.
DISPLA
DATA PORT
Y
Your test results are displaye
located at the side, is for
cable connection.
d
here. The large, easy-to-read
display guides you through
the test using symbols and
simple messages.
SETTING BUTTON
Setting the date, time and unit, located in
the battery compartment.
MAIN BUTTON
The main button in front of the meter
is used to set up the meter, enter the
memory mode, change the value of data
time, unit setting, memory deleting and
turn the meter on and off.
12
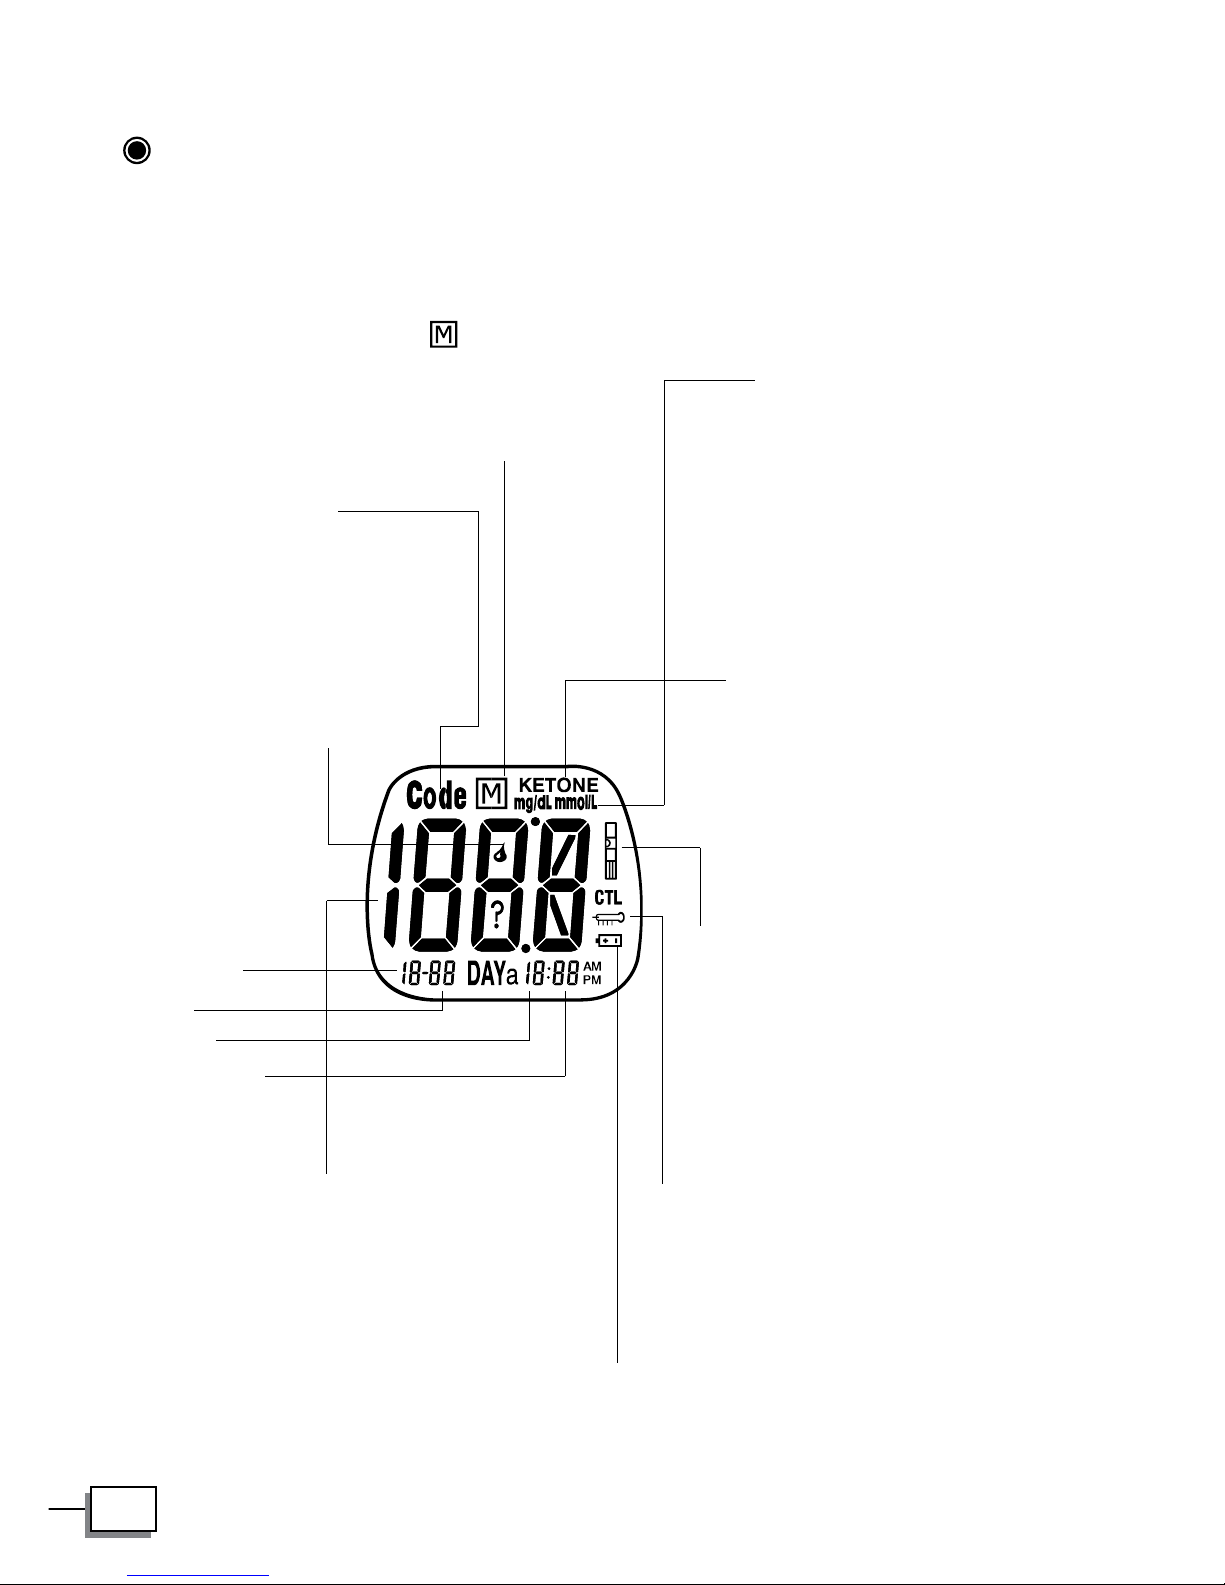
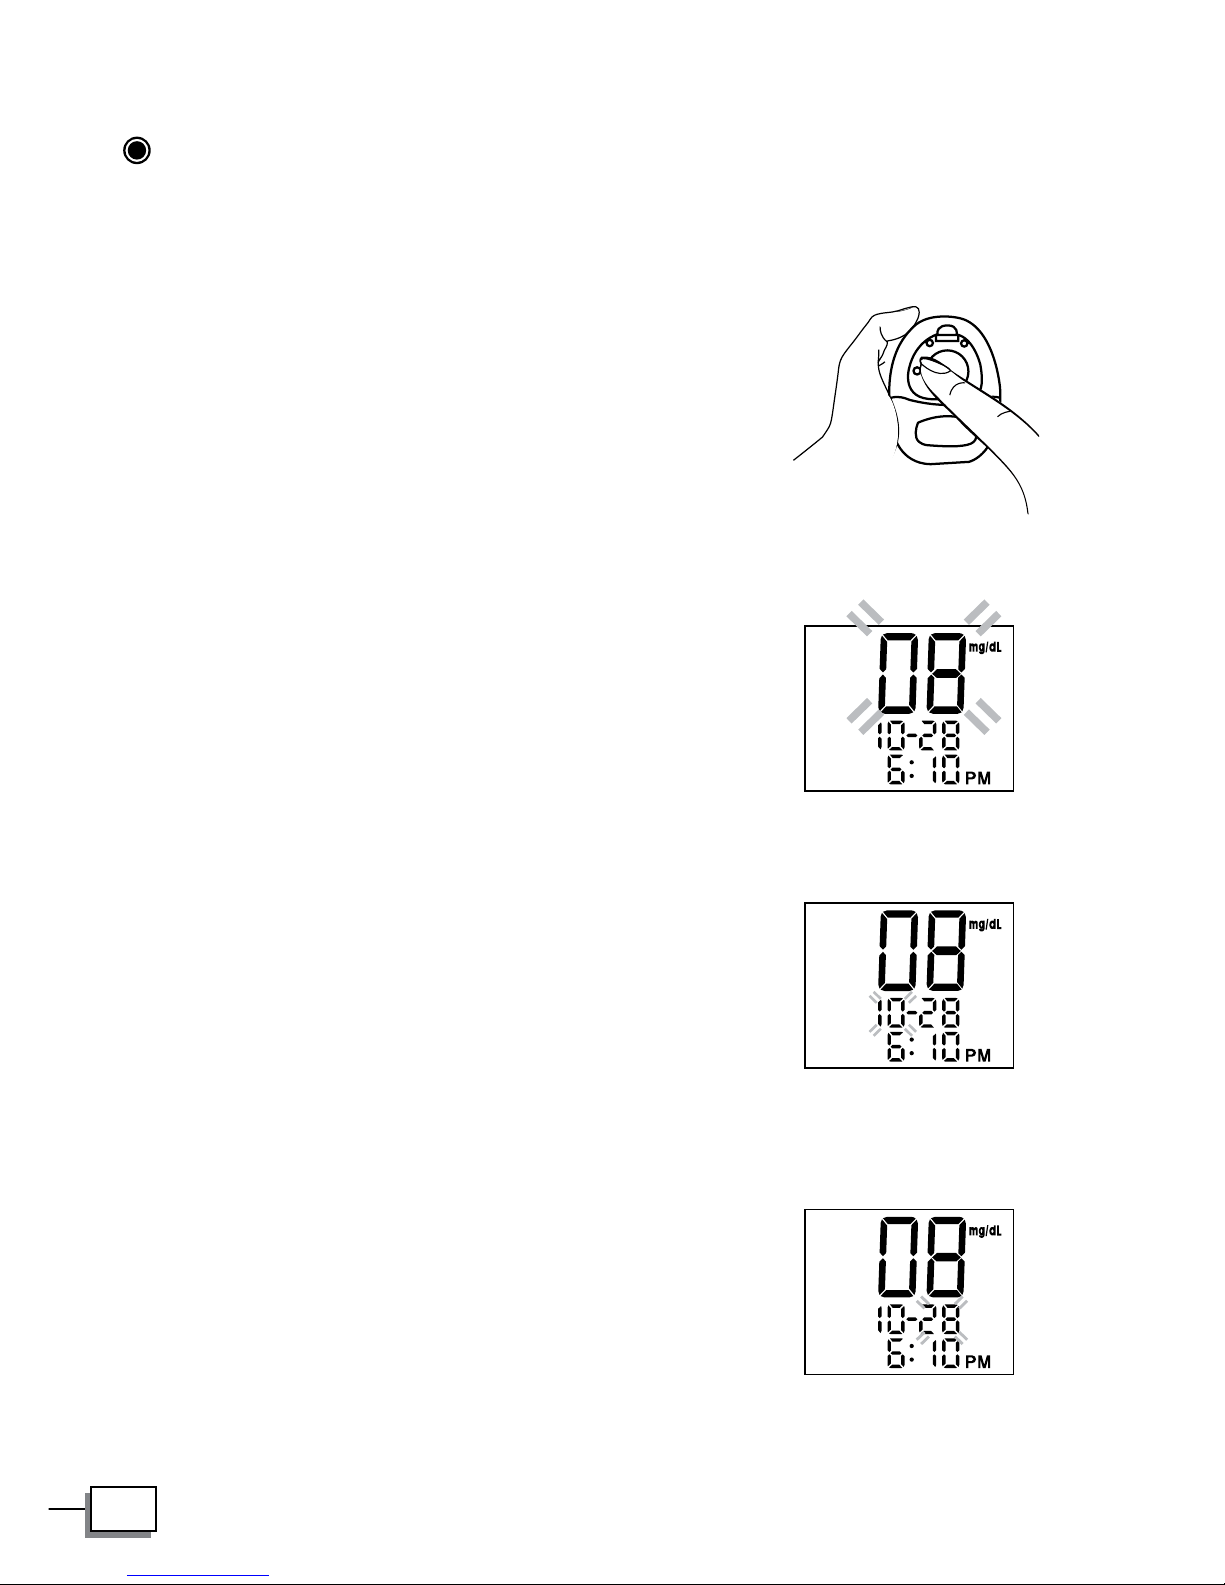
Meter Display Segments
CODE
Appears with the
code number
of the test strips
currently in use.
Indicates a test
result stored in
memory.
UNITS OF
MEASUREMENT
Depending upon how the
meter is set, either mmol/L
or mg/dL will appear with
the test result.
BLOOD DROP SYMBOL
This symbol tells you when
to apply the sample.
MONTH
DAY
HOUR
MINUTES
TEST RESULT AREA
Test results are displayed here.
(A decimal point appears when
the unit of measurement is
millimoles per litre.)
TEST STRIP MESSAGE
Appears when you push the test
strip firmly into the insertion site
or when power of meter is on and
did not insert strip into the meter,
this massage flashes.
TEMPERATURE MESSAGE
Appears with the ambient
temperature after insert a test strip.
BATTERY SYMBOL
Appears when the battery is low
or must be replaced.
KETONE WARNING
When your blood glucose test
result is above 13.3mmol/L
(240mg/dL), this symbol will
appear with " ? " sign on the
display.
13
Appearance of the Test Strip
Your system measures the amount of sugar (glucose) in whole blood.
Blood is applied to the absorbent hole of the test strip and is automatically
drawn into the reaction cell where the reaction takes place.
The test strip consists of the following parts:
Contact Bars
Insert this end of the test strip into the meter.
Push it in rmly until it will go no further.
Test Strip Handle
Hold this part to insert the test strip into the slot.
Conrmation Window
This is where you conrm if enough blood
has been applied to the absorbent hole of the strip.
Absorbent Hole
Apply a drop of blood here,
The blood will be sucked automatically.
See pages 25~31, Testing Your Blood, for complete instructions.
14
PREPARATION BEFORE USE
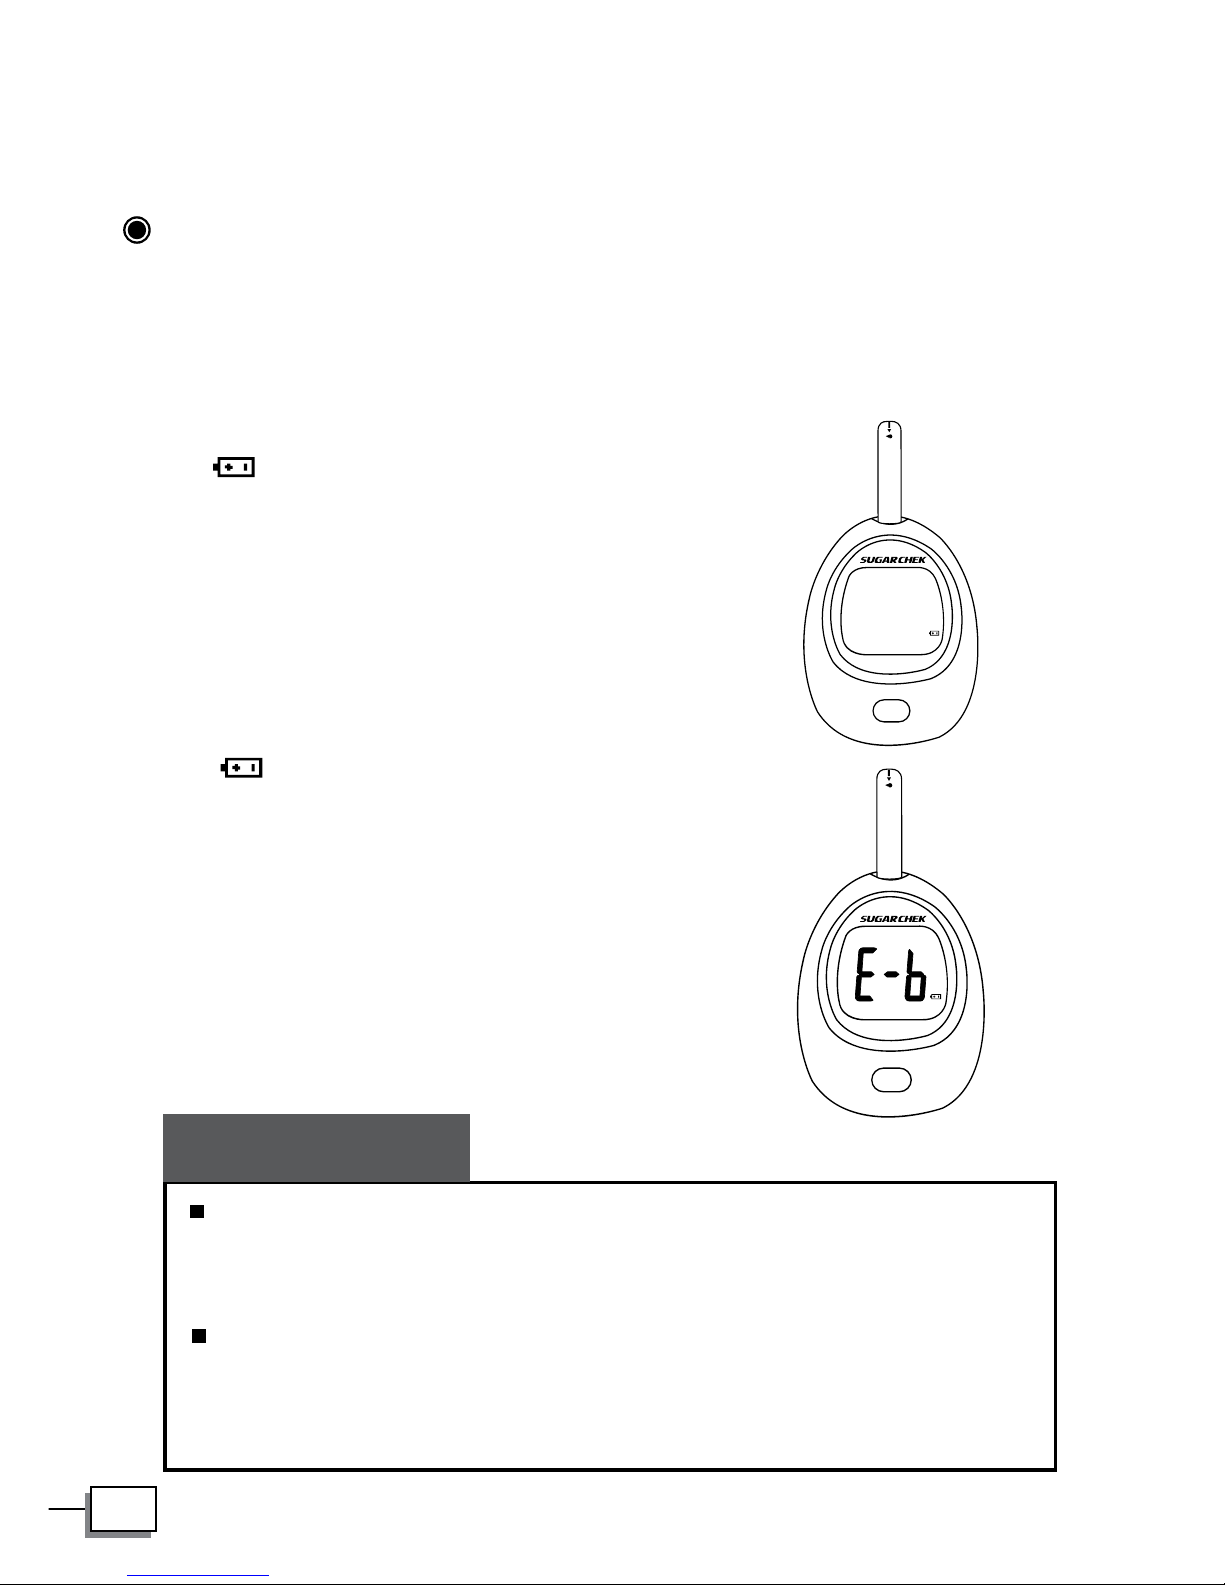
Battery Replacement
Your meter comes with one 3.0 V (CR2032) lithium battery that is already
installed.
The meter will alert you when the power is getting low by displaying two
different messages:
Replacing the battery does not affect the meter’s memory (pre-
vious test results stored in memory). However, the time and
date settings may need to be updated.
Batteries might leak chemicals if not used for a long time. Re-
move the battery if you are not going to use the device for an
extended period (i.e. 3 months or more).
PLEASE NOTE
1. The symbol appears on the display
when the meter is turned on and all
other display messages are functional.
The rest results will be accurate, but it
is time to change the battery.
2. The symbol appears with the E-b
symbol on the displays by itself. This
means that the battery will not provide
enough power for a test. You must
change the battery.

15
To replace the battery, make sure that the meter is turned off.
1. Press the buckle on battery cover and lift up to remove cover.
2. Remove the old battery and replace with one new 3.0 V (CR2032) lithium
battery. Make sure that the positive “+” side is facing up.
3. Close the battery cover. If the battery is inserted correctly, you will hear
a “beep”.
As with all small batteries, the batteries should be kept away from
small children who still put things in their mouths. If they are swal-
lowed, promptly see a doctor for help. If there is no beep sound
after you install the battery, please see Problem in Operation.
WARNING
16
Setting the Meter and Deleting the Memory
Your meter comes with the time, date, unit of measurement and unit of
temperature preset. But if you replace the battery, you may need to reset
the meter.
Start with the meter off. Then press the
set button located in the battery com-
partment. The meter is now in the setting
mode. You can start to set up the meter.
STEP 1 Set the Year
The year will appear rst, with the year set-
ting ashing. Press and release the Main
button to advance one year. To move faster,
keep pressing the Main button until the cor-
rect number appears. With the correct year
on the display, press the Set button and then
the month segment ashes.
STEP 2 Set the Month
Press and release the Main button until
the correct month appears. To move faster,
hold the Main button down. With the correct
month on the display, press the Set button
and then the day segment ashes.
STEP 3 Set the Day
Press and release the Main button until the
correct day appears. To move faster, hold
the Main button down. With the correct day
on the display, press the Set button and then
the hour segment ashes.

17
STEP 4 Set the Hour
Press and release the Main button to ad-
vance one hour. To move faster, hold the
Main button down. With the correct hour on
the display, press the Set button and then
the minute segment ashes.
STEP 5 Set the Minutes
Press and release the Main button to ad-
vance one minute. To move faster, hold
the Main button down. With the correct
minute on the display, press the Set button
and then the current unit of measurement
starts ashing.
STEP 6 Select mg/dL or mmol/L
Press and release the Main button to se-
lect the unit of measurement you want to
use. Press the Set button and then the cur-
rent unit of temperature ashes.
The milligram per deciliter (mg/dL) is the standard unit in India.
The mmol/L is the standard unit in Canada. Use of the wrong unit
of measure may cause you to misinterpret your blood glucose
level, and may lead to incorrect treatment.
WARNING

18
STEP 8 Delete Memory and Exit the Set-
ting Mode
With “dEL” and ashing “ ” symbol on the
display:
Press the Main button again to delete all of the memory, following the
meter will display “---“ and “OK” to show that the memory is deleted. Then
press the Set button to turn off the meter.
STEP 7 Select ºC or ºF
Press and release the Main button to select
the unit of temperature you want to use.
Press the Set button and the meter will dis-
play “dEL” with ashing “ ” symbol.
19
If you do not want to delete the memory, press the Set button to skip this
step and then the meter will be turned off.
Congratulations! You have nished all settings now!
The time, date, unit of measurement and unit of temperature can
ONLY be changed in the setting mode. Therefore, when you perform
a glucose testing, those parameters are not possible to be changed.
Your meter displays 7-, 14-, 21-, 28-, 60- and 90-day averages which
you can access from the meter memory. These averages are cal-
culated from results obtained during the 7-, 14-, 21-, 28-, 60- and
90-day preceding the current date and time settings. When the date
and time are changed, the 7-, 14-, 21-, 28-, 60- and 90-day averages
may change.
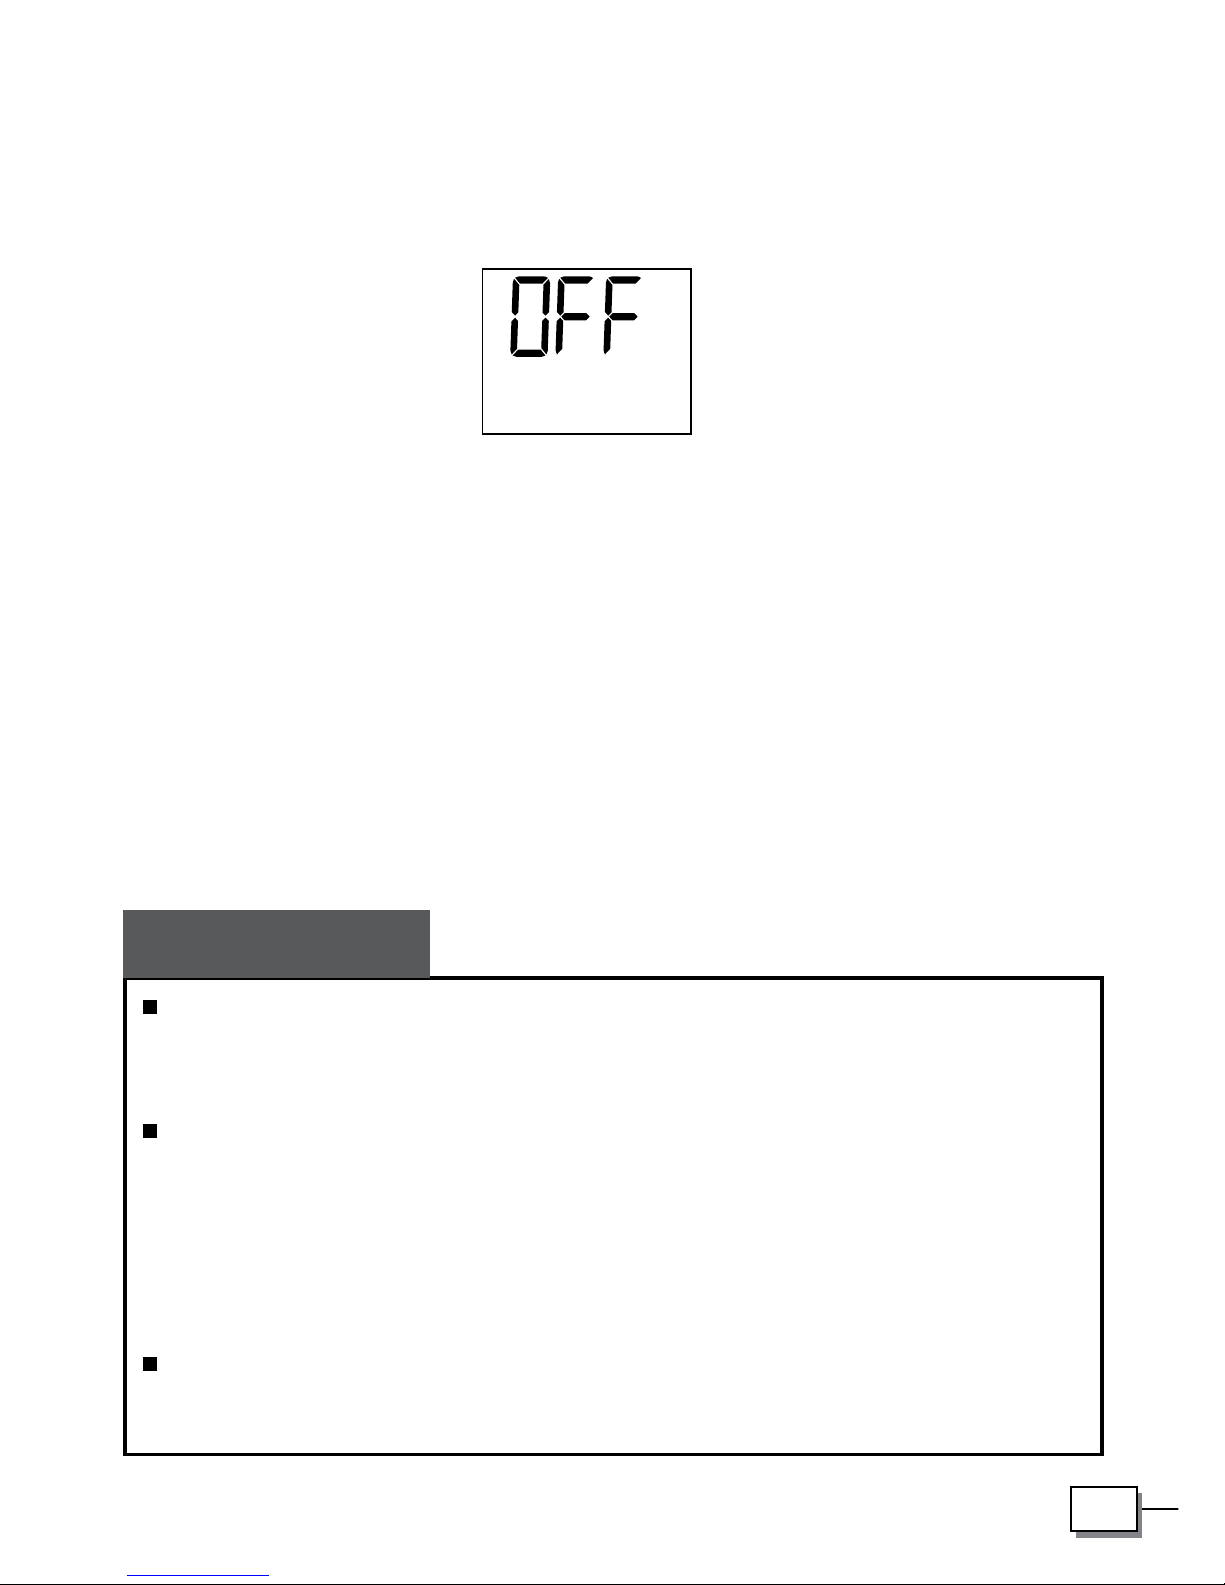
While the meter is in the Setting mode, it will turn off automatically
without any action in one minute.
PLEASE NOTE
20
BEFORE TESTING
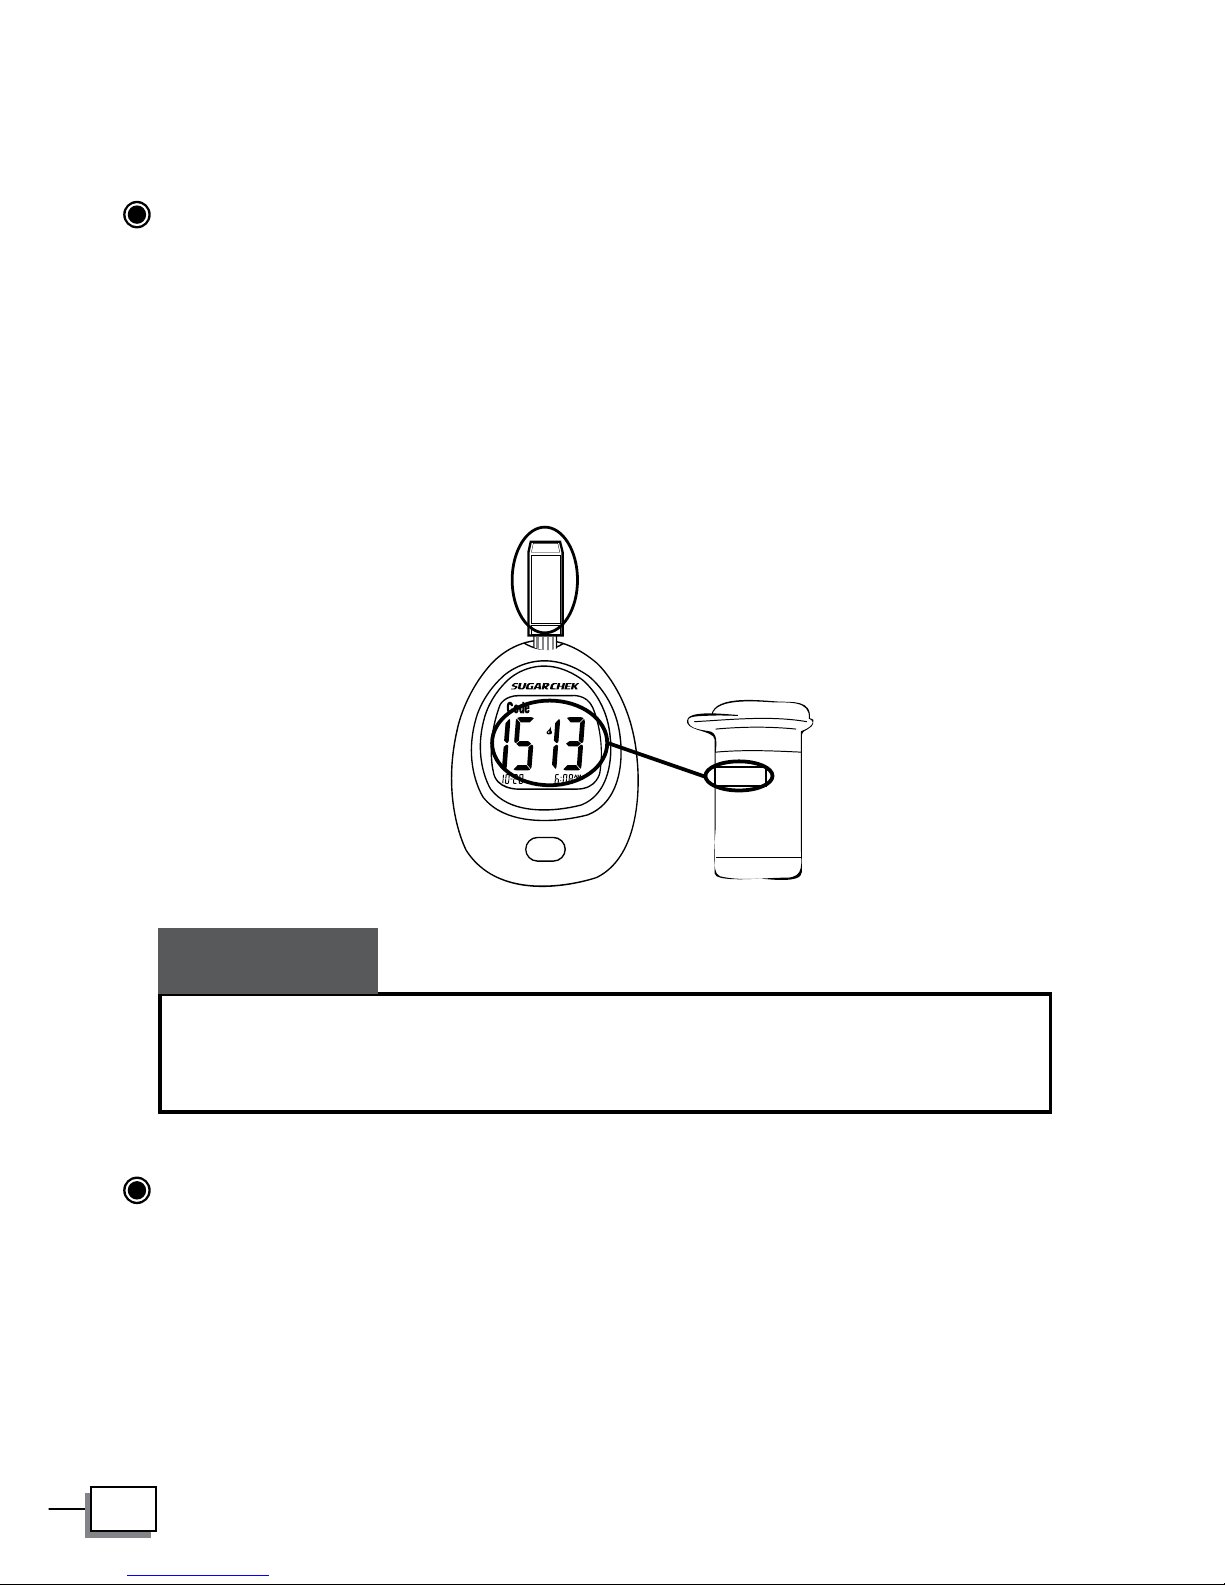
Coding the meter
Code numbers are used to calibrate the test strips with the meter for
accurate results. You must insert code strip to the meter before using it
for the rst time and them every time you change to another vial of test
strips. Each time you test, check that the code number on the meter
display matches the code number on the test strip vial.
Checking the System with SUGARCHEK Control Solutions
SUGARCHEK control solutions contain a known amount of glucose that
reacts with test strips. By comparing your control solution test results with
the expected range printed on the test strip vial label, it is able to check
that the meter and the test strips are working together as a system and
that you are performing the test correctly.
If the code number displayed on the meter does not match the
number printed on the vial, test results may be inaccurate.
CAUTION
1513
1513
Table of contents
Popular Blood Glucose Meter manuals by other brands


Dexcom
Dexcom G4 Platinum user guide

PharmaTech Solutions
PharmaTech Solutions GenUltimate! 4Pets Avantage Quick user guide

Accu-Chek
Accu-Chek Aviva owner's booklet

A. Menarini Diagnostics
A. Menarini Diagnostics GLUCOFIX TECH Sensor 10 Instructions for use

Dexcom
Dexcom G4 Professional user guide

Contour
Contour NEXT EZ user guide


