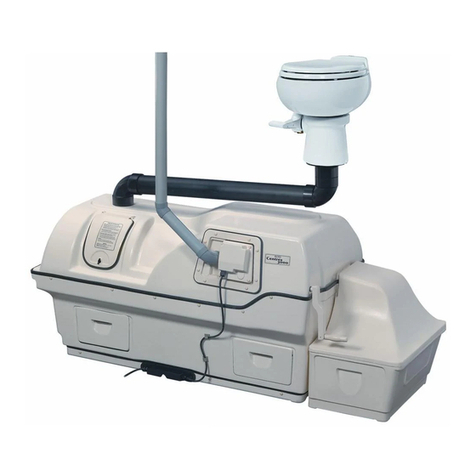
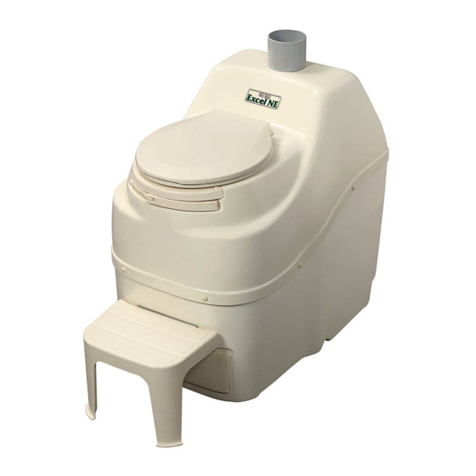
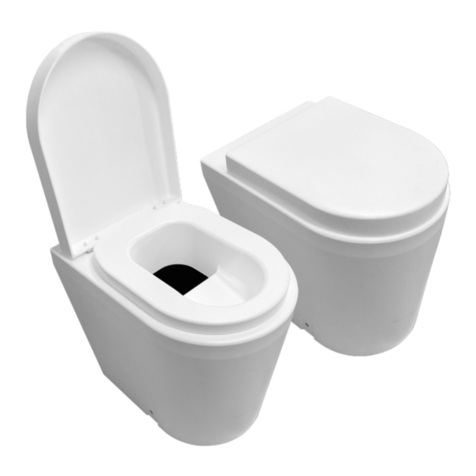
Sun-Mar CENTREX 2000 User manual

Serial No. __________
CENTREX 2000
OWNER’S MANUAL
CENTREX 2000 CENTREX 2000 NE
Certified to NSF/ANSI Standard 41
Standard 41
Certified for liquid containment,
odours, and solid end products in
both residential and cottage use
RATED CAPACITY
Residential & Continuous Use
CENTREX 2000 Electric Units; 4 Adults
CENTREX 2000 NE units: 3 Adults
Weekend & Vacation Use
(Cottage Use)
CENTREX 2000 Electric Units; 7 Adults
CENTREX 2000 NE Units; 6 Adults

Models for which the manual applies:
CCEB-02510 Centrex 2000 115V
CCNB-02540 Centrex 2000 NE
CCEB-02515 Centrex 2000 230V
Metal tools will damage the body of the unit.

OWNER’S MANUAL
CONTENTS
How Composting
Works
The CENTREX 2000
The Patented Bio-Drum
Compost Finishing Drawer
Evaporation Chamber
Inspection
Check for damage
What’s in the box
Familiarise yourself with the CEN-
TREX 2000
Placement of the Unit
Installation
CENTREX 2000 Rough in
Dimensions
CENTREX 2000 Electric Installation
Space requirements
Vent Pipe Location
Electrical Considerations
CENTREX 2000 NE Installation
Space requirements
Vent Pipe Location
Installation Common to All
Leading the vent through
the Roof
Leading the vent through
the wall
The Diffusor
Drain Installation
Handling Effluent
Installing the waste pipe
Installing the Ultra Low Flush Toilet
Start Up and Use
Ongoing Toilet Maintenance
2
3
3
3
3
4
4
4
4
4
5-7
5
6
6
6
6
7
7
7
8
8
8
8
8
8
9
9
10
11
Spring Time Start Up
Winter Use
Removing Compost from the
Bio-Drum
Compost
Troubleshooting
Compost Too Wet
Waste not Breaking Down
Large Lumps In Drum
Drum Too Full
Flies Present
Mechanical
Troubleshooting
Urine Odor In Washroom
Occasional Urine Odor Outside
Strong Sewage Odour
Fan Noisy
Fan Not Working
Liquid Build up/
Lack of Evaporation
Liquid Overflow
Heating System Not Working
Liquid In Finishing Drawer
Drum Will Not Turn
Drum Door Not Opening/
Closing
Basic Instructions
Composting Toilet
Accessories
CENTREX 2000 Specifications
12
13
14
14
14
14
14
14
15-17
15
15
15
15
16
16
16-17
17
17
17
17
18
19
21
- 1 -

HOW COMPOSTING WORKS
Composting is the natural process of decomposition that can be helped along by providing the ideal condi-
tions to help your composting toilet work at peak performance. The ideal conditions for decomposition to
occur depend on several factors: oxygen, temperature, moisture content, and the carbon/nitrogen ratio.
Oxygen
Oxygen is very important in composting. Your compost should be aerated in order to encourage aerobic
bacteria growth. Aerobic bacteria are bacteria that grow and live in the presence of oxygen and are very
efficient in breaking down waste. To aerate the compost and encourage the growth of these bacteria, the
compost drum should be turned three times per week (6 complete turns of the drum).
Temperature
Temperature is another important consideration when composting.Optimal composting temperatures range
between 70-100 ° F (21-38 ° C). If the compost becomes too cold (below 55 ° F or 13 ° C), decomposi-
tion will slow significantly or stop completely. If you are in an area that experiences temperatures below 55
° F (13 ° C) additional heat is required if the composting toilet will be used continually or frequently. If used
for intermittent cottage application (3 - 4 weekends throughout the cold season) no additional heat is
required. The unit will function as a holding tank until the temperature warms up.
Moisture
Moisture is necessary to achieve a good compost. Your compost should always be damp,like your garden
after you have watered it. This moisture allows the bacteria to travel around in the compost so that they can
speed decomposition by digesting the waste.If the compost is too dry, the bacteria cannot survive
and decomposition will slow or cease. When adding water to the compost, you are aiming for a damp com-
post, not saturated. Too much liquid in the compost limits the amount of oxygen that aerobic bacteria require
to survive. If normal urination is not enough to maintain the correct moisture level in the compost, we
encourage you to add additional water to the drum.
Carbon/Nitrogen Ratio
Almost all organic material will compost. The proper bulking material and human waste should be added to
the composting toilet. In order to maintain a good balance between carbon-rich materials (SUN-MAR
Compost Sure Blue) and nitrogen-rich human waste only.
- 2 -

The key to the success of the CENTREX 2000 lies in it’s three chamber design. Each of the three
chambers; patented Bio-drum, compost finishing drawer,and evaporation chamber,have their own
independent environments for optimum efficiency.
The CENTREX 2000 electric version has a thermostatically controlled heater and fan assembly to help
evaporate liquid and should be used where there is a constant electrical supply. The CENTREX 2000
NE (non-electric) version is for use where there is no continuous electric supply. The CENTREX 2000
NE has no fan or heater.Odorless operation is achieved by a 4” vent which acts like a chimney cre-
ating a partial vacuum within the unit.
The Patented Bio-Drum
Unique to Sun-Mar,the patented bio-drum provides the necessary mass to maintain good compost
and allows easy aeration of the compost by simply turning the drum. Excess liquid will exit through
a screen in the bottom of the drum into the evaporation chamber.Mixing the Bio-drum is accom-
plished by rotating the handle in a clock-wise direction. Compost is removed from the drum by pulling
out the white drum lock button (below the handle) and rotating the handle in a counter clock-wise
direction.
The Compost Finishing Drawer
The compost finishing drawer sits in an opening in the front of the unit. Compost in the drawer is
isolated from mixing with new waste while resting for 4 weeks so that it can finish composting.
The Evaporation Chamber
The evaporation chamber is the floor of the unit
under the compost finishing drawer. This is the
area where any excess liquid will gather for
evaporation. A safety drain exits from the left
side of the composting toilet which will drain
over-flow liquid that is not evaporated to an
approved facility.
- 3 -
The CENTREX 2000
Bio-Drum
Evaporation Chamber
Finishing
Drawer

Inspection
We recommend an inspection of the CENTREX 2000 prior to installation and to make sure you have received all of
the parts required as listed below.
Inspecting the unit
for
damage
What’s in the Box
Familiarise
Yourself with
CENTREX 2000
Placement of
Unit
i) If there is any visible damage to the carton-
The contents of the carton should be inspected before signing the bill of lading.
Damaged units should be refused. Call Sun-Mar immediately.
ii) If the shipper has left-
Report the damage immediately to the transport company and call Sun-Mar.
iii) Soon after delivery, remove the CENTREX 2000 carefully from the
carton-
If there is hidden damage, or for any service Questions,contact Sun-Mar to determine
the best course of action.
1- Owners Manual 1- 4” Diffusor (100mm)(Electric)
1- Warranty Card1- 6” (150mm) Diffusor (NE)
1- Hardware Kit 6- 2” x 30” (76.2cm)PVC Pipe (Electric)
1- 8’ 4” (254cm)1” ID Drain Pipe 2- Compost Sure Blue
1- Rake
5- 4” x30” (10.16 x 76.2cm)ABS Pipe (NE)
i) Turn the drum handle clockwise to rotate the patented Bio-Drum for mixing and aeration.
(The drum rotates counter-clockwise and the drum door closes).
This is how you will
rotate the drum during regular operation.
ii) Lift and remove the access door and rotate the drum until the drum opening is visible
through the the access door opening for adding “Compost Sure Blue”.
This is how you
will add “Compost Sure Blue” bulking mixture to the drum during regular operation.
iii) Plug the unit’s electrical cord (Electric) into a standard three-prong electrical outlet, and
feel the air movement from the vent outlet at the front of the unit to ensure the vent
system is working properly.
iv) Pull out the compost finishing drawers at the bottom right of the unit. After the unit has
been plugged in for ten minutes,place a hand on the floor of the evaporating chamber
(the area under the finishing drawer) to check it is warm to the touch, and that the heater
is working properly.
The unit should be installed so that the base is protected from weather. The rubber “u”
channel at the bottom of the unit is well-sealed, but if the unit is sitting in water,has snow
melting against it, or rain pouring on it, this may eventually wear through and short out the
heating element. Install your unit with a protective cover of some kind to protect it from pre-
cipitation from reaching it.
Do not install the unit in a pit where water can accumulate around
it.
- 4 -

Installation
CENTREX 2000 ROUGH IN DIMENSIONS
- 5 -

CENTREX 2000 Electric Installation
Space
Required and other
Installation
Considerations
Vent Pipe
Location
Electrical
Considerations
1) Compost will be removed from the finishing drawer. Ensure that there is at least 17” in front of
the CENTREX 2000 so that the drawer may be removed from the unit.
2) Install the unit in a location where the safety drain can be connected. This drain exits from the
left side of the unit and must slope downward at all points.
3) Install in a location where the vent pipe can be attached as per the instructions listed below.
4) Install in a location that is not air tight.
5) Ensure that the CENTREX 2000 is accessible for ongoing maintenance.
6) Ensure that the installation area is a minimum height of 28”.
WE DO NOT RECOMMEND
DIGGING BELOW GROUND TO FACILITATE THE INSTALLATION OF THE CENTREX 2000.
7) Ensure the CENTREX 2000 is protected from precipitation.
1) If running a vent through a wall, it should be done at a 45° angle to prevent condensation from
accumulating in the vent pipe,causing a constriction.
THERE SHOULD BE NO HORIZONTAL
SECTIONS OF VENT.
Venting should be installed vertically.
2) All vent pipe that is exposed to the outside or in a non-heated space should be insulated if
using the unit during cold weather.
3)
INSTALL VENT SO THAT IT TERMINATES 24” - 30” ABOVE HIGHEST PEAK OF THE ROOF.
4) If you will be installing venting on a steeply pitched roof where snow shear may occur;Install a
heavier pipe through the roof and feed the enclosed vent through the heavier pipe.Seal
between the pipes with expandable foam or other such water-tight substance. The heavier pipe
should be able to withstand the weight of sliding snow.
5) If there is more than 36” of vent needed above the roof line to reach 24-30” above the highest
peak of the roof (diffusor included in measurement), use guy wires to secure the vent above
the roof.
6) Limit bends in the vent stack to no more than 4 that have a combined total of 180 °.
7) The vent must be installed separately from ALL other household vents. Venting cannot be
merged with other venting.Doing so will prevent the unit from operating odorlessly.
8) All connectors in the vent pipe should be sealed.
Use silicone caulking to seal the connection
between the vent and the fan.
PVC cement may be used all other vent connections.
9) The diffusor should be glued vertically on to the top of the vent pipe. This assembly helps draw
air up the vent pipe.
Possible venting configurations for
the 2” electric vent pipe.
The fan will run continuously 24 hours per day. A ground fault interrupter (GFI) circuit is recommended
for any unit installed in an environment where it will be exposed to moisture. This may be installed direct-
ly on the wall socket or at the circuit breaker. If you are in an area where you experience power fluctua-
tions, you may wish to install a surge protector.
Some 230V models may have an over current fuse protection on the heating element circuit which is
located on the electric box.
- 6 -

- 7 -
CENTREX 2000 NE Installation
Space
Required and other
Installation Considerat-ions
Vent Pipe
Location
Vent Inlet
Coupling
1) Compost will be removed from the finishing drawer. Ensure that there is at least 17” in front of
the CENTREX 2000 NE so that the drawer may be removed from the unit.
2) Install the unit in a location where the safety drain can be connected. This drain exits from the
left side of the unit and must slope downward at all points.
3) Install in a location where the vent pipe can be attached as per the instructions listed below.
4) Install in a location that is not air tight.
5) Ensure that the CENTREX 2000 NE is accessible for ongoing maintenance.
6) Ensure that the installation area is a minimum of 28” in height.
WE DO NOT RECOMMEND
DIGGING BELOW GROUND TO FACILITATE THE INSTALLATION OF THE CENTREX 2000
.
1) All vent should be vertically installed.
2) Limit bends in the vent stack to no more than 2 - 45 ° bends.
THERE
SHOULD BE NO HORIZONTAL SECTIONS OF VENT.
3)
INSTALL VENT SO THAT IT TERMINATES 24” - 30” ABOVE HIGHEST
PEAK OF THE ROOF.
If the vent is being installed on a steeply
pitched roof where snow shear may occur;Install a heavier pipe
through the roof and feed the enclosed vent through the heavier pipe.
Seal between the pipes with expanding foam or other such water-tight
material. The heavier pipe should be able to withstand the weight of
sliding snow.
4) If there is more than 36” of vent needed above the roof line to reach
24-30” above the highest peak of the roof(diffusor included in
measurement), use guy wires to secure the vent above the roof.
5) The vent must be installed separately from ALL other household vents.
Venting cannot be merged with other venting.Doing so will prevent
the unit from operating odorlessly.
6) All connectors in the vent pipe should be sealed.
Use silicone caulking
to seal the connections.
7) The diffusor should be glued vertically on to the top of the vent pipe. This assembly helps draw air
up the vent pipe.
Place the vent inlet coupling into the hole for
the 4” vent so that the 1” of smaller diameter
pipe is protruding into the hole in the top of
the unit. This is the first piece of the venting.
Once you have finished assembling the vent,
you should run a bead of silicone around the
inlet coupling to prevent odor from escaping.

Installation Common to All
Leading the vent
through the roof
Leading the vent
through the wall
The Diffusor
Drain
Installation
Handling Effluent
As shown in the installation, the vent stack should end about
30” above the peak of the roof so that it is less subject to downdraft.
Where the pipe is taken through the roof,a roof flashing may be
required to seal the installation. If you are in an area where snow shear
is a danger, you may wish to install a heavier pipe around the vent pipe
where it exits from the roof.If you do choose to do this,ensure that
you seal the area between the pipes with a waterproof substance to
prevent leaks.
When it is necessary to lead the vent through a wall, connect one 45°
elbow on the vent outlet on the unit. Using a 2” hole saw or other
appropriate tool, cut a hole through the wall board behind the unit so
that the vent pipe can be inserted into the 45° elbow. Cut a similar
hole on the other side of the wall that is slightly higher then the inner
hole so that the vent pipe will be angled upward at 45°. If installing
through an exterior wall, waterproof sealant will be required around the
vent pipe where it emerges from the building.
The diffusor provided with the unit is a simple device to be
installed at the top of the vent stack with the larger pipe pro-
truding above the smaller. To install, simply glue the diffusor
vertically on the topmost section of vent pipe. The diffusor
design encourages updraft, and discourages wind and weath-
er from going down the vent stack. We do not recommend
installing anything else on the top of the vent as it could
impede the venting.Unlike wind turbines,diffusors are less
likely to freeze in winter,and are more effective in calm
weather.
The safety drain should be connected as it will be required.
- Remove the orange cap from one side of the overflow drain assembly.
- Place a 1” hose clamp over the end of the drain hose that will be connected to the overflow drain
assembly.
- Push the drain hose over the ribbed end of the over-flow drain and clam with the 1” SS hose clamp.
- Connect the 1” hose to an approved drainage facility.
The following are possible options to take care of the liquid :
- Feed into a lined pit filled with gravel and sand. Such a
recycling bed also ensures a closed loop system.
- Feed into a small cesspit or “french drain”.
- Plumb into an existing septic or holding tank line.
Installation should be in accordance with applicable local regulations.
- 8 -

Installing the waste pipe
Installing the Ultra Low
Flush Toilet
When installing the waste pipe from the toilet to the unit, the following should be considered:-
i) The pipe should be either 45 ° or vertical (if composting unit is directly below toilet),
or at a 2-3 ° angle (1/8”-1/4” or 3-13mm drop per foot maximum) so that the waste
travels with the liquid.
ii) Pipe should not slope upwards at any point.
iii) Connections should be snug so that waste does not cause blockage.
iv) It is recommended that the waste pipe be no longer than 15 feet (460cm) without
installing a clear out port(a Y fitting with screw on end cap) near the toilet to provide
easy access should it be required.
v) Use a soft sealant, such as silicone for the connection of the waste pipe to the unit
so that the unit can be moved for servicing or other reasons should this ever be
required.
vi) Insulate pipe if unit is to be used during the winter.
1. Make sure the center of the floor flange is at least 11 inches
(280mm) from the back wall.
2. When Installing a new floor flange, ensure that the toilet
mounting bolts align properly with ultra low flush toilet
mounting pattern.
3. Secure flange to floor using flat head screws through
counter-sunk holes in flange. Insert bolts into slotted holes
in flange(Fig.A)
4. Position floor seal by pressing the floor bolts up through the
holes in the seal.
5. Set toilet in place with bolts protruding up through mounting
holes in base (Fig C).
6. Install washers and hex nuts provided with toilet. Tighten
nuts down equally with standard 7/16” (12mm) open end
wrench.
7. Connect water supply line to water valve (1/2” or 13mm
MPT) inlet using appropriate fittings (Fig D)
8. Turn on water supply and flush toilet to test for leaks.
9. Attach pedestal and pedal covers to toilet base.See instructions
below.
- 9 -

Start Up and Operation
Initially, when starting up your CENTREX 2000, follow these steps. These steps are only used when starting up
your CENTREX 2000 for the first time or when you have emptied the drum and need to re-start the compost.
After installation is completed do the following:
Step 1
:Spray Compost Quick to condition the surface of the composting
toilet. Remove the finishing drawer and spray the whole inner floor
of the unit under the finishing drawer. Spray Compost Quick into
the Bio-drum and the inside of the finishing drawer.
Step 2:
Pour one bag of Compost Sure Blue into a bucket and add
2 quarts of warm water.Add ½ of the Microbe Mix Packet to the
bucket. Allow the Compost Sure Blue to absorb the water (about
an hour).
Step 3:
Scoop the Compost Sure Blue mixture from the bucket into the
Bio-Drum through the access door on the CENTREX 2000. Rotate
the drum to mix. The opening in the drum must remain open
under the waste pipe. The CENTREX 2000 is now ready for use.
Step 4:
For electic units only. The fan will run continuously 24 hours
per day.
120 Volt Use:
Plug it in to a three prong electrical outlet.
240 Volt Use:
The unit must use a mains plug with an earth
connection. Replacement of electrical components (including the
power cord and mains plug)must be performed by a qualified person
to avoid hazard.
When you first start up the CENTREX 2000, it will take approximately 6 weeks at optimum temperatures (70-90 ° F) before you will
have sufficient quantities of microbes in the drum to actually achieve a good compost. During this time,the contents of the patent-
ed bio-drum start out as Compost Sure Blue and waste.Over the first 6 weeks, you will notice that the compost will hold moisture
and will become more uniformly dark in colour.
During the first six weeks, you may notice that some Compost Sure Blue has fallen through the drum screen onto the evaporation
chamber to the left of the finishing drawer. This should be raked out and removed with the rake tool provided with the unit.
- 10 -

Ongoing Toilet Maintenance
Once your CENTREX 2000 is installed and you have gone through the initial start-up procedure, follows the steps
outlined below to keep your composting toilet working optimally.
Add one cup of
Compost Sure Blue per
person per day
Spray Compost Quick
on the surface of the
compost
Turn the handle clock-
wise every second day
to mix the compost
Make sure that the
opening in the drum is
centered under the
waste pipe
.
Every two weeks
Every three months
Twice per year
Periodic maintenance
Even if you only use the toilet for urination then at least one cup of Compost Sure Blue
should be added per person per day of use.Add the Compost Sure Blue through the
access door on the CENTREX 2000.
Every second day
before turning the handle,spray 3-4 sprays of Compost Quick on the
surface of the compost. Compost Quick is an enzyme that will speed up the composting
process.
Turn the handle
in a clockwise direction to mix and aerate the compost. When mixing,
ensure that the drum rotates 6 complete revolutions (36 turns of the handle).
Turn the handle in a counter-clockwise direction until it comes to a hard stop. The drum
opening should now be centered under the waste pipe.
Add one scoop of Microbe Mix
to the patented bio-drum to ‘recharge’ the pile. This will
help to ensure your microbe colony stays constant and healthy.
Rake the evaporation chamber
: Remove the finishing drawer. Rake any solid debris from
the floor of the unit under the drawer (evaporation chamber), paying extra attention to
the two corners of the unit near the safety drain as this is where debris may accumulate.
Remove the solid debris.
Clean the drum screen
.Spray the drum screen with Compost Quick and let sit for 15 min-
utes (this will help to loosen the debris if the screen is not too encrusted). Scrub the
screen vigorously with the wire brush. If brushing the screen does not clear it and liquid
is still not draining through the screen, you may have to resort to having to use a screw-
driver or nail to puncture each hole in the drum screen.
Remove compost from the drum
. When the drum is half full it is time to remove compost.
To remove compost from the drum:
1) Pull the drum lock button located below the handle on the CENTREX 2000.
2) While holding out the white drum lock button, turn the handle in a counter-clockwise
direction for one complete revolution of the drum.
CAUTION
1. Do
NOT
add or clean the toilet bowl liner with chemicals.Chemicals will kill the bacteria.
INSTEAD
, clean the bowl liner with Compost Quick.
2. Do
NOT
add plastic, glass,metal, cleaning fluids,cigarettes.Add only waste and bulking material.
3. Kitchen or garden waste are
NOT
recommended.
4. Do
NOT
add baby wipes,diapers or feminine paper as they will not compost.
- 11 -

Seasonal Use and Spring time Start Up
Empty Compost from Last Season
Before your first use of the unit, extract compost from the drum by releasing the drum locker (located on the handle side of the
unit), then rotate the handle counter-clockwise giving the drum one complete revolution only. Compost from the drum will drop into
the finishing drawer. Empty the drawer and repeat this procedure until most of the compost is removed, leave 4-6 inches of com-
post. This will be your “starter base” for the coming season.
Rake
Remove the finishing drawer completely and use the rake tool to rake any loose material from the floor of the unit. Pay careful atten-
tion to the left two corners of the unit (near the safety drain) to ensure that your drains do not get clogged.
Add Water & Microbe Mix
Add some warm water to the remaining compost, enough to ensure that it is quite moist. Also,add some Sun-Mar Microbe Mix (two
of scoops) to give the compost pile a “kick-start” and rotate the drum several times to mix.
If your composting toilet is electric,plug it in and use for another season.
Winter Use
No Winter Use
Just add water.Lots of water.Soak the compost in the drum to prevent it from drying out before Spring.Make sure to unplug the
unit if electric.If you have a non-electric unit, it may be a good idea to place something over the diffusor to prevent
animals (who are looking for a home at this time of year) from getting in.
Occasional Winter Use
If the unit will be used for 3-4 weekends throughout the winter season then it is considered occasional use.All of the same consid-
erations should be taken with these units to winterize them. When the temperature dips below 55 ° F (13 ° C), composting activity
will decrease dramatically. These units do not need to be kept warm and will act only as a holding tank during the winter months until
they warm up enough in the spring to begin composting again. During the winter,the compost will freeze into a solid mass so the
drum should not be turned as it may damage the composting toilet. With this in mind, it is a good idea to remove enough compost
before it gets too cold to make room in the drum for winter use.
Heavy or Residential Winter Use
These units should be kept in a heated area and all winterization tips should be followed, including the following:
1. Vent Pipe - electric models; All 2" vent pipe should be insulated if they are exposed to the outside or in an unheated area.
If you are in an area that experiences extreme winter conditions, we recommend that heat tape should be applied to the
exposed vent pipe to prevent ice blockages.
2. Safety Drain - all models; We recommend that the safety drain should be installed and insulated above the frost line. There
will be less evaporation in the winter so this will help with any excess liquid. If possible,heat tape can be applied to the
safety drain to prevent ice blockage.
3. Keep it warm; If the composting toilet is used frequently in the winter then the composting part of the unit should be kept in
a warm place.Below 55 ° F (13 ° C), composting actions slows dramatically so if it is in a place that falls below this
temperature, a source of heat should be provided for the unit so that it can keep up with constant use.
- 12 -

- 13 -
Removing Compost from the patented Bio-Drum
The level of compost in the Bio-drum should never be more than half full. As a guide,the compost in the drum
should be at least 6 inches from the bottom of the drum door.Compost must be removed from the drum by fol-
lowing the steps outlined in this section.
Pull the drum lock
button
Turn the handle
counter-clockwise
Level the compost in
the drawer
Allow the compost to
rest
The drum lock button is
located below the handle.
Pull the button out
approximately 1/2” and
hold.
While holding the drum
lock button out, turn the
handle counter-clockwise
for three revolutions of
the handle. Release the
drum lock button and con-
tinue to turn the handle
counter-clockwise until the
handle hits a hard stop.
Open the drawer and use
your rake to level the
compost.
Compost should now be
allowed to rest in the
drawer for 3 - 4 weeks to
finish the composting
process.
The drum lock button is attached to a bar that
sits in a molded depression in the drum.
When you pull the button, you pull the bar out
of the depression which allows you to turn the
drum in the opposite direction.
The drum door will stay open allowing compost
to fall into the finishing drawer. Fresh and
composted material will be deposited into the
drawer.
Levelling the compost will prevent the compost
from soiling the patented bio-drum.
This compost will be isolated from any new
waste and should be left in the drawer for a
minimum of 4 weeks or longer to finish com-
posting.
Compost maybe be removed at any time that you may need more space in the drum and will need to be removed
more frequently for heavily used units or where the CENTREX 2000 is the primary residential toilet.

Compost Troubleshooting
Symptom Cause Remedial Action Prevention
Compost
Too Wet
Waste not
Breaking Down at
all
If this is the case,
the drum will fill up
quickly
Large Lumps in
Compost
Drum Too
Full
.
Flies Present
Compost porosity
is poor.
Drum screen
clogged
Insufficient moisture
in compost
Insufficient
Microbes
Room Temperature
under
55 ° F/13 °C
Compost Too Dry
Compost not emp-
tied into finishing
drawer in a timely
fashion
Kitchen/Garden
Waste added
-compost too dry
-compost anaerobic
-kitchen/garden
waste added
-foreign material
added
Change bulking material to Compost Sure Blue.
Spray the drum screen with Compost Quick. Scrub the
drum screen with wire brush.
A moisture content of 40-60% is ideal for aerobic
microbes to thrive.
Add Sun-Mar Microbe Mix .
Install heat source to increase temperature. Temperature
should be kept above 55°F/13°C constantly to ensure the
composting action does not stop completely.
Add 1/2 to 1 gallon of warm water to compost in order to
bring it up to appropriate moisture level.
Remove lumps or break them apart.
Remove compost until drum is only half full or less.
Rotate compost thoroughly to aerate,and add compost
accelerant(Compost Quick and Microbe Mix) if available.
We do not recommend adding kitchen or garden scraps.
1 .To eliminate flies, you can use any pesticide that is
used on your garden. Pesticides used for garden
use are not anti-bacterial so are safe to use on your
compost.
2. The alternative to using pesticides is to completely
clean the toilet out, wash the inside with soap and
water
IMPORTANT:
Application of a pesticide in a SUN-MAR composter is not
a health concern because all SUN-MAR units are vented.
If using pesticides, avoid spilling on the outer shell of the
composter.
Use Sun-Mar Compost Sure Blue
Add water to patented bio-drum
Be sure to add ½ microbe pack-
et at start up.
Install unit in warm area. The
warmer the area, the better your
compost will be!
Use proper bulking material and
add warm water if necessary.
When drum is 1/2 full, remove
some compost to the finishing
drawer. Do NOT let drum get
above 1/2 full. This will lead to
lack of aeration, and anaerobic
compost.
Do Not add kitchen or garden
waste.
1. Keep compost moist. In order
to determine a good level of
moisture, shine a flashlight
into the drum. The compost
should have a slight gloss or
shine.If it does not, add
warm water to it until it
reaches this consistency.
Fungus gnats tend to be
attracted to a dry compost,
due to the fungus which
begins to form on the surface
when it dries out. A good,
moist compost will not be
attractive to flies.
2. Do not add topsoil from the
ground, composted matter,or
kitchen scraps to the toilet.
Flies may be present in, or
attracted to these items.
3. Use “Compost Sure Blue”.
- 14 -

MECHANICAL TROUBLE SHOOTING
Symptom Cause Remedial Action Prevention
Urine Odour in
Washroom
Occasional
Urine Odor
Outside
Strong
Sewage
Odor
Fan Noisy
Horizontal runs or
downward slopes on
vent pipe
Fan has failed
Downdraft
Competing appli-
ances
1. Vent stack not
installed above
peak of roof.
2. If vent stack is
installed above
roof line,natural
obstructions,
such as tall
trees,being
located in a
valley or close to
a hill may be
causing
downdraft.
Compost is
anaerobic
Fan damaged in
shipping or bearings
are beginning to
wear.
Re-install the vent so there are no horizontal or low
points where condensation can collect.
Have your serial number ready and call SUN-MAR for a
replacement. Instructions are included with the replace-
ment fan.
If you believe that there may be a downdraft outside of
the building,it may be a good idea to remove your fan
assembly prior to installation and set the fan gate to ‘0’
to prevent urine odor in the bathroom. (electric)
Install a 12 volt fan in vent pipe. (NE)
Wood stoves or furnaces installed in a tightly sealed room
with the composting toilet may draw air in causing a vacu-
um in the room. This will draw air down the vent pipe.
1. Check that the vent is installed above the peak
of the roof.If not, extend the vent. Guide wires
may be necessary.
2. Add lime to the evaporation chamber - as much
as you think necessary. You will have to rake
more often if you do this.
3. SUN-MAR has a filter box available which will filter
the ammonia out of the vented air in a downdraft
situation. Call SUN-MAR for details.
Begin following: “Compost Troubleshooting” suggestions.
1. If it is rattling,it may need to be cleaned or the
bearings are worn and the fan needs to be
replaced.
2. A hum is the normal sound the fan will make.. If
you are in a very quiet setting it will be more
noticeable.If this is the case,consider purchasing
a fan speed control so that the fan may be turned
down.
Install wall brackets on vent pipe
to prevent settling.DO NOT
install horizontal runs as liquid
will collect and block ventilation,
causing odour.
The fan is a constantly moving
part and has a finite service life.
Install an air intake to the com-
peting appliance from the out-
side.
Downdraft is dependent on wind
direction as well as natural
obstructions etc.
Initially, install the vent above the
peak of the roof.If symptoms
occur,add lime or a filter box.
Follow “Ongoing Maintenance”
and use proper bulking material.
Clean the fan with a small brush
and/or compressed air nozzle
once a year. To do this, remove
the fan assembly by taking off
the snap cap covers and
unscrewing the screws which
hold it in.
The entire assembly will then sim-
ply slide out. This will prevent
wear and lengthen the life of your
fan.
- 15 -

- 16 -
Symptom Cause Remedial Action Prevention
Fan Not Working
Liquid
Build up/
Lack of
Evaporat-ion
Liquid
Overflow
Debris in fan or
mechanical failure.
Increased usage.
Climactic conditions
Mineral salts may
have accumulated
in the evaporation
chamber over time,
reducing evapora-
tion rates.
Drains Blocked
Remove the fan assembly from the unit and vacu-
um any dust out of the fan blades.
Check the power source.If this does not remedy
the problem, have your serial number ready and
call SUN-MAR
The amount of liquid varies substantially between
installations. The overflow drain needs to be
installed.
Evaporation rates vary substantially with climatic
conditions.Expect faster evaporation rates
during warm dry weather.
To remove these, fill the evaporation chamber
with very hot water and 1/3 bottle of “Compost
Quick” enzyme liquid. Leave overnight.
- Drain all Liquid through the overflow drain by
tipping the unit up (make sure overflow is hooked
up first)
1. Rake peat moss away from the safety drains.
This is the “build up” area. If drains are still
clogged, proceed to step 3.
2. Check drain line for kinks, blockages or
upward bends. Remove and flush if blockages
present, unkink if bent and ensure that the
drain pipe is sloping downward. If your drain
pipe is in order,proceed to step 3.
3. Use a wire to poke blockage out of the drain
assembly. You will notice if this is clogged
because you will see a brown spot through
the opaque assembly.
The fan is a continuously
moving part which will even-
tually have to be changed.
Do Not turn on and offdaily.
Install the overflow drain.
Rake evaporating chamber
vigorously at spring start ups
for cottage use,and once
every other month for resi-
dential use.
1. A clogged drain is not
very likely to happen if
you rake your evaporating
chamber every 3-4
months.
2. Use premium 1”ID hose
for the drain line.A good
hose will be less likely to
kink. Use elbows or
fittings around bends to
prevent kinks.
3. Use Compost Sure Blue as
your bulking material.

Symptom Cause Remedial Action Prevention
Liquid
Overflow
(Cont’d)
Heating
System Not
Working
Liquid in
Finishing
Drawer
Drum Will Not Turn
Drum Door Not
Opening/ Closing
Properly
Overflow drain not
hooked up
Unit tipped forward
Test to determine
whether failure has
occurred
Thermostat Failure
Heating Element
Failure
Blown fuse
(some 230V units
ONLY)
Drum Screen
Clogged
Set screw securing
handle to shaft has
broken
Steel roll-pin secur-
ing gear wheel to
shaft has broken
Drum too full
Hinges Stuck
Connect overflow safety drain
Check and ensure that the unit is level.
Pull finishing drawer out and put your hand in the evapo-
ration chamber (NOT in the liquid). If there is no warmth
rising from the floor of the unit, your heating system is
not working.It is most commonly the thermostat that has
failed. If you notice a lack of evaporation, but there is
still warmth in the heating chamber,see “Liquid Build up”
for solutions.
Have your serial number ready and call SUN-MAR for a
replacement. (Detailed instructions are included with the
replacement part)
If the insulation behind the thermostat access cover is
moist or discolored, or heating does not work after the
new thermostat has been connected, then the heating
element has failed.
Have your serial number ready and call SUN-MAR for a
replacement. (Detailed instructions are included with the
replacement part)
Check fuse located on the electric box to ensure that it is
functioning correctly. If the wire in the fuse is chared or
broken. Replace the fuse.
Remove the finishing drawer. The drum screen is located
on the bottom of the patented Bio-drum, to the left of
the drawer opening.Scrub drum screen with a wire
brush.
Drill out set screw and replace,or have your serial num-
ber ready and call SUN-MAR for a handle replacement kit
(instructions included).
Have your serial number ready and call SUN-MAR for a
replacement Small Gear Kit.
Drum Hinges have compost caked on them. Spray with
Compost Quick and clean with nylon brush.
Evaporation will slow during damp
weather,make sure drain hose is
installed.
A ground fault interrupter circuit
is recommended to protect your
CENTREX 2000 from power
surges that could cause your
heating system to malfunction.
Your thermostat and fan are the
two constantly moving parts on
the unit, and so are the most
likely to fail. Both are easy to
replace.
If you ever remove the unit from
the bathroom for cleaning,DO
NOT use a water hose around the
base of the unit.
Power surges can cause the fuse
to blow. If this is a possibility in
your area, a serge protector is
recommended.
Drum should never be more than
1/2 full.
- 17 -

Basic Maintenance Instructions
Ultra low flush toilet and CENTREX 2000 Units
The toilet is porcelain and should be cleaned with hot water or bio-degradable products only to
avoid damage to the compost. 'Compost Quick or Baking Soda can be used diluted in hot water.
Weekly maintenance (every second day):
Turn drum to reveal waste inlet hole through access port and add Compost Sure Blue at the rate of
1 cupful (250ml) per person per day.
Rotate handle clockwise to mix contents of Bio-drum and give 6 complete revolutions of the drum -
(36-40 rotations of the handle). Ensure that the drum door opening is in the vertical position at
the end after hearing the 'click' of the catch.
Spray Compost Quick into the drum before and after mixing.
Check compost volume and condition in Bio-drum:
To speed up composting,add one scoop of Microbe Mix every second week, and ensure that the
drum is not more than ½ full.
Bi-Monthly maintenance and emptying cycle:
Rake out evaporation chamber with rake provided (the area below the finishing drawer). Clean the
drum screen. Remove the finishing drawer,the drum screen is to the left of the drawer on the bot-
tom of the drum. Spray the drum screen with Compost Quick and let sit for 15 minutes (this will
help to loosen the debris if the screen is not too encrusted). Scrub the screen vigorously a the
wire brush. If brushing the screen does not clear it and liquid is still not draining through the
screen, use a screwdriver or nail to puncture each hole in the drum screen.
Attention: the Centrex 2000 electric model must remain plugged in to an electrical outlet continu-
ously to function odorlessly. If you will be away from the residence where the composting toilet is
installed for longer than three days, the power may be disconnected while the composting toilet
lays dormant.
- 18 -
Other manuals for CENTREX 2000
1
This manual suits for next models
6
Table of contents
Other Sun-Mar Toilet manuals

Sun-Mar
Sun-Mar EXCEL User manual

Sun-Mar
Sun-Mar EXCEL User manual

Sun-Mar
Sun-Mar EXCEL NE User manual

Sun-Mar
Sun-Mar EXCEL NE User manual

Sun-Mar
Sun-Mar Excel CSEL-01001 User manual

Sun-Mar
Sun-Mar CENTREX 3000 series User manual

Sun-Mar
Sun-Mar EXCEL AC/DC User manual

Sun-Mar
Sun-Mar GTG User manual

Sun-Mar
Sun-Mar CENTREX 1000 User manual

Sun-Mar
Sun-Mar GTG User manual