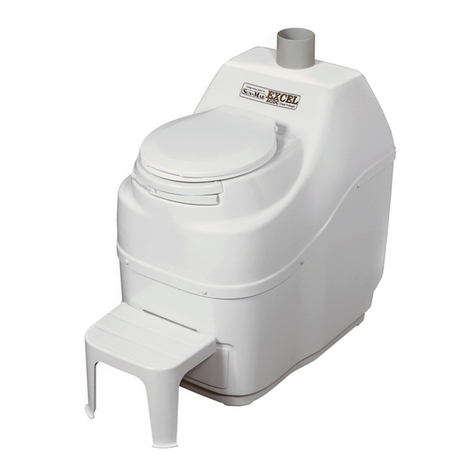
Sun-Mar EXCEL AC/DC User manual

EN-0603
March 1999
Rev. A
RATED CAPACITY
Weekend/Vacation use as:
EXCEL 6 Adults or families of 8
EXCEL NE 5 Adults or families of 7
Residential/Continuous use as:
EXCEL 3 Adults or a family of 5
EXCEL NE 2 Adults or a family of 3
NSF TESTED & CERTIFIED
SUN-MAR XL-1989
The SUN-MAR XL (Now called the “EXCEL”) is the first self-
contained composting toilet to be tested, certified and listed
under N.S.F. Standard #41
N.S.F. (National Sanitation Foundation) offers North America’s
ONLY performance standard for composting toilets.
Certification was granted following a successful 6 month
continuous test period by 4 adults in residential use.
Serial No. ___________
SUN-MAR EXCEL AC/DC
OWNER'S MANUAL
.

-2- -19-

-18-
MECHANICAL TROUBLE SHOOTING (Cont'd)
Symptoms Possible Causes Remedies
LIQUID IN
FINISHING
DRAWER
Compost is too wet 1. See "Ongoing Toilet Maintenance" instructions,
and add bulking material
2. Bulking material compacting. Modify bulking
agent to include material with better porosity such
as chopped straw, shredded mulch, wood shavings
or wood chips. (Not cedar).
Drum Screen Clogged See “Screen Clogged” below.
NOISY FAN Dirt in fan Unplug the fan, remove the fan assembly 12V or 110V,
and clean carefully with a small brush and/or compressed
air nozzle.
Fan bearings are worn Replace fan.
DRUM WILL
NOT TURN
Pin securing handle to shaft has broken Drill out broken pin and replace, or get handle
replacement kit (instructions included).
Steel pin securing gear wheel to shaft
has broken Obtain and install a small gear replacement kit
(instructions included).
Drum fallen from bearings or bearing
fallen Obtain fallen drum or fallen bearing plate kit (Instructions
included).
DRUM WILL
NOT STAY
VERTICAL
Drum lock broken Obtain and install drum lock replacement kit (instructions
included).
DRUM DOOR
NOT
OPERATING
PROPERLY
Drum too full Rake compost to rear of drum to allow door to shut. If
still insufficient space, empty some compost from top,
until door swings freely. Extract compost as per
instructions in "Monthly Check-up" section.
1. Slot in door for nylon hinges too
tight.
2. Drum door corners catching on
drum
3. Drum door hinges broken
File slot/corners to permit easier door movement, or
obtain and install replacement drum door kit (instructions
included).
SCREEN
CLOGGED AT
REAR OF
DRUM
Clay like compost or woody peat moss
preventing excess liquid from exiting to
evaporating chamber
Rotate the drum anticlockwise until the screen is
uppermost. Remove the bowl liner and clear the screen
with a stick or wire brush. If the compost is clay like,
refer to instructions for "Trouble Shooting Your
Compost"
-3-
OWNER’S MANUAL
CONTENTS
How Your Composting Toilet System
Works
!Composting
!The SUN-MAR EXCEL AC/DC
!Start up and Use
!Winter Use
Installation
!Rough-in Dimensions
!Installation procedure
Initial System Start Up
!Start up procedure
Ongoing Toilet Maintenance
!Routine maintenance
Periodic Check Up
!Routine monthly check list
Annual start up
!Restarting procedure for
seasonal units
Trouble Shooting Your Compost
!Procedure for improving a
‘bad’ compost
Toilet Design
!Explosion drawing and part
numbers/descriptions
Mechanical Trouble Shooting
!Diagnosing and fixing
a hardware problem

-4-
HOW YOUR COMPOSTING TOILET WORKS
How Composting Works
Composting is a natural recycling process in
which human waste and toilet paper are broken
downbymicrobesintotheirconstituentminerals
and converted back to earth. Heat, oxygen,
organic material and moisture are needed to
transform this waste into good fertilizing soil.
Heat is generated by the compost itself, assisted
by a heating element if electricity is connected.
Oxygen is provided by the ventilation system,
and by the tumbling of the composting drum.
Additional organic material is introduced by
adding peat mix (or peat moss).
The waste entering the toilet is approximately
90% water content, which may be evaporated
into water vapor and carried back to the
atmosphere through the venting system. The
remaining waste material is transformed into an
inoffensive earth-like substance.
The Sun-Mar "EXCEL AC/DC"
The key to the success of the "EXCEL AC/DC"
lies in it's three chamber design. Each of the
threechambers;-composting,compostfinishing,
and evaporation have their own independent
environments for optimum efficiency.
The Composting Chamber
The composting chamber is in the formof a Bio-
drum™ which holds the natural compost heat,
provides the necessary mass to maintain a good
compost, and is rotated by turning the handle to
achieve perfect mixing and aeration.
A drum stopper (beneath the drum handle)
automatically maintains the Bio-drum™ in a
top dead centre position with the drum door
open so that the drum is positioned to receive
new material.
To mix and aerate, the drum handle is rotated
clockwise. This rotates the drum anti-clockwise,
and the drum door closes automatically as the
drum rotates.
Material is extracted by pulling the drum lock,
and rotating the handle anti-clockwise. When this
is done (at a regular speed), the drum door
remains open and some compost falls into the
second chamber;- the compost finishing drawer.
To ensure that the compost remains moist, but
does not get too wet, any excess liquid which the
compost cannot absorb, drains through a screen
at the rear of the drum directly into the
evaporating chamber.
Compost Finishing Drawer
The compost finishing drawer is immediately
below the composting drum, and just above the
evaporating chamber. For seasonally used units,
severaldrawersofcompostarenormallyremoved
at the beginning of the season. Otherwise some
composted material can be extracted into the
drawer and left there for some weeks until it is
time to remove more compost from the drum.
Evaporating Chamber
The third chamber is the floor of the Sun-Mar
"EXCEL AC/DC" which forms the evaporating
pan from where any excess liquids are
evaporated. Air is pulled through intake holes at
the front of each side of the toilet; over the
evaporating chamber, and up the 2" vent stack
(when the unit is operating with 110 volt power)
or up the 4" vent stack when 110 Volt power is
not available. The 2" vent exits from the top
-17-
MECHANICAL TROUBLE SHOOTING (Cont'd)
Symptoms Possible
Causes Remedies
NO
APPARENT
EVAPORATION
110 Volt thermostat
has failed.
The floor of the evaporating chamber is not hand warm.
Replace the thermostat by removing the thermostat
access plate (mid 1993 models and later); or separate
the heater compartment from the unit (mid 1993
models and prior) to access and replace thermostat.
(Detailed instructions are included with the replacement
part.)
110 volt heating
element has failed.
After replacement of the thermostat, if the floor of the
evaporating chamber is still not hand warm;- separate
the 1½" heater base from the unit and replace the
heating element. (Detailed instructions are included
with the replacement part).
Poor Air Flow See “Poor Air flow remedies”, and ensure drain is
connected.
DRAIN
LEAKING Drain damaged in
transit or during
installation.
Tip the unit towards the drain until most liquid is
drained out. Wipe drain and wait 1 hour or more for
the drain to dry. Silicone thoroughly around joints
(after roughing up with sandpaper) until the leak or
leaks are sealed.
DRAIN
BLOCKED
Peat moss debris or
ice has blocked drain
fitting, or drain line.
1. Use the rake to extract loose peat moss from
the evaporating chamber.
2. Remove the drawer and clear the block by
pouring ½ bucket of hot water through
drawer opening.
3. If still blocked, force in a 4-6" stick or similar
from the unused side of the drain.
4. If the blockage is in the drain hose;- remove,
flush out, and re-attach.
5. Heat trace drain hose to avoid ice-up
LIQUID
COMING
FROM
DRAWER/AIR
INTAKE
See "Drains Blocked"
causes (above) See "Drains Blocked" remedies (above), and if not
done, connect drain to avoid re-occurrence.
See “No Apparent
Evaporation” (above) See “No Apparent Evaporation” remedies (above),
and if not done connect drain to avoid re-occurrence.
MECHANICAL TROUBLE SHOOTING

1An unpleasant smell may be detected only where there is a bad compost (See "Trouble Shooting
your Compost") and then only when there is poor air flow such that insufficient air is being
sucked into unit.
-16-
Symptoms Possible Causes Remedies
POOR
AIR
FLOW
THROUGH
UNIT
Unit is in an air-tight
location and the fan
cannot pull air in.
Provide air supply.
Fan (110 Volt or 12V)
has failed. Remove the bowl liner and reach back to flick the 110V fan
blades. Remove and try the same thing with the 12 V fan. If
this does not restart the fan, then the fan should be replaced.
Instructions are included with the replacement fan.
Device other than Sun-
Mar diffusor is installed. Your device may be discouraging air movement. If so,
replace with a Sun-Mar diffusor.
Sun-Mar diffusor iced
up. Diffusor is probably not needed in winter. Remove until
spring.
Vent has a water trap
where condensation is
collecting and causing a
partial or total blockage.
Re-install the 2" vent so there are no longer any low points
where condensate can collect. If re-installation is not possible,
drill a small hole in the bottom of the low point (preferably
outdoors) to allow condensate to drain. (Note; watch for icing in
winter).
2" vent stack has too
many bends and/or
horizontal lengths, or 4"
vent stack is not straight
enough.
1. Re-install the 2"vent stack to reduce number of bends/
excess horizontal lengths, or straighten 4" vent.
2. If the 2" vent stack cannot be further straightened,
remove the fan assembly and reduce the amount of
recirculating air by covering up the area between the fan
exhaust and the 90ovent intake elbow with duct tape or
similar. If 4" vent is not straight install a 12 Volt fan.
Blockage in stack Check air movement at top of stack. If very little, and other
possible causes eliminated, disassemble stack until blockage
found. Re-assemble, and/or insulate if blockage caused by ice
build up.
UN-
PLEASANT
SMELL
Vent stack is leaking at
joints or is broken. Make sure vent stack and fan assembly gaskets are air tight.
Seal joints/gasket with silicone to permit possible future
access. Vent joints away from the unit can be glued.
See "Poor Air Flow"
causes (above)1See "Poor Air Flow remedies (above).
Bad compost. See earlier section on "Trouble Shooting Your Compost".
-5-
rear, and the 4" vent from the top of the toilet.
The partial vacuum which the fan creates within
the toilet ensures there can be no smell.
Meanwhile, when the 110 Volt fan is not
working, the 4" vent stack acts like a chimney
on a wood stove to provide negative pressure
and prevent odors.
In the 110 volt mode, in addition to a fan, the
evaporation process is further assisted by a
thermostatically controlled heating element
located in a sealed compartment under the
evaporating chamber. This heating element
maintains warmth in the evaporating chamber,
and the indirect warmth also assists the
composting process.
A safety drain at the rear of the composter exits
from both left and right at the rear. These drains
are supplied plugged, but if the unit is to be used
heavily or without 110 volt electricity, one exit
should be connected to drain off any excess
liquid.
Start Up and Use
The "EXCEL AC/DC” requires little
maintenance. To start, put 3-4 gallons of peat
moss mix and a quart of rich top soil in the
drum, (or use Sun-Mar Microbe Mix), moisten
with warm water, and spray "Compost Quick"
into the drum and evaporating chamber under
the drawer. Thereafter, a cupful of peat mix
should be added after every bowel movement.
Although the peat mix included with the unit is
specially formulated for optimum performance,
regular peat moss may usually be used as an
acceptable substitute.
Every third day while the toilet is in use, the
drum should be rotated to mix and aerate the
compost. The drum should be given 4-6
complete revolutions, by turning the handle in a
clockwise direction (Seven turns of the
handle is required for each drum rotation).
To extract compost into the finishing drawer,
pull the drum lock, to enable the handle to
turn anti-clockwise and the drum clockwise.
The drum should be rotated at regular speed,
and as it does so the drum door remains open,
and compost drops automatically into the
finishing drawer.
While it is entirely up to the user, we suggest
that under normal conditions electricity can be
disconnected if the toilet is not going to be
used for over a week.
Winter Use
Because "Sun-Mar" units are made of
fibreglass and high grade stainless steel;
freezing temperatures will not damage the
toilet. Composting action, however, decreases
as the temperature drops, so for extended
winter use attempts should be made to try and
keep the toilet above 60oF (15oC) if possible.
The vent stacks should be insulated to
minimize condensation in the pipe and avoid
ice blockages.
If the toilet is in an unheated space and 110
volt electricity is avaialable, it may be
necessary to keep the toilet plugged in, install
a fan speed control on the toilet so that the fan
is drawing in very little air, and put a blanket
over the toilet.
For periodic use in winter, even where the
compost in the drum is frozen, if there is
enough room in the drum, the toilet may be
used as a “holding tank”, until the compost
warms up and the microbes emerge from
dormancy.

-6- -15-
EXPLOSION DRAWING

-14-
EXCEL AC/DC PART NUMBERS & DESCRIPTIONS
# PART DESCRIPTION # PART DESCRIPTION
1EN-0208 TOILET SEAT 26 EN-0173 NYLON DRIVE GEAR
2EN-0246E BOWL LINER 27 EN-0194 DRUM SCREEN
3EN-0249 NYLON DRUM HINGES 28 EN-0104 EXCEL TANK
4EN-0127 EXCEL DRUM DOOR 29 EN-0571 OVERFLOW DRAIN
5EN-0107B
EN-0108B EXCEL COMPOSTING DRUM 30 EN-0310 THERMOSTAT
6EN-0588 MIXING BAFFLE 31 EN-0120 THERMOSTAT ACCESS PORT
7EN-0126B DRUM LOCK MECHANISM 32 EN-0155 HEATER
8EN-0111B FRONT BEARING PLATE 33 EN-0187 INSULATION
9EN-0113 HUMUS DEFLECTOR 34 EN-0197 AIR INTAKE
10 DRUM HANDLE 35 EN-0188 RUBBER “U” CHANEL
11 EN-0198 FOOTREST CHANNEL 36 EN-0106 EXCEL HEATER TRAY
12 DRUM LOCK RELEASE
13 EN-0109 FINISHING DRAWER
14 EN-0122B FOOTREST
15 EN-0119 FAN COVER
16 EN-0135 FAN CORD
17 EN-0181 POWER CORD
18 EN-0128 FAN DOOR COVER
19 EN-0232 90OVENT INTAKE
20 EN-0129 FAN
21 EN-0305 4" NON-ELECTRIC VENT
22 EN-0101 EXCEL TOP
23 EN-0248 FLAT HD. SCREW (#8Xe” SS)
24 EN-0111B REAR BEARING PLATE
25 EN-0267 ROLL PIN (5/32 X 1¾” SS)
-7-
INSTALLATION
Inspection
Inspect for
Damage Remove the "EXCEL AC/DC" carefully from carton. If the product has been damaged,
contact Sun-Mar to determine the best course of action, and :
i) Note the damage description on the shipping papers.
ii) If the shipper has left, report the damage immediately to the transport Company.
Check Carton
Contents
and
Familiarize
yourself with
the Product.
Check that the carton contains both the 2" and 4" vent stacks (pipe, fittings, roof flashings,
insulation, diffusors, a 12 Volt fan for installation in the base of the 4" vent stack), peat
moss mix, and rake.
i) Turn the drum handle clockwise to rotate the Bio-drum for mixing and aeration.
(The drum rotates counter-clockwise and the drum door shuts).
ii) Depress the drum stopper under bowl liner (1993 and prior) or pull the stopper on
the front of the unit (1994 and on) and turn the handle anti-clockwise to simulate
extraction of compost.
(The Bio-drum rotates clockwise and drum door remains open).
iii) If 110 volt power is available, plug the unit’s electrical cord into a standard electrical
outlet, and put your hand at the top rear of the unit to feel the air movement caused
by the fan.
iv) Pull out the compost finishing drawer (situated below the drum) where the compost
drops for finishing.
v) After the unit has been plugged in for five minutes, place your hand on the floor of
the evaporating chamber (underneath where the drawer was) to check it is warm to
the hand, and the heater and thermostat are functioning properly.
Attaching the Footrest
Attaching and
detaching the
footrest
The footrest attaches to the unit into the slot above the drawer by inclining the footrest at
a 45oangle to the floor, inserting the round top edge of the footrest profile into the round
top edge of the profile on the unit, and lowering the footrest to the floor. It is detached in
the same way, whenever it is necessary to remove the finishing drawer, by lifting the
footrest until it is at a 45o angle and then withdrawing it.
Note: The footrest is designed as a footrest, it is NOT designed for standing on.
Installing the Toilet
Space Required When selecting the best place for your toilet, make sure that there is room (an extra 20" is
required) to remove the finishing drawer from time to time.
Other
Considerations The location of the vent stack, and perhaps the emergency drain may determine the best
place for the toilet. Ensure that the toilet is level front to back or is sloping slightly
backwards. The unit should not tip forward.

-8-
Installing the Vent
Piping
Location
Piping can be installed up the inside wall; through the wall and up the outside wall; or up inside the
wall. The choice depends on ease of installation, visibility, and, (especially if the toilet is to be used
consistently through a cold winter), the need to keep all exposed vent piping insulated
Vent on right is a 4"
non-electric vent. All
others show possible
2" EXCEL vent
configurations.
Piping
Install-
ation
2" pipe and fittings are of standard 2" PVC central vacuum tubing. Additional pipe or fittings are easily
available should you need them. The 4" vent is PVC sewer pipe.
Because each installation is different we make the following general recommendations:-
i) Erect the 4" vent as near to vertical as possible
ii) For the 2" stack, minimise the number of sharp angles because each reduces vent efficiency. Do
not use more than 3 90 degree elbows, and try and use 45 degree elbows wherever possible.
iii) Do not lead the vent pipe downwards at any point because this may lead to the vent pipe being
blocked by condensate.
iv) Use a soft sealant for the connection of the 2" vent stack to the toilet because at some time the
toilet may have to be moved or you may have to access the fan. Also remember that if you are
installing the 12 Volt fan in the 4" vent, or may in the future, you will need to insert it or remove
the 10" section of pipe containing the fan.
v) All exposed 2" vent piping should be insulated with the foam insulation supplied with the
toilet to minimise condensation (especially if winter operation is contemplated). It may also be
useful in some situations to insulate the 4" vent.
Leading
the vent
through
the roof
As shown in the above illustration, the vent stacks should end 2 feet or more above the roof line so that
it is less subject to air turbulence and down draught. Where the piping is taken through the roof, the
roof flashings provided may be used to seal the installation. Where a new roof is being installed, the
roof flashings should be laid underneath the new roofing material.
The
Diffusor The diffusors provided with the unit are simple devices to be installed at the top of the vent stack. The
diffusor design encourages updraught, and discourages wind and weather from going down the vent
stack. Unlike wind turbines, diffusors do not tend to freeze up in winter.
The Overflow Drain
Access
Port
The 1" overflow drains at the rear of the "EXCEL", exit to both left and right.. If the unit is not always going
to be used in the 110 volt mode, the hose provided should be connected to either the left or right exit of the
drain, and be led to away below the level of the drain to an approved facility. The unused exit of the drain
should be capped. (Hose, hose clamp, and cap are all included with the unit).
If the unit is used in the 110 volt mode, the drain if connected offers protection against heavy loading, or
prolonged electrical outage or failure.
-13-
TROUBLE SHOOTING YOUR COMPOST
Characteristics of a Bad Compost
If your compost is over 8 weeks old and it exhibits one or more of the following characteristics, then
it is'bad'.
Extraction Required Too Often
No Obvious Decomposition
Compost is Lumpy
Compost Muddy or Claylike
Flies Present
Compost has Unpleasant Smell
Improving a Bad Compost
Possible Reasons for
Bad Compost Required Action Why?
Too much kitchen/
garden waste added
Insufficient microbes
Too frequent mixing
Insufficient peat moss
Too wet
Too Dry
Insufficient mixing
1 Follow "ANNUAL START UP
PROCEDURE"
then:
2Carry out "ONGOING TOILET
MAINTENANCE"
(If flies present, the compost is probably
dry. Sprinkle diatomaceous earth both on
compost and outside Bio-drum when
mixing compost. Repeat to catch complete
cycle until flies are gone)
Reverting to “Annual
Start Up” procedure
will provide enough
drum space to improve
the compost.
A good compost is
usually not attractive
to flies.
Strong Antibiotics,
or cleaning
chemicals have got
into the compost.
1 Extract all compost
2Wash out Bio-drum
3 Begin "INITIAL SYSTEM START
UP."
Compost was dead and
has to be restarted
Capacity Exceeded
1 Reduce usage down to maximum
capacity if possible
2Follow "ANNUAL START UP",
and then "ONGOING TOILET
MAINTENANCE" procedures.
A SUN-MAR can only
operate beyond rated
capacity for a short
time, and then only
once a good compost
has been established
Mechanical problems
with heating or vent
systems.
See instructions for "MECHANICAL
TROUBLE SHOOTING."

-12-
ANNUAL START UP
Many units are only used during the summer. For such seasonal units Sun-Mar recommends
that the following start up procedure be followed at the beginning of the season.
Action Why?
EMPTY Empty compost, if any, that had been left in
the finishing drawer, and use the rake to
clean out the evaporating chamber.
- Your fertilizer is
ready.
- This is a good
time to remove
any peat debris
EXTRACT
COMPOST Remove additional drawers of compost (if
there is still more than 6-8" in the drum),
by releasing the drum lock, and rotating the
drum clockwise (the handle turns anti-
clockwise) to extract compost into the
drawer. Empty the drawer, and repeat
extraction cycles if necessary until the level
in the drum is reduced to about 6".
- Frees space in the
composting
chamber for
the new
seasons
composting.
Options:
IF COMPOST IS TOO DRY OR
COLD Add 1-2 quarts of very warm water to the compost.
ADD A NEW SOURCE OF
MICROBES Add Sun-Mar “Microbe Mix™”, a few handfuls of
composted matter from garden compost or rich top
soil into the composting drum.
ADD “COMPOST QUICK”
ENZYME Acts as a catalyst to speed composting action.
2Toilet paper is a good source of carbon and should be added after use.
-9-
INITIAL SYSTEM START UP
Commence operation by carrying out the start up procedure described below, and then
continue with the "Ongoing Toilet Maintenance" routine.
It normally takes some weeks before a compost is properly established. You will know this
has happened when:
- Compost volume increases more slowly
- Compost turns black and becomes loam-like
- Toilet paper decomposes within a few days2
Action Why
ADD 3-4 gallons of peat mix (half the 30
Litre bag provided) to the drum - Provides carbon base and initial
mass for compost
ADD One quart of rich topsoil from
different places - Adds necessary microbes which will
breakdown the compost
SPRINKLE About ½ gallon of warm water into
the drum. - Moistens carbon base
PLUG IN Unit, if there is 110V power, so the
fan and heater are operating. - The unit is ready for use
RAKE Loose peat moss from the
evaporating chamber until the
compost is established
- Until the compost is active, some
peat moss may fall through the
screen or drum door into the
evaporating chamber.
Options (If available)
ADD “Microbe Mix” or a few handfuls
of composted matter from garden
compost
- Provides additional source of
microbes
SPRAY "Compost Quick" enzymes into
drum before and after mixing. - Speeds start up of compost
SPRAY "Compost Quick" over complete
surface of evaporating chamber . - Prevents possibility of start-up
odor in evaporating chamber
ONGOING TOILET MAINTENANCE

-10-
The procedure below is designed to keep the compost:
- Moist, but not too wet
- Well aerated and mixed
- Well balanced and aerobic
Action Why?
ADD Add 1 cupful (or 2 handfuls) of Peat Mix or peat moss to the
Bio-drum after every bowel movement. - Maintains the carbon/
nitrogen balance
- Absorbs liquid
- Helps oxygen penetrate
TURN
HANDLE Rotate the drum 4-6 complete revolutions by turning the
drum handle clockwise. Do this twice a week while the
toilet is in use. If used only at weekends, rotate the drum on
departure. After turning, ensure the drum door is in a
vertical position ready to receive waste.
- Mixes and oxygenates
compost
Options:
TO IMPROVE
COMPOSTING SPEED i) Spray "Compost Quick" into Bio-drum before and after rotating
ii) Add one slice of crumbled bread (not mouldy) weekly per person
using the toilet
IF MUDDY OR CLAY-LIKE Add additional peat moss to help oxygen to penetrate the compost
IF TOO DRY Add ½ gallon of FRESH water (very warm) before rotating. Compost
consistency should be that of a wrung out sponge.
IF TOO WET Add wood shavings or chips (not cedar) to the compost instead
of peat moss. By doing this, porosity will be increased, which
will assist aerobic bacteria by allowing more free air space for
oxygen
CAUTION
1. Do NOT add or clean the toilet bowl with chemicals. Chemicals may kill the
bacteria.
INSTEAD, clean the bowl liner with “Compost Quick”, very hot water, baking soda,
or a weak vinegar solution.
2 Do NOT add plastic, glass, metal, cleaning fluids, cigarettes or any other substances
which will disrupt the natural biological process.
3 Kitchen or garden waste is NOT needed, and may be added as a means of disposal
only, once the compost is well established.
PERIODIC CHECK UP
-11-
Once your unit has been through initial or annual start up, and ongoing maintenance
procedures are being followed, Sun-Mar recommends that a system of periodic checks be
undertaken.
Action Why?
RAKE Rake peat moss debris from the evaporating chamber,
making sure to rake from the rear of the chamber. - Ensures drains
cannot get
plugged and
evaporation
improved.
EXTRACT Compost when the Bio-drum is between half and two thirds
full. You may note that at just above bfull the drum door
will have difficulty swinging freely.
Extract compost by releasing the drum lock, and rotating the
drum handle anti-clockwise to turn the drum backwards (at
regular speed) and drop compost into the finishing drawer.
Repeat, if necessary until the finishing drawer is about two
thirds full, and return the Bio-drum to the vertical position.
- Your drum is full
and the drum is no
longer able to mix
effectively
- Don’t overfill the
finishing drawer
LEAVE Leave the compost in the finishing drawer for a few weeks or
until it is next necessary to remove some compost from the
drum.
-Provides extra
time for
composting to be
completed.
Options:
IF COMPOSTING IS TOO
SLOW - Add additional cups of rich top soil, or composted material or
add Sun-Mar “Microbe Mix”
- Add a small quantity of “Compost Quick” enzyme to
compost.
Table of contents
Other Sun-Mar Toilet manuals

Sun-Mar
Sun-Mar CENTREX 2000 User manual

Sun-Mar
Sun-Mar CENTREX 3000 series User manual

Sun-Mar
Sun-Mar Excel CSEL-01001 User manual

Sun-Mar
Sun-Mar CENTREX 1000 User manual

Sun-Mar
Sun-Mar EXCEL User manual

Sun-Mar
Sun-Mar GTG User manual

Sun-Mar
Sun-Mar EXCEL NE User manual

Sun-Mar
Sun-Mar EXCEL User manual

Sun-Mar
Sun-Mar GTG User manual

Sun-Mar
Sun-Mar EXCEL NE User manual