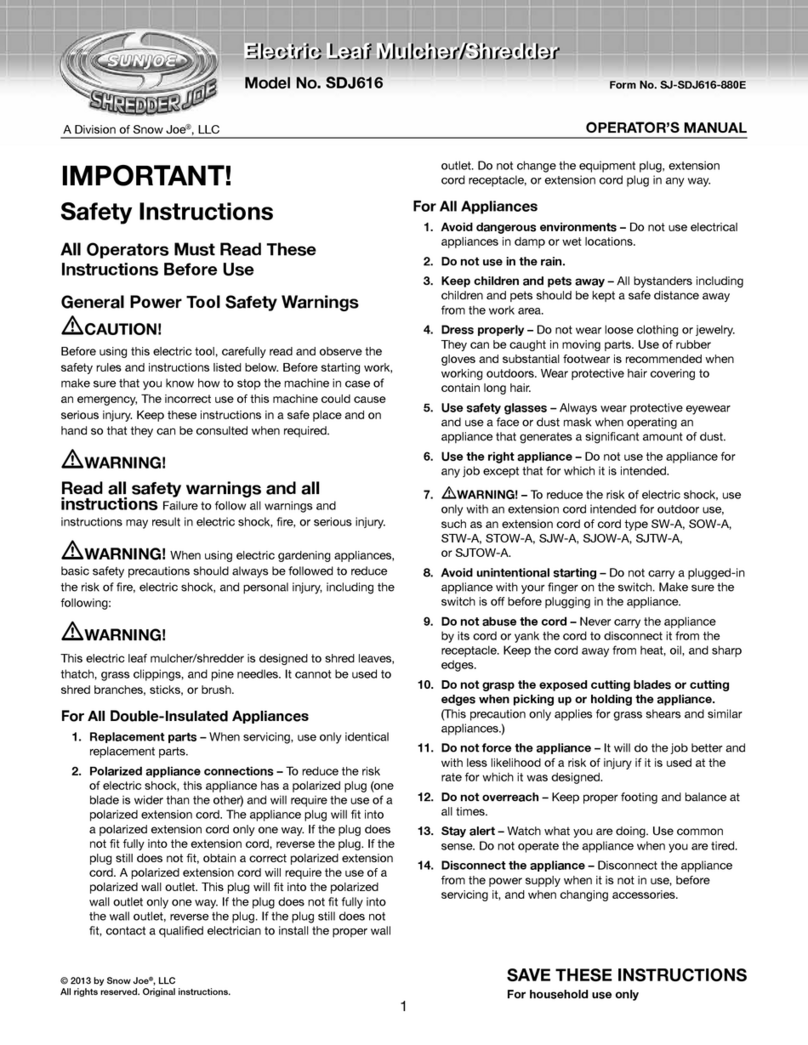
sunjoe SDJ616 User manual

© 2022 by Snow Joe®, LLC
All rights reserved. Original instructions. SAVE THESE INSTRUCTIONS
A Division of Snow Joe®, LLC Model SDJ616 Form No. SJ-SDJ616-880E-MR8
R
OPERATOR’S MANUAL
BLADELESS ELECTRIC
LEAF MULCHER + SHREDDER
13-AMP | 16:1 REDUCTION RATIO
EN
1
IMPORTANT!
Safety Instructions
All Operators Must Read These
Instructions Before Use
Always follow these safety guidelines. Failure to do so may
result in serious bodily injury or property loss.
General Safety WARNINGS!
You and any other operator of this leaf mulcher + shredder
must read, understand, and follow these instructions in
their entirety. Failure to follow these instructions may result
in ELECTRIC SHOCK, FIRE, and/or serious PERSONAL
INJURY.
Notice the personal safety alert symbol mused in this
manual to draw your attention to a WARNING given along
with the particular operating instruction. This means that
the operation requires special ATTENTION, CAUTION, and
AWARENESS.
mWARNING! Wear appropriate personal hearing
protection during use. Under some conditions and duration of
use, noise from this product may contribute to hearing loss.
mWARNING! The rotating part can hurt you. Keep
your hands and other body parts and loose articles of clothing
away from the funnel and discharge area.
Before using the leaf mucher + shredder, familiarize yourself
with the controls, especially how to stop the unit in an
emergency. The only individuals who should use the leaf
mulcher + shredder are those who thoroughly understand
these instructions and know how to properly operate the unit.
Children should never be allowed access to the leaf mulcher +
shredder.
mWARNING! This electric leaf mulcher + shredder
is designed to shred leaves, thatch, grass clippings, and pine
needles. It cannot be used to shred branches, sticks, or brush.
General Safety
1. Avoid dangerous environments – Do not use the leaf
mulcher + shredder in rain or in damp or wet locations. Do
not operate the unit in gaseous or explosive atmospheres
or use the unit near ammable or combustible liquids.
Motors in these tools normally spark, and the sparks
might ignite fumes.
2. Keep children, bystanders, and pets away – All
spectators, including pets, should be kept a safe distance
away from the work area.
3. Dress properly – Do not wear loose clothing or jewelry as
such articles can become caught in moving parts. Wear
a protective covering to contain long hair. Wearing rubber
gloves and substantial non-slip footwear is recommended
when working outdoors.
4. Use safety glasses – Also use dust mask, safety
footwear, snug-tting clothing, protective gloves, hearing,
and head protection.
5. Use the right tool – Do not use this machine for any job
except that for which it was intended.
6. Avoid accidental starting – Do not carry the leaf mulcher
+ shredder with your nger on the switch. Make sure the
switch is o before plugging in or unplugging the unit.
7. Do not abuse the cord – Never carry the leaf mulcher
+ shredder by the cord or yank the cord to disconnect it
from the receptacle. Keep the cord away from heat, oil,
and sharp edges.
8. Do not force the appliance – It will do the job better and
with less likelihood of a risk of injury if it is used at the rate
for which it was designed.
9. Do not overreach – Keep proper footing and balance at
all times.
10. Never leave a running tool unattended – Turn the
leaf mulcher + shredder o and wait until it comes to a
complete stop before leaving the work area.
11. Stay alert – Watch what you are doing. Use common
sense. Do not operate the leaf mulcher + shredder when
you are tired or under the inuence of drugs, alcohol, or
other medication.
12. Disconnect the appliance – Disconnect the appliance
from the power supply when it is not in use, before
servicing it, and when changing accessories.
13. Store idle appliances indoors – When not in use, the leaf
mulcher + shredder should be stored indoors in a dry and
high or locked-up place out of the reach of children.

2
14. Maintain the leaf mulcher + shredder with care –
Keep the cutting line maintained at the proper length
and thickness for optimal performance and to reduce the
risk of injury. Inspect the extension cord periodically and
immediately replace it if damaged. Keep the handles dry,
clean, and free from oil and grease. Follow the additional
recommendations described in the Maintenance section
of this manual.
15. Check for damaged parts – Before further use of the
appliance, a part that is damaged should be carefully
checked to determine that it will operate properly and
perform its intended function. Check for alignment of
moving parts, binding of moving parts, breakage of parts,
mounting, and any other condition that may aect its
operation. A part that is damaged should be properly
repaired or replaced. Contact the Snow Joe®+ Sun Joe®
customer service center at 1-866-SNOWJOE
(1-866-766-9563) for assistance.
Personal Safety
1. This leaf mulcher + shredder should be operated on a
solid, level surface.
2. Disconnect the leaf mulcher + shredder from the power
source when it is not in use, before servicing, and when
replacing the cutting lines.
3. When feeding material into the leaf mulcher + shredder,
make sure that you do not accidentally insert pieces of
metal, rocks, bottles, cans, or other foreign objects.
4. If the cutting mechanism strikes a foreign object or if you
notice an unusual rattling noise or vibration coming from
the leaf mulcher + shredder, immediately switch o the
unit and wait until it comes to a complete stop. Then,
disconnect the power cord and follow the steps below:
a) Remove any foreign or clogged material.
b) Check for any loose parts and tighten them to ensure
continued safe operation.
c) Replace or repair any damaged parts.
mWARNING! Never reach into the funnel until the
leaf mulcher + shredder has come to a complete stop and is
unplugged. The cutting line will continue to rotate for a few
seconds after the unit is turned o.
5. Check the discharge area periodically after stopping the
leaf mulcher + shredder to ensure that the processed
material does not build up and clog the motor cooling
vents.
6. Do not move the leaf mulcher + shredder when the motor
is running or when your nger is on the switch.
Electrical Safety
1. Ground fault circuit interrupter (GFCI) protection should
be provided on the circuit(s) or outlet(s) to be used for
this electric leaf mulcher + shredder. Receptacles are
available having built-in GFCI protection and may be used
for this measure of safety.
2. To prevent electric shock, use only with an extension cord
suitable for outdoor use, such as SW, SOW, STW, STOW,
SJTW or SJTOW.
Before use, check that the extension cord is in good
condition. When using an extension cord, make sure to
use one heavy enough to carry the current to the product.
An undersized cord will cause a drop in line voltage
resulting in loss of power and overheating.
3. To reduce the risk of electric shock, this appliance has
a polarized plug (i.e. one blade is wider than the other).
Use this appliance only with a polarized UL-, CSA-, or
ETL-listed extension cord recommended for outdoor,
all-weather use, such as the Snow Joe®+ Sun Joe®
SJTW-A 14-gauge 50-foot extension cord with lighted
end (Model PJEXT50-B). Visit snowjoe.com to purchase
this extension cord online or, to order by phone, call
1-866-SNOWJOE (1-866-766-9563).
mWARNING! m
Electric shock may cause SEVERE INJURY or
DEATH. Heed these warnings:
• Do not allow any part of the leaf mulcher + shredder
to make contact with water while it is in operation. If
the appliance becomes wet while turned o, wipe dry
before starting.
• Use only a UL-, CSA-, or ETL-rated extension cord
for outdoor, all-weather use, such as the Snow Joe®+
Sun Joe®SJTW-A 14-gauge 50-foot extension cord
with lighted end (Model PJEXT50-B). Visit
snowjoe.com to purchase this extension cord online
or, to order by phone, call 1-866-SNOWJOE
(1-866-766-9563).
• Do not use an extension cord over 100 ft (30 m).
• Do not touch the appliance or its plug with wet hands
or while standing in water. Wearing rubber boots
oers some protection.
EXTENSION CORD CHART
Cord Length:
Min. Wire Gauge (A.W.G.):
50 ft (15 m)
14
100 ft (30 m)
12

3
The appliance plug will t into a polarized extension
cord only one way. If the appliance plug does not t
fully into the extension cord, reverse the plug. If the plug
still does not t, obtain a correct polarized extension
cord. A polarized extension cord will require the use of a
polarized wall outlet. The extension cord plug will t into
the polarized wall outlet only one way. If the plug does
not t fully into the wall outlet, reverse the plug. If the plug
still does not t, contact a qualied electrician to install
the proper wall outlet. Do not modify the appliance plug,
extension cord receptacle, or extension cord plug in
any way.
4. To prevent the appliance cord from disconnecting from the
extension cord during operation, make a knot with the two
cords as shown in Table 1.
5. Power tool plugs must match the outlet. Never modify
the plug in any way. Do not use any adapter plugs with
earthed (grounded) power tools. Unmodied plugs and
matching outlets will reduce the risk of electric shock.
6. Avoid body contact with earthed or grounded surfaces,
such as pipes, radiators, ranges and refrigerators. There is
an increased risk of electric shock if your body is earthed
or grounded.
7. If the supply cord is damaged, it must be replaced by an
electrician or a power tool repairer.
8. When operating a power tool outdoors, use an extension
cord suitable for outdoor use. Use of a cord suitable for
outdoor use reduces the risk of electric shock.
9. If operating a power tool in a damp location is
unavoidable, use a residual current device (RCD)
protected supply. Use of an RCD reduces the risk of
electric shock.
10. Have your tool repaired by an electrician or a qualied
service center. This power tool complies with relevant
safety requirements. To avoid danger, electrical appliances
must only be repaired by qualied personnel using original
spare parts; otherwise this may result in considerable
damage to the user.
Double-Insulated Appliances
In a double-insulated appliance, two systems of insulation
are provided instead of grounding. No grounding means is
provided on a double-insulated appliance, nor should a means
for grounding be added to the appliance. Servicing a double-
insulated appliance requires extreme care and knowledge
of the system, and should be performed only by qualied
service personnel at an authorized Snow Joe®+ Sun Joe®
dealer. Replacement parts for a double-insulated appliance
must be identical to the parts they replace. A double-insulated
appliance is marked with the words “Double Insulation” or
“Double Insulated.” The symbol (square within a square)
may also be marked on the appliance.
DOUBLE-INSULATED: GROUNDING NOT
REQUIRED. WHEN SERVICING, USE ONLY
IDENTICAL REPLACEMENT PARTS.
This leaf mulcher+ shredder is double-insulated, eliminating
the need for a separate grounding system. Use only identical
replacement parts. Read the instructions before servicing
double-insulated appliances. Use this electric leaf mulcher +
shredder only as described in this manual.
(B) Connect plug and receptacle
Cord set Appliance cord
(A) Tie cord as shown
Table 1. Method of Securing Extension Cord

4
Safety Symbols
The following table depicts and describes safety symbols that may appear on this product. Read, understand, and follow all
safety instructions before attempting to assemble and operate the electric leaf mulcher + shredder.
Symbols SymbolsDescriptions Descriptions
SAFETY ALERT – indicates a
precaution, a warning, or a danger.
CAUTION! Remove plug from the
outlet immediately if the cord is
damaged or cut.
READ THE OPERATOR’S
MANUAL(S) –Read, understand,
and follow all safety instructions in
the manual(s) before attempting to
assemble and operate.
CAUTION! Remove plug from the
outlet before conducting
inspection, cleaning, or
maintenance.
WARNING! Do not expose the unit
to rain or wet conditions.
WEAR EYE AND HEARING
PROTECTION – For protection
against injury, wear ear
defenders and safety goggles.
DANGER! Keep hands and feet
away from the cutting area.
Wear foot protection when using
the machine and handling debris.
Double insulation.
Keep bystanders at a safe distance
away from the work area.
Wear protective gloves when using
the machine and handling debris.
Thrown objects and rotating
blade can cause severe injury.

5
Know Your Bladeless Electric Leaf Mulcher + Shredder
Read the owner’s manual and safety instructions carefully before operating the electric leaf mulcher + shredder. Compare the
illustration below to the electric leaf mulcher+ shredder in order to become familiar with the location of the various controls and
adjustments. Save this manual for future reference.
1. Funnel cover
2. Funnel
3. Locking tab
4. Clamp
5. Air vent
6. Motor bracket
7. Height adjustment knob
8. Appliance cord
9. Assembling hole for leg
10. Telescoping leg
11. On/Oswitch
12. Elastic strap
13. Mulch adjustment control dial
14. Spinning head
15. Cutting line
16. Additional cutting lines
Technical Data
Rated Voltage........................................................120V ~ 60 Hz
Motor .............................................................................13-amp
No Load Speed .......................................................... 8000 rpm
Particle Reduction Ratio...................................................... 16:1
Mulch Capacity ..................................... 55 gal/min (208 L/min)
Funnel Diameter .................................................18.9 in. (48 cm)
Max Cutting Diameter ........................................12 in. (30.4 cm)
Line Diameter ................................................... 0.1 in. (0.25 cm)
Line Length.........................................................12.6 in. (32 cm)
Net Weight.........................................................14.5 lbs (6.6 kg)
14 15
16
13
12
11
10
8
4
5
6
7
1
2
3
9

6
Unpacking
Carton Contents
• Funnel cover
• Funnel
• Motor bracket
• Telescoping legs (3)
• Additional cutting lines (20)
• Manual with registration card
1. Carefully remove the electric leaf mulcher + shredder and
check to see that all of the above items are supplied.
2. Inspect the product carefully to make sure no breakage or
damage occurred during shipping. If you nd damaged or
missing parts, DO NOT return the unit to the store. Please
call the Snow Joe®+ Sun Joe®customer service center at
1-866-SNOWJOE (1-866-766-9563).
NOTE: Do not discard the shipping carton and packaging
material until you are ready to use the leaf mulcher +
shredder. The packaging is made of recyclable materials.
Properly dispose of these materials in accordance with
local regulations or save the packaging for long-term
product storage.
IMPORTANT! The equipment and packaging material are not
toys. Do not let children play with plastic bags, foils, or small
parts. These items can be swallowed and pose a suocation
risk!
Assembly
mWARNING! Do not connect to the power supply
until assembly is complete. Failure to comply could result in
accidental starting and serious personal injury.
Mulcher Stand Assembly
1. Loosen the height adjustment knob on the telescoping leg
by turning it counter-clockwise (Fig. 1).
2. Pull the tube to the desired height. Tighten the knob
clockwise to secure the leg in place (Fig. 2).
3. With your nger pressed against the leg pin, insert the leg
into the hole on the motor bracket. Let the pin slip into the
hole to secure the leg in place. Repeat steps 1 through
3 with the other two legs until all three legs are properly
tted (Fig. 3).
4. Stand up the unit, and ensure it stands securely on all
three legs (Fig. 4).
Fig. 1
Telescoping leg
Height adjustment knob
Fig. 2
Telescoping leg Leg pin
Fig. 3
Assembly
hole
Leg pin
Fig. 4

7
Funnel Assembly
1. Fit the funnel onto the motor housing, aligning the
funnel gap with the motor bracket rib. Lock the clamps
located on the motor bracket to secure the funnel in place
(Fig. 5).
2. Fit the funnel cover in the funnel. Use the 8 locking tabs
on the funnel to ensure a secure t (Fig. 6).
Fitting the Collection Bag
NOTE: This unit does not come with a leaf collection bag;
you must supply your own. You may use a plastic, paper, or
cloth collection bag, depending on your preferred method of
waste disposal.
1. Open the bag and t it around the motor housing (Fig. 7).
2. Use the elastic strap located at the base of the motor
bracket to secure the bag in place (Fig. 8).
Gap lines up with rib
Motor housing rib guide
Fig. 5
Clamp
Funnel
Fig. 6 Funnel cover
Locking tabs
Funnel
Fig. 7
Leaf collection bag
Leaf collection
bag
Fig. 8
Elastic strap

8
NOTE: You can remove the telescoping legs and t the motor
bracket assembly onto a leaf-bag lined trash container for
easy and convenient disposal of the shredded waste.
Operation
Starting + Stopping
mCAUTION! To prevent exposure to dusty warm air,
do not stand in front of the motor ventilation slots.
1. Make sure the On/O switch is in the OFF position.
Plug the leaf mulcher + shredder's appliance cord into
a suitable outlet using an approved extension cord if
necessary (Fig. 9).
2. The On/O switch is located on the lower side of the
motor housing portion of the power head. To turn on, push
the green button. To turn o, push the red button (Fig. 10).
mWARNING! The motor will continue running for a
while after the unit is turning o.
Loading Your Machine
1. With the unit running, feed double handfuls of dry leaves
or single handfuls of wet leaves into the funnel (Fig. 11).
2. Allow the machine sucient time to shred the load
completely and regain speed before inserting the next
handful.
NOTE: Do not overload the machine by letting it labor at low
speed; this may cause the motor to stop.
mWARNING! Wear protective gloves while loading the
machine. Keep your hands away from the spinning head and
the cutting lines when loading the machine.
mWARNING! Filling the mulcher with unshredded
material at a rate faster than the machine can handle may
result in permanent damage to the motor. Always wear
protective glasses and a dust mask.
Fig. 9
Appliance
cord
Extension
cord
On/O button
Fig. 10
Funnel
Fig. 11

9
Adjusting the Control Dial
The control dial regulates the particle size and speed at which
material passes through the unit. When the control dial is
set in the COARSE position, material will process through
the unit faster, but will yield a larger particle size than if the
dial were set to the FINE position. The FINE position setting
will discharge the material slower, but will yield the smallest
particle reduction ratio (up to 16 : 1). Use the special settings
for pine needles, grass clippings, and thatch as needed. For
best results, material should be shredded when dry (Fig. 12).
Overheating Protection
Your electric leaf mulcher + shredder is designed with
overheating protection. If the shredder is clogged during
shredding, the overheating protection will cut the power
automatically to protect your shredder. Wait at least 1 minute
before restarting the unit when the power is cut.
1. To restart the leaf mulcher + shredder, rst press push the
red OFF button (Fig. 13).
On/O button
Fig. 13
2. Then, push the green ON button to restart the leaf mulcher
+ shredder (Fig. 13).
Maintenance
mATTENTION! Before performing any cleaning or
maintenance, turn o the unit and disconnect it from the power
supply. Wait until the unit stops completely.
Cleaning
1. Use only a warm damp cloth and a soft brush to clean the
funnel cover and the funnel.
2. Never spray water on the unit's motor bracket or wash
it with water. Do not use detergents or solvents as these
could cause irreparable damage to your leaf mulcher +
shredder.
3. Make sure the ventilation slots are always kept clean and
are free of debris.
4. Remove the funnel to clean the inside of the unit. Open
the two clamps that secure the funnel and remove the
funnel (Fig. 14).
5. Clean the spinning head and the discharge area. Remove
wood sticks or objects that may clog the cutting lines.
Check the lines for damage.
6. After cleaning the inside of the leaf mulcher + shredder,
replace the funnel and lock the clamps.
W
E
T
L
E
A
V
E
S
D
R
Y
L
E
A
V
E
S
P
I
N
E
G
R
A
S
S
,
T
H
A
T
C
H
C
O
A
R
S
E
M
E
D
I
U
M
F
I
N
E
N
E
E
D
L
E
S
Fig. 12
Fig. 14
Funnel
Clamp
Clamp

10
Cutting Lines Replacement
The leaf mulcher + shredder has two 0.1 in. x 12.6 in.
(2.5 mm x 320 mm) heavy-duty trimmer lines that are attached
to the spinning head. Before any maintenance or cleaning
is done on the trimmer lines, always turn the switch o and
disconnect the plug from the outlet, and wait until it comes to
a complete stop.
IMPORTANT: Only use original replacement parts specied for
this leaf mulcher + shredder.
You can purchase replacement cutting lines (Model SDJ616L)
and other genuine replacement parts by ordering online at
sunjoe.com or, to order by phone, contact Snow Joe®+
Sun Joe®customer service at 1-866-SNOWJOE
(1-866-766-9563). The use of parts that do not meet the
original equipment specications may lead to improper
performance of the leaf mulcher + shredder, may compromise
operator safety, and will void the manufacturer's warranty.
1. Replace the cutting line when a noticeable decrease in
shredding eciency is observed. To remove the worn
cutting lines, cut the old lines and pull the remaining line
out of the spinner head.
2. When installing new cutting lines, feed each end of the
new line through the two holes in the post on top of the
spinner head (Fig. 15).
3. Check that the two ends of the line are even in length on
both sides (Fig. 16).
4. Thread the lines through each corresponding ferrule.
Ensure that both ends of the line are straight and are even
in length (Figs. 17 – 18).
Fig. 15
Spinning head
Ferrule
Fig. 16
Even length
Fig. 17
Fig. 18

11
5. Refer to the above steps to replace another cutting line
(Fig. 19).
NOTE: There is a built-in line cutter that will cut and trim the
lines slightly longer than desired.
mWARNING! For optimal performance, use only
replacement cutting lines designed specically for this electric
leaf mulcher + shredder (Model SDJ616L).
Monolament lines having a maximum diameter of 0.1 in.
(2.5 mm) and a maximum length of 12.6 in. (320 mm) long may
be temporarily substituted, but this is NOT recommended.
Use of thicker lines, lines made of substitute material, or lines
greater than 12.6 in. (320 mm) long may result in permanent
damage to the motor and will void the manufacturer’s
warranty. Immediately replace any worn parts of the spinner
head.
Storage
When storing the electric leaf mulcher + shredder at the end
of the season, disassemble the unit and stack the parts in the
following order (Fig. 20):
1. Place the funnel into the box.
2. Fit the motor bracket into the funnel.
3. Place the funnel cover onto the motor bracket.
4. Rest the legs in the box beside the funnel.
Service and Support
If your Sun Joe®bladeless electric leaf mulcher + shredder
requires service or maintenance, please call the Snow Joe®+
Sun Joe®customer service center at 1-866-SNOWJOE
(1-866-766-9563).
Model and Serial Numbers
When contacting the company or reordering parts, you will
need to provide the model and serial numbers of your product.
These are found on the decal axed to the housing or handle
of your electric leaf mulcher + shredder. Copy these numbers
into the space provided below.
Fig. 19
Fig. 20
Record the following numbers from the housing or handle of your
new product:
S D J 6 1 6
Model #:
Serial #:
Other manuals for SDJ616
2
Table of contents
Other sunjoe Paper Shredder manuals
Popular Paper Shredder manuals by other brands

Hama
Hama BASIC S6 operating instructions

GEHA
GEHA top secret 240 operating instructions

Fellowes
Fellowes Microshred MS-460Cs user manual

MTD
MTD 244-650A Owner's operating service instruction manual

Fellowes
Fellowes Powershred PS-60 instruction manual

Martin Yale
Martin Yale Intimus 20CC3 instruction manual