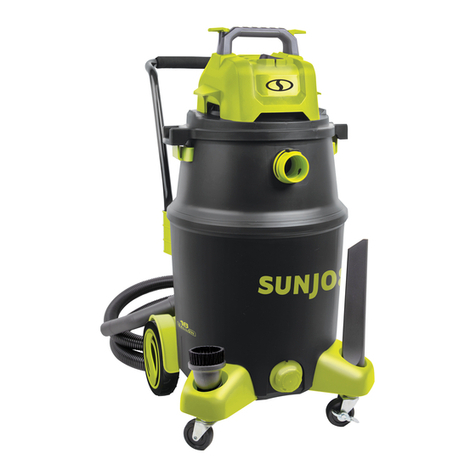
sunjoe AJV1000 User manual

© 2020 by Snow Joe®, LLC
All rights reserved. Original instructions. SAVE THESE INSTRUCTIONS
A Division of Snow Joe®, LLC
OPERATOR’S MANUAL
Model AJV1000 Form No. SJ-AJV1000-880E-MR1
RCORDLESS HANDHELD AUTO VAC
8.4V MAX* | USB CHARGE SYSTEM
IMPORTANT!
Safety Instructions
All Operators Must Read These
Instructions Before Use
Any electrical appliance can be dangerous if used incorrectly.
Some of the safety precautions given in this manual apply
generally to many appliances. Other warnings are specic to
the use of this cordless handheld vacuum.
Always follow these safety guidelines. Failure to do so may
result in electric shock, re and/or serious personal injury.
General Safety
Before using, be sure that everyone using this tool reads
and understands all safety instructions and other information
contained in this manual. Save this manual and review it
frequently prior to using this tool and when instructing
others on the proper operating procedures.
Before using the handheld vacuum, take the time to familiarize
yourself with the controls. Children should never be allowed
access to the handheld vacuum.
Retain this manual for future reference.
mWARNING! To reduce the risk of electric shock, DO
NOT expose to rain. Store indoors.
1. Dress properly. Do not wear loose clothing or jewelry.
Contain long hair. Keep your hair, loose clothing, ngers,
and all parts of the body and clothing, away from
openings and moving parts. Loose clothes, jewelry, or
long hair can be caught in internal moving parts.
2. Do not overreach. Keep proper footing and balance at all
times. Proper footing and balance enables better control
of the handheld vacuum in unexpected situations. Do not
use on a ladder or unstable support.
3. Use safety equipment. Dust mask must be used for
appropriate conditions.
4. Do not allow children to operate the hand vacuum or
play with handheld vacuum as a toy. Close attention is
necessary when used by or near children.
5. Use this handheld vacuum ONLY for its intended use
as described in this manual. Use only the attachments
recommended in this manual.
6. If the handheld vacuum is not working properly, has been
dropped, damaged, left outdoors, or dropped into water,
do not use. Contact Snow Joe®+ Sun Joe®customer
service center at 1-866-SNOWJOE (1-866-766-9563).
7. Do not handle the USB charge cable and the charger
adapter or the handheld vacuum with wet hands.
8. Do not put any objects in ventilation openings. Do not use
with any opening blocked. Keep openings free of dust,
lint, hair, and anything that may reduce air ow.
9. NEVER vacuum materials that are burning or smoking,
such as hot coals, cigarette butts, matches, burning or
smoking ashes, etc.
10. This unit is for dry vacuuming only. Do not use to clean
up liquids.
11. DO NOT use to pick up ammable or combustible liquids,
such as gasoline, or use in areas where they may be
present.
12. Do not use without the dust tank or the HEPA lter in
place.
13. Use extra care when using on stairs.
14. Do not use to pick up hard objects such as nails, screws,
coins, etc. Damage or injury could result.
15. Do not incinerate this appliance even if it is severely
damaged. The batteries can explode in a re.
16. This handheld vacuum does not have to be plugged into
an electrical outlet, therefore it is always in operating
condition. Be aware of possible hazards when using the
handheld vacuum or when changing accessories.
17. Batteries can explode in the presence of a source of
ignition, such as excessive heat or a pilot light. To reduce
the risk of serious personal injury, never use any cordless
product in the presence of an open ame or temperature
above 265 °F (130 °C). An exploded battery can propel
debris and chemicals. If exposed, ush with water
immediately.
18. Protect your lungs. Wear a face or dust mask if the
operation is dusty. Following this rule will reduce the risk
of serious personal injury.
19. Check for misalignment or binding of moving parts,
breakage of parts, and any other condition that may aect
the handheld vacuum’s operation. If damaged, have the
handheld vacuum serviced before using. Many accidents
are caused by poorly maintained handheld vacuums.
20. Use only accessories that are recommended by the
manufacturer for your model. Accessories that may be
suitable for one handheld vacuum may create a risk of
injury when used on another handheld vacuum.
1

2
21. Do not let gasoline, oils, petroleum-based products, etc.,
come in contact with plastic parts. They contain chemicals
that can damage, weaken, or destroy plastic.
22. This product contains no serviceable parts. Never attempt
to remove or replace any parts other than those specied
in this manual.
23. Do not run the handheld vacuum unattended.
24. Keep children and animals at a safe distance when using
this appliance.
25. Do not use this vacuum with a torn lter or without the
lter installed. Replace a damaged lter promptly.
26. Do not use or store near hazardous materials.
Battery Safety Warnings
This manual contains important safety and operating
instructions for your battery and charger.
1. Before using, always check the charger, cable and plug.
If defects are detected, do not use the charger; never
open the charger. Thoroughly read all instructions and
cautionary markings on the manual, the charger, and the
cordless handheld vacuum.
mWARNING! If the cordless handheld vacuum is cracked
or damaged, do not insert the charging adapter into the power
tool or plug the power tool into the mains outlet. There is a
danger of electric shock or electrocution.
2. Protect the battery charger from rain and moisture. Water
penetration in a battery charger increases the risk of
electric shock.
3. Recharge only with the charger specied by the
manufacturer (AJV1000-USBCHARGER). A charger that is
suitable for one type of battery pack may create a risk of
re when used with another battery pack.
4. Under abusive conditions, liquid may be ejected from
the battery; avoid contact. If contact accidentally occurs,
ush with water. If liquid contacts eyes, additionally seek
medical help. Liquid ejected from the battery may cause
irritation or burns.
5. Do not use a battery pack or appliance that is damaged
or modied. Damaged or modied batteries may exhibit
unpredictable behavior resulting in re, explosion or risk of
injury.
6. This charger is ONLY intended to charge the rechargeable
battery inside of the cordless handheld vacuum. Any other
use poses a risk of re, electric shock or electrocution.
7. Do not modify or attempt to repair the appliance or the
battery pack except as indicated in the instructions for
use and care.
8. Keep the battery charger clean. Contamination may
increase the risk of electric shock.
9. Do not place any object on top of the charger or place
the charger on a soft surface that may result in excessive
internal heat. Keep the charger away from any heat
source.
10. To reduce the risk of damaging the charger adapter and
the USB cable, pull the charger adapter, not the USB
cable, when disconnecting the charger from the electric
outlet.
11. Make sure the USB cable is located in a safe place so
that it will not be stepped on, tripped over or otherwise
subjected to damage or stress.
12. An extension cord should not be used unless absolutely
necessary. Using an improper extension cord poses a risk
of re, electric shock or electrocution.
13. Do not operate the adapter if it has received a sharp
blow or has become damaged in any way. Contact
the Snow Joe®+ Sun Joe®customer service center at
1-866-SNOWJOE (1-866-766-9563) before continuing
use.
14. Do not disassemble the charger adapter. Incorrect
reassembly may pose a serious risk of electric shock
or re. If the battery or charger are damaged, contact
an authorized Snow Joe®+ Sun Joe®dealer or call
the Snow Joe®+ Sun Joe®customer service center at
1-866-SNOWJOE (1-866-766-9563) for assistance.
15. To reduce the risk of electric shock, unplug the charger
from the outlet before cleaning the unit.
16. Never attempt to connect two (2) chargers together.
17. DO NOT store or use the tool and the charger in locations
where the temperature may reach or exceed 104 ºF
(40 ºC). Dangerous storing locations include outdoor
sheds or metal buildings in the summer.
18. The charger is designed to operate on standard household
electrical power (100 -240 V). Do not attempt to use it with
any other voltage!
NOTE: The integrated battery is not fully charged out of
the carton. Read the safety instructions and then follow
the charging notes and procedures.
19. The longest life and best performance can be obtained if
the integrated battery is charged when the air temperature
is between 64.4 ºF – 75.2 ºF (18 ºC – 24 ºC). Do not
charge the battery pack when the air temperature falls
below 50 ºF (10 ºC) or above 104 ºF (40 ºC). Following
these safety measures will prevent damage to the battery
pack.
20. Do not incinerate the integrated battery even if it is
seriously damaged or completely worn out. The battery
can explode in a re.

Service
1. Have servicing performed by a qualied repair person
using only identical replacement parts. This will ensure
that the safety of the product is maintained. If your power
tool requires service, contact an authorized Snow Joe®
+ Sun Joe®dealer or call the Snow Joe®+ Sun Joe®
customer service center at 1-866-SNOWJOE
(1-866-766-9563). Only identical replacement parts should
be utilized for repairs. This will ensure that the safety of the
power tool is maintained.
2. If the USB cable or the charger adapter is damaged, it
must be immediately replaced to avoid a hazard. Contact
the Snow Joe®+ Sun Joe®customer service center at
1-866-SNOWJOE (1-866-766-9563) for assistance.
3

4
Safety Symbols
The following table depicts and describes safety symbols that may appear on this product. Read, understand, and follow all
instructions on the machine before attempting to assemble and operate.
To reduce the risk of electric
shock, do not use outdoors or
in damp or wet environments.
Do not expose to rain. Store
indoors in a dry place.
Safety alert. Exercise caution.
Symbols Descriptions Symbols Descriptions
To reduce the risk of injury,
user must read the instruction
manual.
Indoor use only. Only use battery
charger indoors.

Know Your Cordless Handheld Vacuum
Read the owner’s manual and safety rules carefully before operating the handheld vacuum. Compare the illustration below to the
unit in order to familiarize yourself with the location of the various controls and adjustments. Save this manual for future reference.
5
1
2
3
4
5
7
8
910
11
12
BACK
13
14
1. Motor housing
2. HEPA lter
3. Dust tank
4. Dust retaining ap
5. Vacuum cap
6. Nozzle
7. Release button
8. 2-in-1 nozzle + brush attachment
9. Charger adapter
10. USB charging cable
11. Charge level indicator
12. On/O button
13. USB charge socket
14. Handle
Technical Data
Motor .................................................... 60 W
Battery Voltage* .................................... 8.4 V D.C.
Battery Capacity ................................... 2.0 Ah
Battery Type ......................................... Lithium-iON
Charger Input ........................................ 100 – 240 V AC,
50 – 60 Hz
Charger Output ..................................... 5 V DC, 1 A
Battery Runtime Max ............................. 12 min
Battery Charge Time Max ...................... 4 hours
Vacuum Pressure Max ........................... 4 kPa
Air Flow Max .......................................... 14.1 CFM (0.4 m3/min)
Dust Tank Capacity ............................... 3.4 oz (100 ml)
Weight (no attachments) ........................ 1.4 lbs (0.6 kg)
6
*Initial no-load voltage, when fully charged, peaks at 8.4 volts; nominal voltage under typical load is 7.4 volts.

Unpacking
Carton Contents
• Cordless handheld vacuum
• 2-in-1 nozzle + brush attachment
• Charger adapter
• USB charging cable
• Manuals with registration card
1. Carefully remove the handheld vacuum and check to see
that all of the above items are supplied.
2. Inspect the product carefully to make sure no breakage or
damage occurred during shipping. If you nd damaged or
missing parts, DO NOT return the unit to the store. Please
call the Snow Joe®+ Sun Joe®customer service center at
1-866-SNOWJOE (1-866-766-9563).
NOTE: Do not discard the shipping carton and packaging
material until you are ready to use your new handheld
vacuum. The packaging is made of recyclable materials.
Properly dispose of these materials in accordance with
local regulations.
IMPORTANT! The equipment and packaging material are not
toys. Do not let children play with plastic bags, foils, or small
parts. These items can be swallowed and pose a suocation
risk!
Before Using
Charging Procedure
The battery charger supplied matches the lithium-ion battery
installed in the tool. Do not use other battery chargers.
The lithium-ion battery is protected against deep discharging.
When the battery is empty, a protective circuit will
automatically switch OFF the equipment. The vacuum will no
longer work.
Charge the battery up to 4 hours then use it until it runs down.
Recharge for up to 4 hours again before resuming operation.
mWARNING! Continued and excessive overuse of the
ON/OFF button can permanently damage the lithium-ion
battery.
• During the charging procedure, the handle and the
housing of the tool will feel slightly warm to the touch.
This is normal.
• When no further use is planned for an extended period of
time, disconnect the battery charger from the outlet and
the unit.
• Do not use the tool during the charging procedure.
Battery Charge Level Indicator
The equipment has charger level indicators, which will
illuminate and indicate the charge level when the unit is being
used, and when the unit is connected with charger.
• All 3 level monitoring LEDs are lit white: Battery charge
level is high.
• 2 level monitoring LEDs are lit white: Battery charge level
is decreasing.
• 1 level monitoring LED is lit white: Battery is almost at.
Stop work and charge the battery.
• 1 level monitoring LED is lit red: Battery is at. Stop work
IMMEDIATELY and charge the battery. Otherwise the
battery’s service life will be greatly shortened.
Battery Charging
The length of service between each charging varies depending
on the type of work you are doing. The battery in this handheld
vacuum has been designed to provide maximum trouble-
free life. However, like all batteries, it will eventually wear out.
To obtain the longest possible battery life, we suggest the
following:
• Store and charge your cordless handheld vacuum in a
cool area. Temperatures above or below normal room
temperature will shorten battery life.
• Never store the cordless handheld vacuum with the
battery in a discharged condition. Recharge the unit
immediately after it is discharged.
• All batteries gradually lose their charge. The higher the
temperature is, the faster they lose their charge. If you
store your cordless vacuum for long periods of time
without using it, recharge the battery every 6 months. This
will extend battery life.
NOTE: The cordless handheld vacuum has been shipped in a
low charge condition and should be fully charged before use.
1. Plug the charger adapter into an appropriate AC power
outlet. Connect the charger adapter and the handheld
vacuum with the USB charging cable, as shown (Fig. 1).
NOTE: The cordless handheld vacuum can also be
charged by connecting with other USB ports (e.g. laptop
USB port) through the equipped USB charging cable.
6

2. The battery will take approximately 4 hours to charge.
The battery indicator LEDs will twinkle and illuminate one
by one during the charging process. Unplug the charger
immediately when the 3 LEDs are all illuminated.
NOTE: The cordless handheld vacuum is equipped with
charging overheating protection. When the temperature
is too high during charging, the LED light close to the On/
O button will be lit red and the charging process will be
stopped. Disconnect the unit from the charger and wait
until it cools down before reconnecting it to charge.
3. Timely recharging of the tool will help prolong the battery's
life. You must recharge the tool according to the charger
level indicator.
mWARNING! This charger does not automatically turn o
when the battery is fully charged. Please take care not to leave
the battery plugged into the charger. Switch o or unplug the
charger at the mains when charging is complete.
IMPORTANT! Never allow the tool to become fully discharged
as this will cause irreversible damage to the battery.
Operation
This cordless handheld vacuum is designed to clean hard
surfaces. It is only suitable for vacuuming dry, light materials.
The vacuuming of heavy materials and liquid is expressly
excluded. Using this tool in any way that doesn't comply
with the designed intent will cause malfunction and void the
warranty.
mWARNING! Do not allow familiarity with this product
to make you careless. Remember that a careless fraction of a
second is sucient to inict serious injury.
mWARNING! Do not use any attachments or accessories
that are not recommended by the manufacturer. The use of
attachments or accessories not recommended can result in
serious personal injury.
Starting/Stopping the Vacuum
1. Before operation, remove the air vacuum cap from the
vacuum (Fig. 2).
2. Make sure the lter is installed and the dust tank is
securely attached.
3. With the nozzle pointed to the dust/debris to be cleaned,
press the On/O button (Fig. 3).
NOTE: Before switching on the handheld vacuum, make
sure that it is not in contact with any foreign objects.
4. After use, turn o the vacuum by pressing the On/O
button (Fig. 3). Replace the vacuum cap before storing.
Empty the Dust Tank
1. It's recommended to empty the dust tank every time after
using. Turn o the vacuum. Wait until the tool is stopped
completely.
2. Remove the dust tank by twisting it clockwise, and pull it
out from the vacuum (Fig. 4).
NOTE: Be careful of dust dropping out when
disconnecting the dust tank from the vacuum. It's
recommended to point the vacuum nozzle toward the
ground to avoid this when removing the dust tank.
Fig. 1
Charger adapter
USB charging
cable
Charge socket
Fig. 2
Vacuum cap
Fig. 3
On/O button
7

3. Remove the HEPA lter from the dust tank (Fig. 5).
4. Discard the debris and dust from the dust tank according
to local laws and regulations (Fig. 5).
5. Reassemble the lter and the dust tank when all debris/
dust are removed. Insert the HEPA lter inside the dust
tank, and reattach the dust tank to the vacuum. Push in
and turn the tank counterclockwise until it locks in place
(Fig. 7).
Use the 2-in-1 Nozzle + Brush
attachment
The included 2-in-1 nozzle + brush attachment is suitable for
cleaning small areas and collecting ne dust. To use the nozzle
+ brush attachment, follow the instructions below.
1. Turn o the vacuum and wait until it completely stops.
2. Insert the 2-in-1 nozzle + brush attachment into the
vacuum nozzle, press rmly until it's locked in place (Fig.
8)
Fig. 4
Dust tank
Twist clockwise1
Pull out
2
Fig. 5
Dust tank
HEPA lter
Fig. 6
Fig. 7
Dust tank
HEPA lter
Insert in
1
Twist
counterclockwise
2
8

9
3. To use the nozzle without the brush, press the release
button and slide the brush up (Fig. 9).
mWARNING! Do not adjust the 2-in-1 nozzle + brush
attachment while the tool is switched on. Doing so could result
in injury.
Operation Tips
mWARNING! Use the cordless handheld vacuum only in
daylight or good articial light.
• Make sure the dust tank with the HEPA lter is properly
installed and secured when using. Failure to properly
secure the assembly could cause the dust tank and the
HEPA lter to release from the equipment.
• Double check to make sure the HEPA lter is not broken
or torn. Do not use lter that are broken or torn. Handle
the lter carefully when removing and installing.
• This unit is intended for indoor use only. Do not use this
unit outdoors.
• Be extremely careful when working on slopes and stairs.
• Clean up after using the handheld vacuum. Dispose of
debris appropriately.
mWARNING! To avoid personal injury, wear ear
protectors when operating this unit. Wear a face mask or dust
mask in dusty locations.
Basic Vacuuming Procedure
• Always hold the unit on the handle when the vacuum is
on.
• During vacuuming, keep the nozzle at a distance of
approximately 0.4 inch (1 cm) above the material to be
vacuumed.
NOTE: The cordless handheld vacuum is equipped with
working overheating protection. When the temperature is
too high during vacuuming, the circuit will cut o and the
vacuum will stop working. If this happens, DO NOT press
the On/O button any more. Let the vacuum cool down
for a while before resuming working.
• Turn o the unit after vacuuming, before cleaning and
maintenance. Empty the dust tank, clean and dry the
inside and outside before storage.
• Empty the dust tank outside in order to avoid a mess.
• Clean or change the lter (see Maintenance section) if the
suction performance deteriorates.
mWARNING! Never remove the dust tank without rst
switch o the equipment.
Maintenance
To order genuine replacement parts or accessories for the
Sun Joe®AJV1000 cordless handheld vacuum, please visit
sunjoe.com or contact the Snow Joe®+ Sun Joe®customer
service center at 1-866-SNOWJOE (1-866-766-9563).
Cleaning The Dust Tank
1. Take the unit outside to clean it to avoid creating a mess
indoors.
2. Remove and empty the dust tank. Clean the tank with
water and allow it to dry completely.
Cleaning/Changing The Filter
The HEPA lter included is made of high quality material
designed to stop small dust particles. The lter should be used
for dry pick-up only. Handle the lter carefully when removing
it for cleaning and replacing. Check the lters for tears or
small holes, a small hole can let dust pass through and out of
the cleaner. Do not use a lter with holes or tears, replace it
immediately.
1. Remove and empty the dust tank. Lift the HEPA lter up
from the dust tank.
2. Clean the lter by gently tapping or brushing dirt o.
3. If needed, rinse the lter with clean water. Allow the lter
to air dry for 24 hours before installing onto the vacuum.
4. If the lter is torn and cannot be used anymore, insert a
new lter into the dust tank and attach the dust tank onto
the vacuum (Fig. 7).
Fig. 8
2-in-1 nozzle + brush attachment
Fig. 9
Nozzle Brush
Release button

10
mWARNING! The HEPA lter must be installed before
vacuuming again.
IMPORTANT: Only use original replacement lters specied for
this vacuum.
You can purchase replacement lters (Model AJV1000-FILTER)
and other genuine replacement parts by visiting us online at
sunjoe.com or calling our toll-free customer service helpline
at 1-866-SNOWJOE (1-866-766-9563). The use of lters that
do not meet the original equipment specications may lead
to improper performance of the vacuum, may compromise
operator safety and will void the manufacturer's warranty.
Storage
• Examine the cordless handheld vacuum thoroughly for
worn, loose or damaged parts. Should you need to repair
or replace a part, contact an authorized Snow Joe®+
Sun Joe®dealer or call the Snow Joe®+ Sun Joe®
customer service center at 1-866-SNOWJOE
(1-866-766-9563) for assistance.
• Examine the HEPA lter thoroughly for signs of excess
wear or damage. If it is worn or damaged, replace it
immediately.
• Store the handheld vacuum with the vacuum cap on
indoors in a clean, dry and locked location out of the reach
of children and animals.
Service + Support
If your Sun Joe®AJV1000 cordless handheld vacuum requires
service or maintenance, please call the Snow Joe®+ Sun Joe®
customer service center at 1-866-SNOWJOE
(1-866-766-9563).
Model + Serial Numbers
When contacting the company, reordering parts, or arranging
service from an authorized dealer, you will need to provide the
model and serial numbers, which can be found on the decal
located on the housing of the unit. Copy these numbers into
the space provided below.
A J V 1 0 0 0
Record the following numbers from the housing or handle of your
new product:
Model #:
Serial #:

11
Troubleshooting
• Turn o the equipment before carrying out maintenance on the machine or when checking that its parts are in proper working
order.
• To avoid unnecessary hassles, consult the following table before contacting customer service with any mechanical issues.
Problems Possible Cause Possible Solution
Machine refuses
to start
• Flat battery
• Overheating protection is on
• On/O button is damaged
• Charge the battery.
• Wait for a while until the unit is cool down and resume
working
• Contact the Snow Joe®+ Sun Joe®customer service
center at 1-866-SNOWJOE (1-866-766-9563).
• Empty the dust tank
• Clean the HEPA lter
• Charge the battery
• Shut down the unit. Wait for a while until the unit is cool
down before resuming working
• Empty the dust tank
• Clean the HEPA lter
• Dust tank is full
• HEPA lter is clogged
• Battery power is low
• The unit works continuously for
too long
• Dust tank is full
• HEPA lter is clogged
Vacuum suction
drops
Motor housing is hot
Table of contents
Other sunjoe Vacuum Cleaner manuals

sunjoe
sunjoe 24V-WDV6000 User manual

sunjoe
sunjoe SWD4000 User manual

sunjoe
sunjoe 24V-X2-OGV User manual

sunjoe
sunjoe SWD2500 User manual

sunjoe
sunjoe ASHJ201 User manual

sunjoe
sunjoe SWD16000 User manual

sunjoe
sunjoe SWD16000 User manual

sunjoe
sunjoe 24V-WDV6000 User manual

sunjoe
sunjoe ASHJ202E User manual

sunjoe
sunjoe SWD12000 User manual