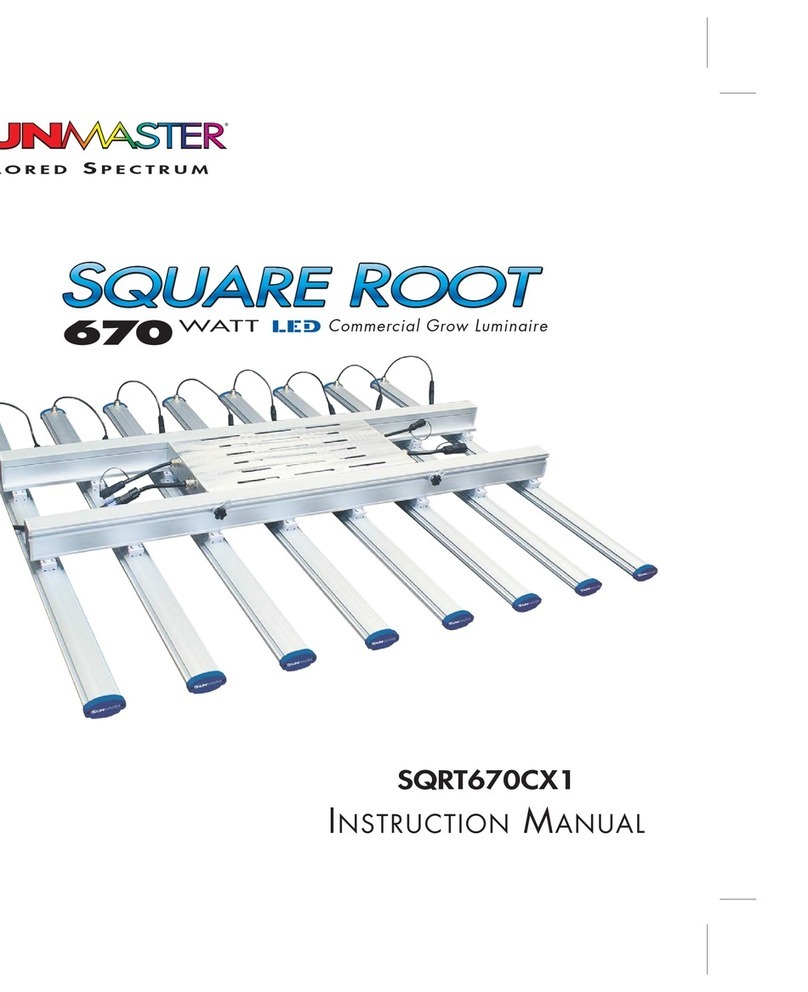
Sunmaster SQUARE ROOT SQRT670CX User manual

SQRT670CX
INSTRUCTIONMANUAL
Commercial Grow Luminair
e
T
AILORED
S
PECTRUM

1
THANK YOU
Thank you for purchasing Sunmaster’s SQRT670CX, spectrally
tailored for indoor growing.
This state-of-the art fixture is supported by robust engineering,
ISO 9001 manufacturing and backed by Sunmaster’s long-
standing commitment to quality and service.
For over 20 years Sunmaster has provided best-in-class lighting
products throughout North America, Europe and Australia.
Contact us at any time at sunmastergrowlamps.com/contact.
We’d love to hear your success story!
Regards,
The Sunmaster Team

FIXTURE HARDWARE
CONTENTS OF BOX:
(1) Spine with driver
(8) Light Bars
(1) AC power cord (120-277V)
may be sold separately
(4) Adjustable mounting hooks
(4) Adjustable mounting cables
2
Please read and understand all installation and safety
guidelines before attempting to install or operate this fixture.
• Always adhere to local and national building and
electrical codes
• Do not use this fixture if its power cord is damaged.
Replace the power cord only with original certified power
cords.
• Light bars and power supply are splash-proof but not
waterproof. In the event that the light bar becomes
submersed, first disengage the circuit breaker, followed
by unplugging the fixture
• Disconnect fixture from main power source before
performing any cleaning or repairs
• Do not open or disassemble the fixture as it contains no
serviceable parts. Opening the fixture can be dangerous
and will void the warranty
• Do not operate the fixture near flammable, explosive or
reactive substances.
• Do not clean the under side of the light bars (side with
LEDs) with heavy detergents, rags or sponge.
• Do not touch the under side of the light bars (side with
LEDs)
• Regularly check fixture for dust or dirt build up. Clean if
necessary
• To prevent eye damage, do not look directly at LEDs
when powered
• Allow heat sink surfaces to sufficiently cool before
handling
• This fixture is IP65 rated which is “dust tight” and
protected against low pressure water jets. The fixture
must not be immersed in water
• Do not operate fixture within an ambient temperature of
45°C or higher
SAFETY RECOMMENDATIONS / WARNINGS
NOTE: Fixture to fixture power cord
and fixture-to-fixture control
cable are sold separately
(1) Spine with driver
(8) Light Bars
(1) AC power cord
(120-277V)
may be sold
separately
(1) Control cable
sold separately
(4) Adjustable
mounting hook
(4) Adjustable
mounting cables

Click
3
ASSEMBLY AND INSTALLATION
1. Place spine upside down (grey connectors facing up) on a clean, flat surface
2. Attach (8) light bars by sliding each set of (2) grey connectors on the light bar into
the (2) grey slots on the spine. Ensure that the light bars are faced in the proper
direction whereby the electrical connectors on the light bar face the electrical
connectors on the spine. You will hear a ‘click’ when light bar is fully engaged.
3. Align light bar electrical cable with spine electrical cable (see tab within each
connector). Hand tighten until firmly screwed together
4. Hang (4) cables in desired location above plant canopy using eye end of cable
5. Carefully turn spine over (using 2 people) and hang from cables using hook end of
cables
6. Connect enclosed power cable (included) or fixture-to-fixture power cable (sold
separately) to fixture
7. Adjust fixture height using adjustable locking mechanism on cable hooks
8. Cap off any unused power or control ports
9. Plug power cable into power outlet
10. Turn on power
Note: Light bars can be removed by simultaneously pressing the (2) grey tabs on the
connectors and sliding the connectors out of the grey slots on the spine.
1
2
3
4
5
7

4
ELECTRICAL
• Fixture has a single power (blue) and single dimming (yellow) cord at each end.
Electrical or control connection may be made at either end. Connectors on the
opposite end of the fixture may be used to connect additional fixtures.
• Do not overload circuit. Please adhere to the attached table to comply with
maximum number of fixtures per circuit.
• Dust caps must be in place on any unused electrical or dimming connectors.
• When connecting fixture to a dimming system or controls, remove the dust cap and
use the 3-pin dimming connector.
• Do not touch fixture while in operation
• Do not connect to power source over 277V
• Seek the services of a qualified installation professional
• Fixture MUST be grounded. DO NOT bypass by removing ground pins or using
adapters
Input Power (Watts)
Input Voltage
Dimming
670
100-277 auto-sensing
1-10V
Main Voltage
Input Current (A)
Power Factor
120V208V240V277V
5.63 3.25 2.82 2.47
0.99 0.99 0.99 0.98
Maximum fixtures 2455
per 20A circuit
To power To controller or cap off
Connect to next fixture or cap off
Control cablePower cord
Do not attach two AC input
plugs, when connect one light
or in series!
Never join two cable ends
together in-line!
Do not attach two AC input
plugs,when connect one light
or in series!

5
OPERATIONAL GUIDELINES
• Mount light bars approximately 6” above the top of the plant canopy. This assures
that the maximum amount of light energy reaches and penetrates the plant canopy.
Light diminishes significantly as it is pulled away from the plant canopy.
• Raise the fixture as the plant canopy height increases
• Many plants prefer increased temperatures when exposed to high amounts of light
energy. Therefore, it is encouraged to experiment with increased temperature.
• Regularly check plant growth and health. Consider adjusting water, CO2, relative
humidity, nutrients, and ambient temperature.
CARE
The SQRT670CX has been designed for harsh environments and years of
maintenance-free operation. Please maintain your fixture to assure peak operation:
• Assure proper air flow around the fixture, maintaining at least 1” of space between
top of fixture (spine) and the mounting surface or ceiling.
• Remove excess dust, debris and mineral build-up from light bars and spine. Clean
while fixture is unplugged. Use low-pressure air or a rag dampened with water.
• Do not touch the LED array with hands.
6”

6
WARRANTY
This Sunmaster product is warranted for the period of 3 years,
as specified, from the date of purchase against defects in
material and workmanship. The determination of whether the
product is defective shall be made by Sunmaster. A Sunmaster
product will not be considered defective under this warranty
solely because a small number of separate LED components
fail to operate (i.e. provide light) when the number of such
failed components is less than 10% of the total number of light
emitting components which are part of the product.
This limited warranty shall only apply if the Sunmaster product
has been installed and operated (i) in compliance with the
specifications and guidelines set forth herein, on the product
label and packaging, and on the Sunmaster website, (ii) in
accordance with the National Electric Code (NEC), the
Standards for Safety of Underwriters' Laboratory, Inc. (UL),
the Standards for the American National Standards
Association (ANSI), or in Canada, with the standards of the
Canadian Standards Association (CSA), and (iii) in lighting
equipment designed and approved for the application and in
environmental conditions within the normal specified
operating range of the product.
This limited warranty does not apply to loss or damage to the
product caused by: negligence; abuse; misuse; mishandling;
improper installation, storage, or maintenance; damage due
to fire or acts of God; vandalism; civil disturbances; power
surges; improper power supply; electrical current fluctuations;
corrosive environment installations; induced vibration;
harmonic oscillation or resonance associated with the
movement of air currents around the product; alteration;
accident; failure to follow installation, operating, maintenance
or environmental instructions.
The warranty terms contained herein shall be the sole and
exclusive remedy of the purchaser of Sunmaster products and
state Sunmaster's entire liability and obligation to such
purchaser. NO WARRANTY OF FITNESS FOR ANY SPECIFIC
OR PARTICULAR PURPOSE IS MADE OR IS TO BE IMPLIED.
NO OTHER WARRANTIES APPLY.
If the product is defective, this product
will be repaired or replaced, at
Sunmaster's option. This warranty
is expressly limited to the repair
or replacement of the product.
This warranty gives the customer
specific legal rights, which vary
from state to state and province
to province. No distributor,
salesperson, dealer, retailer or
other representative has the
authority to change or modify this
warranty, wither orally or in writing, in
any respect. WARRANTY IS VOID IF
PRODUCT IS NOT USED FOR THE PURPOSE
FOR WHICH THIS PRODUCT IS DESIGNED.

SUNMASTERGrowLamps.com
© 2020 Venture Lighting International, Inc. SUNMASTER is a trademark of Venture Lighting International.
SUN-0206B1_v10-0720
FOR TECHNICAL SUPPORT:
855-562-1008
Email: info@SUNMASTERGrowLamps.com
F
OLLOW
/L
IKE US ON
F
ACEBOOK
, T
WITTER
, I
NSTAGRAM AND
Y
OU
T
UBE
!
3 year warranty 1-10V Dimming
Robust design
Easy installation
No fan
Connectivity
Communication
Full Spectrum
T
AILORED
S
PECTRUM
Table of contents
Other Sunmaster Lantern manuals