Sunshine GardenHouse GKP68 User manual

Mt. Hood 6’ x 8’
Assembly Instructions
Model GKP68

Sunshine GardenHouse™888-590-8657
2
Thank you for purchasing your Sunshine GardenHouse. We hope you will
have many years of gardening success and enjoyment. Take time to review
the printed instructions as well as the video.
Preparing to build. A level well-drained area is essential to the assembly of
your GardenHouse. No foundation is required. Many people use pathway
gravel on top of landscape fabric to make an affordable easy to level drain-
ing surface. Two people should be able to assemble the greenhouse in about
4 hours. The Standard Building Code states that “a greenhouse with wood
frame construction shall be located not less than 5 feet from an adjoining
structure or property line” (Section 502, Greenhouses). Your local building
code may vary, so check with local ofcials.
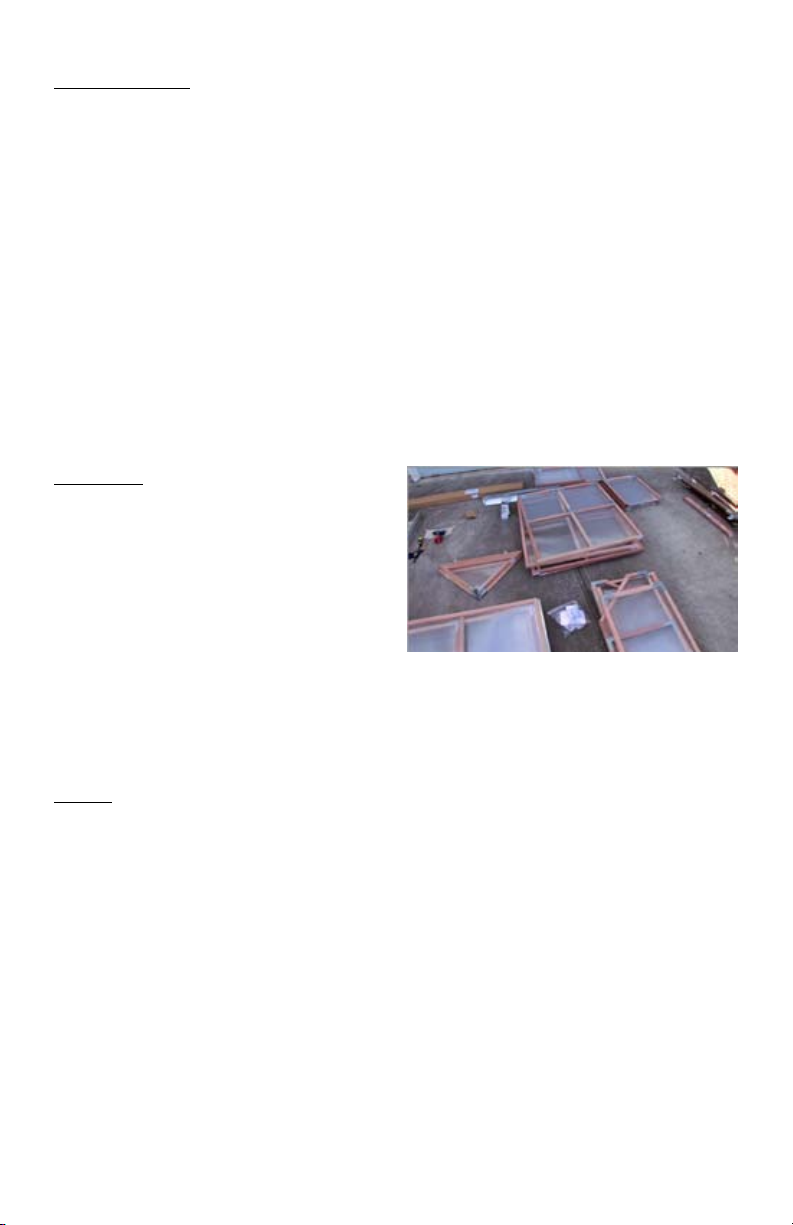
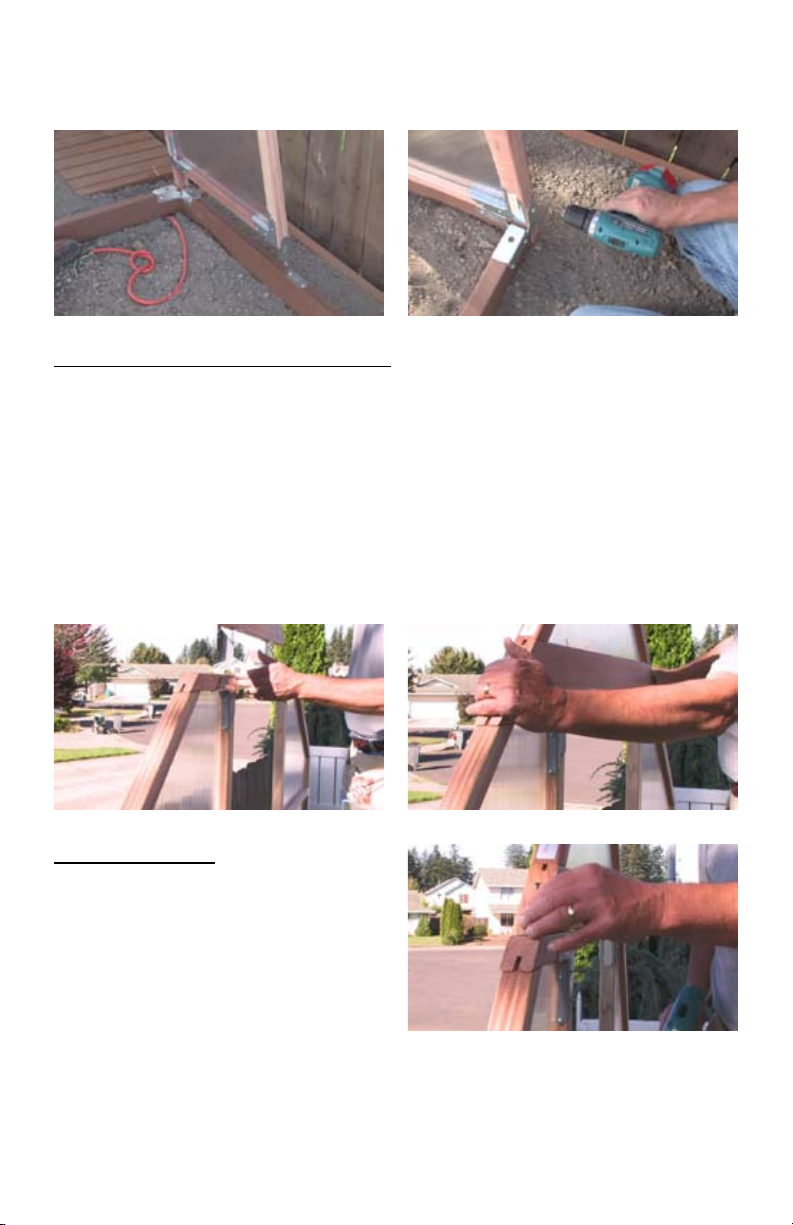
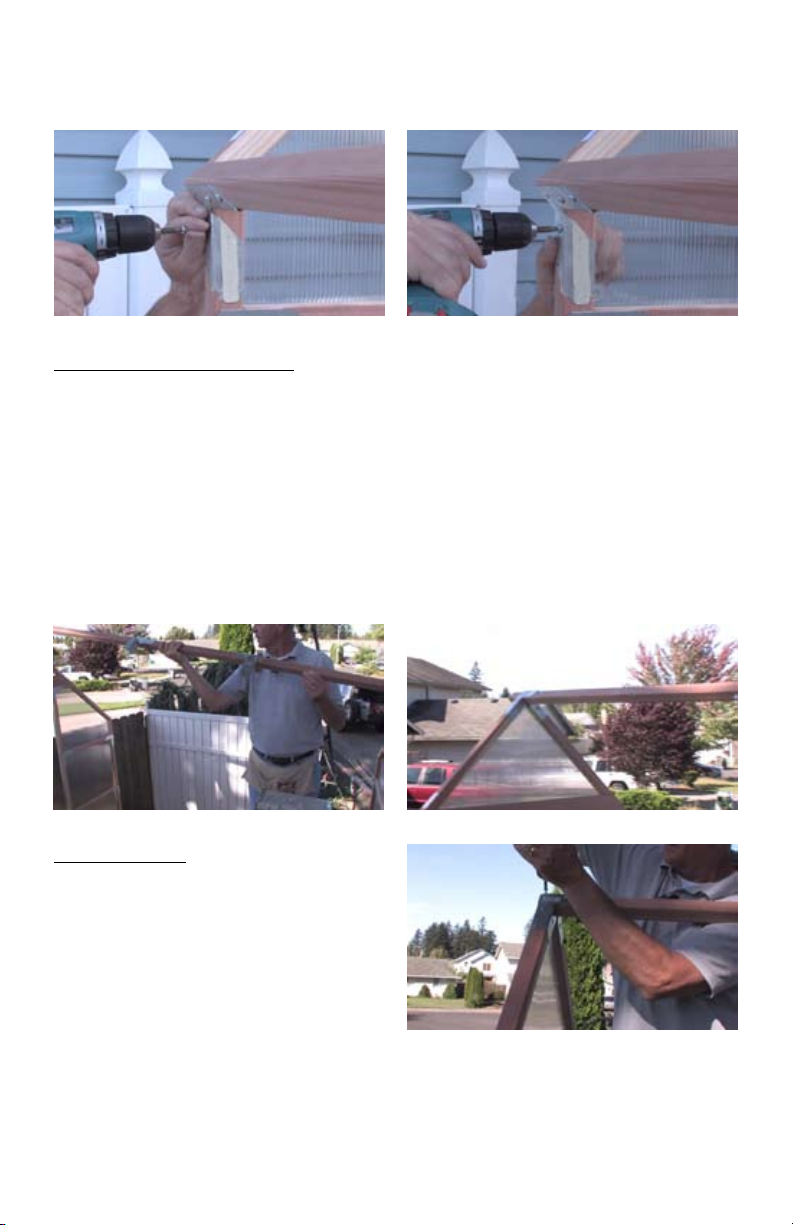
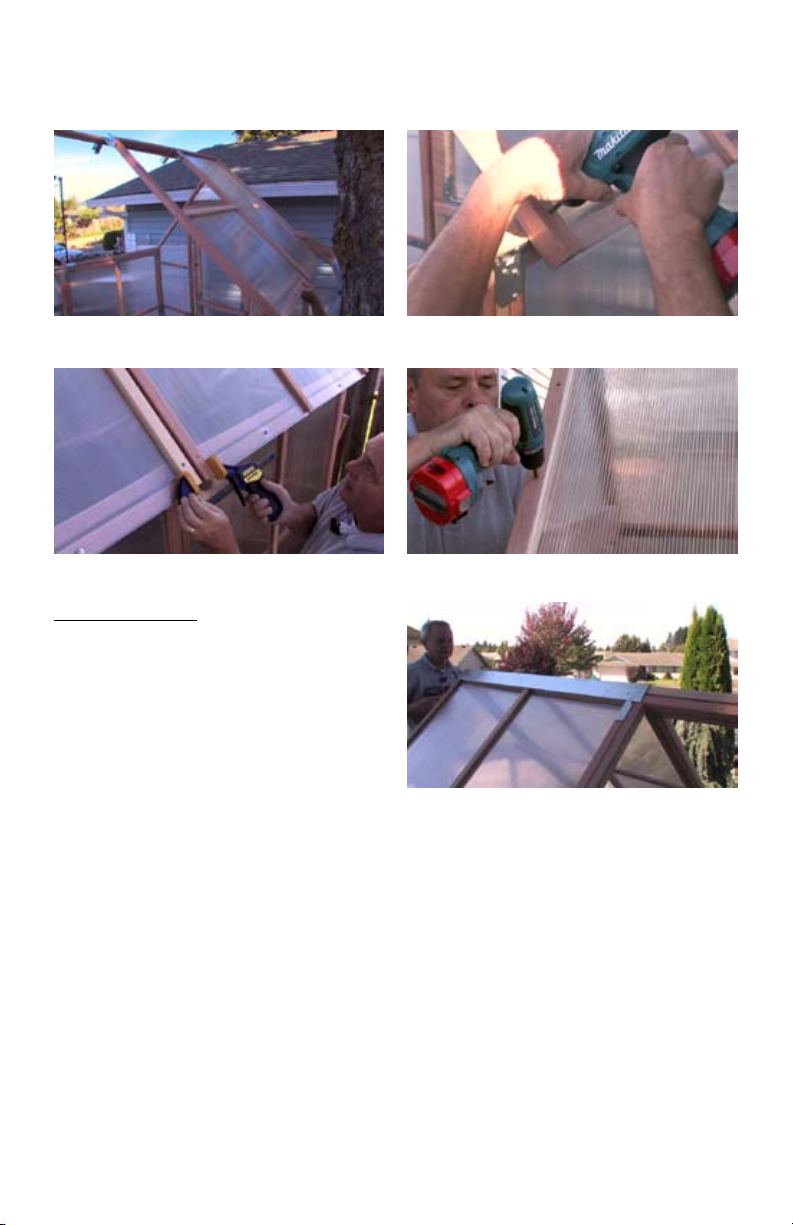
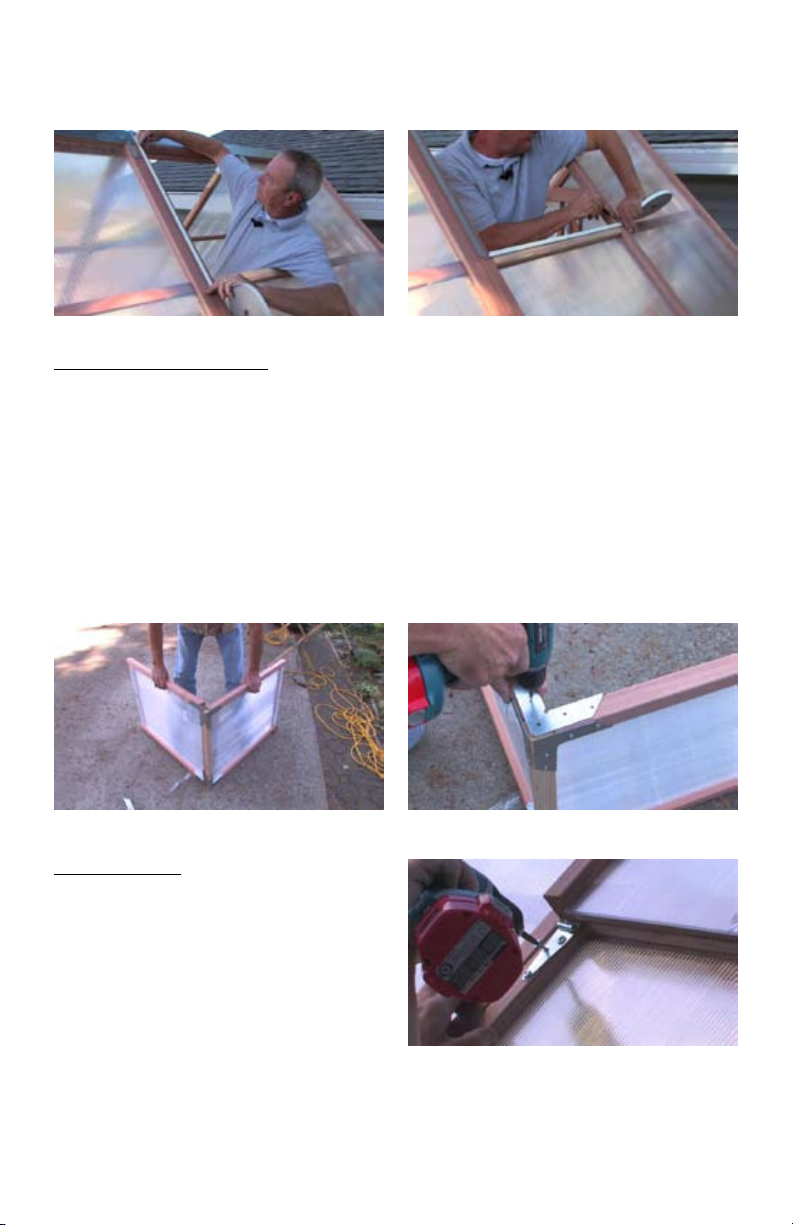
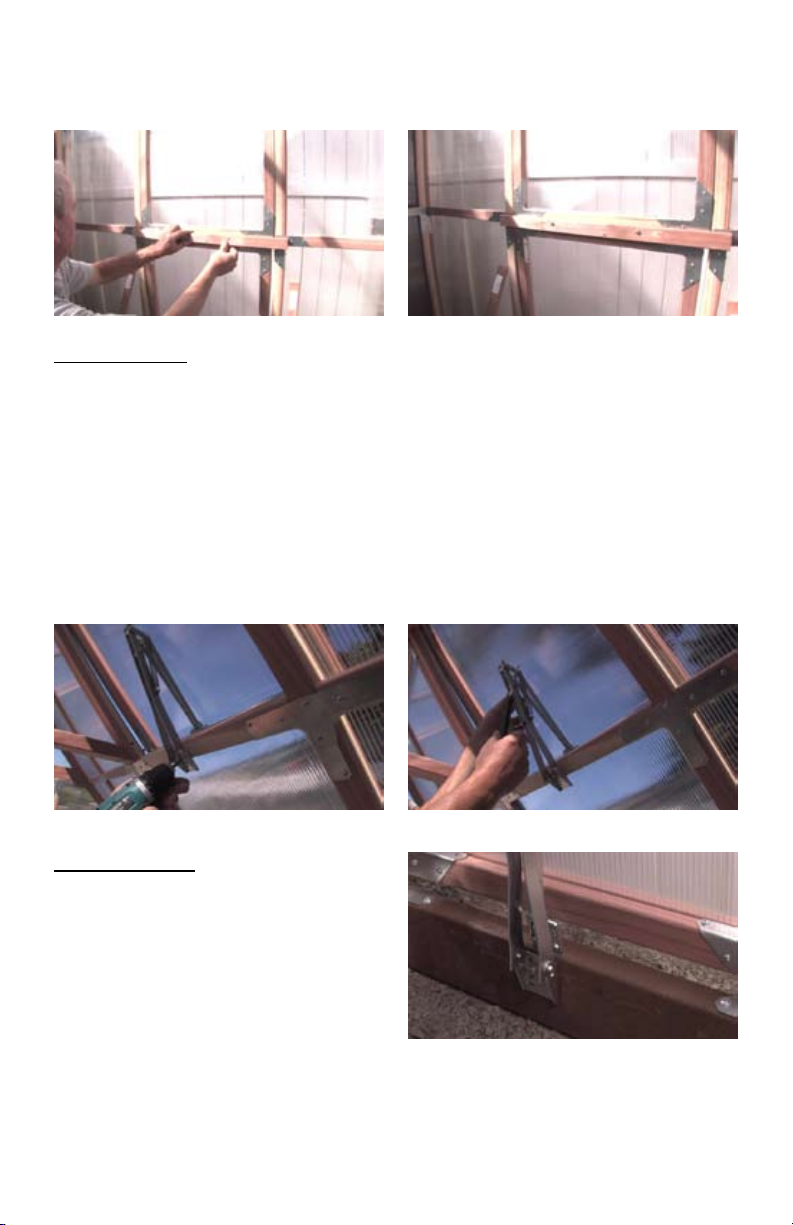
All major components of the kit are panelized so that you and a helper can
assemble the GardenHouse in a day or two. A second person is essential
to position the panels.
The GardenHouse kit comes in four boxes. Before you begin, please verify
the contents or your boxes using our parts inventory list.
TOOLS REQUIRED
Screw gun or variable speed drill with a #2 Philips drive bit.•
All screws are provided as well as one drive bit.•
6 ft. step ladder•
12 ft. tape measure•
Safety goggles•
Gloves•
Nail apron•
Quick grip clamp•
Level•
Optional for extreme cold winter areas (not required) Silicone-based clear•
caulk. Use to seal small spaces particularly where some brackets touch
leaving a small space.
Always wear the appropriate safety equipment and follow the manufactur-
er’s instructions when using power equipment.
Redwood is naturally resistant to moisture and insect damage, and will fade
to a silver gray over time unless treated. If you seal or paint the wood, use a
water based product. Acetone or Ketone products may damage the glazing.
Getting Started

Sunshine GardenHouse™PO Box 2068, Longview, WA 98632
3
ANCHORING
Anchoring may be required if exposed to strong winds. There are many ways
to anchor depending on conditions and wind strength. Our anchor kit will
work well in rm non-rocky soils. We recommend you that you secure each
corner. Consult with your local building products dealer for additional ways
to anchor. Remember the base of our kit is Trex decking 2X4 on its edge.
A note about the base
You may notice some curl in the plastic lumber base prior to assembly. Lay-
ing the base on a warm at surface will allow it to become straight as its
“memory” returns.
BASE
Set out the base making sure to have all brackets on the outside of the base.
Use the stub block enclosed to “save the space” in each corner. Use 1-1/4”
screws to secure the brackets to the Trex base. Check for square by measur-
ing the diagonal from corner to corner. They should be equal. Also check the
base for level at this time. Some movement may occur during assembly so
you may need to re-check.
Adding screws to the Redwood parts.
Take care not to use extreme torque when adding screws to the Redwood.
A soft wood, Redwood does not require extreme force to make the structure
strong.
UNPACK
Lay out all boxes and begin opening.
Each box is label 1 of and 2 of etc.
Unpack all boxes and use the en-
closed inventory sheet to make sure
all components are correct.

Sunshine GardenHouse™888-590-8657
4
FRONT AND BACK WALL PANELS
Place the front and back wall panels on the back wall base and add 1-1/4”
screws. You will notice tape covering some holes on the brackets. DO NOT
add screws through the taped holes.
TOP TRIANGLE
Place and add 1-1/4”screws to
secure brackets. Use deck screws
through pre-drilled holes on each
corner.

Sunshine GardenHouse™PO Box 2068, Longview, WA 98632
5
ROOF RIDGE
Using a stepladder slip the roof
ridge into the connectors on the top
of the front and back wall. Use 5/8”
screws.
SIDE WALL TOP PLATES
Install the 2-sidewall top plates joining the front wall and back wall.

Sunshine GardenHouse™888-590-8657
6
SIDE WALL
Starting in the back wall corner, place the rst sidewall. Using the quick grip
tool, tighten the sidewall to the back wall. On the inside of the greenhouse
through pre-drilled holes, add deck screws. Continue adding sidewalls. Add
1-1/4”screws to the brackets on the outside of the side walls.

Sunshine GardenHouse™PO Box 2068, Longview, WA 98632
7
ROOF PANELS
Each panel is labeled. Start with the
front panels, which have an opening
for the vent. The right and left sides
of the GardenHouse are found when
facing the front door. Each sidewall
top plate has a pre-marked location
to align the roof panel. Add a deck screw to the pre-drilled hole next to the
center mark being sure that the hole is centered over the sidewall top plate.
Next move to the corner of the front wall and add a screw through the pre-
drilled hole using a deck screw. Repeat until all 4 roof panels are installed.
You will nd pre-drilled holes at the top roof ridge where deck screws
should be added. Use the quick grip clamp to pull the roof panels together
tightly. Place the 8 ft. roof apex in the V channel on the roof. Next place the 2
roof ashing on the peak and add 1-1/4”screws to secure.

Sunshine GardenHouse™888-590-8657
8
WEATHER STRIPING
Add the adhesive weather striping to the vent opening.
ROOF VENT
Align each part A and B. It is impor-
tant to be sure the parts a square.
Add the 2 vent connector brackets to
the parts using ¾” screws. Place the
vent over the opening placing the
hinges on either side. (Place so that a
strong wind will not lift the vent by
placing the hinges facing the windy
side).

Sunshine GardenHouse™PO Box 2068, Longview, WA 98632
9
COLLAR TIE
The collar tie is installed on the
inside of the greenhouse by screwing
deck screws through the pre-drilled
holes.
BACK WALL VENT
Using the quick grip vise, place the back wall vent panel in place and add a
deck screw to the pre-drilled center point on the upper inside of the panel.
Again using the quick clamp, pull the panels tightly together and secure with
deck screws through the pre-drilled holes.

Sunshine GardenHouse™888-590-8657
10
AUTO VENTS
There are 2 Automatic vent openers.
Refrigerate the black cylinder (do not
freeze) to cool it and make installa-
tion easier. Install each in the center
of the vent. Use 1-1/4”screws to
attach them to the frame. Be sure the
vent opens and closes easily before
installing the black cylinder.
WIND STOPS
Each wind stop is labeled and has pre-drilled holes. Attach them top the
inside of the vent opening and door way using 1-1/4”screws through the
pre-drilled holes.

Sunshine GardenHouse™PO Box 2068, Longview, WA 98632
11
BENCH KIT
Attach 2 enclosed brackets at each
end of the greenhouse spacing them
evenly. Place the 8 ft. long 2X4 into
the bracket and use a hammer to
push them into place. Space out the
bench slats evenly. Add 1-1/4”screw
to secure them to the 2x4 frame.
DOOR HARDWARE
Your kit includes some very basic door hardware. Other methods of securing
the door may be used. Consult with your local hardware store for ideas.

Sunshine GardenHouse™888-590-8657
12
PO Box 2068
Longview, WA 98632
Toll Free: 888-590-8657
www.gardenhouse.com
04/13MH
Sunshine GardenHouse™
E-mail or Fax Your Comments:
____________________________________________________________________
____________________________________________________________________
____________________________________________________________________
____________________________________________________________________
____________________________________________________________________
____________________________________________________________________
____________________________________________________________________
____________________________________________________________________
____________________________________________________________________
____________________________________________________________________
____________________________________________________________________
____________________________________________________________________
sunshinegardenhouse@gmail.com
Fax: 503-210-0308
Congratulations!
You’ve completed your Sunshine GardenHouse.
We are very interested to hear about your GardenHouse experience. Please
send us your owner’s registration form so that we can keep you updated on
any special information.
Table of contents