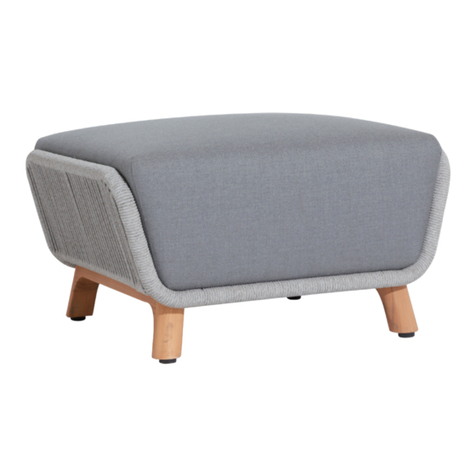
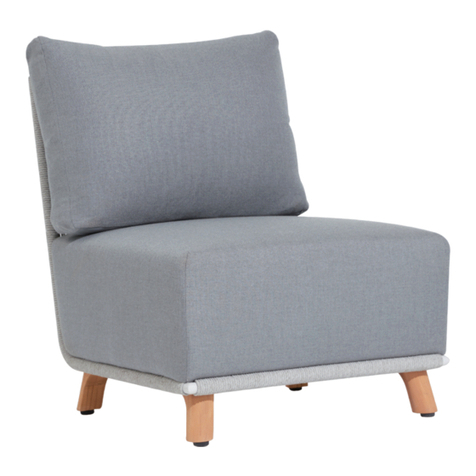
Sunsitt Capetown ST-015 User manual

sku:ST-015
W
A
R
R
A
N
T
Y
1
Y
E
A
R
1
Thank you for choosing Sunsitt!
Our goal is to provide high quality outdoor furniture with
outstanding customer service-all at an affordable price.
Please let us know how we are doing!
Problems?
(Missing pieces, wrong pieces...)
We will fix it Immediately. Send us an email at
[email protected]. If you are not satisfied with our
customer service, pls send your comments to
Happy?
Please leave us a review!
You can make others happy too!
www.sunsitt-patio.com
SU NSIT T
Capetown 4-Piece Conversation Set

- 1 -
SU NSIT T
Capetown
4-Piece Conversation Set
CARTON 1/2
ST-015-12
ST-015
CARTON 2/2
ST-015-22

IMPORTANT, RETAIN FOR
FUTURE REFERENCE:
READ CAREFULLY.
Safety
For domestic use only.
Don't tighten all the bolts before the product is fully assembled.
Periodic structural checks of this product should be
It would be useful to ask someone to help you assemble
the product.
undertaken, do not use if you have any doubts about its
Do not stand on the seat.
Do not stand on the armrest.
Do not let children play with this product.
At the beginning of the season
product are secure, do not use if you have any doubts
At the end of the season
This product should be stored under cover during
prolonged spells of adverse weather (wet or cold) and
also during the winter (ideally in a garden shed or
garage).
Always clean and dry thoroughly before storage.
- 2 -
SU NSIT T
Maximum load per seat: 250 lbs.

SU NSIT T
- 3 -
If the glass is chipped or broken, stop using the table and
consult us for help.
Do not sit or stand upon the glass surface.
Do not use the glass as a chopping surface. Do not strike
the glass with hard or pointed items.
When moving the table, do so using 2 adults and hold
the frame tight to prevent the glass from falling out.
Do not place very hot or very cold items on the glass surface
unless adequately thick table mats are used to prevent such
items from coming into contact with the glass.
Safety for tempered glass

Tips for Cushions
1
3
OK
2
In order to compress the package, we put the cushions in
the gap of some parts. So there may be crinkle on the fabric.
Don’t worry. Just flap every corner of the cushion evenly and
it will get back into its original shape soon.
- 4 -
SU NSIT T

- 5 -
Item
no.
Reference
Image Description Qty.
A
B
C
D
E
G
F
Seat Back
COMPONENT LIST - BENCH
Side Panel
Armrest
Seat Base
1
1
2
1
1
24
SU NSIT T
Side Panel
5
M6X35
Head Cap Screws
M6X40
Head Cap Screws

- 6 -
Item
no.
Reference
Image Description Qty.
H
I
J
K
L
O
COMPONENT LIST - BENCH
Seat Cushion
Back Cushion
Allen Key
29
1
1
2
4
2
SU NSIT T
Washer
Plastic Foot
Plastic Foot

- 7 -
SU NSIT T
Attach the two Seat Bases (C) by
securing with M6*40 Head Cap
Screws (G) and Washers (H).
Tighten into place with Allen Key (I).
Do this in 1 place.
1
Attach the two Seat Bases (C) to the
Side Panel (D) by securing with M6*35
Head Cap Screws (F) and Washers
(H). Tighten into place with Allen Key
(I).Pls don't fully tighten in this step.
Do this in 4 places.
2
CC
C
D
C
NOTE:
When tightening the Screws, tighten sequentially.
DO NOT tighten any Screws fully and then move on to the next one.
This may cause the frame to warp.
If there is still wobbles or screw holes cannot be aligned,loosen the
screws and execute this same process.
If the Chair is not stable it could lead to damage to the product.
HG
1
H
F
4

A
D
B
B
B
A
DE
C
A
SU NSIT T
Attach the Seat Back (A) to the
Armrest (B) by securing with M6*35
Head Cap Screws (F) and Washers
(H).Tighten into place with Allen Key
(I). Pls don't fully tighten in this
step. Do this in 2 places.
3
- 8 -
4
Attach the two Seat Bases (C) to
the Seat Back (A) by securing with
M6*40 Head Cap Screws (G) and
Washers (H). Do this in 4 places.
Attach the Side Panel (D) to the
Armrest (B) by securing with
M6*35 Head Cap Screws (F) and
Washers (H). Do this in 2 places.
Tighten into place with Allen Key
(I). Pls don't fully tighten in this
step.
5
Attach the Side Panel (E) to the Seat
Back (A) and Side Panel (D) by
securing with M6*35 Head Cap Screws
(F) and Washers (H). Do this in 4
places. Then tighten all 17 screws into
place with Allen Key (I) .
Note: If any screw holes cannot be
aligned, loosen all the screws and go
back step 1 and restart assembly.
HF
H
F
4
HF
H
G
4

A
KJ
B
KJ
E
J
J
O
L
- 9 -
SU NSIT T
6
Complete the assembly of
adjustable feet (J)&(K) by securing
with M6*35 Head Cap Screws (F)
and Washers (H) as drawing.
Tighten into place with Allen Key
(I). Do this in 12 places.
7
Place the chair on a level surface, and
adjust height for balance. Place Seat
Cushion(L) and Back Cushions (O) on
the chair. Your Chair is ready for use.
Adjust height
for balance
Adjust low
for balance
12
Adjust Pre-installed levellers
height for balance
H
F

Seat Cushion
Allen Key
Washer
- 10 -
Item
no.
Reference
Image Description Qty.
A1
B1
C1
F
H
I
M
Seat Back
COMPONENT LIST - CORNER SOFA
Armrest
Seat Base
1
1
1
17
17
1
1
SU NSIT T
M6X35
Head Cap Screws
OBack Cushion 1

Plastic Foot 2
2
- 11 -
Item
no.
Reference
Image Description Qty.
J
Plastic foot
K
COMPONENT LIST - CORNER SOFA
SU NSIT T

- 12 -
SU NSIT T
Attach the Seat Back (A1) to the
Armrest (B1) by securing with M6*35
Head Cap Screws (F) and Washers
(H).Tighten into place with Allen Key
(I). Pls don't fully tighten in this
step. Do this in 2 places.
1
Attach the Seat Base (C1) to the Seat
Back (A1) and Armrest (B1) by
securing with M6*35 Head Cap Screws
(F) and Washers (H). Do this in 7
places. Then tighten all 17 screws into
place with Allen Key (I) .
Note: If any screw holes cannot be
aligned, loosen all the screws and go
back step 1 and restart assembly.
2
A1
A1
B1
B1
C1
NOTE:
When tightening the Screws, tighten sequentially.
DO NOT tighten any Screws fully and then move on to the next one.
This may cause the frame to warp.
If there is still wobbles or screw holes cannot be aligned,loosen the
screws and execute this same process.
If the Chair is not stable it could lead to damage to the product.
HF
2
H
F
7

K
J
K
J
O
M
- 13 -
SU NSIT T
3
Complete the assembly of
adjustable feet (J)&(K) by securing
with M6*35 Head Cap Screws (F)
and Washers (H) as drawing.
Tighten into place with Allen Key
(I). Do this in 8 places.
4
Place the chair on a level surface, and
adjust height for balance. Place Seat
Cushion(M) and Back Cushions (O) on
the chair. Your Chair is ready for use.
Adjust height
for balance
Adjust low
for balance
8
Adjust Pre-installed levellers
height for balance
H
F
A1
B1
C1

4
Plastic Foot
Seat Cushion
Allen Key
Washer
- 14 -
Item
no.
Reference
Image Description Qty.
P
Q
R
F
H
I
N
J
Seat Base
COMPONENT LIST - OTTOMAN
1
1
1
16
16
1
1
SU NSIT T
M6X35
Head Cap Screws
Side Panel
Side Panel

P
- 15 -
SU NSIT T
Attach the Seat Base (P) to the Side
Panel (R) by securing with M6*35
Head Cap Screws (F) and Washers
(H). Tighten into place with Allen Key
(I). Pls don't fully tighten in this
step.Do this in 4 places.
1
Attach the Side Panel (Q) to the Seat
Base (P) and Side Panel (R) by
securing with M6*35 Head Cap Screws
(F) and Washers (H). Do this in 4
places. Then tighten all 8 screws into
place with Allen Key (I).
Note: If any screw holes cannot be
aligned, loosen all the screws and go
back step 1 and restart assembly.
2
NOTE:
When tightening the Screws, tighten sequentially.
DO NOT tighten any Screws fully and then move on to the next one.
This may cause the frame to warp.
If there is still wobbles or screw holes cannot be aligned,loosen the
screws and execute this same process.
If the Ottoman is not stable it could lead to damage to the product.
HF
4
H
F
4
P
Q
R
R

P
Q
N
- 16 -
SU NSIT T
3
Complete the assembly of
adjustable feet (J) by securing with
M6*35 Head Cap Screws (F) and
Washers (H) as drawing. Tighten
into place with Allen Key (I). Do
this in 8 places.
4
Place the ottoman on a level surface,
and adjust height for balance. Place
Seat Cushion (N) on the ottoman. Your
ottoman is ready for use.
Adjust height
for balance
Adjust low
for balance
8
Adjust Pre-installed levellers
height for balance
H
F

4
Plastic Foot
J
Allen Key
Washer
- 17 -
Item
no.
Reference
Image Description Qty.
T
S
U
V
F
H
I
Table Top
COMPONENT LIST - TABLE
1
1
1
1
16
16
1
SU NSIT T
M6X35
Head Cap Screws
Side Panel
Glass
Side Panel

- 18 -
SU NSIT T
Attach the Table Top (T) to the Side
Panel (U) by securing with M6*35
Head Cap Screws (F) and Washers
(H). Tighten into place with Allen Key
(I). Pls don't fully tighten in this
step. Do this in 4 places.
1
Attach the Side Panel (S) to the Table
Top (T) and Side Panel (U) by securing
with M6*35 Head Cap Screws (F) and
Washers (H). Do this in 4 places. Then
tighten all 8 screws into place with
Allen Key (I).
Note: If any screw holes cannot be
aligned, loosen all the screws and go
back step 1 and restart assembly.
2
T
U
U
NOTE:
When tightening the Screws, tighten sequentially.
DO NOT tighten any Screws fully and then move on to the next one.
This may cause the frame to warp.
If there is still wobbles or screw holes cannot be aligned,loosen the
screws and execute this same process.
If the Table is not stable it could lead to damage to the product.
HF
4
T
H
F
4
S

V
- 19 -
SU NSIT T
3
Complete the assembly of
adjustable feet (J) by securing with
M6*35 Head Cap Screws (F) and
Washers (H) as drawing. Tighten
into place with Allen Key (I). Do
this in 8 places.
4
Turn the table over and place on a flat
surface, adjust height for balance.Then
put the Glass (V) on the top.Your table
is ready for use.
Adjust height
for balance
Adjust low
for balance
Adjust Pre-installed levellers
height for balance
T
S
8
H
F
This manual suits for next models
2
Other Sunsitt Indoor Furnishing manuals
Popular Indoor Furnishing manuals by other brands

SCIAE
SCIAE BLAKE Assembling instructions

Next
Next NEWHAVEN 666351210 Assembly instructions

Safavieh Furniture
Safavieh Furniture Jamison AMH1535A quick start guide

KidKraft
KidKraft Avalon Chair 16600A Assembly instructions

Dimensions Furniture
Dimensions Furniture 1005 Assembly instructions

Kvik
Kvik MH569 manual

Amart Furniture
Amart Furniture KORI 60248 Assembly instruction

Amart Furniture
Amart Furniture ORWELL 64930 Assembly instruction

VISIONARY DESIGNS
VISIONARY DESIGNS MOD-1543 Setup instructions

Heart of House
Heart of House Higham 248/9320 Assembly lnstructions

Northridge Home
Northridge Home 1434690 manual

Zenith
Zenith 2501S Assembly instructions