sticker and window, pulling from left to right and right to left until the
4. Plug in car charger into the car cigarette lighter.
5. Connect car charger to the Car DVR USB input with charging Cable.
[Caution] USB cable can be laid around front window.
6. Place external camera at the back of the car, mind the direction of the
view of the camera. Cable can be laid across the seats to the Car DVR at the
front, connect external camera by plug the camera AV cable into Car DVR
7. Adjust camera position, ensure the line of sight is perpendicular to the
8. Starting engine, check if DVR has been installed correctly.
[Caution] Indicating lights turned on while device is functioned and
installed correctly; Video recording indication light flashes while device is
recording. Please check with the display, contact us if it is showing upside
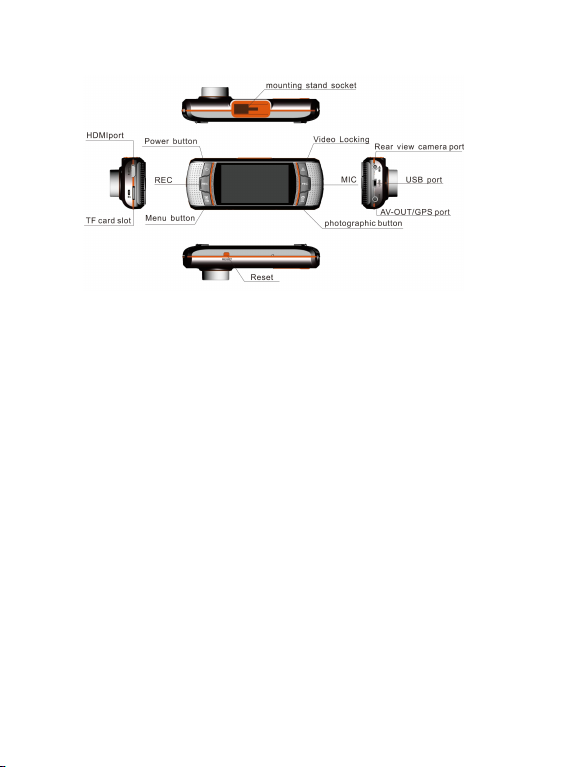
1. Installing Instructions
1) Automatically Recording Function
Start video recording automatically when engine turns on, video recording
indicator and audio recording indicator start flashes. After engine been shut
down, video recording stops automatically after 12 seconds, saving latest
video and then power off. Recorded videos have been saved in TF card and
loop recording earliest video while memory is full.
[Caution] a. Video length can be set in menu, 1/2/5minutes adjustable.
b. DVR Camera and External Camera video footage stored in
TF card file: “DCIMA” and “DCIMB”. Videos are stored in NORMAL, file
name LOCK is only stores Video Locked footages.
2. Manually Recording Function
To start up DVR, press power button for 3 seconds, video recording
function activated automatically, video recording indicator and audio
recording indicator flashes. To shut down DVR, press power button for 3
seconds, last video have been saved automatically before power off.