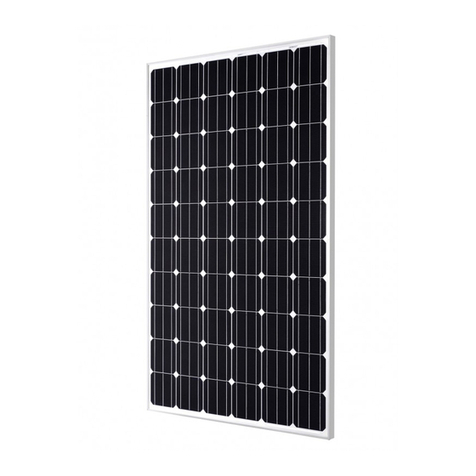
Sunways SM 230M User manual

1 Safety first!
Follow the setup instructions!
Safe handling and trouble-free operation of the Sun-
ways Solar Modules requires knowledge of the basic
safety precautions.
This setup document provides an overview of the
safe installation and commissioning procedures for
Sunways Solar Modules.
In addition, the rules and regulations for accident
prevention applicable for the operating site/plant
must be observed.
Danger of death through electric shock!
Touching live parts can result in death.
All electrical work on the solar generator must be
carried out by a qualified electrician while observing
the VDE regulations, national and other regulations.
Due to the series connection of the modules, voltage
levels may exceed the protective extra-low voltage.
Even with low solar radiation almost the full open-
circuit voltage can be expected in the modules.
During all installation and wiring work the modules
must therefore be covered or disconnected from
the consumer load. Otherwise there is a risk of arc
formation on lines carrying direct current.
Suitable fall protection must be used when working
on roof-mounted solar generators.
The standard solar module is a glass/film product and
must not be walked on due to the risk of breakage.
Protect the front and rear of the solar modules from
scratching.
2 Your Solar Modules
Your Sunways Solar Modules consist of the following
components. Only the details relevant for the instal-
lation at the front and rear are shown.
1 2 3
6
5
4
Front Rear
1 Sunways Solar Cells
2 Aluminium profile frame
3 Junction box with connection cable and
connectors
4 Hole for earthing
5 Mounting hole
6 Connection cables
SETUP
Installation and Operating
Instructions
Sunways Solar Modules
SM 230M
SM 215L
SM 215M
SM 240M
SM 210U
SM 235U
SM 170U
English EN

3 Installation
3.1 Orientation
Ideally, the front of the solar modules should face
due south.
The tilt angle can be calculated as follows:
The ideal tilt angle corresponds to the latitude of the
installation site minus 20°
To achieve a good self-cleaning effect through pre-
cipitation the tilt angle of the solar modules should
be at least 20°.
≥ 20°
Avoid any shading and heat build-up at the rear of
the module. Both can lead to significant losses in
yield!
3.2 Maximum series/parallel configuration
CAUTION
Only solar modules of the same type and output class
may be connected in series! The maximum system
voltage of the modules must never be exceeded!
To achieve the required system currents the modules
may be connected in parallel. Only modules of the
same type and voltage may be used. Ensure that the
specified permitted load capacity with regard to the
return current IR is not exceeded!
4 Installation
4.1 General
CAUTION
Mount the modules only on suitable support struc-
tures. These structures must ensure that no mechani-
cal stresses are transferred from the building (e.g.
the roof structure) to the module.
The minimum distance between modules is 5 mm to
allow for material expansion.
The modules must be installed such that water flow
(particularly along the cable) towards the cable
gland at the junction box is prevented.
The connection cables between the modules and
towards the inverter must be installed such that the
closed connectors are not permanently in water. This
means, for example, that rainwater must be able to
drain from U-shaped profiles.
Use only the holes provided in the frame! Do not
drill, nail or weld the module frames.
The mounting systems recommended and approved
by Sunways can be found on our website at
http://www.sunways.de.
4.2 Standard mounting
Each module must be secured at a minimum of
four points (drill holes in the long sides - see dia-
gram in section 2, Your Solar Modules). The frame
is structurally approved for mounting on the long
sides. Mounting on the short module sides must be
avoided. The maximum tolerance is 100 mm.
100
100
100
100
1000
Insertion systems (U-shaped profile over the whole
long/short side) are permitted under the following
load conditions:
Short side mounting
Mounting rails only at the short edges without cen-
tral support for loads up to 2400 Pa
Mounting rails at the short edges with central sup-
port for loads up to 5400 Pa
Long side mounting
Mounting rails covering the whole length of the long
edges for loads up to 5400 Pa
2400 Pa 5400 Pa 5400 Pa
Only use corrosion-resistant screws. Use a torque
wrench and tighten the screws with 20 Nm.
4.3 Installation instructions for laminates (frame-
less modules)
Avoid pointwise support and mounting of the lami-
nates, except with mounting brackets approved by
Sunways. These brackets are designed for loads up to
2400 Pa.
Further details and recommendations can be found
on our website at http://www.sunways.de.
Otherwise the laminates must be linearly supported
and fixed at both long module sides as a minimum.
All support rails must be aligned such that twisting
or warping of the laminates is avoided.
Only use mechanical fixtures for mounting the mod-
ules. Do not use adhesives or adhesive tapes for fas-
tening the laminates, unless they have been explicitly
approved by Sunways.
Please ensure that the laminate edges are not per-
manently in water and are allowed to dry.
Please note that the glass edges of the modules are
particularly sensitive to impact.
Follow the installation instructions for the respective
mounting system.
4.4 Other data
Bundling or concentration of solar radiation, for
example using lenses or mirrors, is prohibited!
Avoid covering the drainage holes in the module
frames.
For any maintenance and repair work produce a plan
documenting the module installation layout, includ-
ing serial number allocation and cable layout.

5 Electrical connection
Danger of death through electric shock!
Touching live parts can result in death.
Make sure the polarity is correct when connecting
the modules. Reverse polarity can lead to destruction
of the protective diodes.
Before installing check junction box, the cables and
connectors for obvious damage.
For safety reasons the junction box must not be
opened.
Do not use the plug connectors if the plug contacts
are dirty!
Do not install damaged solar modules!
The solar modules, and in particular the connectors
and tools, must be dry during installation.
In exposed locations, installation of lightning protec-
tion is recommended. If lightning protection equip-
ment is already present, the solar modules must be
integrated properly. Follow the respective current
regulations.
During normal conditions PV module may supply a
higher current and/or voltage than specified under
test conditions.
For determining the voltage design values of the
components, the current design values of the con-
ductors, the ratings of the fuses and the control units
connected to the solar module output, the values of
ISC and UOC specified on the module should be multi-
plied with a factor of 1.25.
The solar module is equipped with high-quality solar
cables and the Tyco plug connector system, which
is protected against reverse polarity and accidental
contact. The connection polarity is marked.
The minimum cable cross-section should be 4 mm2.
5.1 Tyco Solarlok plug connector system
The Solarlok plug connector system is designed for
convenient, reliable connection of individual solar
generators and the Solar Inverter.
Plug connections
The positive/negative coded connectors are marked
with polarity symbols and a coloured ring (blue =
negative, red = positive. They are equipped with
coding ribs for assignment, which ensure that only
connectors of the same polarity can be connected to
each other.
Connecting socket and plug:
The system is only correctly locked if the locking
hooks are recessed flush in the mating piece.
CAUTION
The plug connectors must not be disconnected or
connected under load current! They may be con-
nected and disconnected while voltage is present.
Release the locking mechanism by pressing on the
ribbing of the locking hooks and pulling the connec-
tors apart.
5.2 Application class
Sunways Solar Modules conform to application class
A according to the international safety standard
EN 61730 and therefore meet the requirements of
protection class II.
Sunways Solar Modules can be used in systems with a
DC voltage in excess of 120 VDC.
5.3 Earthing of the modules
An overview of the solar module can be found in sec-
tion 2, Your Solar Modules. A diagram indicates the
holes for connecting the earthing cables.
Detail view of the earthing cable connection
3
4
5
2
6
7
1
1 Fastening screw M6
2 Ring terminal with earthing cable
3 Hole for earthing
4 Lock washer
5 Module frame
6 Spring washer
7 Nut
Proceed as follows to ensure correct earthing of the
modules:
1. Place the lock washer (4) and the ring terminal
with the earthing cable (2) over the earthing hole
(3) on the front of the module.
2. Insert the fastening screw M6 (1).
3. Then push the spring washer (6) from the under-
side of the module onto the fastening screw (1)
and fasten the nut (7).
6 Care and maintenance
Check your solar generator approx. every three years
for soiling. This occurs especially on the lower edge
of the modules and forms a haze that cannot be
washed off even by heavy rain.
In the event of significant dirt build-up we recom-
mend cleaning the glass surface. Use plenty of
lukewarm water and a soft brush. This prevents loss
of yield.
CAUTION
Do not use strong cleaning agents and metallic
objects, in order to avoid damage to the hardened
glass surface!
Occasionally check the cables for damage, corrosion
and make sure they are secure.

7 Module parameters
The electrical parameters can be found in the cor-
responding module datasheet.
8 Declaration of conformity
EU declaration of conformity
Relevant EC Directives
· Directive 73/23/EEC
· Directive 89/336/EEC (EMC Directive)
· Directive 93/68/EEC (Low-Voltage Directive)
Sunways AG, Macairestraße 3-5, 78467 Konstanz,
Germany declares under its sole responsibility
that the solar module types listed above meet the
requirements of the following standards
· DIN EN 50178
· EN 50081-1 (2)
· EN 50082-1 (2)
· DIN VDE 0101
· DIN VDE 0110
and therefore comply with the EC Directives listed
above.
Roland Burkhardt, CTO
Sunways AG
Photovoltaic Technology
Macairestraße 3 - 5
78467 Konstanz
Germany
Phone +49 (0)7531 996 77-0
Fax +49 (0)7531 996 77-444
email [email protected]
www.sunways.de
Technical Hotline
Germany: +49 (0)7531 996 77-577
Spain: +34 93 665 20-40
SD210712A 12/09 EN
Other Sunways Solar Panel manuals
Popular Solar Panel manuals by other brands

IBC SOLAR
IBC SOLAR PolySol TX Series installation instructions

CSG PVTech
CSG PVTech CSG270M2-35/1956x992 series installation manual

Kings Adventure
Kings Adventure 250W user manual

Unical
Unical SOLECO 160 2.5 Installation, Use and Servicing Instructions

UNIRAC
UNIRAC SolarMount 224 installation manual

Conrad
Conrad TPS-103 2W/6V operating instructions