RIDGE
ACCESSORIES
RIDGE
ACCESSORIES
EMERGENCY OVER-RIDE SWITCH
EMERGENCY OVER-RIDE SWITCH
IMPORTANT
Do not use any type of corrosion inhibiting spray on any part of this unit.
This unit is hermetically sealed so does not require any other form of
sealing. The studs have been tinned to inhibit corrosion.
ENSURE CORRECT BATTERY SIZING
The charging system must be correctly sized to the batteries. If the
charging system is too small for the batteries the Isolator Module will not
function correctly.
INSTRUCTIONS
INSTRUCTIONS
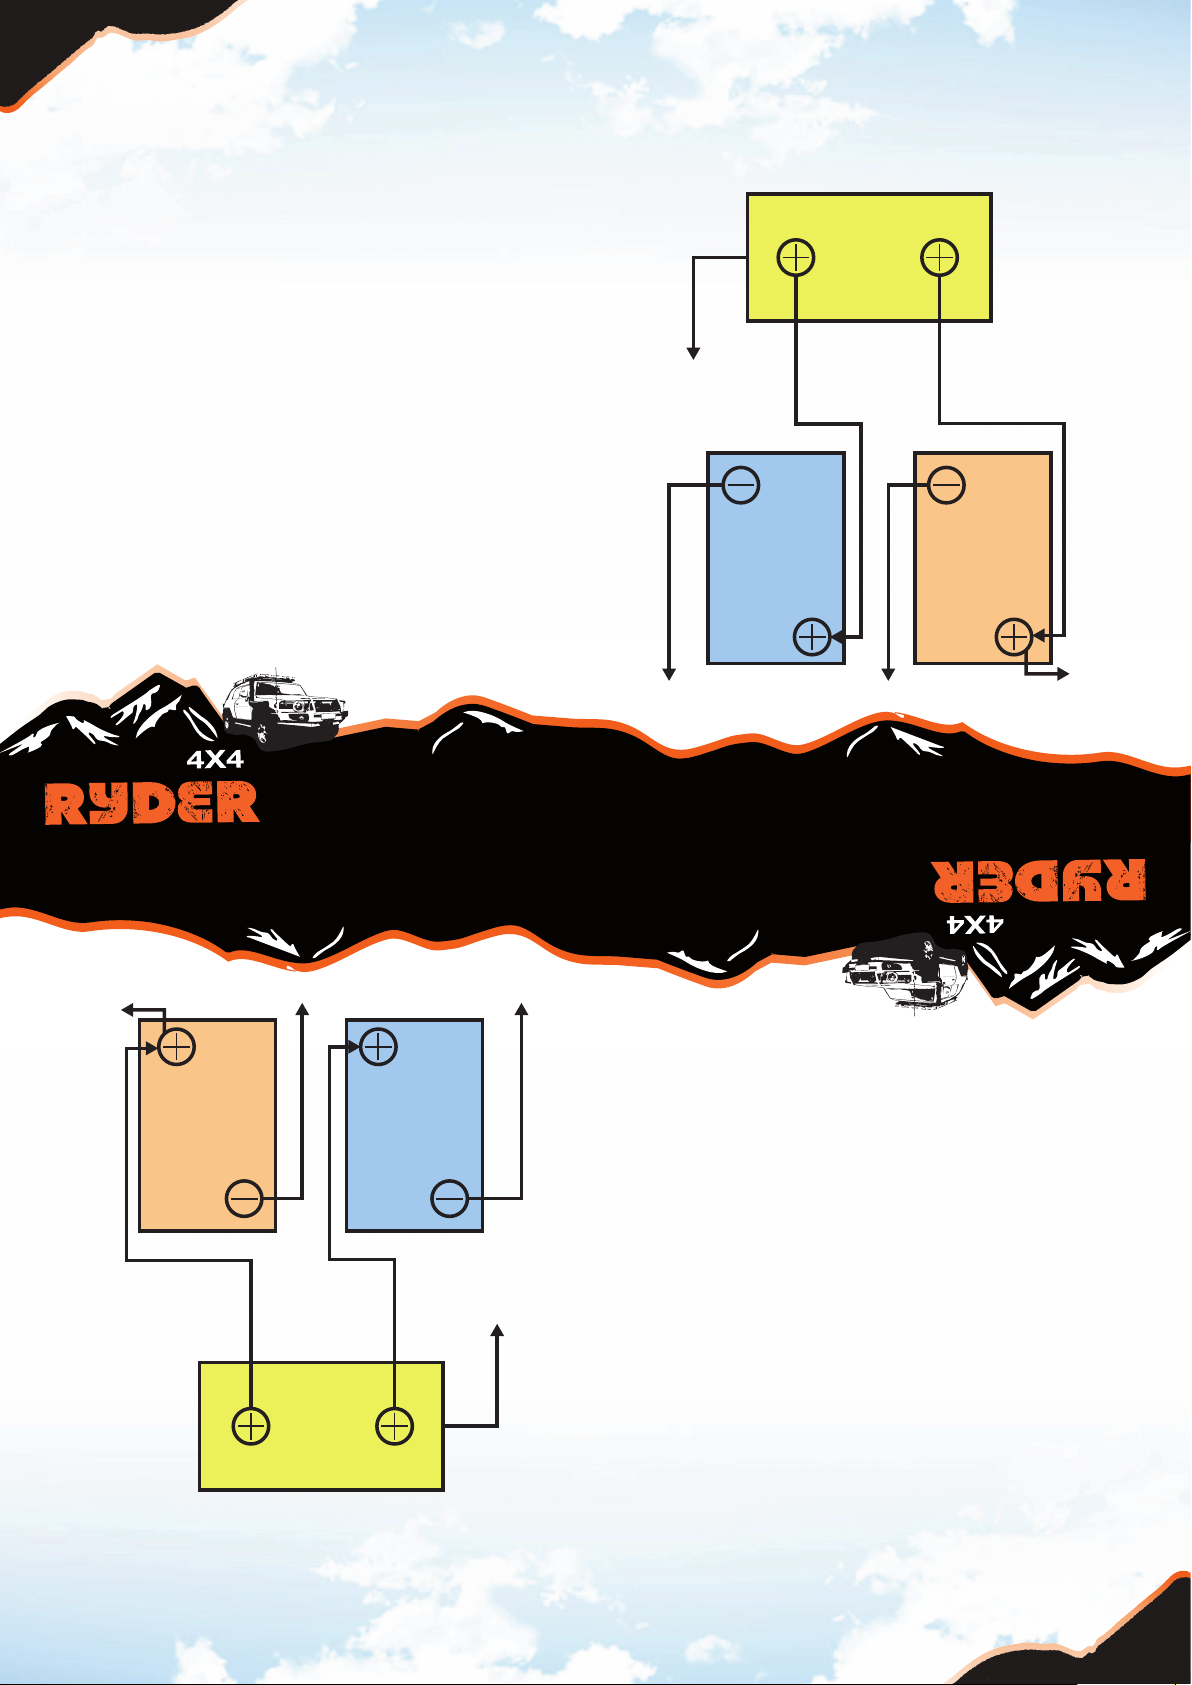
How the Isolator module works:
Two Position Switch
With the switch in the Ø position the isolator is in normal operation.
Once the voltage of the starting battery rises above 13.3V DC, the
isolator switches to charge both batteries in parallel, when the voltage
drops below 12.8V DC the isolator disengages.
With the switch in the 1 position the auxiliary battery is now in parallel
with the main cranking battery and can be utilised for additional
cranking power or to start the vehicle if the cranking battery has failed.
Alternator Size Max Auxiliary Battery
10 Amp 60 AH GRP 22
16 Amp 85 AH GRP 24
25-35 Amp 85-100 AH GRP 27
50-60 Amp 100-130 AH GRP 31
80-90 Amp 130-220 AH GRP 80
Alternator Size Max Auxiliary Battery
10 Amp 60 AH GRP 22
16 Amp 85 AH GRP 24
25-35 Amp 85-100 AH GRP 27
50-60 Amp 100-130 AH GRP 31
80-90 Amp 130-220 AH GRP 80
Manufactured and packaged for
SUPER CHEAP AUTO PTY LTD
ABN: 64 085 395 124
751 Gympie Road, Lawnton, QLD,
4501, Australia
MADE IN CHINA
www.supercheap.com.au
Manufactured and packaged for
SUPER CHEAP AUTO PTY LTD
ABN: 64 085 395 124
751 Gympie Road, Lawnton, QLD,
4501, Australia
MADE IN CHINA
www.supercheap.com.au
Warranty Information
Our goods come with guarantees that cannot be excluded under the
Australian Consumer Law. You are entitled to a replacement or refund
for a major failure and for compensation for any other reasonably
foreseeable loss or damage. You are also entitled to have the goods
repaired or replaced if the goods fail to be of acceptable quality and the
failure does not amount to a major failure.
0009 -19
0009 -19
Alternator Vs battery capacity:
Alternator Vs battery capacity: