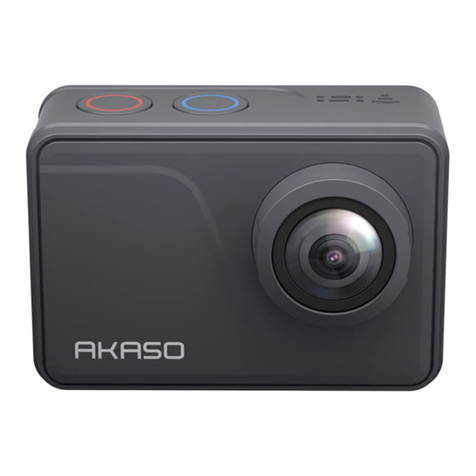
SURFOLA SF530 User manual

DE FREN
ES JP
IT


Let us know if you encounter any problems while using the camera, our
support team will provide you with our best solution quickly and professionally.
All items purchased from Surfola are covered by a 1 year warranty.
Official Website: www.surfola.co
After-sale email address:
support.ac@surfola.co
support@surfola.co
We look forward to bringing you more great products in the future.
Kind regards,
Surfola Team
Thanks for Choosing Surfola!
Instagram YouTube Facebook
Wi-Fi App available on:


English - - - - - - - - - - - - - - - - - - - - - - - - - - - - 1-10
Detusch - - - - - - - - - - - - - - - - - - - - - - - - - - - 11-16
Français - - - - - - - - - - - - - - - - - - - - - - - - - - 17-22
Italiano - - - - - - - - - - - - - - - - - - - - - - - - - - - 23-28
Español - - - - - - - - - - - - - - - - - - - - - - - - - - - 29-34
日本语 - - - - - - - - - - - - - - - - - - - - - - - - - - - 35-40
Contents

01
++ =
+ =

02

EN
03
Image Resolution
Lens
Video Compression Format
Video/Image Format
Wi-Fi Connection
Storage
USB Interface
Charging Time
Continuous Recording Time
Battery
Waterproof Case Depth Rating
Specifications
Model
Video Resolution
SF530
4K (60FPS), 4K (30FPS), 2.7K (60FPS), 2.7K (30FPS)
1080P (120FPS), 1080P (60FPS), 1080P (30FPS)
720P (240FPS), 720P (120FPS), 720P (60FPS)
24MP/20MP/16MP/14MP/10MP/8MP/5MP/2MP
Wide/Medium/Narrow Adjustable Lens
H.264
MOV/JPEG
Android/iOS Supported
Support U3 Micro SD card up to 128GB (Not included)
Micro USB
2 Hours
Up to 90 Minutes [or Continuously if powered through the cable]
Removable 3.7V 1050 mAh Li-ion Battery
40M/131.2FT
English/Español/Pусский/Portugues/한국어/简体中文/
繁体中文/Deutsch/Italiano/Français/日本語
Language Options
Weight
Dimensions
64g/2.24oz [With Battery]
60×43×27mm/2.36"×1.69"×1.06"

EN
04
Product Description
Front Screen
OK Button
Power/Mode Button
Wi-Fi Indicator
Micro-USB Port
Micro-HDMI Port
Microphone
TF Card Slot
Touch Screen
Battery Compartment Door
Battery Compartment Door Catch
Camera Lens
Up Button/Wi-Fi
Down Button/
Speaker
Charging Indicator
Working Indicator

EN
05
GETTING STARTED
Charging
To charge, use the included micro-USB cable to connect the camera with a power adapter
or a USB charging port. The camera will automatically turn on when charging. To more
effectively charge the camera, turn it off. The red charging indicator will stay on when the
camera is charging and turn off when the camera is fully charged.
You can also charge the batteries with the included Surfola action camera battery charger.
Turning the Camera On/Off
Press and hold the power button for 2 seconds to turn the camera on/off.
Using a Micro SD Card
The camera does not include internal storage and requires a U3 Micro SD card (Max 128GB
supported) to function. Use a high-quality, branded card for maximum reliability. Insert a
micro SD card and format it (format option is in the camera's system settings) to prepare
the card for use. Formatting will permanently erase any data on the micro SD card.

EN
06
OPERATING THE CAMERA
Camera Modes
Video Mode
After turning on, the camera will enter video mode automatically.
• Press the OK button to start or stop recording.
• Press the DOWN button to turn on/off the audio recording. You can choose the
microphone type in the system settings when you use the external microphone.
• Press and hold the DOWN button for 3 seconds to switch between the front and rear
screen.
• Press the UP button to turn on/off the Wi-Fi.
• Press the MODE button to cycle through video, photo, playback, video settings and
photo settings modes. You can also swipe left or right on the screen to switch modes.
• Touch icon to enter playback mode.
• Touch icon to enter video and system settings.
• Swipe up on the screen to select different video recording modes: Normal, Loop
Recording, Time-lapse, Slow Motion, Fast Motion.
Normal
4K30

EN
07
Photo Mode
• In different video recording modes, the
corresponding video settings will also be
different. The supported features and
resolutions are also different. (Refer to
the settings menu page for details)
• EIS is not supported in Time-lapse,
Slow Motion, or Fast Motion recording
modes.
• Press OK button to take photos.
• Press the UP button to turn on/off Wi-Fi.
• Press and hold the “DOWN” button for 3 seconds to switch between the front and rear
screen.
• Press the MODE button to cycle through photo, playback, video settings, photo settings
and video mode. You can also swipe left or right on the screen to switch to video mode.
• Touch icon to enter playback mode.
• Touch icon to enter photo and system settings.
• Swipe up on the screen to select different photo capture modes: Single, Burst Photo,
Time-lapse Photo, Self-Timer, Long Exposure.
Single
24MP
Normal
SlowMotion FastMotion Wi-Fi
Loop
Record
Video
V-Timelapse

EN
08
Playback Mode
• In different photo capture modes, the
corresponding photo settings will also
be different. (Refer to the settings menu
page for details)
Single Burst
Self-Time LongExp Wi-Fi
Photo
P-Timelapse
7/7
00:00:02 00:00:03 00:00:47
• Touch and icon to choose to playback either your photos or videos.
• Touch to choose the desired picture or video you want to playback.
• For videos, press the OK button or touch the screen to play/pause the video. Press
the icon to exit current video playback.
• To delete a file, touch the icon first, and then touch the picture or video you want
to delete, then touch again the icon. Then you can choose to delete the current file,
delete all files or cancel the deletion.
• Touch icon to exit playback mode.

EN
09
Settings Mode
Operating the Camera via Mobile Phone
Download the app to view and control the camera on your mobile device.
Download the App
Option 1: Download the "iSmart DV2" App from the App Store [iOS 7.1 or Later] or
Google Play (Android 4.3 or later).
Option 2: Scan the QR code below to download and install the "iSmart DV2" App.
• In video or photo mode, touch the icon to enter settings mode.
• To exit settings and go back to recording mode, touch the icon.
• Diving Mode: When you dive with the action camera, turn on this function to adjust the
settings for underwater photography.
• Distortion Calibration: When this function is turned on, the distortion effect caused by
the wide angle will be corrected.
• Driving Mode: This feature allows using the action camera as a dash cam. After this
function is turned on, the camera automatically enters a 1-minute loop recording.
You can also change the duration of the loop recording in the settings.
• Upside Down: Flip the camera's operation page up and down.

EN
10
Wi-Fi Connection
Note
Connect your phone to the camera wirelessly. You can control the camera, and download
recordings from the camera to your phone.
• When you use your mobile phone to operate the camera, the camera screen will stay off.
• The camera can only connect to one device at a time.
• Using the Wi-Fi connection is more energy-intensive; avoid using it when the camera
is low on battery.
Operating Camera via the 2.4GHz Remote Control
Using the remote control to take photos or record videos by pressing the photo button
(red) or video button (gray). It operates in the current photo or video mode, or switches
to standard photo or video mode to capture. After using the remote for a long time, the
battery will eventually need to be replaced. Unscrew the four small screws on the back
of the case and replace with a new CR2025 cell battery.
• Turn on the camera, then press the UP button to turn on Wi-Fi. The orange light at the
top of the camera lights up when Wi-Fi is on.
• Switch on Wi-Fi on your phone and scan for Wi-Fi connections.
• Find and connect with "ActionCam****", Wi-Fi password: 1234567890
• Open the "iSmart DV2" app on your phone.
• To turn off Wi-Fi and disconnect, press UP button again.

DE
11
FERTIG MACHEN
Aufladen
Verwenden Sie zum Aufladen das mitgelieferte Micro-USB-Kabel, um die Kamera mit
einem Netzteil oder einem USB-Ladeanschluss zu verbinden. Die Kamera schaltet sich
beim Aufladen automatisch ein. Um die Kamera effektiver aufzuladen, schalten Sie sie
aus. Die rote Ladeanzeige leuchtet, wenn die Kamera aufgeladen wird, und erlischt, wenn
die Kamera vollständig aufgeladen ist.
Sie können die Akkus auch mit dem mitgelieferten Akkuladegerät für die
Surfola-Action-Kamera aufladen.
Ein-/Ausschalten der Kamera
Halten Sie die Ein/Aus-Taste 2 Sekunden lang gedrückt, um die Kamera ein-/auszuschalten.
Verwendung einer Micro-SD-Karte
Die Kamera enthält keinen internen Speicher und benötigt eine U3 Micro SD-Karte
(max.128 GB unterstützt), um zu funktionieren. Verwenden Sie eine hochwertige
Markenkarte für maximale Zuverlässigkeit. Legen Sie eine Micro-SD-Karte ein und
formatieren Sie sie (Formatieren in den Systemeinstellungen der Kamera), um die
Karte für die Verwendung vorzubereiten. Durch das Formatieren werden alle Daten auf
der Micro-SD-Karte dauerhaft gelöscht.

DE
12
BEDIENUNG DER KAMERA
Kameramodi
Video Modus
Nach dem Booten wechselt die Kamera automatisch in den Videomodus.
• Drücken Sie die OK-Taste, um die Aufnahme zu starten oder zu beenden.
• Drücken Sie die DOWN-Taste, um die Audioaufnahme ein-/auszuschalten. Sie können
den Mikrofontyp in den Systemeinstellungen auswählen, wenn Sie das externe Mikrofon
verwenden.
• Halten Sie die DOWN-Taste 3 Sekunden lang gedrückt, um den vorderen und hinteren
Bildschirm zu wechseln.
• Drücken Sie die UP-Taste, um Wi-Fi ein-/auszuschalten.
• Drücken Sie die MODE-Taste, um zwischen den Modi Video, Foto, Wiedergabe,
Videoeinstellungen und Fotoeinstellungen zu wechseln. Sie können auch auf dem
Bildschirm nach links oder rechts wischen, um in den Fotomodus zu wechseln.
• Berühren Sie das Symbol, um in den Wiedergabemodus zu wechseln.
• Berühren Sie das Symbol, um die Video- und Systemeinstellungen aufzurufen.
• Wischen Sie auf dem Bildschirm nach oben, um verschiedene Videoaufnahmemodi
auszuwählen: Normal, Loop Aufnahme, Zeitraffer, Zeitlupe, Schnelle.
Normal
4K30

DE
13
Fotomodus
• In verschiedenen Videoaufnahmemodi sind auch
die entsprechenden Videoeinstellungen
unterschiedlich. Die unterstützten Funktionen
und Auflösungen sind ebenfalls unterschiedlich.
(Einzelheiten finden Sie auf der Seite des
Einstellungsmenüs)
• EIS wird in den Aufnahmemodi Zeitraffer,
Zeitlupe und Schnelle nicht unterstützt.
• Drücken Sie die OK-Taste, um Fotos aufzunehmen.
• Drücken Sie die UP-Taste, um Wi-Fi ein-/auszuschalten.
• Halten Sie die DOWN-Taste 3 Sekunden lang gedrückt, um den vorderen und
hinteren Bildschirm zu wechseln.
• Drücken Sie die MODE-Taste, um durch Foto, Wiedergabe, Videoeinstellungen,
Fotoeinstellungen und Videomodus zu blättern. Sie können auch auf dem Bildschirm
nach links oder rechts wischen, um in den Videomodus zu wechseln.
• Berühren Sie das Symbol, um in den Wiedergabemodus zu wechseln.
• Berühren Sie das Symbol, um die Foto-und Systemeinstellungen aufzurufen.
• Wischen Sie auf dem Bildschirm nach oben, um verschiedene Fotoaufnahmemodi
auszuwählen: Einzelbild, Serienbild, Zeitrafferfoto, Timing, Lange Belich.
Single
24MP
Normal
SlowMotion FastMotion Wi-Fi
Loop
Record
Video
V-Timelapse

DE
14
Wiedergabemodus
• In verschiedenen Fotoaufnahmemodi sind
auch die entsprechenden Fotoeinstellungen
unterschiedlich. (Einzelheiten finden Sie auf
der Seite des Einstellungsmenüs)
Single Burst
Self-Time LongExp Wi-Fi
Photo
P-Timelapse
7/7
00:00:02 00:00:03 00:00:47
• Berühren Sie die Symbole und , um Videos und Fotos wiederzugeben.
• Berühren, um das gewünschte Bild oder Video auszuwählen, das Sie wiedergeben möchten.
• Für Videos drücken Sie die OK-Taste oder berühren Sie den Bildschirm, um das Video
abzuspielen/anzuhalten. Drücken Sie das Symbol, um die aktuelle Videowiedergabe
zu beenden.
• Um eine Datei zu löschen, berühren Sie zuerst das Symbol und dann das Bild oder
Video, das Sie löschen möchten. Die ausgewählte Datei wird hervorgehoben. Und tippen
Sie erneut auf das Symbol . Dann können Sie die aktuelle Datei löschen, alle Dateien
löschen oder den Löschvorgang abbrechen.
• Berühren Sie das Symbol , um den Wiedergabemodus zu verlassen.

DE
15
Einstellungsmodus
Bedienung der Kamera über das Handy
Laden Sie die App herunter, um die Kamera auf Ihrem Mobilgerät anzuzeigen und zu steuern.
Laden Sie die App herunter
Option 1: Laden Sie die App „iSmart DV2“ aus dem App Store [iOS 7.1 oder höher] oder
Google Play (Android 4.3 oder höher) herunter.
Option 2: Scannen Sie den QR-Code unten, um die „iSmart DV2“-App herunterzuladen
und zu installieren.
• Berühren Sie im Video-oder Fotomodus das Symbol, um in den Einstellungsmodus
zu gelangen.
• Um die Einstellungen zu verlassen und zum Aufnahmemodus zurückzukehren, berühren
Sie das Symbol.
• Tauchmodus: Wenn Sie mit der Action-Kamera tauchen, schalten Sie diese Funktion ein,
um die chromatische Aberration der Unterwasserfotografie anzupassen.
• Verzerrung Skorrektur: Wenn diese Funktion eingeschaltet ist, wird der durch den Weitwinkel
verursachte Verzerrungseffekt korrigiert.
• Fahrmodus: Diese Funktion bedeutet, dass die Action-Kamera als Dashcam verwendet
wird. Nachdem diese Funktion eingeschaltet wurde, beginnt die Kamera automatisch mit
einer 1-minütigen Schleifenaufnahme. Sie können auch die Dauer der Loop-Aufnahme
in den Einstellungen ändern.
• Inversions Modus: Klappen Sie die Betriebsseite der Kamera nach oben und unten.
Table of contents
Languages:
