1. INTRODUCTION
Suunto Bike POD is an accessory for your Suunto t3, Suunto t4 or Suunto
t6 wristop computer. It is a light-weight, wireless speed and distance sensor
that combines new speed and distance functions with the detailed heart
rate analysis and training benefits of your wristop computer, creating one of
the most advanced cycling-specific training tools available.
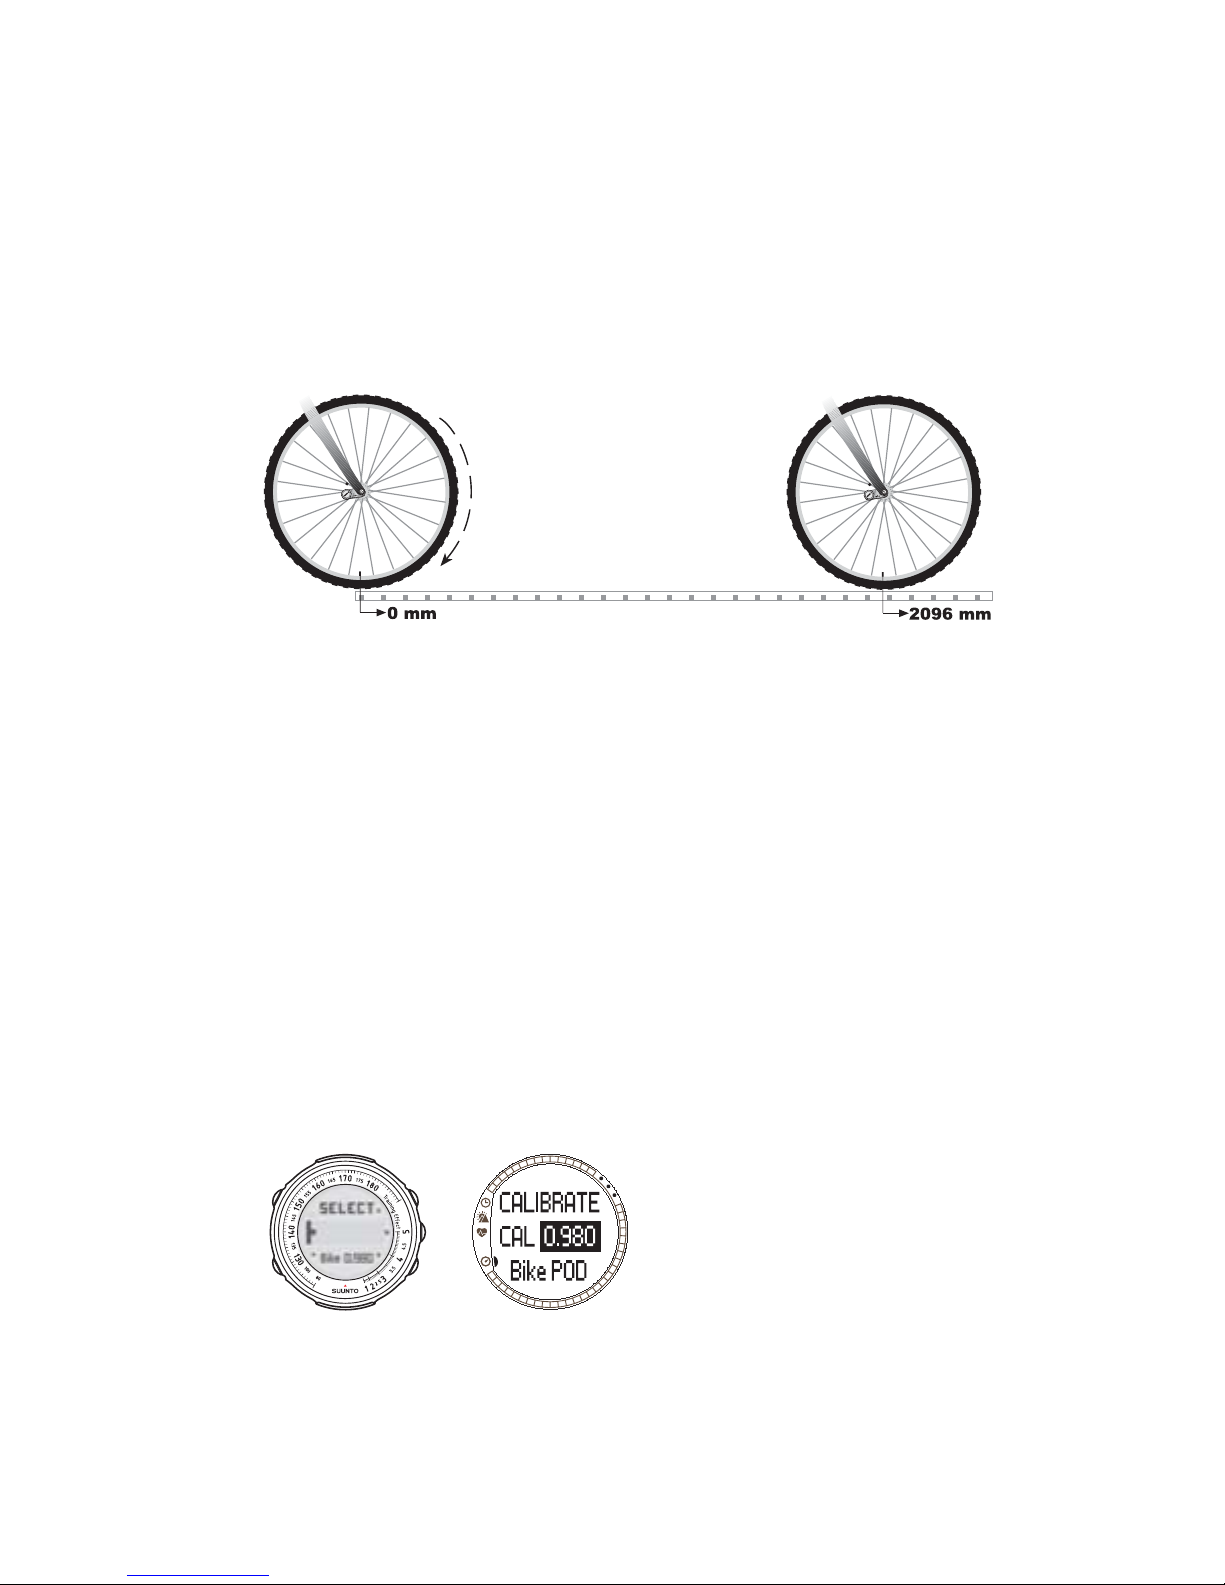
Suunto Bike POD measures your cycling speed and distance by calculating the
relation between the circumference of your bicycle wheel and the speed at
which it rotates. Measurement is effortless and, when properly calibrated, also
very accurate.
Suunto Bike POD adds new features to your Suunto t3, t4 or t6 wristop
computer. Once paired with the Bike POD, the wristop computer displays your
current speed, the distance from start and the lap distance. Furthermore, it
stores lap times automatically according to the distance set by the user; gives
alarms for too fast or too slow speed, and offers a distance-based interval
training function.
NOTE: The wristop-computer functions related to the use of your Suunto Bike
POD are explained in the individual Suunto t3, t4, and t6 instruction manuals.
You can download the latest version of the manuals at www.suunto.com/
training.
2. BEFORE USE
2.1. PAIRING YOUR BIKE POD
Before you can use your Suunto Bike POD, you have to pair it with your Suunto
wristop computer. This process can be compared to the tuning of a radio. To be
able to listen to a specific radio station, you have to tune the radio to the correct
frequency. Similarly, to be able to use your Suunto wristop computer with a
specific Bike POD, you must pair them with each other. This is only necessary
when you use your Bike POD for the first time.
To pair your Bike POD with your Suunto wristop computer:
1. Remove the Bike POD battery.
2. Short-circuit the - and + metal plates in the battery compartment of the POD
by connecting them with a metal instrument, for example, by touching them
with a screwdriver, knife or a paperclip.
3. In your Suunto t3 or Suunto t4, go to Training mode settings and select
Pair a POD and then Bike.
In your Suunto t6, go to the Training menu and select Pair and then Bike
POD (if your device has a serial number 50500000 or higher) or Spd sens (if
your device has a serial number 50499999 or lower). The message ‘TURN ON
NEW DEVICE’ is displayed.
4. Insert the battery in the battery compartment and wait for acknowledgement.
5. Your Suunto t3 or t4 will display “Paired” or, if pairing failed, return to the
Pair a POD menu.
Your Suunto t6 will display either ‘”PAIRING COMPLETE” or, if pairing failed,
“NO DEVICES FOUND” within 30 seconds.
6. If pairing is successful, close the battery compartment cover. If pairing fails,
remove the battery and repeat steps 2–5. If pairing still fails, make sure that
there are no active ANT transmitters such HR belts nearby and repeat steps
2–5.
After successful pairing, you can view speed and distance-related information in
the Speed/Distance mode while on the move.
If you would like to use the Suunto t6 (serial number 50499999 or lower)
simultaneously with both the Bike POD and the Foot POD, Suunto offers a free
update to the device at your nearest Suunto Service Center, upon presenting
the Bike POD proof of purchase and after paying the postal costs for sending it
to the service center.
For information on Suunto Service Center locations visit www.suunto.com.
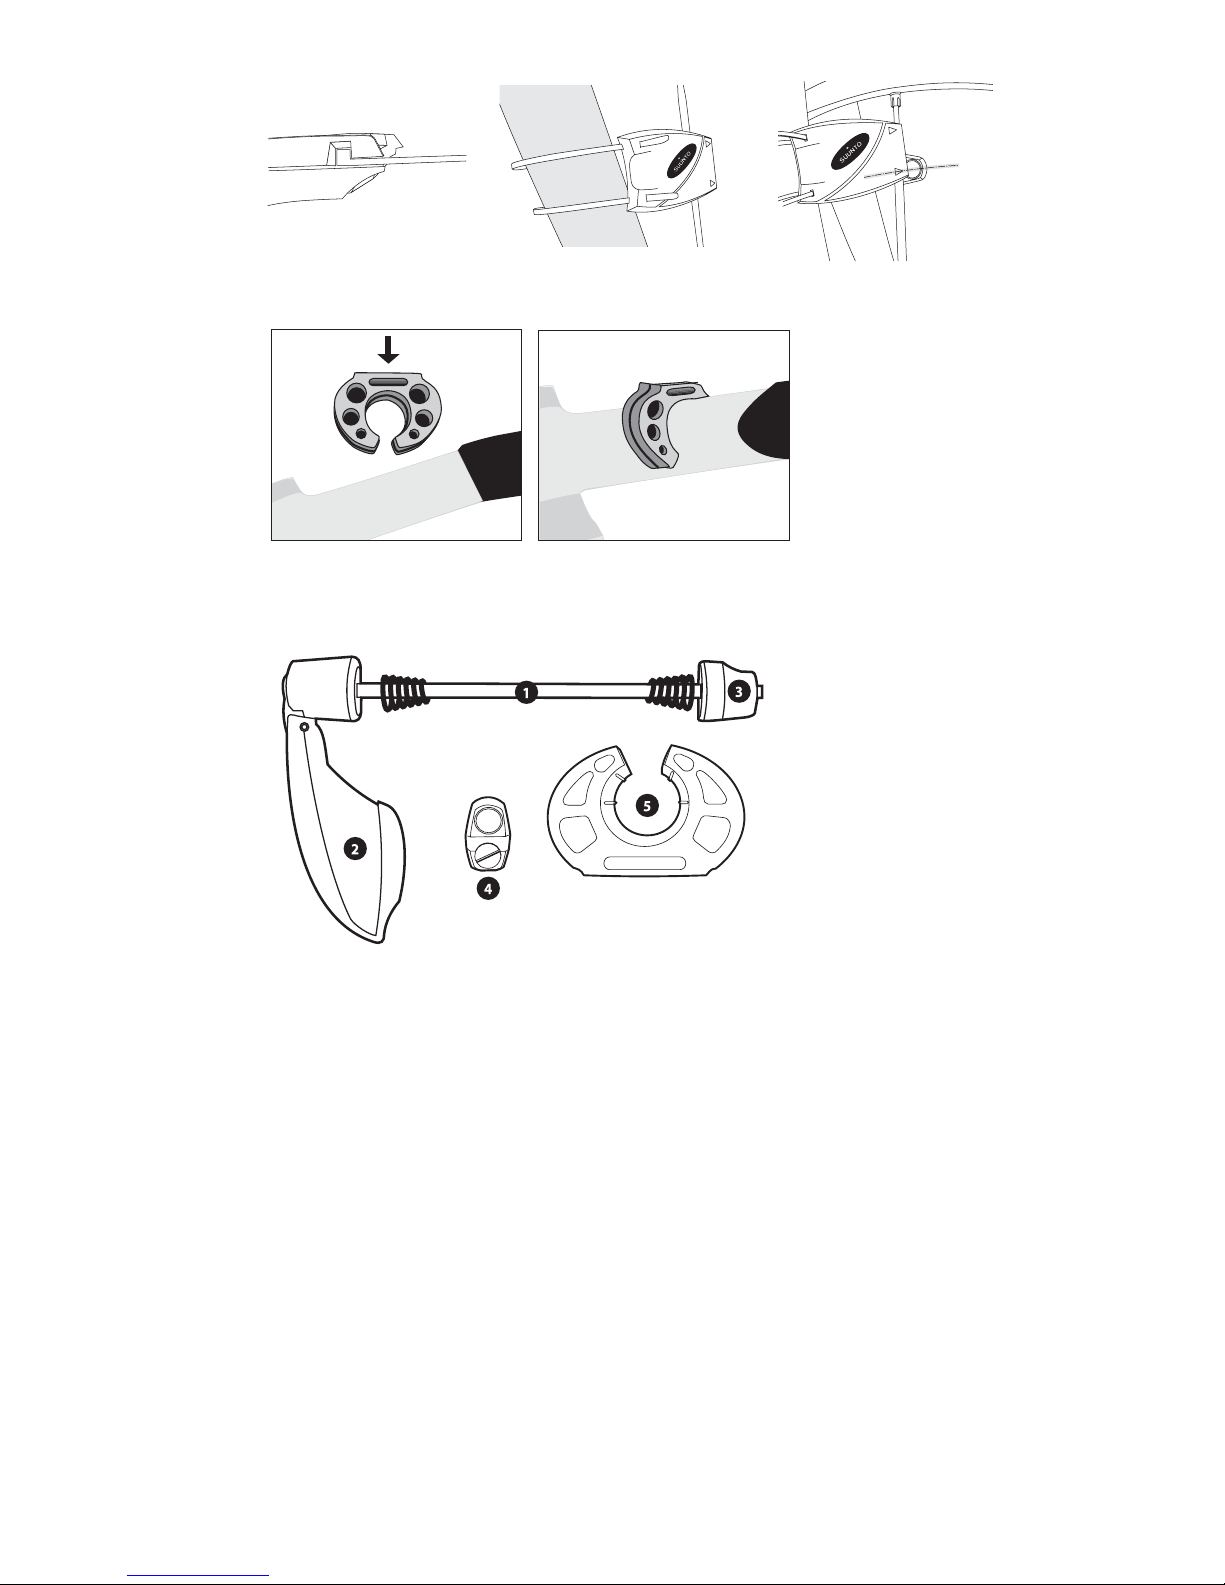
2.2. INSTALLING AND REPLACING THE BATTERY
1. Open the battery compartment cover with a coin.
2. If replacing the battery, remove the old battery.
3. Place the new battery into the battery compartment with the positive side
facing up and close the cover.
NOTE: Replace the battery with extreme care to ensure that your Bike POD
remains water-resistant. Check the condition of the seal on the battery cover
each time you change the battery and replace the battery cover if the seal is
damaged. Careless battery replacement may void the warranty.
EN