Sven EASY SEE-149 LED User manual

www.sven.fi
OPERATION
MANUAL
DVB-T/T2 TV Tuner with
Multimedia Player
EASY SEE-149
LED
EASY SEE-150
DD LED

ENG
1
Operation Manual
Congratulations on purchasing the SVEN TV Tuner!
Please read this Operation Manual before using the unit and retain this Operation Manual in a safe
place for future reference.
COPYRIGHT
© 2014. SVEN PTE. LTD. Version 1.0 (V 1.0).
This Manual and information contained in it are copyrighted. All rights reserved.
TRADEMARKS
All trademarks are the property of their legal holders.
NOTICE OF RESPONSIBILITY RESTRICTION
Despite the exerted efforts to make this Manual more exact, some discrepancies may occur. The
information in this Manual is given on “as is” terms. The author and the publisher do not bear any
liability to a person or an organization for loss or damage which has arisen from the information
contained in this Manual.
UNPACKING
Unpack the device carefully. Make sure there are no accessories left in the box. Check up the
device for damage. If the product was damaged during transportation, address the company-
carrier responsible for the delivery If the product functions incorrectly, address the dealer at once.
2
2
3
6
18
19
20
CONTENTS
1. SAFETY PRECAUTIONS ...........................................................................
2. PACKAGE CONTENTS .............................................................................
3. DESCRIPTION ......................................................................................
4. CONNECTION AND OPERATION ................................................................
5. TROUBLESHOOTING .............................................................................
6. TECHNICAL SPECIFICATIONS ..................................................................
7. FILE PLAYING FORMATS .....................................................................
Technical support is on www.sven.fi.
EASY SEE-149 LED
EASY SEE-150 DD LED

ENG
2
DVB-T/T2 TV Tuner with
Multimedia Player
Caution! High voltage inside! To avoid the risk of electric
shock do not open or touch elements inside.
1. SAFETY PRECAUTIONS
• Carefully read this Instruction Manual before installing and connecting TV Tuner and do not forget
about it during operation in future. Follow all instructions and pay attention to warning signs.
• Disconnect the device from the electrical source of power, if you do not intend to use it for an
extended period. Switch offthe power and unplug the power supply plug for safety purposes
during storm, as well as aerial wire. Do not touch the aerial wire plug.
• Do not close vent openings with newspapers, serviettes and other objects not to prevent heat
removal. Do not install the device close to thermal sources such as radiators, heaters, etc. to avoid
its overheating.
• Protect the device against ingress of foreign objects inside.
• Protect the device against high humidity, ingress of water and dust inside.
• Provide easy access to the socket and power cord. Before connecting the tuner to the power
supply network make sure that the socket and power cord are not damaged and they provide a
reliable contact. The power cord must not be deformed or bended. Do not place any objects on the
power cord and aerial cable. It is prohibited to plug the tuner in the network with voltage less than
90 V or higher 242 V and with alternating current frequency different from 50 / 60 Hz.
• Protect the device against excessive vibrations or being dropped, which can result in damage of
its housing and electronic components and reducing its service life. Keep out of reach of children
to avoid the device damage by them.
• Never attempt any repairs of the appliance. Any repairs must be performed by specialists of
a service centre. See the list of service centres on the web-site www.sven.fi.
Danger arrow inside triangle means hazardous voltage inside housing.
Exclamation mark inside triangle means that you should pay special attention to available
important instructions.
Square-in-square means that the device belong to Class 2 electrical protection. Product
safety is provided by double insulation of current-carrying parts. Identical components must
be used only for the replacement of components.
ATTENTION!
If the device was exposed to the electrostatic discharge, it can be out of operation
temporarily. In this case it is necessary to turn off the device and to turn on again after a
time.

ENG
3
Operation Manual EASY SEE-149 LED
EASY SEE-150 DD LED
a b c edf
Fig. 1. Front panel of EASY SEE-149 LED
2. PACKAGE CONTENTS
• DVB-Т2 TV tuner – 1 pc
• Remote control – 1 pc
• ААА battery – 2 pcs
• АV cable – 1 pc
• Operation Manual – 1 pc
• Warrant card – 1 pc
3. TECHNICAL DESCRIPTION
DVB-T/T2 TV tuners EASY SEE-149 LED and EASY SEE-150 DD LED with multimedia players are
intended to receive the digital over-the-air signal and transmit the converted signal to a TV-set. The
possibility exists of recording programs on a USB device with their following watching, as well as
watching later a required program (Timeshift). Tuners have also USB ports to reproduce photo, to
play back video or musical files from external digital carriers.
Features
• Reception of DVB-T/T2 signal (open channels)
• 720p, 1080i, 1080p high-definition television capability
• Media content reproduction via USB port
• Personal video recorder (PVR) capability
• Scheduled personal video recorder (scheduled PVR) capability
• Timeshift mode capability
• Device software updating
• Digital radio
• LED display
• Dolby Digital decoder (in SEE-150 DD LED)
• Games Gomoku, Boxit, Tetris are integrated into the tuner
• Built-in 5 V/2 A adapter
• Metal case
Front panels

ENG
4
DVB-T/T2 TV Tuner with
Multimedia Player
b c ge fd
ah
dca b e f
EASY SEE-150 DD LED
aON/OFF button
bLED display
cLED indicator
dIR sensor for remote control
e▲▼: Menu navigation battons
fUSB port to connect external carriers
aAC IN: power cord
bANT IN: antenna input connector to connect
DVB-T/T2
cANT OUT: output jack for the through signal
(supplied to jack ato transfer to another device)
dL/R: stereo audio output (left/right channel)
eVIDEO: composite video output (CVBS)
fHDMI: HDMI output
gCOAX: coaxial audio output
hYPbPr: component video output (YPbPr)
Rear panels
Fig. 3. Rear panels of EASY SEE-149 LED and EASY SEE-150 DD LED
Fig. 2. Front panel of EASY SEE-150 DD LED

ENG
5
Operation Manual EASY SEE-149 LED
EASY SEE-150 DD LED
w
t
u
s
q
r
q
p
e
h
c
d
f
h
i
k
n
o
l
l
j
e
g
x
v
ab
m
p
Fig
. 4. Remote control
Remote control
aSTANDBY: tuner switching on/off
bMUTE: sound switching on/off
cTTX: display teletext contents
dSUBTITLE: selection of subtitle language
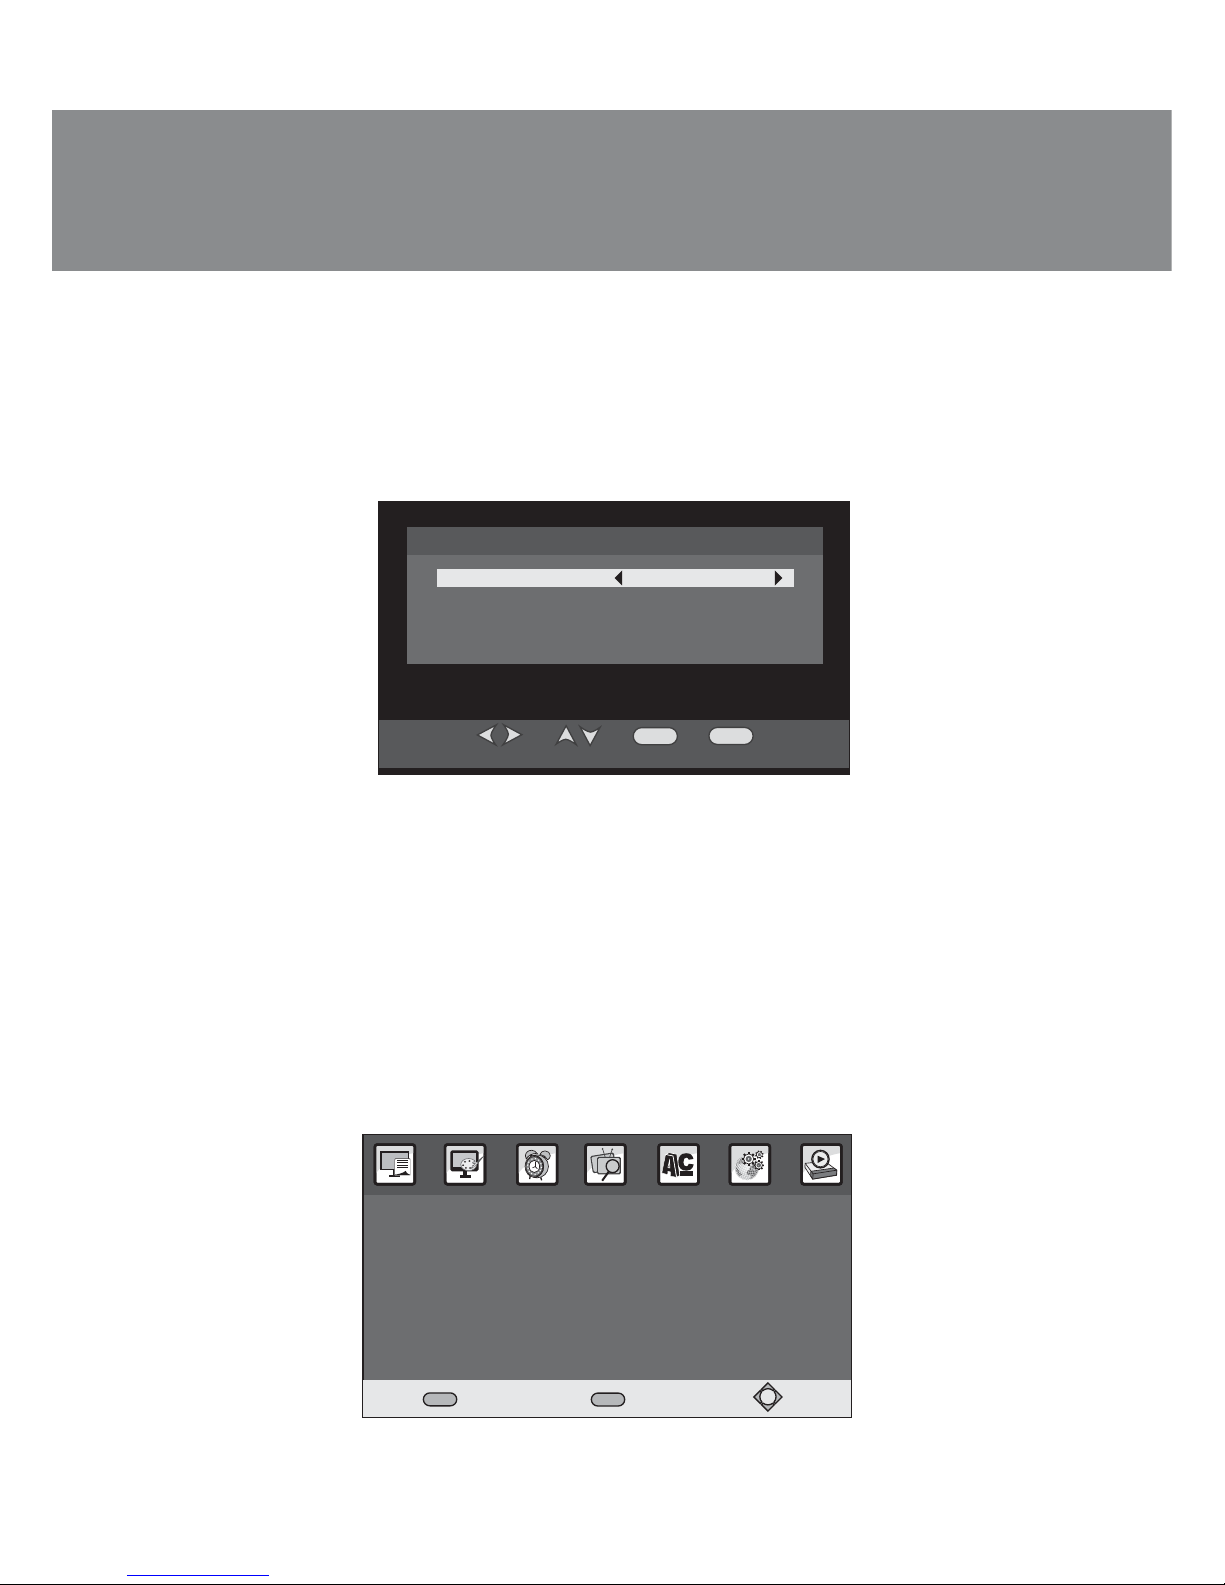
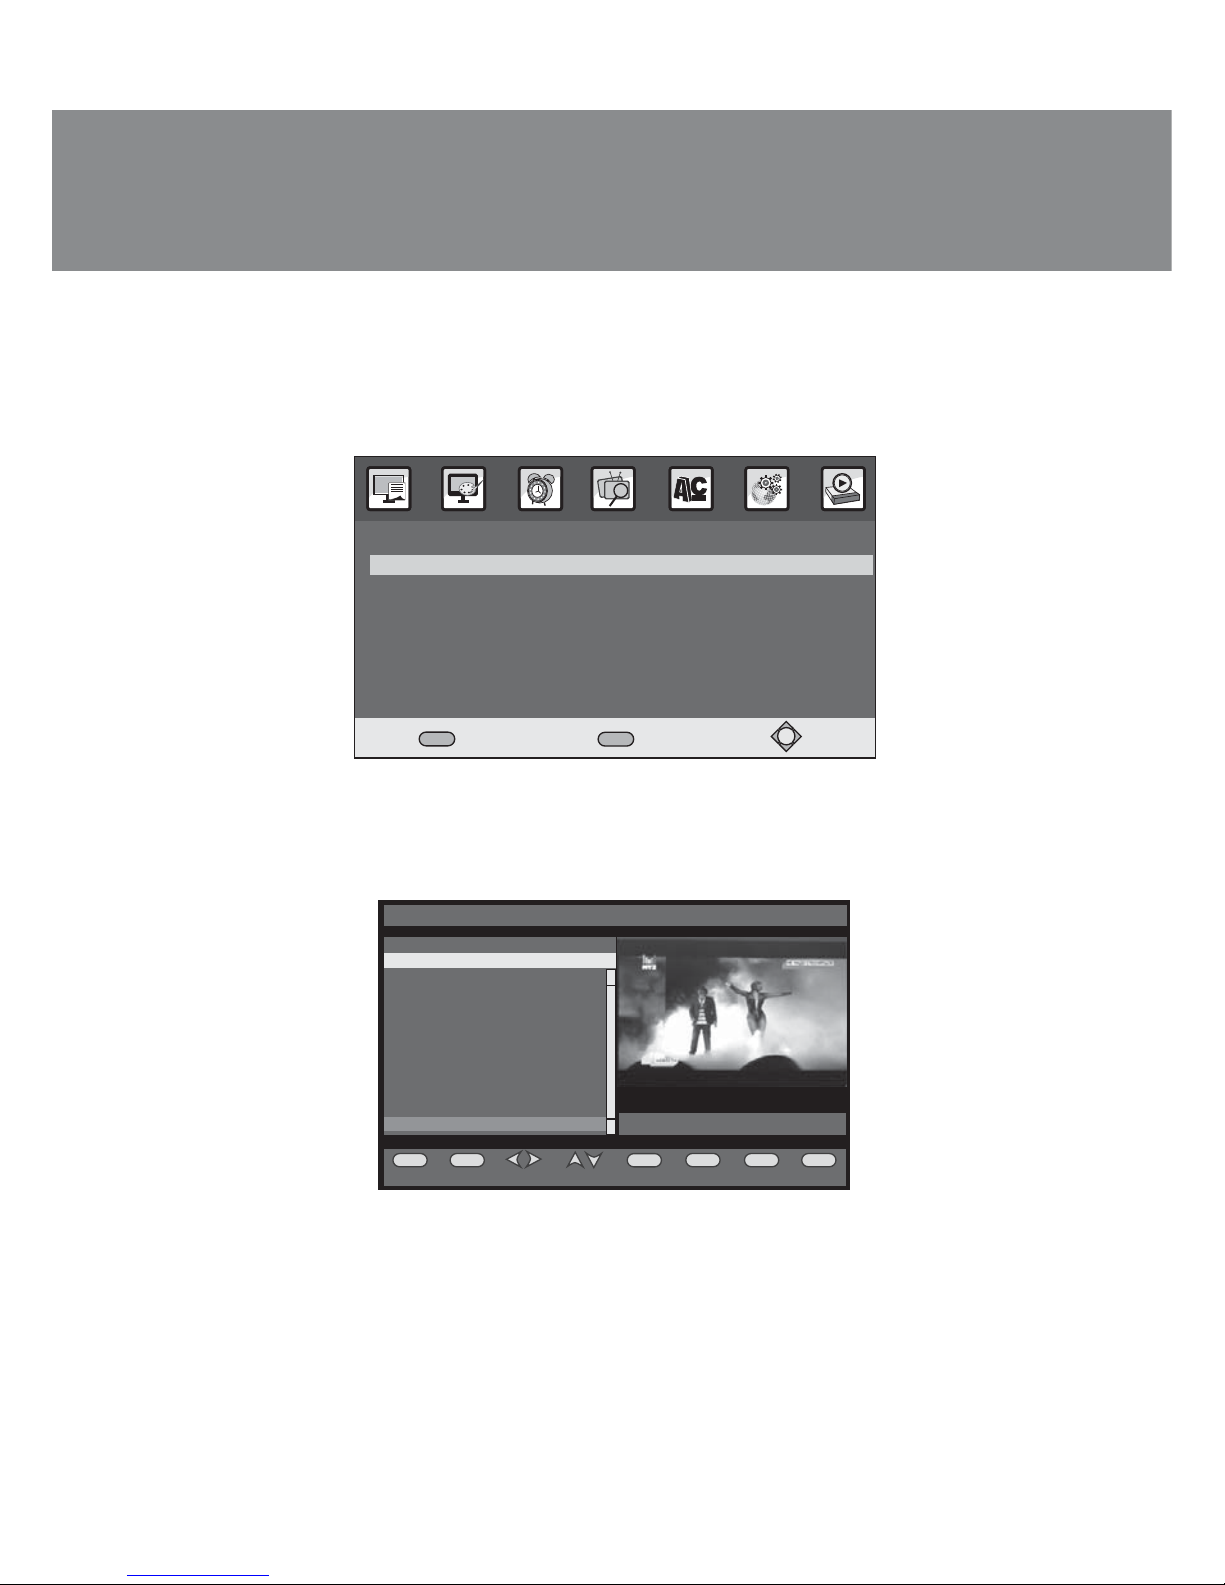
e▲/▼: menu navigation buttons
(CH-/CH+: view of previous/ next channel)
fEXIT: menu exit, teletext mode exit
gOK: selected highlighted parameter confirmation
h◄/►: menu navigation buttons
(VOL-/VOL+: volume decrease/increase)
iTV/RADIO: switch between ТV and radio mode
jRECALL: return to last selected TV channel
kGOTO: move to Multimedia mode or selected time of
video playback
lPREV/NEXT: previous/next file
mSTOP: stops media playing
nREPEAT: turn on/offrepeat mode
oColor buttons: operations in teletext menu and other
comands from OSM
pPLAY/PAUSE: play/pause media playback or start
Timeshift function
qREV/FWD: rewind backward/forward during a media
playback
r0-9: numeric buttons
sFAVOURITE: display favorite channels list
tMENU: display the main menu
uAUDIO: audio setting menu
vPVR: record a TV program
wEPG: display electronic program guide
xINFO: display content information
Battery installation
• Remove the battery compartment cover from the remote
control.
• Put 2 × ААА size batteries (included) observing polarity.
• Close the battery compartment.
Notes:
• Use the remote control at an angle of up to 30° at the
distance of up tp 7 meters from the appliance.
• Point the remote control to the IF sensor of the tuner.
• If the remote control does not operate, check the
battery availability or change them for new batteries.
• Extract batteries from the remote control if it will not be
used over a long period of time (more than one week).

ENG
6
DVB-T/T2 TV Tuner with
Multimedia Player
Y
L
VIDEO
VIDEO
HDMI
HDMI
COAX
COAX
AC IN
AC IN
Cb/Pb
Cb/Pb
Cr/Pr
Cr/Pr
R
COAX
COAX
LR
VIDEO
VIDEO
HDMI
HDMI
Y
Pb
Pb
Pr
Pr
RF
RF
IN
IN
4. CONNECTION AND OPERATION
Connection to external devices
Before connecting the tuner to any electronic device, turn offthe network power supply both of the
tuner and the device. Carefully read the Operation Manual on a device being connected: TV-set,
amplifier, etc.
• Connect the tuner to a TV-set in accordance with the diagram (Fig. 5) given below using the
included АV cable or HDMI cable (not included).
Note. We recommend to use HDMI cable to improve the sound quality (HDMI interface
provides the best quality of the signal transmission to a TV-set), which is purchased se-
parately.
Fig. 5. Connection diagram
Areal connection with other devices
Rear panel
TV
Component AV cable
HDMI cable
Coaxial cable
Аerial cable
DVB Т/T2
signal source
(aerial/
cable network

ENG
7
Operation Manual EASY SEE-149 LED
EASY SEE-150 DD LED
OK Confirm
Installation
Antenna Setting
Country Setting
Tuner System
Auto Scan
Manual Scan
OFF
England
T + T2
EXIT Return
USB
OSD Language
Country Setting
Tuner System
Auto Scan
English
England
Т+Т2
OK EXIT
Swich Move Select Exit
Start menu
Warning! Menu and its bars can differ depending on a model and software version.
Check connections once more according to instructions of this Operation Manual and then turn on
a TV-set and the tuner.
• Press Standby button ato turn on the receiver. If you use the tuner for the first time or reset the
tuner to the factory presets before turning off, then the Installation menu will be displayed on the
screen (see Fig. 6).
• OSD Language. Using buttons ◄/►hon the remote control select the required language for you
to display the main menu.
• Country Setting. With buttons ◄/►hselect a country, where you are now.
• Tuner System. With buttons ◄/►hselect a signal type you want to receive.
• Auto Scan. Press OK button gon the remote control to start auto scan of channels.
As soon as the auto scan is over, you will be able to watch TV programs.
Installation
• Press MENU button tand select Installation Menu using buttons ◄/►h. In this menu you can
preset your device quickly. Select a parameter using navigation buttons ▲/▼e, press OK button
gor buttons ◄/►hto change its value. After the operation completion press EXIT button fto exit
menu.
Fig. 6
Fig. 7
Installation

ENG
8
DVB-T/T2 TV Tuner with
Multimedia Player
OK EXIT
Swich Move Select Exit
Manual Scan 02/07/2014 12:04
Channel No
Frequency
Bandwidth
Strength
Quality
81%
36%
CH - 30
546. 000 МHz
8 МHz
OK EXIT
Auto Scan
Total Lock
Progress
Frequency
TV List
05 ПЯТЫЙ
06 РОСC
07 РОССИ
08 КАРУС
09 О
10 ТВ Цент
Радио Вести F
Радио Мая
Радио Росси
Radio List№0022 №0003
770.00 МHz МHzBandwidth 8
78%
2
02/07/2014 12:04
Swich Move Select Exit
• Antenna Setting: when using the active aerial with a possibility to supply power over the signal
cable, it can be powered from the receiver (see technical description for the aerial).
• Country Setting: select a broadcasting country.
• Tuner System: here you can choose the type of a signal being received.
• Auto Scan: select Auto Scan menu for automatic scanning and storage of all channels. When
Auto Scan is used, all previously stored channels will be canceled. Press OK button gto start Auto
Scan. Press EXIT button fto cancel Auto Scan.
• Manual Scan: select Manual Scan menu for scanning and storage channels without changing of
the stored list of channels. Use buttons ◄/►hon the remote control to change a channel
number, its frequency or bandwidth. The scale of a received signal level and quality will be
displayed below if any signal available. Press OK button gto start scanning. Press EXIT button f
to exit Manual Scan.
• After selection of all channels, they will be added automatically to the list of channels. If channels
are not found, the tuner will exit Manual Scan automatically.
Fig. 8
Fig. 9

ENG
9
Operation Manual EASY SEE-149 LED
EASY SEE-150 DD LED
OK EXIT
Edit Lock
TV List
Visible
02/07/2014 08:44
Ch-24 / 498000 kHz PID: V 2101. F 2102
Ch + - Select Exit Del Top
08 КАРУСЕЛЬ
09 ОТР
10 ТВ Центр
11 РЕН ТВ
12 Спас
13 СТС
14 Домашний
15 ТВЗ
16 Спорт Плюс
17 Звезда
18 МИР
19 ТНТ
20 МУЗ ТВ
0020
0021
0022
0023
0024
0025
0026
0027
0028
0029
0030
0031
0032
№Program Name
OK Confirm
Channel
OFF
EXIT Return
USB
TV Channel Editor
Radio Channel Editor
EPG
LCN
TV Channel Editor
• Press MENU button tand with buttons ◄/►hselect “TV Channel Editor” menu. In this menu you
can edit the list of TV and radio channels or view TV guide. Using navigation buttons ▲/▼eselect
a parameter, press OK button gor buttons ◄/►hto change its value. After the operation comp-
letion press EXIT button fto exit menu.
TV (Radio) Channel Editor:
In this menu you can edit the list of TV (radio) channels.
Electronic Program Guide (EPG):
If you watch any TV program and want to switch over to another channel at the preset time (by
starting a favorite program), then carry out the following actions:
• Press EPG button wto activate the list of TV programs (TV guide).
• Select a desired TV channel using buttons ▲/▼e, e.g. MUZ TV (see Fig. 11), and press OK
button gto confirm the selection.
• Select a TV program you want to watch later (which you desire to switch over to) in the right
pop-up window.
Fig. 10
Fig. 11

ENG
10
DVB-T/T2 TV Tuner with
Multimedia Player
TV Guide
Visible
02/07/2014 08:44
ONE HD
TEN Digital
ONE HD
ONE Digital
0001
0002
0003
0004
№Program Name
19/08/2014Thu
Footbal: Liverpool TV
LIVE: Swimming
Spirit Off Yachting
Athletics: Berlin Marathon
Omnisport
TNA Xplosion
Tennis: ATP World Tour
LIVE: Thursday Night Live
LIVE: Sports Tonight
Golf Central
23:00
02:00
04:30
05:00
06:00
06:30
07:00
08:00
09:00
09:30
Today 345 6 7 8
OK EXIT
Ch + -Event View Exit Book Top
OK Confirm
Time
GMT Usage
Time Zone
Set Date
Set Time
Sleep Time
Summer Time
Adv Timer
ON
+ 01:00
19/08/2014
00:21
OFF
OFF
EXIT Return
USB
Fig. 13
• Press OK button gand in the pop-up window “Event Edit” (see Fig. 15) record a desired program
(channel number, starting and termination dates, mode). See Timer, page 54.
• Select “Book” bar in “Timer Mode” menu and press ОК button gto confirm.
• Press EXIT button fto exit. Several seconds before switching over the program, a warning will
be displayed with time count-down to start switching.
LCN:
• Sort by LCN (Logical Cluster Number).
Time
• Press MENU button tand select “Time” option. In this menu you will be able to preset the clock
and timer. Use navigation buttons ▲/▼eon the remote control to select a parameter and buttons
◄/►hfor its setting. Press EXIT button fto exit this submenu.
Autopreset:
• Select ON (automatic mode) or OFF (manual mode) to preset GMT time zones.
Fig. 12

ENG
11
Operation Manual EASY SEE-149 LED
EASY SEE-150 DD LED
OK EXIT
Del
Adv Timer 02/07/2014 08:44
Move Edit Exit
Event CH Date Time Mode
01
02
03
04
05
06
07
08
09
32 02/07/2014 08:49-08:58 Once
Time Zone:
• Select the time zone of your region. It is active, if “Auto Preset” option is in ON position.
Date Set:
• Preset a current date, if “Auto Preset” option was in OFF position.
Sleep Time:
• If required you can set the time, after a lapse of which the tuner will enter the STANDBY mode
automatically.
Summer Time:
• Function of automatic adjustment for daylight saving time (Summer Time), this function is active
when “Auto Scan” option is OFF.
Timer:
• Select “Adv Timer” menu (see Fig. 14) to see tasks to watch/record according to the timer.
• Press OK button gto add/edit a new task.
• Press “Red button” (Del) to delete a created task.
To record a desired program see Fig. 15:
• Press EPG button wto open the list of TV programs (TV Guide).
• Using buttons ▲/▼eon the remote control select a TV program.
• Select a TV program you want to record using buttons ◄/►hon the remote control.
• Press OK button gand “Yellow button” (Book). In a pop-up window you can change a channel,
date and time of record starting and finishing, select a record repeat.
• Set “Record” value in “Mode” bar.
• Press EXIT buttonf.
Several seconds before the program record starting a warning message will appear with time
count-down to start recording. If you want to see all scheduled records (according to schedule),
press “Blue button” (one page up). In order to delete a record, highlight it and press “Red button”
(Del).
Fig. 14

ENG
12
DVB-T/T2 TV Tuner with
Multimedia Player
OK EXIT
Adv Timer 02/07/2014 08:44
MoveSwitch Sаve Exit
Event CH Date Time Mode
01
02
03
04
05
06
07
08
09
Channel Type
Channel No
Channel
Start Date (Y/M/D)
Start Time
End Time
Mode
Timer Mode
TV
0032
20 МУЗ ТВ
02/07/2014
08:50
08:59
Once
Schedule
Event Edit
OK Confirm
TV Setup
TV Format
TV Mode
Video Output
TV Resolution
OSD Transparency
Banner Display Time
16:9 FIT
NTSC
HDMI
AUTO
5
3 S
EXIT Return
USB
Fig. 16
Video settings
• Press MENU button tand select “TV Setup” submenu. In this menu you can set parameters to
display video signal on the screen. With navigation buttons ▲/▼eselect a proper option and
press buttons ◄/►hfor its setting. Press EXIT button fto exit the menu.
Format:
• Select the most comfortable display aspect ratio to watch video image: 4:3 full-screen, 4:3 Pan
Scan, 4:3 Letter Box and 16:9 FIT.
TV Mode:
• If video content is displayed on the screen incorrectly, try to change a TV system as well:
– NTSC – for TV-sets, which support NTSC scanning system;
– PAL – for TV-sets, which support PAL scanning system.
TV Resolution:
If video image is displayed incorrectly, try to change screen resolution parameter.
Fig. 15

ENG
13
Operation Manual EASY SEE-149 LED
EASY SEE-150 DD LED
OK Confirm
Language
OSD Language
Audio Language
Subtitle Language
Digital Audio Output
English
POLSKA
OFF
LPCM
EXIT Return
USB
• 480i – corresponds to NTSC system (interlace);
• 480р– corresponds to NTSC (progressive scanning). HDMI only;
• 576i – corresponds to PAL system (interlace);
• 576р– corresponds to PAL system (progressive scanning). HDMI only;
• 720р– corresponds to HD-resolution of PAL or NTSC system (progressive scanning). HDMI only;
• 1080i – corresponds to HD-resolution of PAL or NTSC system (interlace). HDMI only;
• 1080р– corresponds to HD-resolution of PAL or NTSC system (progressive scanning). HDMI only.
Note. You can use V-FORMAT button to change the screen resolution quickly (depending on
the remote control model).
OSD Transparency:
• Set OSD transparency value.
Banner Display Time:
• Setting of Banner Display Time.
Language
• Press MENU button tand select “Language” bar. In this menu you can set a desired OSD language,
subtitle language and audio language. Use navigation buttons ▲/▼eto select a parameter and
◄/►hfor its setting. Press EXIT button fto exit the submenu.
OSD Language:
• Select a required OSD language.
Audio Language:
• Select a required audio language.
Subtitle Language:
• Select a required subtitle language.
Digital Audio Output:
• Select a required format for digital audio output.
Fig. 17

ENG
14
DVB-T/T2 TV Tuner with
Multimedia Player
OK Confirm
Others
Parental Control
Update & Backup
Factory Setting
Calendar
Calculator
Game
EXIT Return
OK Confirm
Others > Parental Control
Menu Lock
Channel Lock
Censorship Lock
Change Password
OFF
No Block
NO
OFF
EXIT Return
USB
Others
• Press MENU button tand select “Others” submenu (see Fig. 18). In this menu you can set the
system settings. Use navigation buttons ▲/▼eto select a parameter and ◄/►hfor its setting.
Press EXIT button fto exit the submenu.
Parental Control:
• You can restrict access to the TV channels that are unsuitable for children. To restrict/lock a channel,
you need to enter either the default password “0000” or your own password (see Fig. 19).
Update & Backup:
• In this menu you can use your USB device to upgrade the newest software and store required
user’s information on a USB device.
Factory Setting:
• Selecting this option all preset channels and settings will be deleted.
Calendar:
• Selecting this option will display calendar with the current month.
Calculator:
• Selecting this option will display calculator.
Fig. 18
Fig. 19

ENG
15
Operation Manual EASY SEE-149 LED
EASY SEE-150 DD LED
USB>Multimedia
OK Confirm
EXIT Return
Movie Music Photo My Recorder
OK Confirm
USB
Multimedia
Recorder Setting
Device Removed
EXIT Return
USB
Fig. 20 Fig. 21
Games:
• The list of games will be displayed on the screen after selecting this point, which can be used on
our tuner. There are just 3 integrated games in the tuner: Gomoku, Boxit, Tetris. They are controlled in
the game mode from the remote control. For movements use navigation buttons▲/▼eand ◄/►h.
USB player
• Press MENU button tand select “USB” or GOTO button kon the remote control. The multi-
media interface is integrated in the tuner, with the help of which you can playback audio, photo and
video files, such formats as MP3, WMA, JPEG, BMP, AVI, MKV, etc. Using this menu you can
customize correctly all the control parameters of the USB player. Use navigation buttons ▲/▼eto
select a parameter and buttons ◄/►hfor its preset. Press EXIT button fto exit the submenu. The
tuner supports the playback of files from USB devices up to 500 GB with FAT12/16/32 and NTFS
systems.
Multimedia:
• If a USB carrier is not inserted into USB port, the following message will be displayed on the
screen: “USB device is not found”. When you insert a USB carrier into USB port, the tuner will
identify it automatically. To watch multimedia files (music, photos, movies, records) select
corresponding icons and press OK button gto enter the contents (see Fig. 21).
My Recorder (record files) (see Fig. 22):
• When using PVR record function, the tuner will create the PVR folder automatically on your USB
device. All records will be stored in this folder and displayed according to their record time. You can
rename, playback and delete records in the folder. Press PLAY button pto playback a record to the
entire screen.
Presetting for recording:
• Using this menu, you can preset the device for recording.
Timeshift (see Fig. 23):
• Timeshift function can be preset in the Timeshift submenu.
Quick record:
• You can turn on or offthe record by pressing REC button on the remote control.

ENG
16
DVB-T/T2 TV Tuner with
Multimedia Player
Fig. 22 Fig. 23
OK Confirm
USB>Record Option
Timeshift
One Button Recording
Default Recording Period
Time Shift Size
OFF
Maximum
5120MB
PAUSE
EXIT Return
USB
OK EXIT
Edit Device Page
My Recorder
USB/USB0/0
NO Program Name Status
001 20 МУЗ ТВ (07/02 12:16)
02/07/2014 08:44
001/001
02/07/2014
00:01’20”
20 МУЗ ТВ
12:16~12:18
Move PAUSE Exit Select Del
Record setting:
• You can change the standard record setting. Use navigation buttons ◄/►hto change record
time.
Time Shift Size:
• You can change the Time shift size. Use navigation buttons ◄/►hto change Time shift size.
Attention!
• USB interface supports most USB carriers, such as flash, hard disks, digital cameras, etc.
If an error occurs while device identification, it may be that the tuner software does not
support this device and it does not mean that the tuner is out of order.
•USB port supports 5 V voltage and 500 mАpeak current. If you want to connect an exter-
nal hard disk to the tuner, it must have an external power supply.
• Sometimes file read rate from USB devices decreases, it can occur, for example, in at-
tempting to playback a high-capacity file. Read rate drop is not a malfunction of the tuner.
• Do not extract a USB device during playback of files. The producer does not bear res-
ponsibility for the data loss.
• Some files, extensions of which belong to the reproduced formats, sometimes cannot be
reproduced if they are coded in a special way.
PVR (record):
• Using this function, you can record a digital channel content to a USB device. Insert a USB device
into a proper port of the tuner to record a channel. The carrier must comply with the requirements
set forth above. It must have enough free space as well.
Quick record:
• Press REC button while watching a TV program. “Record starting, wait, please” message will be
displayed on the screen. When the tuner is in the record mode, a special record character and
recorded time will be displayed in the upper corner of the screen.
• Press REC button once again to stop recording.
Exit the record mode:
• Press EXIT button fonce again on the remote control. A message to stop recording will be dis-
played on the screen. Press “Yes” bar to confirm the exit. The record character and total record time
will disappear from the screen.

ENG
17
Operation Manual EASY SEE-149 LED
EASY SEE-150 DD LED
Fig. 24
Timeshift:
• When Timeshift function is activated, it reserves a part of USB disk space and continuously
records a chosen channel in the background. Timeshift enables to pause during viewing, for
example, when your attention is drawn away by a phone call, or just to fast rewind a record
backward and to continue viewing from a skipped place. It is possible to view an interesting moment
several times time and again, for example, of a basketball match, as well as not to skip the following
course of events. It is possible (if there is free space on a USB disk) just to record a favorite channel
around the clock and then to view the records of several skipped days at once after rewinding.
• Connect an external USB device to a USB port of the tuner. Make sure, that there is enough free
space on the USB device for recording in the background (more than 256 MB). During viewing
a television program, if you have to go out for a while, press Pause button p. The television program
will be automatically paused. The timeshift recording will start. For onward watching, press Play
button pon the remote control. The status panel with time reading will appear at the bottom of the
screen, Timeshift function is switched on. You can rewind a recordable video sequence backward/
forward or pause as during playing back of an ordinary video file. Press STOP button mto stop
recording. Use INFO button xto display the information about the timeshift record.
Device extracting:
• Enter this menu for safe extraction of the connected USB device.

ENG
18
DVB-T/T2 TV Tuner with
Multimedia Player
No power supply.
Antenna cable is disconnected.
Antenna is out of order.
No connection (incorrect audio
cable connection).
Sound is off(Mute).
Audio track is not supported.
No connection (incorrect video
cable connection).
Cannel is a radio program.
Battery discharged.
IR sensor is closed with external
elements or it is far from the remote
control.
Too feeble signal.
Connect power supply.
Connect the antenna cable.
Eliminate the malfunction.
Connect audio cable correctly.
Increase volume level.
Playback another track.
Connect video cable correctly.
Press TV/RADIO button ito
enter TV mode.
Insert new batteries.
Remove obstacles; check the
remote control close to the tuner.
Amplify the signal.
No picture.
“No signal” message.
No sound.
Only sound without
picture.
Remote control does
not operate.
Tessellation, mosaic
signal.
Cause
Problem Solution
5. TROUBLESHOOTING
In the event of malfunctions during the tuner operation try to turn offthe tuner and to turn it on
again. For troubleshooting process you can also use the table given below. If none of the above
methods can solve the problem, please seek professional advice at your nearest service center.
Never attempt to repair the product on your own.

ENG
19
Operation Manual EASY SEE-149 LED
EASY SEE-150 DD LED
6. TECHNICAL SPECIFICATIONS
Frequency range, MHz
Supply voltage, V/Hz
Power consumption (max), W
Support of multilingual menu, subtitles
Playback support of different media files:
music
graphics
video
Inputs
Outputs
Dimensions, mm
Weight, kg
177.5-226.5 (VHF); 474-858 (UHF)
~220/50
8
SRT, SSA, ASS
MP3, WMA, WAV, AAC, AC-3 (вSEE-150 DD LED)
JPEG, BMP, PNG
MKV, AVI, XVID, MOV, VOB, FLV, DAT,
MPEG, MPG, MP4
ANT IN, USB
ANT OUT, Coaxial (SPDIF), Audio output (L&R),
Composite video CVBS, Component video YPbPr,
HDMI
148 × 96 × 38
0.4
Parameter Value
Notes:
• Technical specifications given in this table are supplemental information and cannot give
occasion to claims.
• Technical specifications are subject to change without notice due to the improvement of
SVEN production.
This manual suits for next models
1
Table of contents
Popular TV Tuner manuals by other brands

BenQ
BenQ QS01 user manual

Clarion
Clarion TTX7502z Owner's manual & installation manual

Amino
Amino 140 Reflash Image Procedure from a USB Stick

Telestream
Telestream Wirecast Gear Read this first

Hauppauge
Hauppauge WinTV-HVR-950Q Quick installation guide

Diamond Multimedia
Diamond Multimedia XtremeTV PVR 550 Features