SWAGTRONTM SWAGDRONETM 150-UPRacing Quadcopter Quick Start Guide 9
* PROCEED WITH CAUTION. The drone will
immediately receive power to all parts
including the propellers once the battery is
connected. Do not allow loose clothing, hair,
fingers or any other part of your body to
come in contact with or near the propellers
during battery installation.
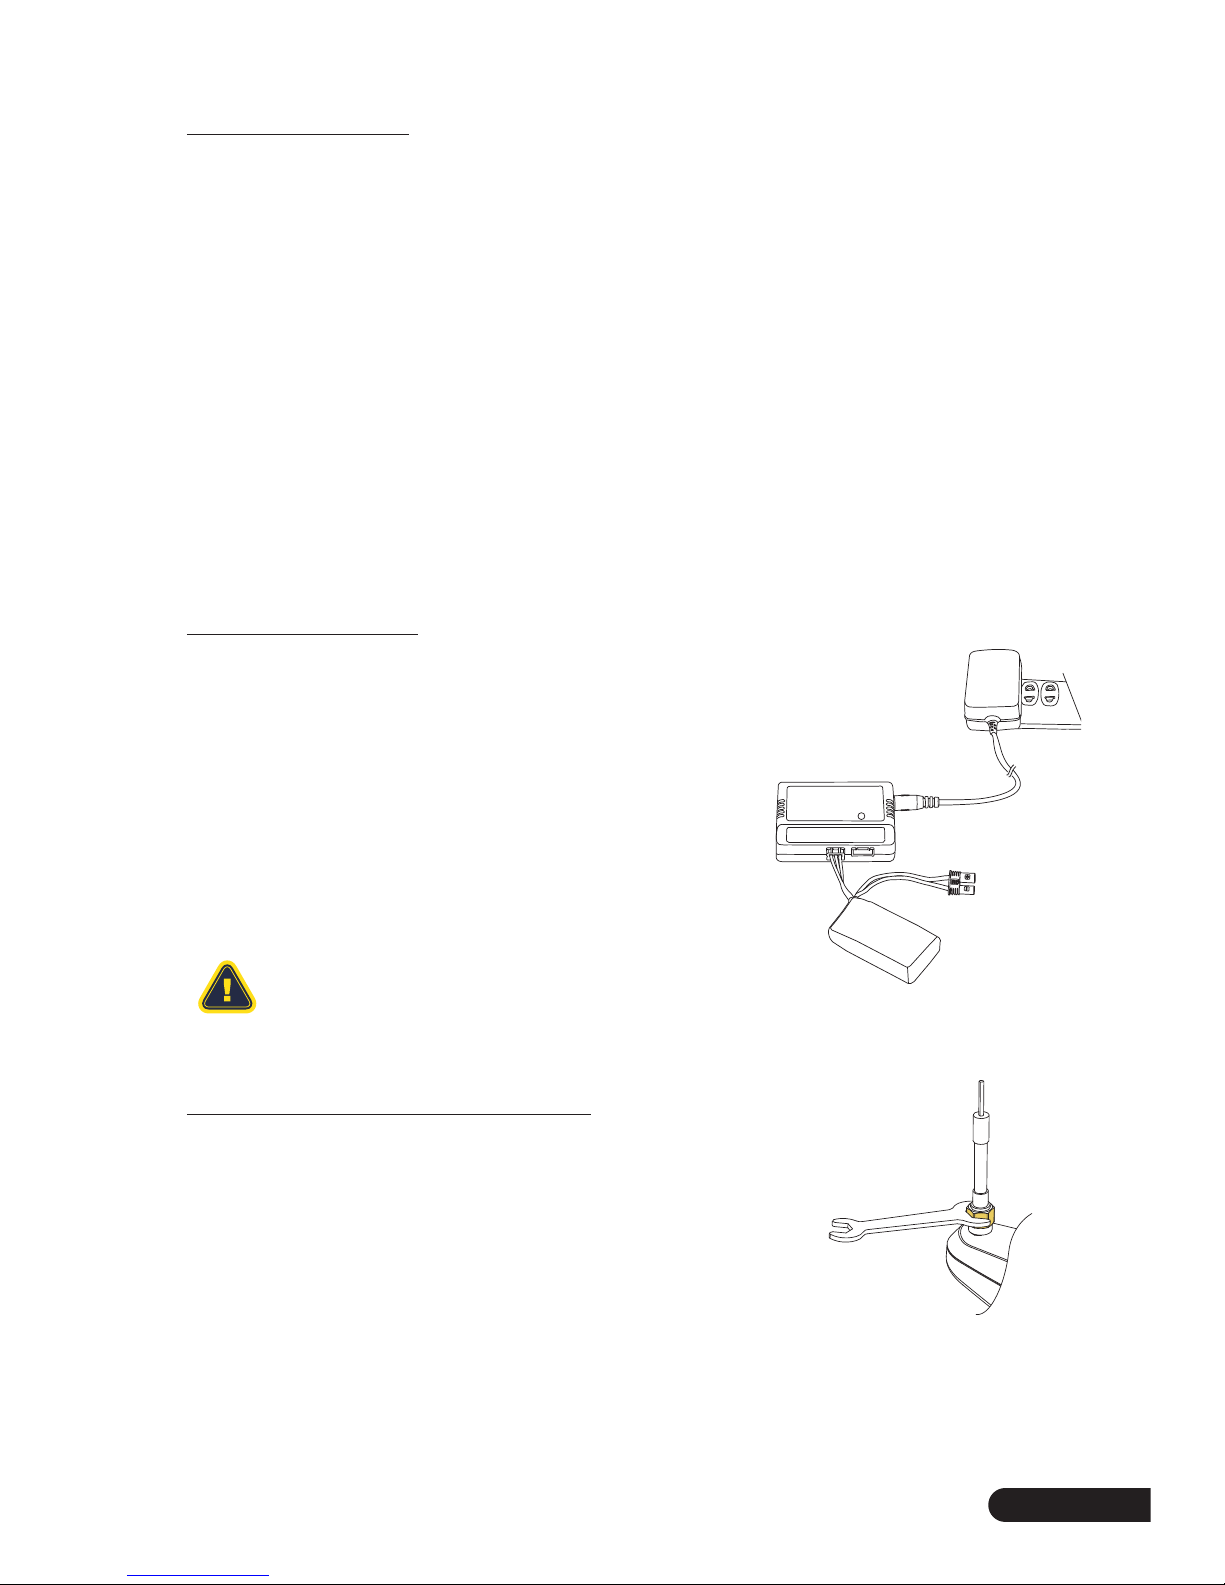
STEP2. Turn the drone over. Pull the button to
unlock the cover and slide it open.
Connect the battery to the drone using
the matching connectors. The drone
will make noise and the propellers may
move slightly as it receives power. Make
sure the connectors are fully joined
and the battery is fully seated inside its
compartment. Tuck the cords inside the
compartment and slide the cover closed,
making sure it's locked in place. Turn the
drone over and place it on a level surface.
STEP3. In the event that the drone has been
successfully bound, the red LED will slowly
blink.
* In the event that the buzzer keeps buzzing,
please try binding the drone again.
* Do not move the SwagDrone 150-Up during binding.
* Always extend the Receiver Antennas before flying. Do not fly without properly unfolding
the antennas.
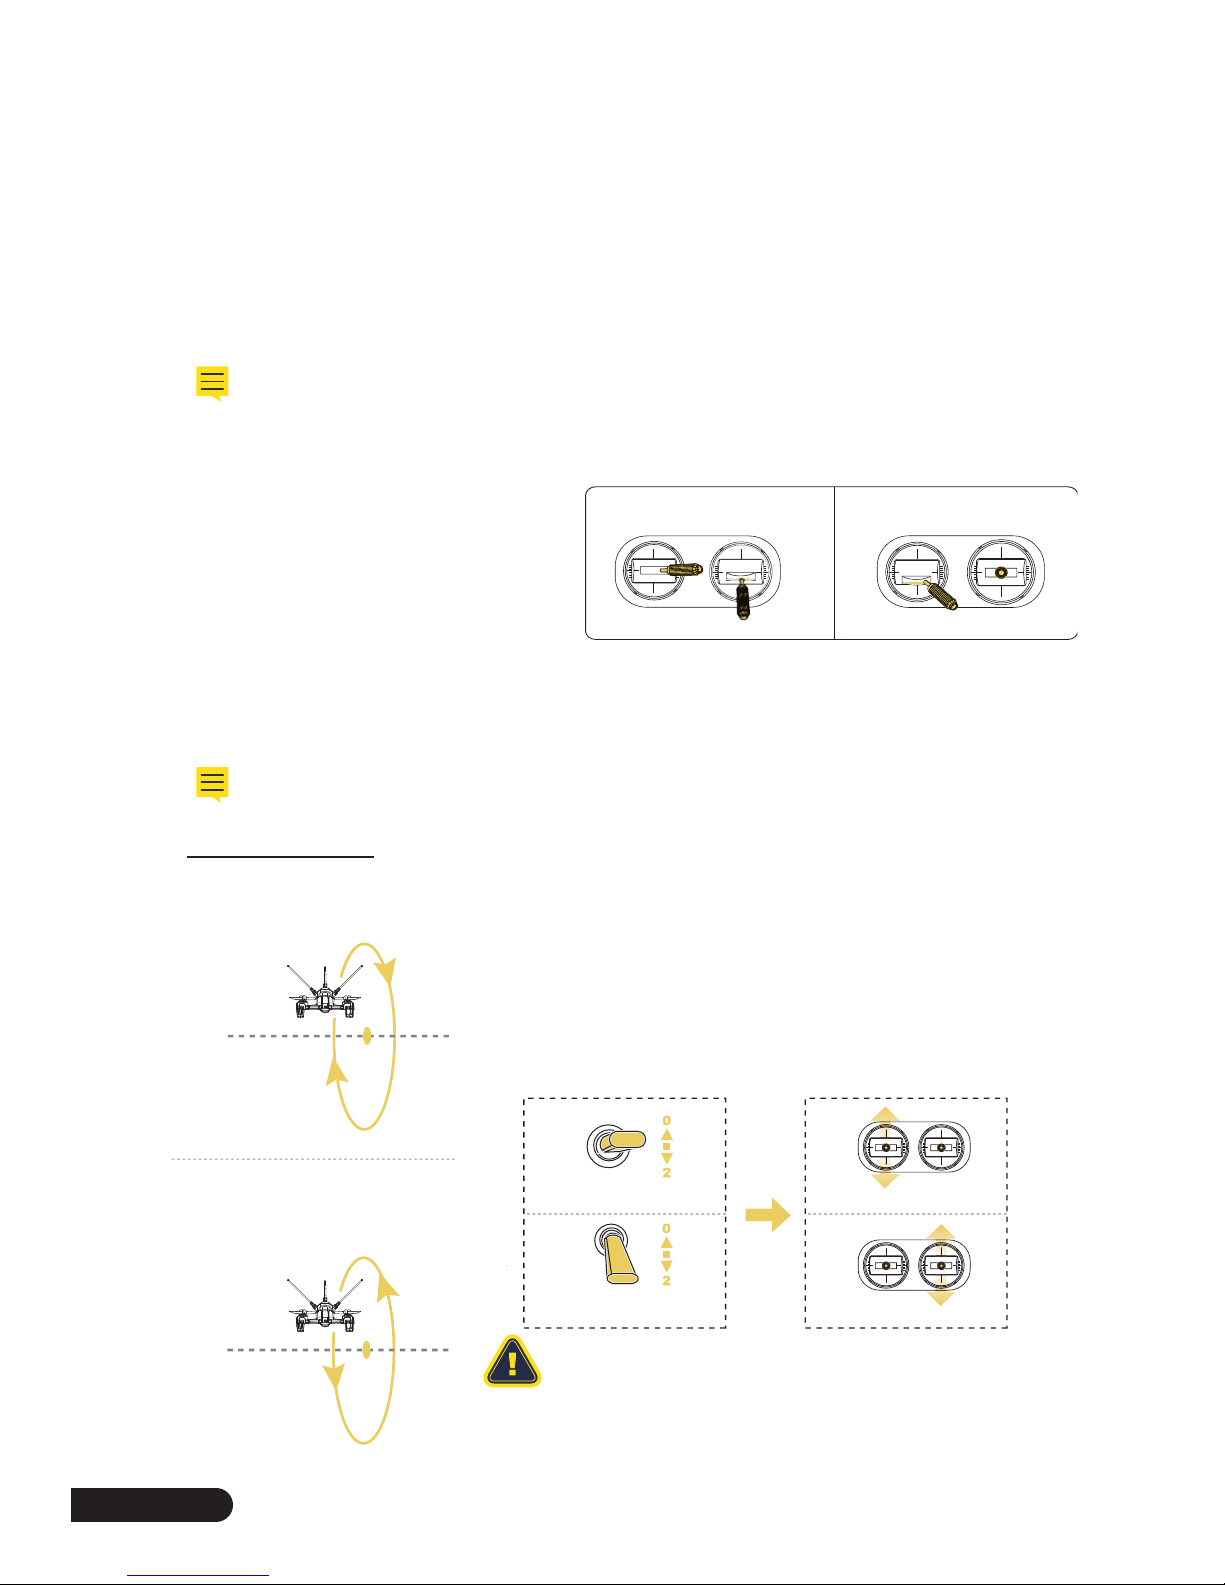
7.2 Locking & Unlocking the Motor
* The motors are locked by default after successful binding.
Motor Unlock
STEP1. After binding the remote control
to the SwagDrone 150-UP,
check that all the trims are
neutral, and the throttle stick is
all the way down with a display
indicating 0% throttle. Check
Red LED light
ELEV/RUDD THRO/RUDDTHRO/AILE ELEV/AILE
MODE 1 (Throttle stick on the right) MODE 2 (Throttle stick on the left)
Button


 user manual")