SWAGTRONTM SWAGDRONETM 210-UPRacing Quadcopter Quick Start Guide
10
STEP3. When the right red LED flashes slowly before turning off, this indicates that the
drone has been successfully bound.
7.2 Locking & Unlocking the Motor
Motor Unlock
STEP1. After binding the remote control
to the SwagDrone 210-UP,
check that all the trims are
neutral, and the throttle stick is
all the way down with a display
indicating 0% throttle. Check
that ALL the switches are in the
UP position.
STEP2. Gently push the THRO Stick down, move the RUDD Stick to the left side, and hold
on for more than two seconds. On Mode 2, the THRO (throttle) and RUDD (rudder) is
on the same stick.
STEP3. When the motor unlocks, the RIGHT red LED light will turn on, and the buzzer will
issue a sound, indicating that the motors are unlocked. Be very careful at this point,
as pushing the throttle up will start the motors.
* You can test this by pushing the stick up a little; the motors should start.
Motor Lock
* After successfully binding, the motor is locked by default.
STEP1. Gently move the RUDD Stick to
the right side, push the THRO
Stick down, and hold on for more
than two seconds. On Mode 2,
the THRO (throttle) and RUDD
(rudder) is on the same stick.
STEP2. When the motor locks, the RIGHT red LED light will turn on, and the buzzer will
issue a sound, indicating that the motors are locked.
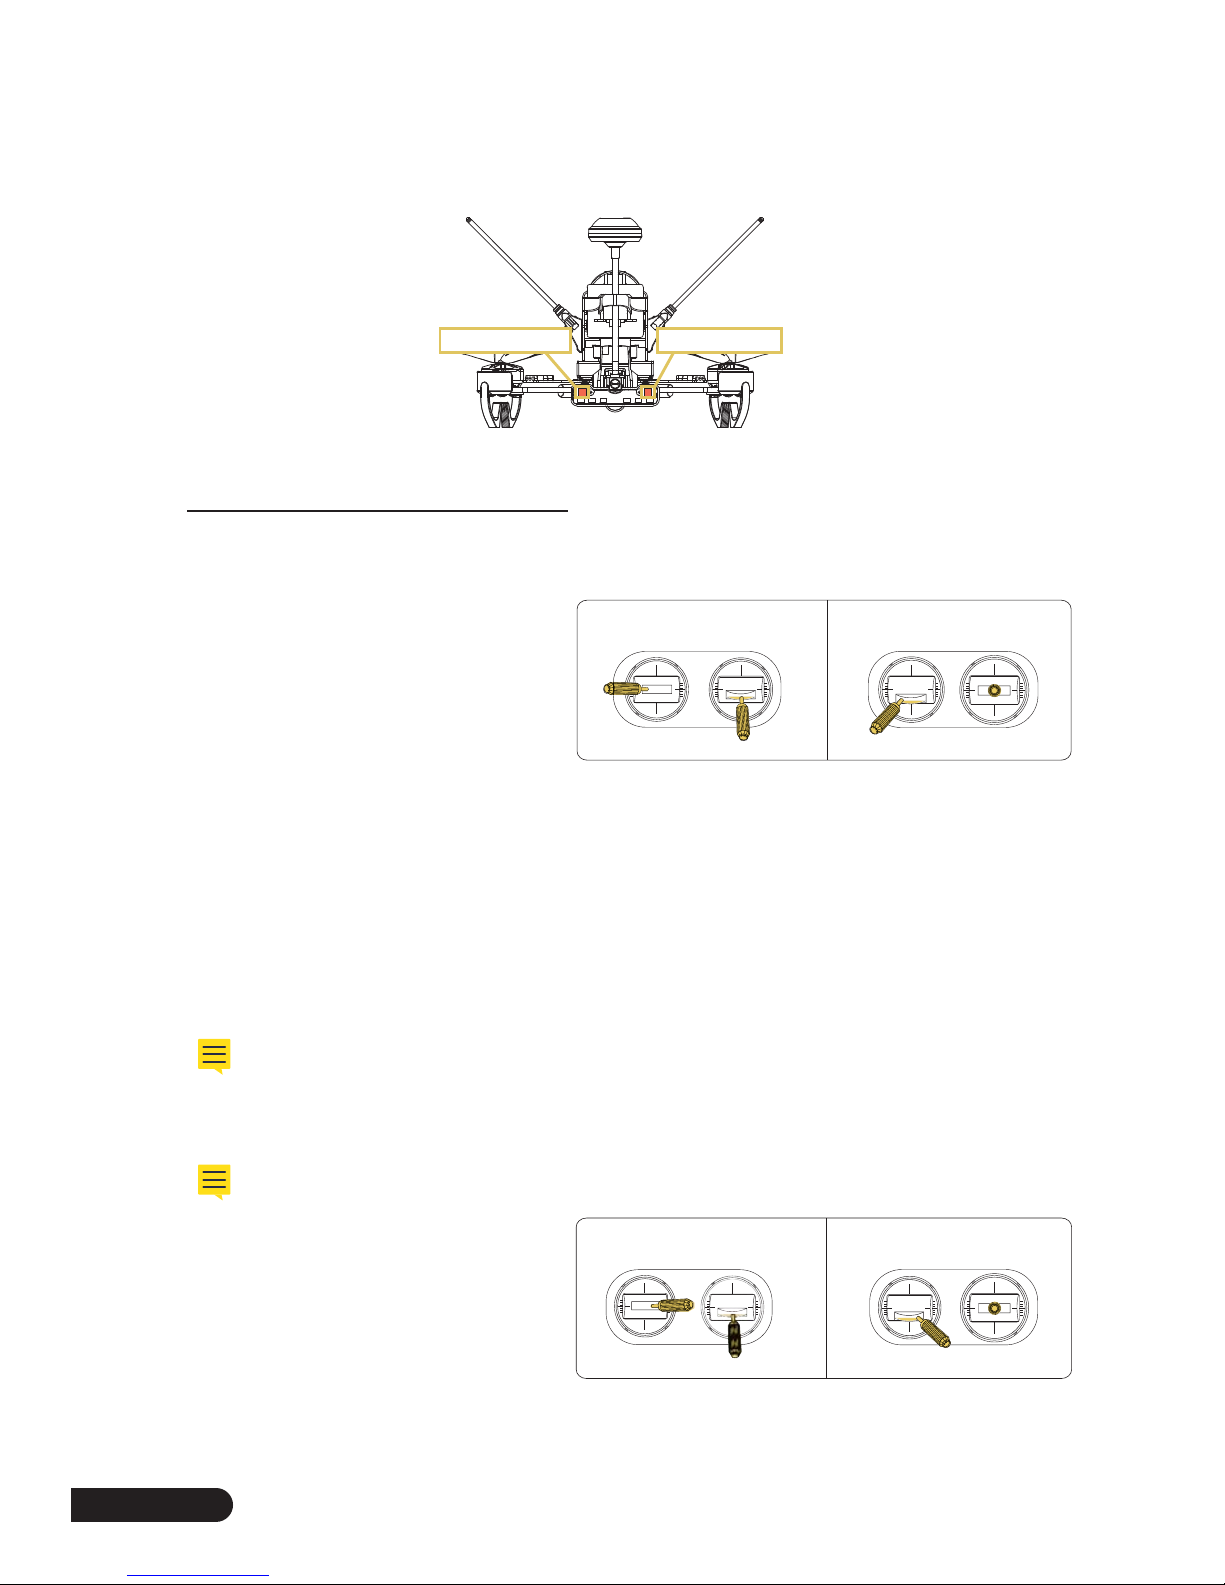
Left LED light Right LED light
Back View
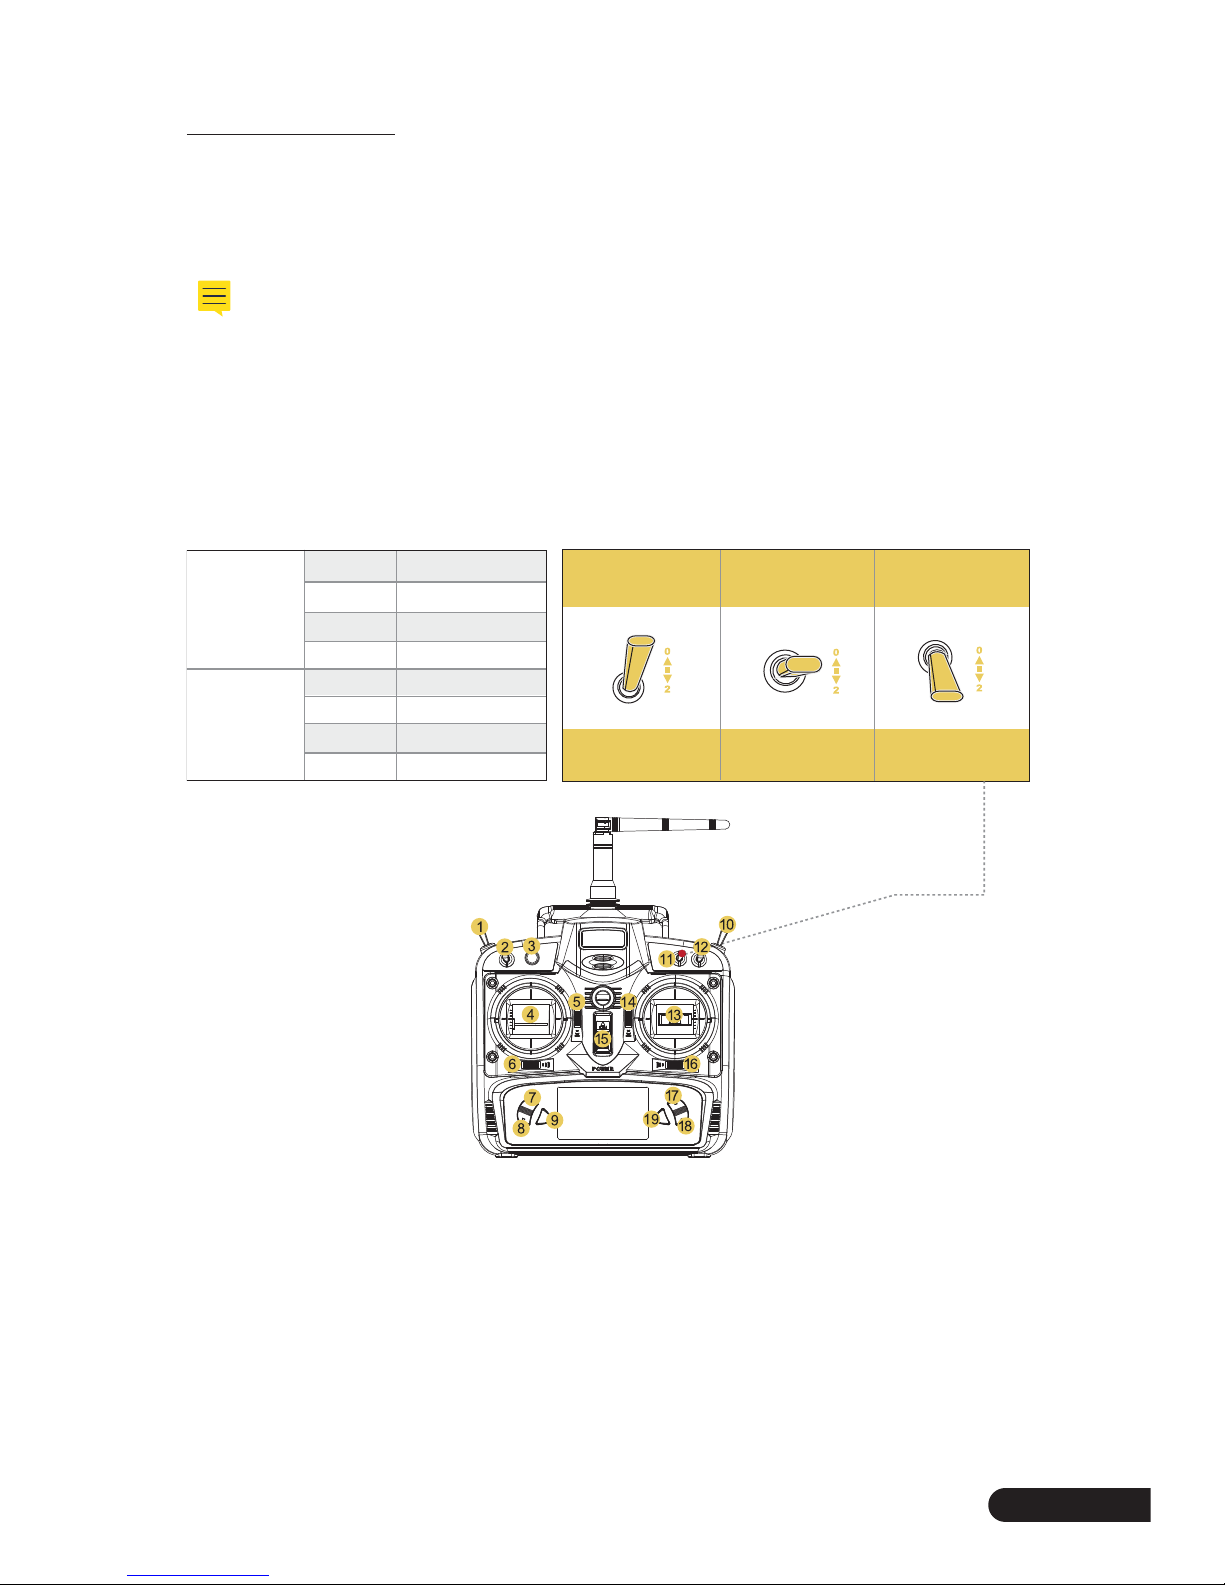
ELEV/RUDD THRO/RUDDTHRO/AILE ELEV/AILE
MODE 1 (Throttle stick on the right) MODE 2 (Throttle stick on the left)
ELEV/RUDD THRO/RUDDTHRO/AILE ELEV/AILE
MODE 1 (Throttle stick on the right) MODE 2 (Throttle stick on the left)


 user manual")


