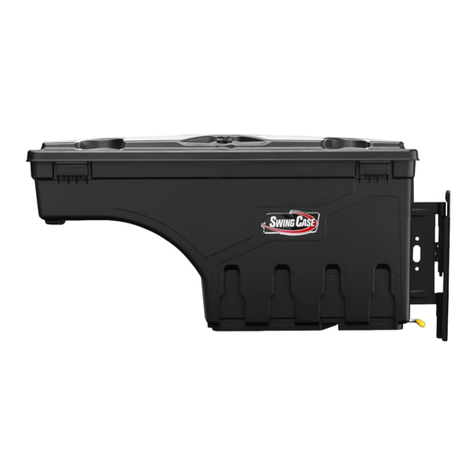
Swing Case SC302P User manual

SC302P - Passenger Side
Ram 2019 - Current
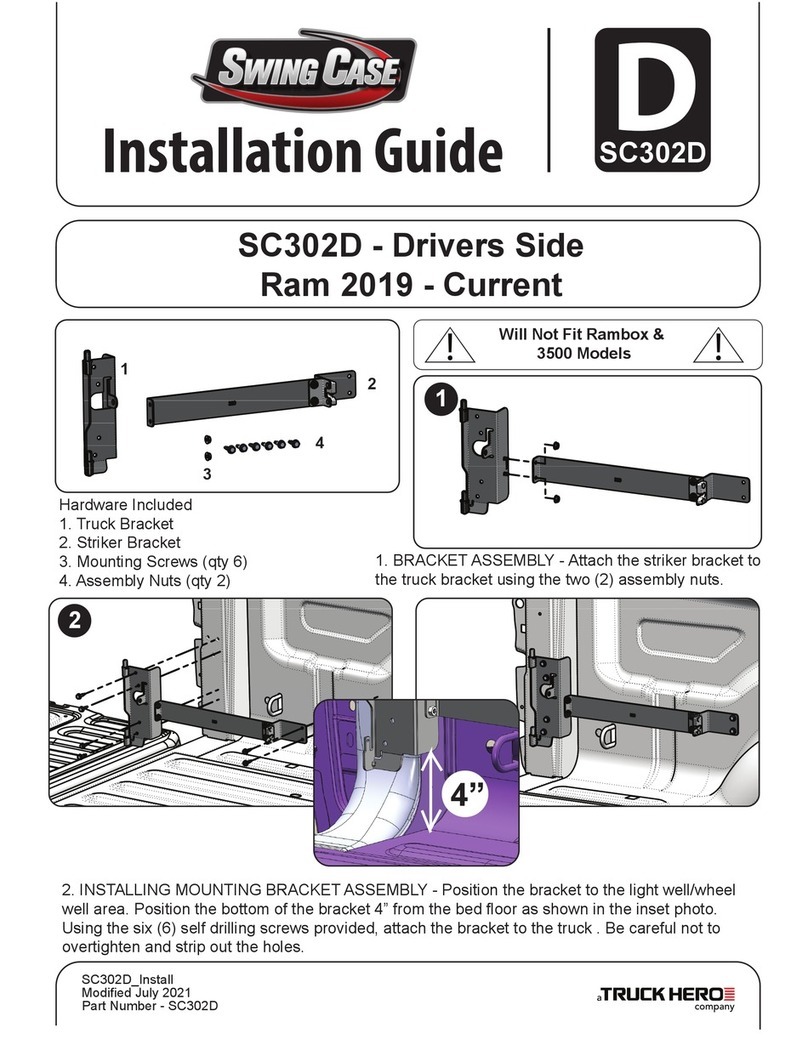
Hardware Included
1. Truck Bracket
2. Striker Bracket
3. Mounting Screws (qty 6)
4. Assembly Nuts (qty 2)
1
2
34
1
2
1. BRACKET ASSEMBLY - Attach the striker bracket to
the truck bracket using the two (2) assembly nuts.
Will Not Fit Rambox &
3500 Models
SC302P_Install
Modified July 2021
Part Number - SC302P
SC302P
2. INSTALLING MOUNTING BRACKET ASSEMBLY
- Position the bracket to the light well/wheel well
area. Position the bottom of the bracket 4” from the
bed floor as shown in the inset photo. Using the six
(6) self drilling screws provided, attach the bracket
to the truck . Be careful not to overtighten and strip
out the holes.
4”

• FOR TRUCKS WITH BED RUGS
For trucks with Bed Rugs it will be necessary to cut slots in the material. WE
DO NOT RECOMMENDED TO INSTALL THE BRACKETS ON TOP OF THE BED
RUG. Most of the brackets will fit under the bed rug, pull the Bed Rug loose
from the corner, remove any hook and loop strips that may be in the way
of the brackets, and install the brackets per instructions in Steps 1 through
5. Push the rug around the latch bracket and cut a slot to allow it to stick
through. Push the rug around the pad lock piece and cut a slot to allow it
to stick through. It may be necessary to remove the rubber bumper from
the bracket assembly. You will need to re-attach the Bed Rug to the truck
bracket at the light well using the existing hook and loop strips.
• FOR TRUCKS WITH PLASTIC BED LINERS
For trucks with plastic bed liners it will be necessary
to trim the liner. DO NOT INSTALL THE BRACKETS ON
TOP OF THE BEDLINER. The brackets will not fit over
the plastic bedliner, the brackets must be attached
directly to the sheet metal. Hold the brackets up
against the bedliner in their approximate location.
Using a grease pencil, mark lines to indicate where to
cut the bedliner. Once you have finished trimming
your bedliner, install the brackets per the
instructions in Steps 1 through 5. Due to the fact that
all the brands of bed liners fit differently we can not
provide exact instructions as how much of your liner
to trim. These pictures are only an example and may
not accurately depict your specific situation.
3. INSTALLING SWING CASE
Lower the box onto the hinge pins and gently push the box to the stowed position.
4. OPERATION AND ADJUSTMENT
Pull the latch rod and swing through the full motion making sure it operates freely and latches easily. Do
not slam the box to stow it, if it will not latch easily it may be necessary to make some minor adjustments.
The latch has slotted holes, just loosen the two bolts and adjust as needed. Be sure to blow or sweep the
metal shavings out of the truck bed.
34
Page 2
UnderCover, Inc.
(866) 900-8800
59 Absolute Dr
Rogersville, MO 65742
UnderCoverInfo.com
A Truck Hero Company
© 2018 UnderCover, Inc.
All Rights Reserved.

Insert the supplied pivot lock at an angle in between the lower tab and the top of the lower pivot bushing.
While pushing upward on the pivot lock, rotate the pivot lock into position over the top over the lower
pivot bushing.
Once the pivot lock is over the top of the pivot bushing, slide the pivot lock down against the top of the
pivot bushing, then rotate the pivot lock towards the box bracket, so that the pivot lock is against the
bracket and lines up with the slotted hole in the bracket. Rotate the key 90 degrees into the locked
position. Once the pivot lock is in the locked position, this will allow the user to still pull the release handle
and swing the case out over the tailgate. The pivot lock will prevent the case from being fully removed.
Pivot Lock Installation
Page 3
UnderCover, Inc.
(866) 900-8800
59 Absolute Dr
Rogersville, MO 65742
UnderCoverInfo.com
A Truck Hero Company
© 2018 UnderCover, Inc.
All Rights Reserved.

User Guide - Warranty
SC3007WC_Install
Modified Oct 2018
Thank you for purchasing the Swing Case!
• Read instructions completely before installing your Swing Case to your truck.
• The Swing Case is designed for trucks that do not have a bedliner (spray in bedliners pose no problem).
Trucks that do have plastic drop in bedliners or Bed Rugs will require some trimming of the liner to ensure
proper fit of the brackets. We provide some guidelines for installing with liners, however due to the wide
variety of liner manufacturers, the modifications will vary. Any modifications must be made to the liner
and NOT to the Swing Case mounting hardware. Modifications to the mounting hardware could result in
improper installation and will void your warranty.
• The Swing Case is left and They will not interchange.
• The Swing Case will not
right specific.
work with bed extenders.
• The Swing Case will work with most tonneau covers. If you have any questions regarding your installation,
please contact our customer service team at the number below.
Warning: Chemicals that are NOT labeled safe for use with plastics should NOT be
stored in the Swing Case. Some chemicals such as insect repellents, brake fluid
and solvents can potentially damage the plastic. Doing so may void the warranty.

P.O. Box 620 •Rogersville, MO 65742
Customer Service: (417) 753-8000 • (866) 900-8800
Terms of this Warranty. The manufacturer warrants that the ABS polymer structure of your Swing
Case will be structurally free from defects in material and workmanship for one (1) year from the
retail date of purchase. The lock, hinges, and hardware are warranted to be free from defects in
material and workmanship for one (1) year from the retail date of purchase. This warranty applies
only to the original purchaser and is nontransferable. Your original sales receipt will serve as proof
of purchase for this warranty. Be sure to retain your receipt for your proof of purchase date.
Before credit can be issued on a warranty claim, proof of defect may be required. This can be
determined at the time of the claim.
Exclusions of this Warranty. Not covered under this warranty is failure due to neglect, improper
installation including any modifications to installation hardware, alterations, addition of equip-
ment, abuse, accident, weather related damage, exposure to chemicals that are not labeled “safe
for plastics,” and normal wear from lack of maintenance.
Caution. Always read the ingredients of any product you are using to clean your Swing Case.
Make sure that you use only products that are safe for use with plastics. Many chemicals contain
material that will permanently discolor your Swing Case. This is not considered a manufacturer
defect.
Owner Responsibilities. Incidental or consequential damage or loss of contents due to use,
neglect, lack of maintenance, misuse, or abuse of the Swing Case is the sole responsibility of the
truck owner and operator. Paint damage to your truck is not covered under this warranty. When
operating your truck, always keep the Swing Case in the stowed position with the lid closed and
latched.
Repair and Replacement. In the event that your Swing Case is found to be defective under the
terms of this warranty, it is at the manufacturer’s discretion to repair or replace the defective part.
All repairs must be made by an authorized Swing Case dealer or under the direction by the
factory. In the case of either event, we are not responsible for any transportation costs associated
with the warranted claim.
Maintenance & Care. The ABS polymer body of your Swing Case requires only periodic cleaning
with mild car wash soap. ONLY USE CLEANERS, WAXES OR PRODUCTS THAT ARE LABELED “Safe for
use on plastics.” Do not let chemicals or substances come into contact with your Swing Case, unless
labeled “safe for plastics.” Avoid use of all abrasive type cleaners as they may dull the finish. Be sure
that products such as OFF® or other insecticides do not get onto the Swing Case from contact with
your hands or other parts of your body. This could cause serious damage and discoloration.
Swing Case - 1 Year Limited Warranty
Table of contents
Other Swing Case Automobile Accessories manuals
Popular Automobile Accessories manuals by other brands

Curt Group
Curt Group 60628 installation manual

Front Runner
Front Runner FATF006 quick start guide

Dynojet
Dynojet Power Commander III Installation instructions manual

Cisbo
Cisbo Parking sensor user manual

Audiovox
Audiovox UNIVERSAL RDS PRO A-UNI-150 Installation guide & user manual

Stanfred
Stanfred SMPBC-BM3V installation instructions