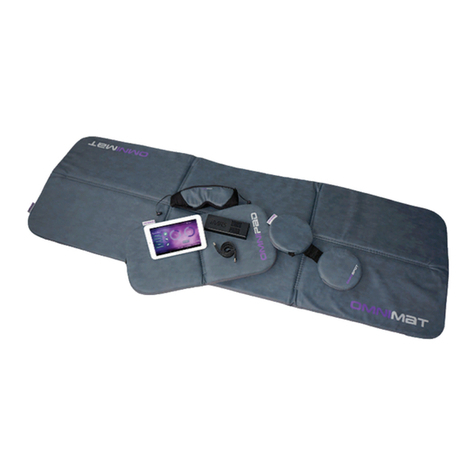
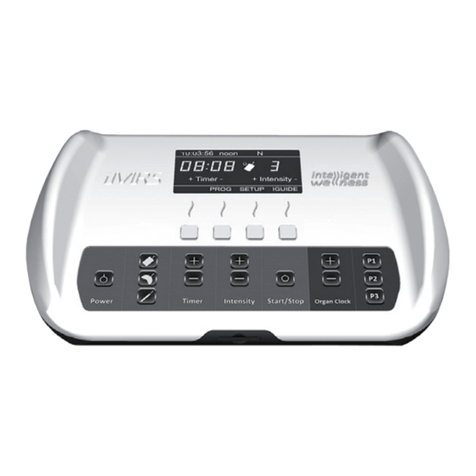
Swiss Bionic Solutions OMNIUM 1 User manual

intelligent Lifestyle
Quick Reference Guide
2.0

2
Important Notes for Getting Started
• This operator’s guide will serve to familiarize you with the operation of this
product. Always store these instructions in a safe place, so that you can ac-
cess them at any time.
• Please use the product only in the intended manner. Use in an unintended
manner may cause damage to the product or the area around the product.
• Any modications or changes to the product may limit the security and saf-
ety of the product. Note: there is a danger of injury.
• Never open the product without authorization. Do not make your own re-
pairs.
• Please treat the product carefully. It can be damaged by impacts, shocks or
falls even from minimal heights.
• Please keep the product away from extreme heat.
• Never immerse the product in water or other liquids.
• The right to make technical changes and correct errors is reserved.
Copyright
Copyright © 2019 Swiss Bionic Solutions Holding GmbH
All rights reserved.
No part of this guide, including the products and software described herein,
may be reproduced, transferred, transcribed, stored in a retrieval system or
translated into other languages in any form without the express written per-
mission of Swiss Bionic Solutions Holding GmbH. This excludes any documen-
tation retained by the purchaser for back-up purposes. This provision shall not
apply for software subject to the General Public License (GPL) or other free
open source licenses.
Omnium1 and the Omnium1 logo are trademarks of Swiss Bionic Solutions
Holding GmbH. All other trademarks are the property of the corresponding
holders.
The content of this guide may deviate in individual details from the product or
the associated software. All information in this document may change without
prior notication.

3
Table of Contents
1. Scope of Delivery.............................................................................................4
2. Housing and Buttons ......................................................................................5
3. Charging the Battery .......................................................................................6
4. Switching On and Off ......................................................................................7
5. Inserting and Removing the Micro SD Card ..................................................8
6. Working with the Screen.................................................................................9
7. Using the Operating Buttons........................................................................10
8. Viewing in Portrait and Landscape Modes ..................................................11
9. Information on the Menu.............................................................................11
10. Connecting to the Internet .........................................................................12
11. Identication, Technical data .....................................................................13
11.1 Identication .............................................................................................13
11.2 Technical data............................................................................................13

4
1. Scope of Delivery
If any of the parts is damaged or missing, please contact your partner at Swiss
Bionic Solutions.
Omnium1 Tablet
Charging Equipment Earphones
Quick Reference Guide
20 Pin cable
Charging Equipment
20 Pin cable

5
2. Housing and Buttons
1. 3.5 mm headphone jack
2. Microphone
3. Micro SD/SDHC (TF) card slot
4. DC charging cable
5. Front camera
6. 20-pin adapter connection
7. Home button
8. Touchscreen
9. Volume control
10. On/off and lock button
11. Rear Camera & LED ash
12. Battery compartment
13. Speaker
4
6
7
2
10
13
3
1
9
5
8
11
12

6
3. Charging the Battery
Before you use your Omnium1 for the rst time, the battery will need to be
charged.
1. Plug the power supply into the tablet’s power connection.
2. Plug the power supply into the wall socket. The Omnium1 display will
show a picture indicating that the device is being charged.
3. Once the battery has been completely charged, disconnect the power sup-
ply from the tablet and then from the wall socket
• Only use the recharging unit that was supplied with your Omnium1
tablet. Using a different power adapter could damage your tablet.
• The input voltage between the wall socket and the adapter is 100 V to
240 V AC. The adapter’s output voltage is 18 V DC, 1200 mA.
• If the battery has been completely discharged, the device may not
switch on. In this case, allow several minutes before you try again.
Do NOT dispose of the Omnium1 in the standard garbage. Some of the
product components can be re-cycled and re-used. The symbol with
the cross-out garbage container indicates that the product does not
belong in the standard garbage. Ask about the disposal guidelines and
laws in your region.
BILD
ply from the tablet and then from the wall socket
BILD

7
4. Switching On and Off
How to switch your Omnium1 on:
• Press the on/off button on the top for several seconds.
• As soon as the device has booted, the lock screen will appear. Use your n-
ger to drag the lock symbol to one side in order to unlock the screen. Your
Omnium1 will now display the home screen.
Once the Omnium1 has been switched on, you can use the on/off button (10)
to activate the power-saving mode or return to standard mode.
After several minutes of non-use, the Omnium1 will switch to power-saving
mode (the interval can be set from Settings => Display => Sleep). You can also
exit power-saving mode by pressing the on/off button.
How to switch your Omnium1 off:
• Press the on/off button down until a conrmation message appears.
Touching the Power off symbol will switch the device off completely.
How to re-start your Omnium1:
• Press the on/off button down until the Omnium1 logo appears on the dis-
play.
SAFE TEMPERATURE RANGE: The Omnium1 may only be operated in an
environmental temperature range between 0 °C and 35 °C.
When you switch your new Omnium1 on for the rst time, we recom-
mend that you rst make several important settings on your Omnium1.
These include setting the language (Settings => System => Languages
& input => Languages => Add a language) as well as setting your time
zone and the time format (Settings=> System => Date & time).

8
5. Inserting and Removing the Micro SD Card
Insert a micro SD memory card (max. 32 GB) in the card slot as shown in the
picture of the device. Do not push hard or use any force. The card only needs
to overcome a light spring resistance. Once the memory card is properly posi-
tioned, it will lock into place instead of being ejected.
To remove the memory card, press it into the device until the spring releases
and then pull the card out.
To prevent the loss of data, the micro SD card should only be inserted
or removed after the tablet has been switched off. Optionally, you can
remove the micro SD card with the tablet switched on, once you have
rst deactivated the card. To do that, open the Settings and then click
Storage. Then, tap on Unmount SD card in the window on the right
and click OK.

9
6. Working with the Screen
Your Omnium1 has been equipped with a touch-sensitive (capacitive) mul-
ti-touch touchscreen, so a simple touch (without any pressure) is sucient for
running your commands. There are a number of options for controlling the
tablet:
Tap Tap on an item once The tapped item
will be opened,
selected or
activated. This
works like
clicking with a
mouse
Tap and hold Tap and keep your
nger there for about
one second.
The options for
the current action
will be displayed
(similar to action of
right-clicking).
Pinching or stretching Touch screen or an
item with at least two
ngers and pinch or
stretch them.
Zooms in or out on
that area of a web
page, street map or
picture
Rotate Put at least two
ngers on an item
and then rotate your
hand
The item touched
will also be rotated
(if possible).
Drag to scroll Drag one nger
across the screen
This action will
scroll through the
items on screen
(similar to scrolling
with a mouse).

10
7. Using the Operating Buttons
App Menu Button Opens the app menu.
There, you will nd a number of pre-instal-
led apps. In addition, all downloaded apps
will be stored there
Back Button Allows you to go back one step in all apps.
Home Button Briey tapping the button will return you to
the home screen (also possible with Home
button (7)).
Apps Button Briey tapping the button will display all
open apps. Tapping on an app icon will
open the app immediately. In order to close
open apps, touch the corresponding app
and swipe from left to right.
To optimize power use, you should close
apps that you do not need.

11
8. Viewing in Portrait and Landscape Modes
Turning the Omnium1 from horizontal to vertical or vice versa will change the
screen orientation. Most apps will automatically adjust their screen content.
If automatic orientation is not possible, check if the function has been activa-
ted. To do this, open the Settings and tap the Accessibility icon. Check the
Auto-rotate screen option to enable this feature.
If automatic orientation is still not possible, the app may only be able to work
in one direction (such as the iMRS one app).
9. Information on the Menu
The menu will display a variety of icons. They will provide a range of informa-
tion. The battery charge status and the time will always be displayed. All other
information will only be displayed in the appropriate situations.
Battery charge status
New email
Active USB connection
WIFI reception strength
Time

12
10. Connecting to the Internet
To surf the Internet or send email messages with your Omnium1, you must be
able to connect to a wireless LAN network that you can access.
To do so, open the Settings and then click on Network & Internet => WI-FI.
Enable the WI-FI option by setting the switch to ON. Choose the network that
you would like to access by tapping the corresponding network name and en-
ter your WI-FI password.

13
12. Identi cation, Technical data
12.1. Identi cation
Identi cation plate iMRS one:
0483
The conformity according to EC directives is explained for the equipment de-
scribed in this Operators Guide.
12.2 Technical data
Size (W x H x D) 213 mm x 134 mm x 30 mm (8,39 x 5,28 x 1,18
inches)
Weight 616,6 g (1,36 pound)
Chip (CPU) Media Tech MT8163 Cortex-A53 1.5GHZ
Graphic Chip (GPU) Mali-T720 5.2Gpixel @650MHz
Internal Memory (ROM) 16 GB
Internal Memory (RAM) 1 GB
Battery 4 pcs * 18650 2500mAH
Housing Plastic
CE-Sign
law for used electric devices
DC-Symbol (direct current)

14
Display-Type capacitive 5-Dot Multitouch-Display
Display-Size 8.0“ (20,32 cm)
Display-Ratio 16:10
Resolution 1280 x 800, 217 DPI
External Connectors 20 Pin Adapter, Audio Out, Microphone, Came-
ra, Card Reader, WIFI.
External Memory microSD, microSDHC (max. 32 GB)
Camera 5.0MP Front Cam, 8.0MP Rear Cam with LED
Flash
Operating System Android™ 8.1 (Oreo)

15

16
Swiss Bionic Solutions Schweiz GmbH
Schulhausstrasse 17 | 8834 Schindellegi, Schweiz
Phone: +41 (62) 295 5951 | Fax: +41 (62) 295 5952
Email: [email protected]
Swiss Bionic Solutions Deutschland GmbH
Biberacher Str. 87 | 88339 Bad Waldsee, Deutschland
Phone: +49 (7524) 996 950 | Fax: +49 (7524) 996 9518
Email: [email protected]
Swiss Bionic Solutions USA Inc.
12330 SW 53rd Street | Suite 703 & 704 | Cooper City | Florida 33330, USA
Phone: +1 (954) 766 4153 | Fax: +1 (954) 766 4156
Email: [email protected]
Swiss Bionic Solutions Canada Inc.
1195 North Service Rd. West, Unit B8 | Oakville, Ont. L6M 2W2, Canada
Phone: +1 (905) 465 0753 | Fax: +1 (1 866) 792 8182
Email: [email protected]
Swiss Bionic Solutions Asia Ltd.
998 Canton Road | Mongkok | Kowloon | Hong Kong
Phone: +852 2337-8774
Email: [email protected]
www.swissbionic.com
Table of contents
Other Swiss Bionic Solutions Medical Equipment manuals
Popular Medical Equipment manuals by other brands

Biocontrol
Biocontrol Assurance GDS Rotor-Gene Q user manual

Otto Bock
Otto Bock 1C60 Triton Instructions for use

ResMed
ResMed AirFit F20 user guide

bort medical
bort medical 103 700 quick guide

Orliman
Orliman Lumbitron Elite Use and maintenance instructions

Braun
Braun Aesculap Eccos Instructions for use/Technical description