manuals.online logo
Brands
  1. Home
  2. •
  3. Brands
  4. •
  5. Swisscom
  6. •
  7. Network Router
  8. •
  9. Swisscom Internet-Box standard Manual

Swisscom Internet-Box standard Manual

HD-Phone
Connect the new fibre optic cable to
the Internet-Box.
Connect the fibre optic cable to the
fibre optic socket.
Switch on the Internet-Box and wait
5 minutes.
Installation overview
Follow the steps below to convert your existing Internet-Box to fibre optic
technology.
Remove the protection caps and connect the blue end of the cable into the
Internet-Box.
The cable is sensitive, so please do not touch it at either end!
Push in the fibre optic module (clip facing up) into the «fibre» insert until it
clicks in.
Insert the fibre optic module.
The package includes:
Connect your telephone.
(This only applies if you are a fixed network subscriber.)
Connect your computer and open your
Internet browser.
Now only connect your telephone and
/or fax machine to the
Internet-Box (phone 1 and 2) – and not the telephone socket as before.
Use the black telephone adapter if necessary.
Connect the computer per Ethernet cable or to your existing WLAN. Open
www.bluewin.ch in the Internet browser and, if the registration page is
displayed, complete all compulsory fields step by step. If the page is not
displayed, continue with step 8. After 5 minutes continue with step 7.
Open the slot on the fibre optic socket that we specified to you per letter.
This is generally slot 2, rarely slot 1. Remove the protective cap and connect
the green cable end.
HD-Phone
> Internet-Box: press +
button
> Start your HD-Phone and select connection mode
N.B. Please note that conventional DECT cordless phones
cannot be wirelessly connected to the DECT base station
integrated into the Internet-Box, but must be directly inserted
into the «phone 1» or «phone 2» ports.
Convert your
existing
Internet-Box
to fibre optic
technology
Internet-Box fibre-optic kit setup
www.swisscom.ch/internetbox-help
Swisscom (Switzerland) Ltd
Contact Center
CH-3050 Bern
www.swisscom.ch
0800 800 800
Telephone adapter
Fibre optic cable
Fibre optic module
Internet-Box standard
Internet-Box plus
If your router looks like this,
follow the instructions on the
reverse.
Optionally:
Wireless HD-Phone connections
You can connect the HD-Phones from Swisscom wirelessly with the
Internet-Box. For information about HD-Phones from Swisscom please
visit www.swisscom.ch/hdphones
Continue you with step 1 if your router is the same as the one on the
installation overview.
You are now surfing with fibre optic technology!
Switch off the Internet-Box and
remove the DSL cable.
You can return old devices to Swisscom for recycling free of charge.
A return label is included on the delivery slip.
Remove your old Internet
/
telephony
installations (if any).
1 2 3
789
4
10
11
5
6
Start
HD-Phone
HD-Phone
KKD+JM (RES-CWE-UID) 10203081 12/2015 EN
Connect the new fibre optic cable to
the Internet-Box.
Connect the fibre optic cable to the
fibre optic socket.
Switch on the Internet-Box and wait
5 minutes.
Installation overview
Follow the steps below to convert your existing Internet-Box to fibre optic
technology.
Remove the protection caps and connect the blue end of the cable into the
Internet-Box.
The cable is sensitive, so please do not touch it at either end!
Push in the fibre optic module (clip facing up) into the «fibre» insert until it
clicks in.
Insert the fibre optic module.The package includes:
Connect your telephone.
(This only applies if you are a fixed network subscriber.)
Connect your computer and open your
Internet browser.
Now only connect your telephone and
/or fax machine to the
Internet-Box (phone 1 and 2) – and not the telephone socket as before.
Use the black telephone adapter if necessary.
Connect the computer per Ethernet cable or to your existing WLAN. Open
www.bluewin.ch in the Internet browser and, if the registration page is
displayed, complete all compulsory fields step by step. If the page is not
displayed, continue with step 8. After 5 minutes continue with step 7.
Open the slot on the fibre optic socket that we specified to you per letter.
This is generally slot 2, rarely slot 1. Remove the protective cap and connect
the green cable end.
> Internet-Box: press +
button
> Start your HD-Phone and select connection mode
N.B. Please note that conventional DECT cordless phones
cannot be wirelessly connected to the DECT base station
integrated into the Internet-Box, but must be directly inserted
into the «phone 1» or «phone 2» ports.
Convert your
existing
Internet-Box
to fibre optic
technology
Internet-Box fibre-optic kit setup
www.swisscom.ch/internetbox-help
Swisscom (Switzerland) Ltd
Contact Center
CH-3050 Bern
www.swisscom.ch
0800 800 800
Telephone adapter
Fibre optic cable
Fibre optic module
Internet-Box standard
Internet-Box plus
You can return old devices to Swisscom for recycling free of charge.
A return label is included on the delivery slip.
Remove your old Internet
/
telephony
installations (if any).
Switch off the Internet-Box and
remove the DSL cable.
If your router looks like this,
follow the instructions on the
reverse.
Optionally:
Wireless HD-Phone connections
You can connect the HD-Phones from Swisscom wirelessly with the
Internet-Box. For information about HD-Phones from Swisscom please
visit www.swisscom.ch/hdphones
Continue you with step 1 if your router is the same as the one on the
installation overview.
You are now surfing with fibre optic technology!
2 3
789
4
10
11
5
6
Start 1

This manual suits for next models

1

Other Swisscom Network Router manuals

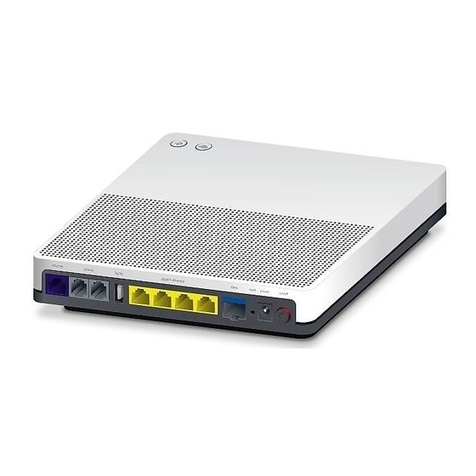
Swisscom Internet-Box standard User instructions

Swisscom

Swisscom Internet-Box standard User instructions

Swisscom Centro Grande User manual

Swisscom

Swisscom Centro Grande User manual

Swisscom Centro Business User manual

Swisscom

Swisscom Centro Business User manual

Swisscom Magic-Box User manual

Swisscom

Swisscom Magic-Box User manual

Swisscom Centro Grande User manual

Swisscom

Swisscom Centro Grande User manual

Swisscom Centro Business User guide

Swisscom

Swisscom Centro Business User guide

Popular Network Router manuals by other brands

Aztech DSL605ER Easy start guide

Aztech

Aztech DSL605ER Easy start guide

ADTRAN 424RG quick start guide

ADTRAN

ADTRAN 424RG quick start guide

Asus Republic of Gamers Rapture GT-AX11000 user manual

Asus

Asus Republic of Gamers Rapture GT-AX11000 user manual

Carrier Access Broadmore 1750 user manual

Carrier Access

Carrier Access Broadmore 1750 user manual

Luxul EPIC 4 installation guide

Luxul

Luxul EPIC 4 installation guide

Billion VoIP/(802.11g) ADSL2+ Router BiPAC 7300VGP quick start guide

Billion

Billion VoIP/(802.11g) ADSL2+ Router BiPAC 7300VGP quick start guide

NETGEAR XR500 Nighthawk quick start

NETGEAR

NETGEAR XR500 Nighthawk quick start

Interlogix IFS NS3601-24P user manual

Interlogix

Interlogix IFS NS3601-24P user manual

q-Tech QSW-3900 user manual

q-Tech

q-Tech QSW-3900 user manual

Education AV CommBox Micro installation instructions

Education AV

Education AV CommBox Micro installation instructions

Cisco 700 series quick start guide

Cisco

Cisco 700 series quick start guide

NetComm NB8 user guide

NetComm

NetComm NB8 user guide

Cisco 2650 - 2650 Router Hardware installation guide

Cisco

Cisco 2650 - 2650 Router Hardware installation guide

Wienet IP SWITCH UMS 4-C-2SC-FM installation instructions

Wienet

Wienet IP SWITCH UMS 4-C-2SC-FM installation instructions

D-Link DSL-G804V Quick information guide

D-Link

D-Link DSL-G804V Quick information guide

D-Link DSL-2680 Quick installation guide

D-Link

D-Link DSL-2680 Quick installation guide

SyncMOS Technologies International SM39R08A5 user guide

SyncMOS Technologies International

SyncMOS Technologies International SM39R08A5 user guide

D-Link DSR-250V2 Quick installation guide

D-Link

D-Link DSR-250V2 Quick installation guide

manuals.online logo
manuals.online logoBrands
  • About & Mission
  • Contact us
  • Privacy Policy
  • Terms and Conditions

Copyright 2025 Manuals.Online. All Rights Reserved.