Swisscom Handset Top S329 User manual

Top S329 / SWZ_PTT Swisscom DE / A31008-M1751-F151-1-2X19 / cover.fm / 29.07.2005
Handset Top S329
User Guide with SMS function

Top S329 / SWZ_PTT Swisscom DE / A31008-M1751-F151-1-2X19 / cover.fm / 29.07.2005

1
Handset at a glance
Top S329 / SWZ_PTT Swisscom EN / A31008-M1751 / OVERVIEW.fm / 29.07.2005
Handset at a glance 1Display in idle status
2Battery pack charge status
=eVU(flat to full)
= flashes: battery pack almost flat
e V U flashes: battery pack charging
3Display keys (page 9)
4Message key
Access to calls and message lists (depending
on the base station)
Flashes: new message or new call.
5End call key, On/Off key
End call, cancel function, go back one menu
level (press briefly), back to idle status (press
and hold), activate/deactivate handset
(press and hold in idle status)
6Hash key
Key lock on/off (press and hold in idle sta-
tus),
Toggle between upper/lower case and digits
7Swisscom Voice Portal" key (page 10)
8Connection socket for headset
9Microphone
10 Recall key
- Confer (Flash)
- Insert a dialling pause (press and hold)
11 Star key
Ringtones on/off (press and hold),
Open table of special characters
12 Key 1
Select network mailbox (press and hold)
13 Talk key
Answer a call, open last number redial list
(press briefly), start dialling (press and hold)
14 Handsfree key
Switch between earpiece and handsfree
mode
Lights up: handsfree activated
Flashes: incoming call
15 Control key (page 8)
16 Signal strength
Ð i Ñ Ò (high to low)
| flashes: no reception
16 2
3
5
4
6
7
15
14
12
10
11
9
8
1
13
ÐV
INT 1
10.05.05 09:45
INT SMS
Note:
Illustration of a handset on a base station with
SMS functionality.

2
Contents
Top S329 / SWZ_PTT Swisscom EN / A31008-M1751 / E45_IVZ.FM / 29.07.2005
Contents
Handset at a glance . . . . . . . . . . . 1
Safety precautions . . . . . . . . . . . . 3
Top S329 – a handset with
many extras . . . . . . . . . . . . . . . . . 4
First Steps . . . . . . . . . . . . . . . . . . . 4
Pack contents . . . . . . . . . . . . . . . . . . . . 4
Setting up the handset for use . . . . . . . 4
Making calls . . . . . . . . . . . . . . . . . 7
Making an external call . . . . . . . . . . . . 7
Ending a call . . . . . . . . . . . . . . . . . . . . . 7
Answering a call . . . . . . . . . . . . . . . . . . 7
Handsfree operation . . . . . . . . . . . . . . 7
Muting . . . . . . . . . . . . . . . . . . . . . . . . . 8
Making internal calls . . . . . . . . . . . . . . 8
Operating the handset . . . . . . . . . 8
Switching the handset on/off . . . . . . . 8
Activating/deactivating the
keypad lock . . . . . . . . . . . . . . . . . . . . . . 8
Control key . . . . . . . . . . . . . . . . . . . . . . 8
Display keys . . . . . . . . . . . . . . . . . . . . . 9
Returning to idle status . . . . . . . . . . . . 9
Menu guidance . . . . . . . . . . . . . . . . . . 9
Correcting incorrect entries . . . . . . . . 10
Using the directory and lists . . . 10
Directory . . . . . . . . . . . . . . . . . . . . . . 10
Last number redial list . . . . . . . . . . . . 12
Opening lists with the message key . 12
Using a handset as a room
monitor . . . . . . . . . . . . . . . . . . . . 13
Activating the room monitor and
entering the number to be called . . . 13
Handset settings . . . . . . . . . . . . . 14
Changing the display language . . . . . 14
Setting the display . . . . . . . . . . . . . . . 14
Setting the screen picture . . . . . . . . . 15
Setting display illumination . . . . . . . . 15
Activating/deactivating auto answer . 15
Adjusting the loudspeaker volume . . 15
Changing ringtones . . . . . . . . . . . . . . 16
Activating/deactivating advisory
tones . . . . . . . . . . . . . . . . . . . . . . . . . . 16
Setting the alarm clock . . . . . . . . . . . . 17
Restoring the handset default
settings . . . . . . . . . . . . . . . . . . . . . . . . 17
Appendix . . . . . . . . . . . . . . . . . . . 18
Care . . . . . . . . . . . . . . . . . . . . . . . . . . . 18
Contact with liquid . . . . . . . . . . . . . . . 18
Questions and answers . . . . . . . . . . . . 18
Warranty/Maintenance/Repair/
Authorisation . . . . . . . . . . . . . . . . . . . 19
Repair/Maintenance . . . . . . . . . . . . . . 19
Specifications . . . . . . . . . . . . . . . . . . . 20
Notes on the operating
instructions . . . . . . . . . . . . . . . . . 20
Symbols used . . . . . . . . . . . . . . . . . . . 20
Example: menu input . . . . . . . . . . . . . 20
Example: multiple line input . . . . . . . . 21
Writing and editing a text message . . 22
Accessories . . . . . . . . . . . . . . . . . 24
Index . . . . . . . . . . . . . . . . . . . . . . 25

3
Safety precautions
Top S329 / SWZ_PTT Swisscom EN / A31008-M1751 / start_guide_time.fm / 29.07.2005
Safety precautions
Caution:
Read the safety precautions and the user guide before use. Explain their contents to your children,
and the potential hazards associated with using the phone.
Use only the mains adapter supplied, as indicated on the underside of the charg-
ing cradle.
Fit only the recommended rechargeable battery pack (page 20)! I.e. do not
use any other battery type or non-rechargeable batteries as this could result in
significant health risks and personal injury.
The operation of medical appliances may be affected. Be aware of the technical
conditions in your particular environment (e.g. doctor's surgery).
The handset may cause an unpleasant humming noise in hearing aids.
Do not install the charging cradle in bathrooms or shower rooms. The charging
cradle is not watertight (page 18).
Do not use your phone in environments with a potential explosion hazard
(e.g. auto paint shops).
If you give your Top S329 to someone else, make sure you also give them the
user guide.
Information about disposal
At the end of its service life this product must not be disposed of among the nor-
mal household refuse. Instead, it must be handed in at a sales outlet or at a col-
lection point for recycling electrical and electronic devices in accordance with
regulations governing the return, taking back and disposal of electrical and elec-
tronic devices (ORDEA).
The materials can be recycled as indicated. By recycling materials and reusing or
utilising old appliances in any other way you are making an important contribu-
tion to the protection of the environment.
$
ƒ
Note:
Not all of the functions described in this manual are available in all countries. The menu structure is
dependent on the base station (analogue or ISDN base). The analogue version is represented in this
user guide.

4
Top S329 – a handset with many extras
Top S329 / SWZ_PTT Swisscom EN / A31008-M1751 / start_guide_time.fm / 29.07.2005
Top S329 – a handset with
many extras
Your Top S329 not only lets you store up to
150 telephone numbers (page 10) - your
Top S329 can do much, much more:
uYou can designate important people as
VIPs so you can tell important calls from
the "tone" (page 11).
uYou can store anniversaries (page 12)
in your phone and it will remind you of
them in advance.
uSelect frequently used phone numbers
at the press of a single key (page 11).
Have fun using your new Top S329!
First Steps
Pack contents
uone Top S329 handset,
uone charging cradle (incl. mains
adapter),
uone battery pack,
uone battery cover,
uone lock ring,
uone belt clip,
uone headset socket cover,
uuser guide (Ger, Fr, It),
uheadset
Setting up the handset for use
Connecting up the charging cradle and
mounting it on the wall (if required) is
described at the end of these instructions.
Fitting the battery pack
¤Fit the plug into the socket.
¤Insert the battery pack.
¤Place the cords in the cord routing.
Closing the battery cover
¤Hold the battery cover at a slight angle
and introduce the two lower lugs into
the casing first. Then close the cover so
that it clicks into place.
Caution:
Use only the recommended rechargeable bat-
tery pack (page 20). I.e. on no account may a
conventional (non-rechargeable) battery pack
or other type of battery be used, as this may
cause significant damage to health and prop-
erty e.g. the outer casing of the battery or bat-
tery pack could be destroyed or the battery
pack could explode. The phone could also mal-
function or be damaged as a result of using
batteries that are not of the recommended
type.

5
First Steps
Top S329 / SWZ_PTT Swisscom EN / A31008-M1751 / start_guide_time.fm / 29.07.2005
Locking the battery cover
Insert the catches on the lock ring or belt
clip into the notches in the casing and
make sure that the arrow markings on the
casing are aligned with those on the bot-
tom of the ring. Turn the lock ring or belt
clip clockwise to the end stop. When both
holes are horizontally aligned with the
upper edge of the handset the lock ring is
closed.
Opening the battery cover
Position both thumbs on the lock ring and
at the same time turn the lock ring or belt
clip anticlockwise and remove.
¤Insert a coin into the cavity at the top of
the battery cover and twist it until the
cover opens.
Registering your phone
Before you can use your Top S329 you
must register it to a base station. It can be
registered to a maximum of four base sta-
tions. The actual registration procedure
will depend on the type of base station.
Automatic registration
Important: The handset must not already
be registered to any base station.
Registering the handset to the Top S329
base station occurs automatically. (On the
E455 base station you register your hand-
set manually, see page 6.)
¤Place the handset in the base with its
display facing forward.
Registration takes around 1 minute. Dur-
ing this process, Regstr.Procedure appears
in the display and the name of the base
station flashes e.g. Base 1. When the
handset has registered, its screen displays
its internal number, e.g. INT 2 for internal
number 2. The handset is assigned the
lowest available internal number (1-6). If
all internal numbers 1-6 have been
assigned, number 6 is overwritten, pro-

6
First Steps
Top S329 / SWZ_PTT Swisscom EN / A31008-M1751 / start_guide_time.fm / 29.07.2005
vided the handset with the internal
number 6 is in idle status.
Manual registration
If the handset does not activate automati-
cally when the battery pack is fitted, you
must first charge the battery pack.
You must activate manual registration of
the handset at both the handset and the
base station.
After it has registered, the handset returns
to idle status. The handset's internal
number is shown in the display e.g. INT 1.
If not, repeat the procedure.
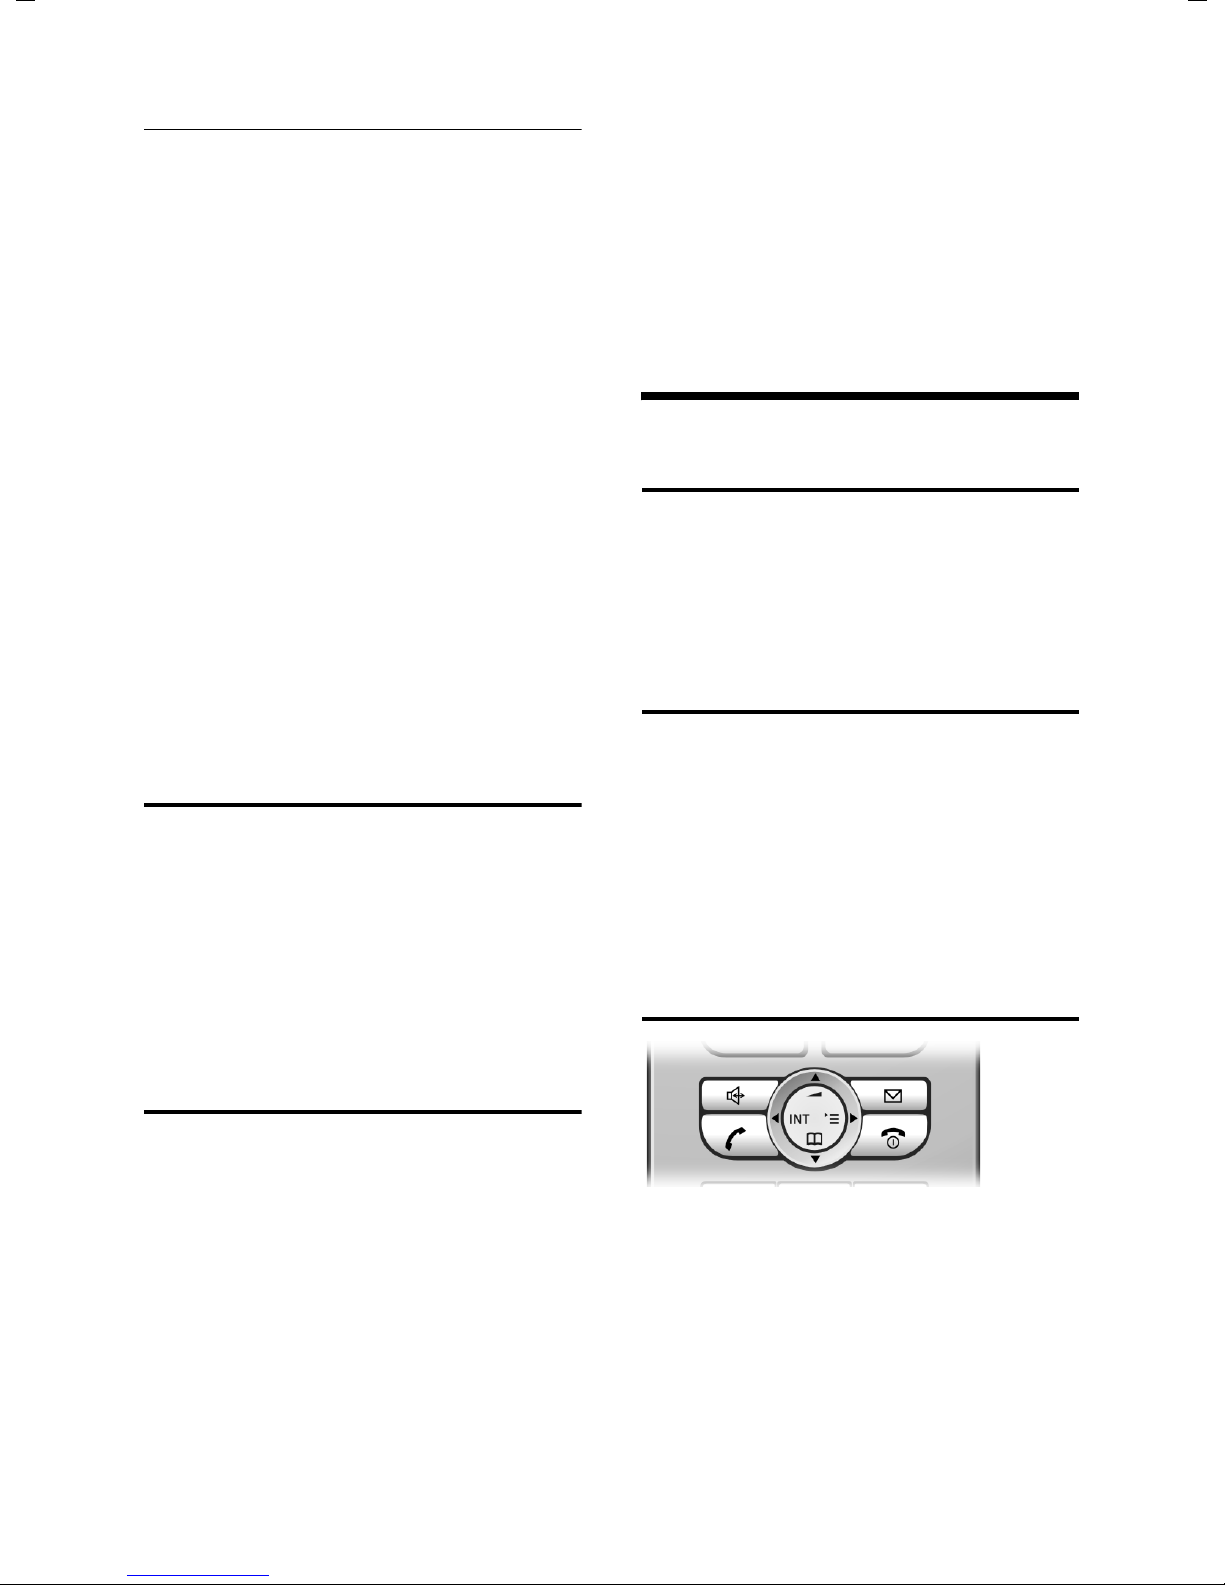
1. On the handset
v¢Ð¢Handset ¢Register H/Set
sSelect base station, e.g. Base
1, and press §OK§.
~Enter the system PIN of the
base station (the default is
0000) and press §OK§. The
screen will display, e.g. Base 1.
2. On the base station
Within 60 secs. press and hold the regis-
tration/paging key on the base station
(page 1) (approx. 3 secs.).
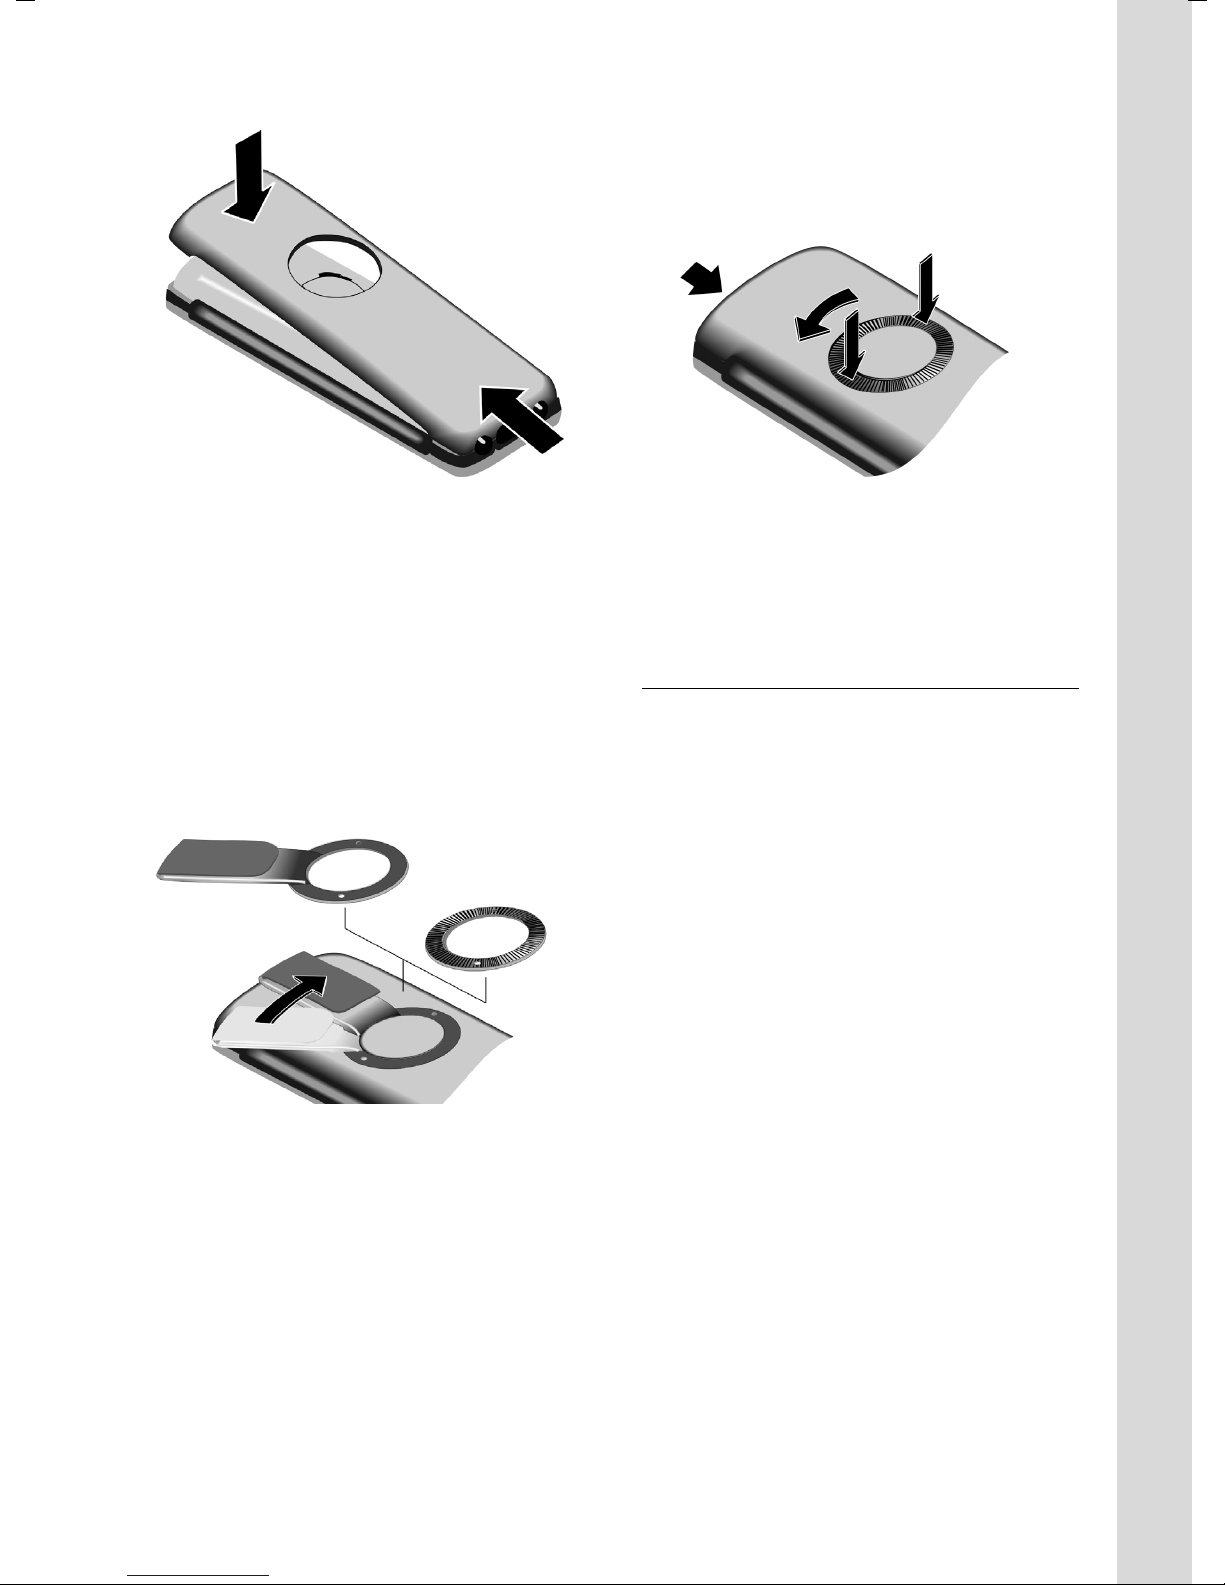
Headset socket
You can connect various types of headset
(with jack connector).
If you do not connect a headset, please
insert the cover supplied for the headset
socket to guarantee the unit is still splash
proof.
Charging the battery pack
¤Plug the mains adapter of the charging
cradle into a mains power socket.
¤Place the handset in the cradle with its
display facing forward.
To charge the battery pack, leave the
handset in the charging cradle. If the
handset is activated, the flashing battery
icon ein the top right of the display indi-
cates that the battery pack is being
charged. During handset operation, the
battery icon indicates the charge status of
the battery pack (page 1).
Initial charging and discharging of the
battery pack
The correct charge status can only be dis-
played if the battery pack is first fully
charged and discharged.
¤To do this, leave the handset in the
charging cradle continuously for ten
hours. Your handset need not be
switched on for it to charge.
¤Afterwards, remove the handset from
the charging cradle and do not put it
back again until the battery pack is fully
discharged.
Please remember:
uAlways repeat the charging and dis-
charging procedure if you remove the
battery pack from the handset and
insert it again.
Notes:
– Automatic registration is not possible when
the base station on which you wish to reg-
ister the handset is being used to make a
call.
– Each key press interrupts the automatic
registration.
– If automatic registration does not work,
you will have to register the handset manu-
ally.
Notes:
– The handset should only be placed in a
base station or charging cradle that is
designed for it.
– When the handset is in the cradle, it
charges even if it is switched off.
– If the handset has switched itself off
because the battery pack is flat and it is
then placed in the cradle, it will switch itself
on automatically.
– After the first battery charge and discharge
you may replace your handset in the charg-
ing cradle after every call.

7
Making calls
Top S329 / SWZ_PTT Swisscom EN / A31008-M1751 / start_guide_time.fm / 29.07.2005
uThe battery pack may warm up as it is
charging. This is not dangerous.
uAfter a time the charge capacity of the
battery pack will decrease for technical
reasons.
Setting the date and time
If you have not yet set the date and time,
press the display key §Time§ to open the
input field.
To change the time, open the input field
via:
v¢Ð¢Date/Time
¤Change multiple line input:
Date:
Enter day, month and year in 6-digit
format.
Time:
Enter hours and minutes with 4 digits,
e.g. QM15for 07:15
a.m.
§Save§ Press the display key.
Changing the base station
If your handset is registered to more than
one base station, you can set it to a partic-
ular base station or to the base station
that has the best reception (Best Base).
v¢Ð¢Handset ¢Select Base
sSelect one of the registered
base stations or Best Base and
press §OK§.
Making calls
Making an external call
External calls are calls using the public tel-
ephone network.
~c Enter the number and press
the talk key.
Or:
c~ Press and hold the talk key
cand then enter the
number.
You can cancel the dialling operation with
the end call key a.
You are shown the duration of the call
while the call is in progress.
Ending a call
aPress the end call key.
Answering a call
The handset indicates an incoming call in
three ways: by ringing, by a display on the
screen and by the flashing handsfree
key d.
You can accept the call by:
¤Pressing the talk key c.
¤Pressing the handsfree key d.
If the handset is in the charging cradle and
the Auto Answer function is activated
(page 15), the handset will take a call
automatically when you lift it out of the
cradle.
If the ringtone is intrusive, press the dis-
play key §Silence§. You can take the call so
long as it is displayed on the screen.
Handsfree operation
In handsfree mode instead of holding the
handset to your ear you can put it down
e.g. on the table in front of you to allow
others to participate in the call.
Notes:
– Dialling with the directory or last number
redial list (page 12) saves you repeatedly
keying in phone numbers.

8
Operating the handset
Top S329 / SWZ_PTT Swisscom EN / A31008-M1751 / start_guide_time.fm / 29.07.2005
Activating/deactivating handsfree
Activating while dialling
~d Enter the number and press
the handsfree key.
¤You should inform your caller before
you use the handsfree function so that
they know someone else is listening.
Switching between earpiece and
handsfree mode
dPress the handsfree key.
Switch handsfree on or off during a call.
If you wish to place the handset in the
charging cradle during a call:
¤Press and hold the handsfree key d
while placing the handset in the base
station. If handsfree key ddoes not
light up, press the key again.
For how to adjust the volume, see
page 15.
Muting
You can deactivate the microphone in
your handset during an external call. The
other party hears a wait melody.
uPress the control key on the
left to mute the handset.
”Press the display key to reacti-
vate the microphone.
Making internal calls
Internal calls to other handsets registered
on the same base station are free.
Calling a specific handset
uInitiate internal call.
~Enter the number of the hand-
set.
Or:
uInitiate internal call.
sSelect handset.
cPress the talk key.
Calling all handsets ("group call")
uInitiate internal call.
*Press the star key. All handsets
are called.
Ending a call
aPress the end call key.
Operating the handset
Switching the handset on/off
aPress and hold the end call
key. You will hear the confir-
mation beep.
Activating/deactivating the
keypad lock
#Press and hold the hash key.
You will hear the confirmation beep. The
icon Øappears in the display when the
keypad lock is activated.
The keypad lock is deactivated automati-
cally if someone calls you. It is re-activated
when the call is finished.
Control key
In the following information the side of
the control key (top, bottom, right, left)
you have to press in each operating situa-
tion is shown in black (e.g. vfor "press
the right of the control key").
The control key has a number of different
functions:

9
Operating the handset
Top S329 / SWZ_PTT Swisscom EN / A31008-M1751 / start_guide_time.fm / 29.07.2005
When the handset is in idle status
sOpen the directory.
vOpen main menu.
uOpen list of handsets.
tSet the ringtones on the hand-
set (page 16).
In the main menu and in input fields
You can use the control key to move the
cursor up t, down s, right vor left
u.
In lists and submenus
t/ sScroll up/down line by line.
vOpen submenu or confirm
selection.
uGo back one menu level, or
cancel.
During an external call
sOpen the directory.
uInitiate an internal consulta-
tion call.
tAdjust loudspeaker volume for
earpiece and handsfree mode.
Display keys
The function of the display keys changes
depending on the particular operating sit-
uation. Example:
1 Current display key functions are shown in
the bottom display line.
2Displaykeys
Press the display key below to launch the
function.
The most important display symbols are:
§§§§§§Menu§§§§§ Open the main menu.
§Options§ Open a context-dependent
menu.
WDelete key: backspace deletes
one character at a time.
ÎGo back one menu level or
cancel operation.
ÓCopy number into directory.
ŸOn bases with built-in answer-
ing machines: forward exter-
nal call to answering machine.
•Open the last number redial
list (depending on the base
station).
Returning to idle status
You can revert to idle status from any-
where in the menu as follows:
¤Press and hold the end call key a.
Or:
¤Do not press any key: after 2 minutes
the display will automatically revert to
idle status.
Changes that you have not confirmed or
saved by pressing §OK§, §Yes§, §Save§, §Send§ or
Save Entry §OK§ will be lost.
An example of the display in idle status is
shown on page 1.
Menu guidance
Your telephone's functions are accessed
using a menu that has a number of levels.
Main menu (first menu level)
¤Press vwith the handset in idle status
to open the main menu.
The main menu functions are shown in
the display as a list with icon and name.
Accessing a function, i.e. opening the cor-
responding submenu (next menu level):
¤Navigate to the function using the con-
trol key q. Press the display key §OK§.
2
INT SMS 1

10
Using the directory and lists
Top S329 / SWZ_PTT Swisscom EN / A31008-M1751 / start_guide_time.fm / 29.07.2005
Submenus
The functions in the submenus are dis-
played as lists.
To access a function:
¤Scroll to the function with the control
key qand press §OK§.
Or:
¤Enter the corresponding digit combina-
tion.
A short press on the end call key a
returns you to the previous menu level /
cancels the operation.
Correcting incorrect entries
You can correct wrong characters in the
text by navigating to the wrong input
using the control key. You can then:
upress Xto delete the character to the
left of the cursor,
uinsert characters to the left of the cur-
sor,
uoverwrite the character (flashing)
when entering the time and date etc.
uYou will find examples of symbols
used, menu entries and multiple line
input in the appendix to this user guide,
page 20.
Using the directory and lists
You can store up to 150 entries altogether
in the directory (the actual number
depends on the size of the individual
entries).
You can create a personalised directory for
your own individual handset. You can,
however, send the entries to other hand-
sets or the base station (page 11).
Directory
In the directory, you can store numbers
and the associated names.
¤With the handset in idle status, open
the directory by pressing the skey.
Length of entries
Number: max. 32 digits
Name: max. 16 characters
Storing a number in the directory
s¢New Entry
¤Change multiple line input:
Number :
Enter number.
Name :
Enter name.
Annivers.:
Enter anniversary if required (page 12).
Speed Dial:
Select key for quick dial.
¤Save changes.
"Swisscom Voice Portal" key
CPress the key.
Select Swisscom VP and confirm with §OK§.
You will be connected straight to the
Swisscom Voice Portal.
Note:
For quick access to a number from the direc-
tory (quick dial), you can assign the number to
a key.
Note:
This key connects you to the Swisscom Voice
Portal where you can activate additional ser-
vices such as call diversion (Service 21, 61 or
67), call waiting (Service 43) or three-party
conference with a simple voice command. You
can also use voice command to access current
sport, news and weather information.

11
Using the directory and lists
Top S329 / SWZ_PTT Swisscom EN / A31008-M1751 / start_guide_time.fm / 29.07.2005
Selecting entries in the directory
sOpen directory.
You have the following options:
uUse sto scroll through the entries
until the required name is selected.
uEnter the first character of the name, or
scroll to the entry with sif required.
Dialling with the directory
s ¢s(select entry)
cPress the talk key. The number
is dialled.
Managing entries in the directory
s ¢s(select entry)
Viewing an entry
§View§ Press the display key.
The entry is displayed.
Back with §OK§.
Editing entries
§View§ §Edit§ Press display keys one after the
other.
¤Carry out changes and save.
Using other functions
s¢s(select entry)
¢Options (open menu)
The following functions can be selected
with q:
Display Number
Edit or add to a stored number. Then
dial or call up further functions by
pressing Options.
Edit Entry
Edit selected entry.
Delete Entry
Delete selected entry.
VIP Entry (directory only)
Mark a directory entry as VIP (Very
Important Person) and assign it a par-
ticular ringtone. You can then identify
VIP calls by their ringtones.
Requirement: caller display ("CLIP")
Copy Entry
Send a single entry to a handset
(page 11).
Delete List
Delete all entries in the directory.
Copy List (depending on the receiving
handset)
Send complete list to a handset
(page 11).
Available Memory
Display the available entries in the
directory (page 10).
Using quick dial keys
¤Press and hold the required quick dial
key.
Sending the directory to another
handset
Requirements:
uThe sending and receiving handsets
must both be registered to the same
base station.
uThe other handset and base station can
send and receive directory entries.
Please read the relevant user guide for
further information.
s ¢s(select entry) ¢Options (open
menu) ¢Copy Entry / Copy List
~Enter the internal number of
the receiving handset. You see
Copying entry.
§Yes§ / §No§ Press the display key.
A successful transfer is confirmed by a
message and confirmation tone on the
receiving handset.
Please remember:
uEntries with identical numbers are not
overwritten on the receiving handset.
uThe transfer is cancelled if the phone
rings or if the memory of the receiving
handset is full.

12
Using the directory and lists
Top S329 / SWZ_PTT Swisscom EN / A31008-M1751 / start_guide_time.fm / 29.07.2005
Storing anniversaries in the directory
You can store an anniversary for every
number in the directory, and specify a
time when you will receive a reminder call
on the anniversary.
s ¢s(Select entry; page 11)
§View§ §Edit§ Press display keys one after the
other.
sScroll to the Annivers.: line.
§Edit§ Press the display key.
¤Change multiple line input:
Date:
Enter the day/month in 4-digit format.
Time:
Enter the hour/minute for the reminder
call in 4-digit format.
Prompt:
Select the type of signal for the
reminder and press §OK§.
¤Save changes (page 21).
Deleting anniversaries
s ¢s(Select entry; page 11)
§View§ §Edit§ Press display keys one after the
other.
sScroll to the Annivers.: line.
§Edit§ §Delete§ §Save§
Press display keys one after the
other.
Reminder call on an anniversary
A reminder call is signalled on the handset
using the selected ringtone.
§Silence§ Press the display key to stop
the reminder call.
Last number redial list
The last number redial list contains the ten
numbers last dialled with the handset
(max. 32 numbers). If one of the numbers
is in the directory, then the corresponding
name will be displayed.
Manual last number redial
cPress the key briefly.
sSelect entry.
cPress the talk key again. The
number is dialled.
When a name is displayed, you can display
the corresponding phone number by
pressing the display key §View§.
Managing entries in the last number
redial list
cPress the key briefly.
sSelect entry.
Options Open the menu.
The following functions can be selected
with q:
Display Number (as in the directory,
page 11)
Copy to Directory
Copy an entry to the directory
(page 10).
Delete Entry (as in the directory, page 11)
Delete List (as in the directory, page 11)
Opening lists with the message
key
An advisory tone sounds as soon as a new
entry appears on a list. The fkey
flashes (it goes off when the key is
pressed). In idle status, the displays shows
an icon for the new message.
If you press the fkey, you access the
lists which contain new messages.
Note:
Reminder calls require a time stamp. If you
select a visual signal, then a time stamp is not
required and is automatically set to 00.00.

13
Using a handset as a room monitor
Top S329 / SWZ_PTT Swisscom EN / A31008-M1751 / start_guide_time.fm / 29.07.2005
Using a handset as a room
monitor
If the room monitor is activated, a previ-
ously stored destination number is called
as soon as a set noise level is reached. You
can store an internal or external number
in your handset as the destination
number.
The room monitor call to an external
number stops after approx. 90 seconds.
The room monitor call to an internal
number (handset) stops after approx. 3
minutes (depending on the base station).
While the room monitor is activated, all
keys are locked except the end call key.
The handset's speaker is muted.
When the room monitor is activated,
incoming calls to the handset are indi-
cated without a ringtone and are only
shown on the screen. The display and key-
pad are not illuminated and advisory
tones are also turned off.
If you accept an incoming call, the room
monitor mode is suspended for the dura-
tion of the call, but the function remains
activated.
If you switch off the handset, the room
monitor mode is deactivated. You must
reactivate the function after switching on
the handset again.
Activating the room monitor and
entering the number to be called
v¢í¢Room Monitor
¤Change multiple line input:
Room M.:
Select On to activate.
Call to:
Press the display key §Edit§ and enter des-
tination number.
External number: select number from
the directory or enter directly. Only the
last 4 digits are displayed.
Internal number: delete any stored
external number. §INT§ s(select hand-
set or Call All , if all registered handsets
are to be called) §OK§.
Store number with §Save Entry§ §OK§.
Level:
Set noise level sensitivity (Low or High).
¤Save changes (page 21).
The function is now activated. With v,
you can move directly to settings.
Caution!
–You should always check the operation
of the room monitor before use. For
example, test its sensitivity. Check the
connection if you are diverting the room
monitor to an outside number.
– When the function is switched on, the
handset's operating time is severely
reduced. If necessary, place the handset in
the charging cradle. This ensures that the
battery pack does not run down.
– Ideally the handset should be positioned 1
to 2 metres away from the baby. The micro-
phone must be directed towards the baby.
– The connection to which the room monitor
is diverted must not be blocked by an acti-
vated answering machine.

14
Handset settings
Top S329 / SWZ_PTT Swisscom EN / A31008-M1751 / start_guide_time.fm / 29.07.2005
Changing previously set external
destination number
v¢í¢Room Monitor
sScroll to the Call to: line.
§Edit§ Press the display key.
XDelete existing number.
¤Enter number as described in "Activat-
ing the room monitor and entering the
number to be called" (page 13).
¤Save changes (page 21).
Changing previously set internal
destination number
v¢í¢Room Monitor
sScroll to the Call to: line.
§Edit§ Press the display key.
§Yes§ Press the display key to con-
firm the prompt.
¤Enter number as described in "Activat-
ing the room monitor and entering the
number to be called" (page 13).
¤Save changes (page 21).
Deactivating the room monitor
remotely
Requirements: The phone must support
touch tone dialling and the room monitor
is set for an external destination number.
¤Take the call from the room monitor
and press keys 9;.
The room monitor function will deactivate
after the call ends. There will be no further
room monitor calls. The other room moni-
tor settings on the handset (e.g. no ring-
tone) will however remain activated until
you press the display key §Off§ on the hand-
set.
To reactivate the room function with the
same phone number:
¤Turn on the activation again and save
with Save (page 13).
Handset settings
Changing the display language
You can view the display texts in different
languages (total of 17 languages).
v¢Ð¢Handset ¢Language
The current language is indicated by .
sSelect a language and press
§OK§.
a Press and hold (idle status).
If you accidentally choose a language you
do not understand:
v 5 41
Press keys one after the other.
sSelect the correct language
and press §OK§.
Setting the display
You have a choice of four colour schemes
and several different contrasts.
v¢Ð¢Display
Colour Scheme
Select and press §OK§.
sSelect a colour scheme and
press §OK§ ( = current col-
our).
aPress briefly.
Contrast Select and press §OK§.
rSelect contrast.
§Save§ Press the display key.
a Press and hold (idle status).
‰
‰

15
Handset settings
Top S329 / SWZ_PTT Swisscom EN / A31008-M1751 / start_guide_time.fm / 29.07.2005
Setting the screen picture
You can display a screen picture (picture or
digital clock) when the handset is in idle
status. This will replace the idle status dis-
play. It may conceal the date, time and
name.
The screen picture is not displayed in cer-
tain situations, e.g. during a call or when
the handset has been deregistered.
If a screen picture has been activated, the
menu item Screen Picture is marked with
.
v¢Ð¢Display ¢Screen Picture
The current setting is displayed.
¤Change multiple line input:
Activation:
Select On (screen picture is displayed)
or Off (no screen picture).
Selection:
Change screen picture if necessary (see
below).
¤Save changes (page 21).
If the screen picture conceals the display,
press the end call key briefly to show the
idle display with time and date.
Changing the screen picture
v¢Ð¢Display ¢Screen Picture
sScroll to the Selection line.
View§ Press the display key. The
active screen picture is dis-
played
sSelect picture/Clock and
press §OK§.
¤Save changes.
Setting display illumination
Depending on whether or not the handset
is in the charging cradle you can set differ-
ent levels of display illumination. If the
charging cradle is switched on, the display
is permanently dimmed.
v¢Ð¢Display ¢Backlight
The current setting is displayed.
¤Change multiple line input:
In Charger
Select On or Off .
without Charger
Select On or Off .
§Save§ Press the display key.
a Press and hold (idle status).
Activating/deactivating auto
answer
If you have activated this function, when
you get a call you can simply lift the hand-
set out of the charging cradle without hav-
ing to press the talk key c.
v¢Ð¢Handset
Auto Answer
Select and press §OK§ (=on).
aPress and hold (idle status).
Adjusting the loudspeaker
volume
You can set the loudspeaker volume for
handsfree speaking to five different levels
and the earpiece volume to three different
levels. You can only make these adjust-
ments during an external call.
The handsfree volume can only be
adjusted when this function is set.
You are conducting an external call.
tOpen menu.
rSelect volume.
§Save§ Press display key if necessary
to save the setting perma-
nently.
If tis assigned a different function:
§Options§ Open menu.
Volume Select and press §OK§.
Configure setting (see above).
‰
‰

16
Handset settings
Top S329 / SWZ_PTT Swisscom EN / A31008-M1751 / start_guide_time.fm / 29.07.2005
Changing ringtones
uVolume:
You can choose between five volumes
(1–5; e.g. volume 2 = ˆ) and
the "Crescendo" ring (6; volume
increases with each ring =
‰).
uRingtones:
You can choose between 15 different
melodies.
You can configure the following functions
with different ringtones:
uExt. Calls : For external calls
uInternal Calls : For internal calls
uAll: The same for all functions
Settings for individual functions
Set the volume and melody depending on
the type of signalling required.
v¢Ð¢Audio Settings ¢
Ringer Settings
qSetting, e.g. select Ext. Calls
and press §OK§.
¤Change multiple line input:
rSet volume (1–6).
sScroll to the next line.
rSelect melody.
§Save§ Press the display key to save
the setting.
In idle status, you can also open the menu
Ringer Settings by pressing tbriefly.
Settings for all functions to ring the
same
v¢Ð¢Audio Settings ¢
Ringer Settings ¢All
¤Set volume and ringtone (see "Settings
for individual functions").
§Yes§ Press the display key to con-
firm the prompt.
aPress and hold (idle status).
Activating/deactivating the ringtone
Before answering a call or while your
handset is in idle status, it is possible for
you to cancel the ringtone permanently or
for the current call. The ringtone cannot
be re-activated while an external call is in
progress.
Deactivating the ringtone permanently
*Press the star key and hold
until you can no longer hear
the ringtone.
The Ú icon appears in the display.
Re-activating the ringtone
*Press and hold the star key.
Deactivating the ringtone for the current
call
§Silence§ Press the display key.
Activating/deactivating the alert tone
In place of the ringer tone you can activate
an alert tone. When you get a call, you will
hear a short tone ("Beep") instead of the
ringtone.
*Press and hold the star key
and within 3 seconds:
§Beep on§§ Press the display key. A call is
now signalled by one brief
alert tone. You will now see
ºin the display.
Activating/deactivating advisory
tones
Your handset uses ‘advisory tones’ to tell
you about different activities and statuses.
The following advisory tones can be acti-
vated and deactivated independently of
each other:
uKey beep: Each key press is acknowl-
edged.

17
Handset settings
Top S329 / SWZ_PTT Swisscom EN / A31008-M1751 / start_guide_time.fm / 29.07.2005
uAcknowledge tones:
–Confirmation tone (rising tone
sequence): at the end of the entry/
setting and when an SMS or a new
entry arrives in the calls list
–Error beep (descending tone
sequence): when you make an
incorrect entry
–Menu end tone: when scrolling at
the end of a menu
uBattery low beep: the battery pack
requires charging.
v¢Ð¢Audio Settings ¢
Advisory Tones
¤Change multiple line input:
Key Tones:
Select On or Off .
Confirm.:
Select On or Off .
Battery:
Select On, Off or In Call. The battery
tone is activated/deactivated or only
sounds during a call.
¤Save changes (page 21).
You cannot deactivate the confirmation
tone for placing the handset in the charg-
ing cradle.
Setting the alarm clock
Requirement: the date and time have
already been set (page 7).
Activating/deactivating the alarm
clock and setting the wake-up time
v¢ì
¤Change multiple line input:
Alarm Clock:
Select On or Off .
Time:
Enter the wake-up time in 4-digit for-
mat.
Melody:
Select melody.
Volume:
Set the volume (1-6).
¤Save changes (page 21).
You will see the ¼icon.
A wake-up call with the selected ringer
melody is signalled on the handset. The
wake up call sounds for 60 seconds. The
display shows Alarm Clock . If no key is
pressed the wake-up call is repeated twice
at five minute intervals and then switched
off.
During a call, the wake-up call is signalled
by a short tone.
Deactivating the wake-up call/
repeating after a pause (slumber
mode)
Requirement: A wake-up call is sounding.
§Off § Press the display key. The
wake-up call is deactivated.
or
§Snooze§ Press the display key or any
key. The wake-up call is deacti-
vated and then repeated after
5 minutes. After the second
repetition the wake-up call is
deactivated completely.
Restoring the handset default
settings
You can reset any individual settings and
changes that you have made. This will not
affect entries in the directory, call-by-call
list or calls list, nor the handset's registra-
tion to the base station.
v¢Ð¢Handset ¢Reset Handset
§Yes§ Press the display key.
aPress and hold (idle status).
Cancel the restoring process by pressing
aor the display key §No§.

18
Appendix
Top S329 / SWZ_PTT Swisscom EN / A31008-M1751 / start_guide_time.fm / 29.07.2005
Appendix
Care
¤Wipe the charging cradle and the hand-
set with a damp cloth (do not use sol-
vent) or an antistatic cloth.
Never use a dry cloth. This can cause
static.
Contact with liquid
Your handset is splash proof.
If it comes into contact with water, knock
the water out of the microphone opening
and remove any water on the handset
with an absorbent cloth. Your handset is
ready for use.
If your handset comes into contact with a
larger amount of liquid take the following
steps:
1. Do not switch the handset on under
any circumstances!
2. Remove the battery pack immediately.
3. Remove the headset socket cover.
4. Hold the handset horizontally with the
open battery compartment facing
down.
5. Hold the handset vertically. Tilt the
handset backwards and forwards
slightly, giving it a gentle shake each
time.
6. Dab all parts dry and then leave the
handset for at least 72 hours with the
battery compartment open and the
keypad facing down in a dry, warm
place (not: microwave, oven or similar).
When it has fully dried out, you will nor-
mally be able to use it again.
Questions and answers
Faults and Self-help with Troubleshooting
Not every fault is due to a defective
phone. In certain circumstances, it can
come from a brief interruption in the
power supply to the base station (unplug/
plug in power supply) or if the batteries of
the handset are removed and inserted
again. The following instructions should
be of help for specific faults.
Important: problems or faults can only be
remedied if you bring the complete unit
(base station, handset, as well as connect-
ing cable) to the place of purchase.
!
The display is blank.
1. The handset is not switched on.
¥Press and hold the end call key a.
2. The batteries are flat.
¥Charge or replace the batteries (page 6).
The handset does not respond to a key press.
The keypad lock is activated.
¥Press and hold the hash key #(page 8).
"Base station x" flashes in the display.
1. The handset is outside the range of the base
station.
¥Reduce the distance between handset/
base station.
2. The handset has been de-registered.
¥Register the handset (page 5).
Base Search flashes in the display.
The handset is set for Best Base and no base sta-
tion is switched on or within range.
¥Reduce the distance between handset/base
station.
Handset does not ring.
The ringtone is switched off.
¥Activate the ringtone (page 16).
The other party cannot hear you.
You have pressed the u(INT) key. The hand-
set is "muted".
¥Switch on the microphone again (page 8).
Table of contents
Other Swisscom Telephone Accessories manuals