SwitchBot Curtain Rod 2 User manual

Curtain Rod 2
User Manual • Uživatelský manuál •
Užívateľský manuál • Használati utasítás •
Benutzerhandbuch •Manuel de l'utilisateur

2
English
3 –26
Čeština
27 –51
Slovenčina
52 –75
Magyar
76 –99
Deutsch
Français
100 –124
125 –148

3
The product user guide contains product features, how to use, and the operating
procedure. Read the user manual carefully to get the best experience and avoid
unnecessary damage. Keep this manual for future reference. If you have any questions
or comments about the device, please contact the customer line.
✉www.alza.co.uk/kontakt
✆+44 (0)203 514 4411
Importer Alza.cz a.s., Jankovcova 1522/53, Holešovice, 170 00 Prague 7, www.alza.cz

4
Package Contents
Name of Parts
Main Body
Hook Pair (Rod 2)
Type-C Cable
Beads
Clip
Beads Fixer
Hook Arm (Rod 2)
Motor
Hook Button
Hook
Reset Button
Type-C Charging Port
Indicator Light & Light Sensor

5
Preparation
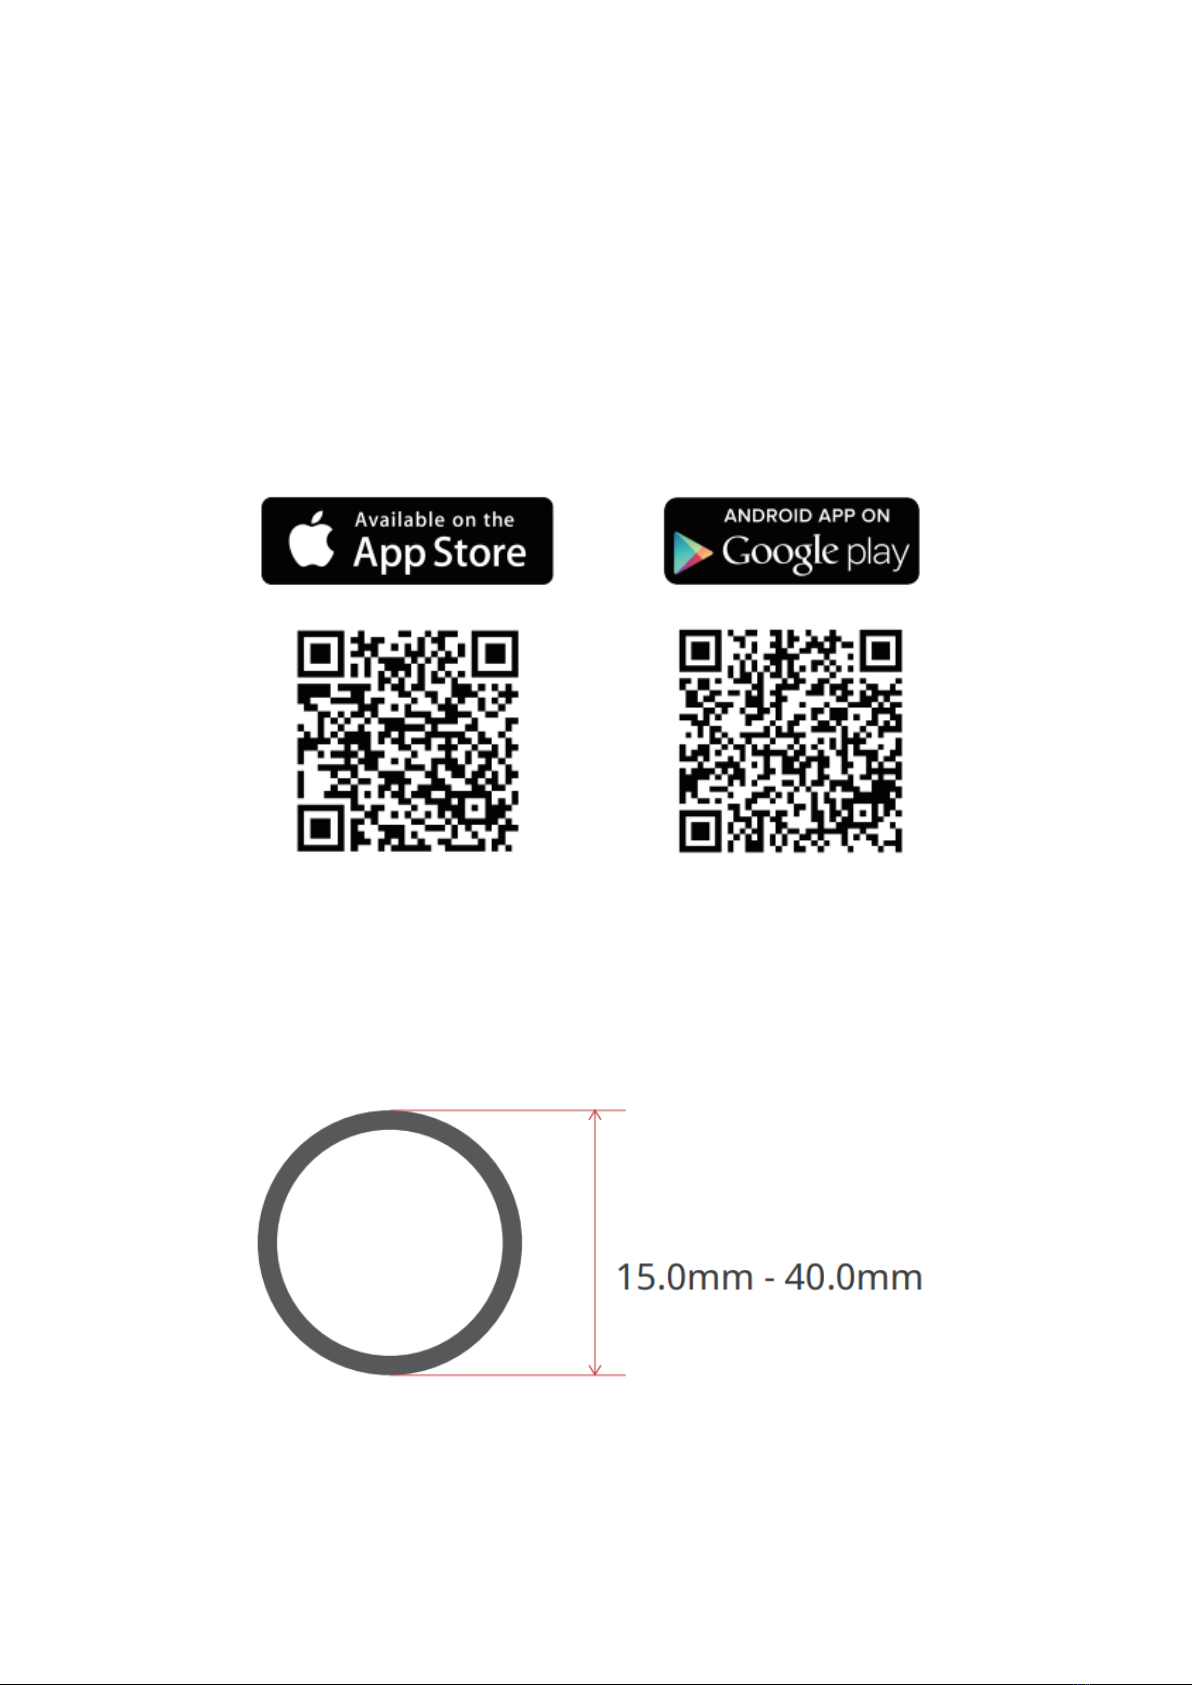
•A smartphone or tablet with Bluetooth 4.2 or above
•Download the SwitchBot app on App Store or Google Play Store.
•Open SwitchBot app and register for a SwitchBot account or log in directly if you
have an account.
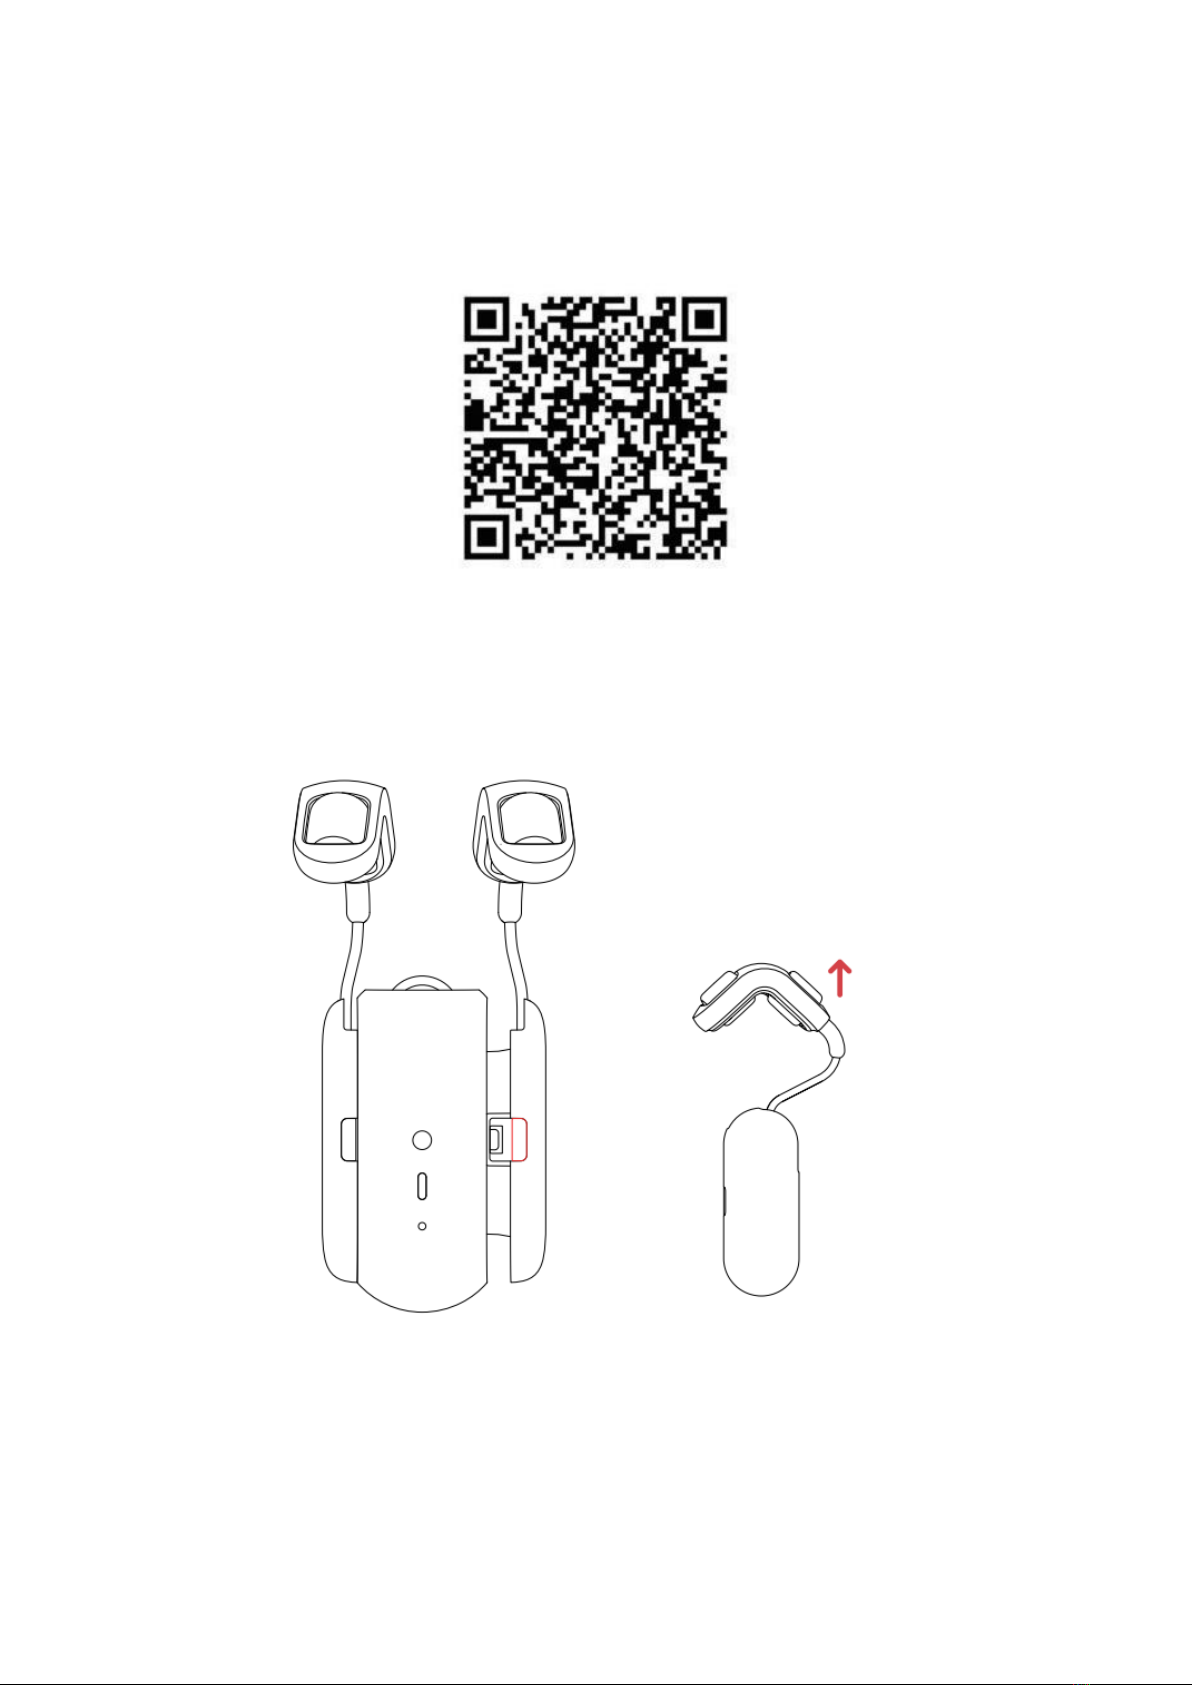
•Charge SwitchBot Curtain for about 4 hours
•(Optional) If you intend to use the cloud service feature, you need to set up a
SwitchBot Hub Mini (sold separately) and connect your phone to the internet
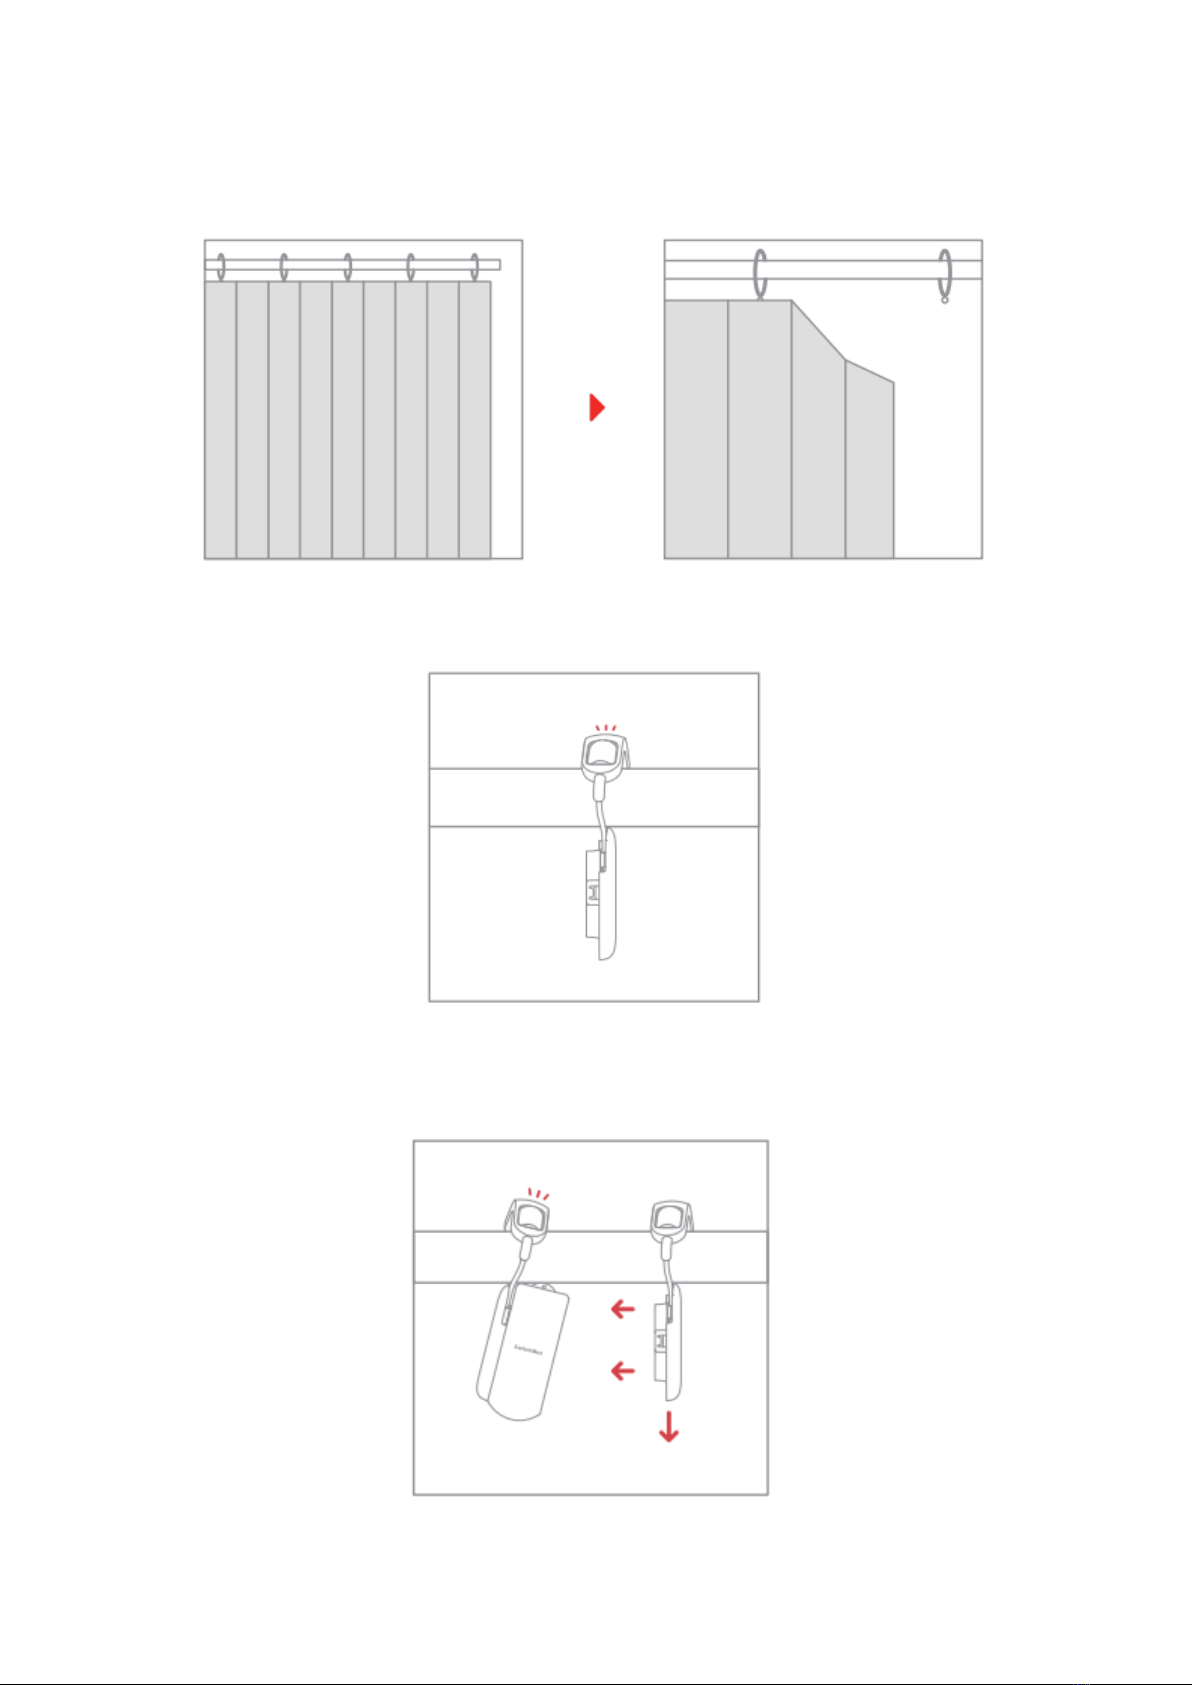
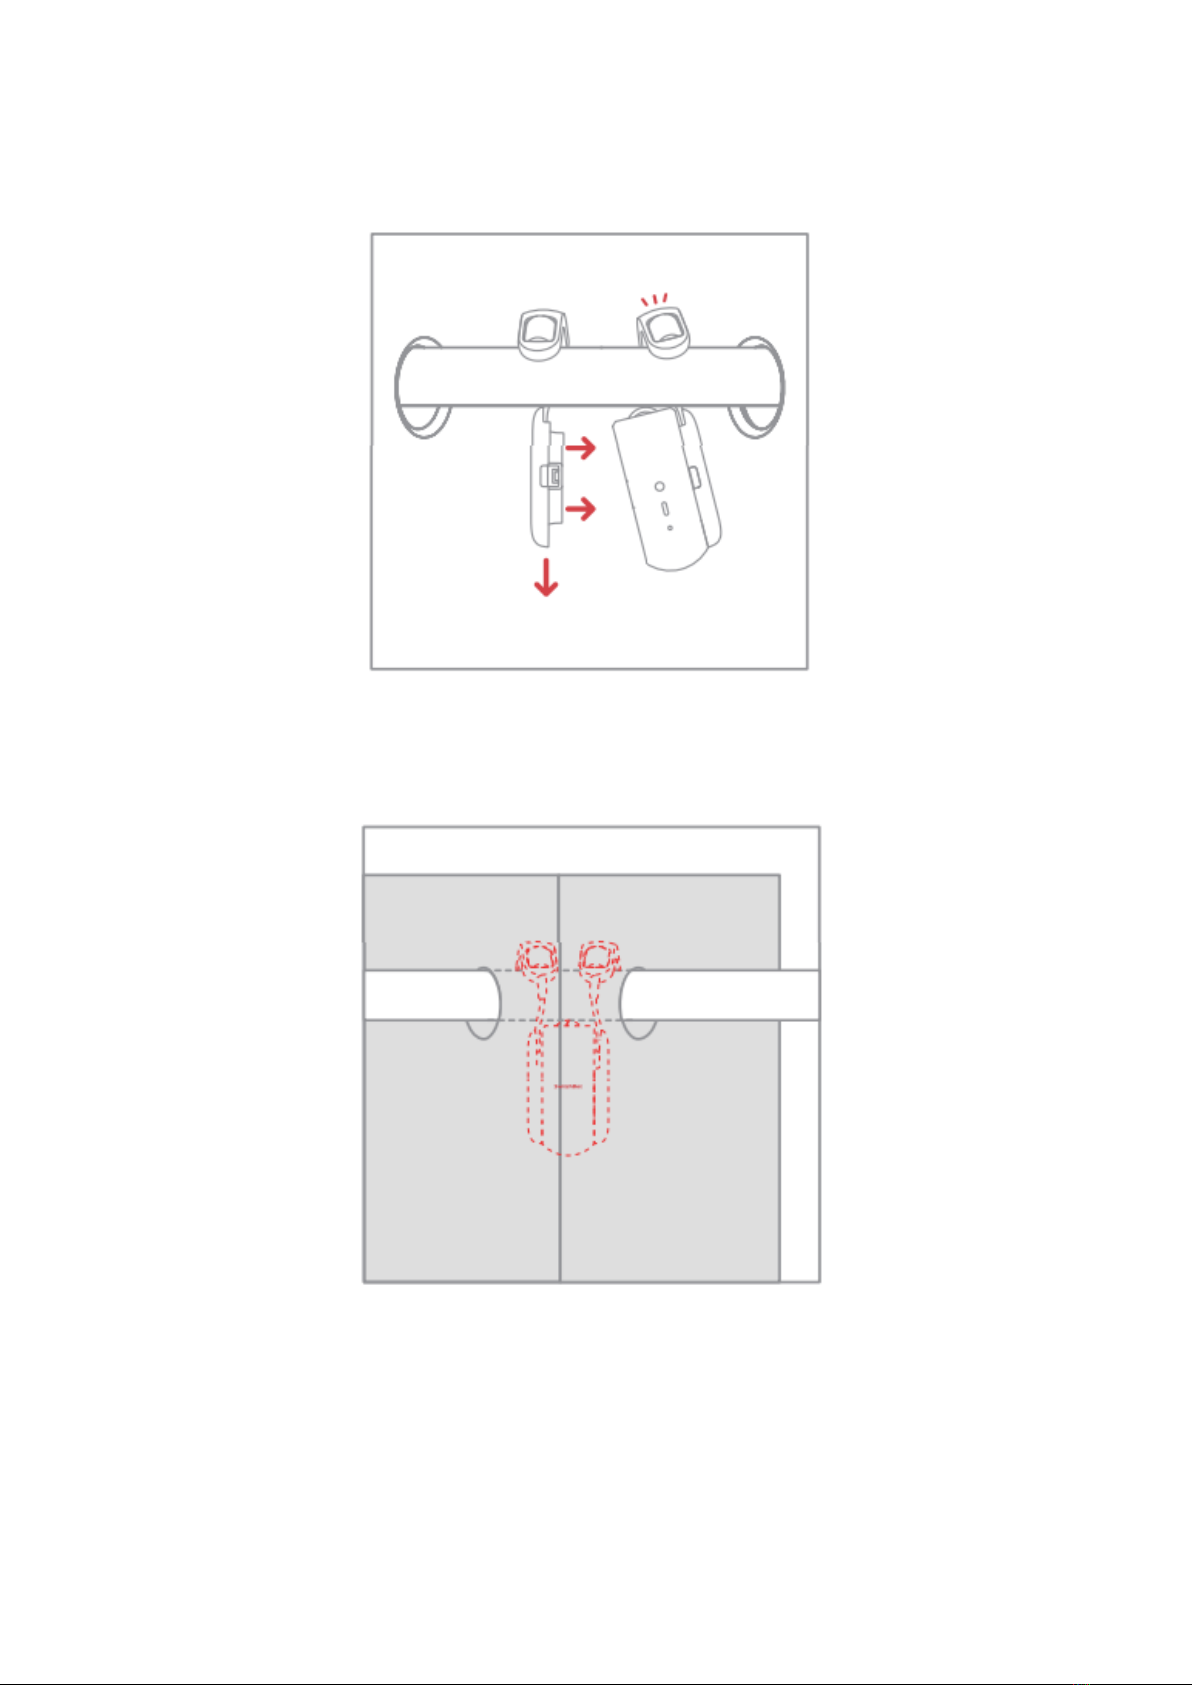
Installation
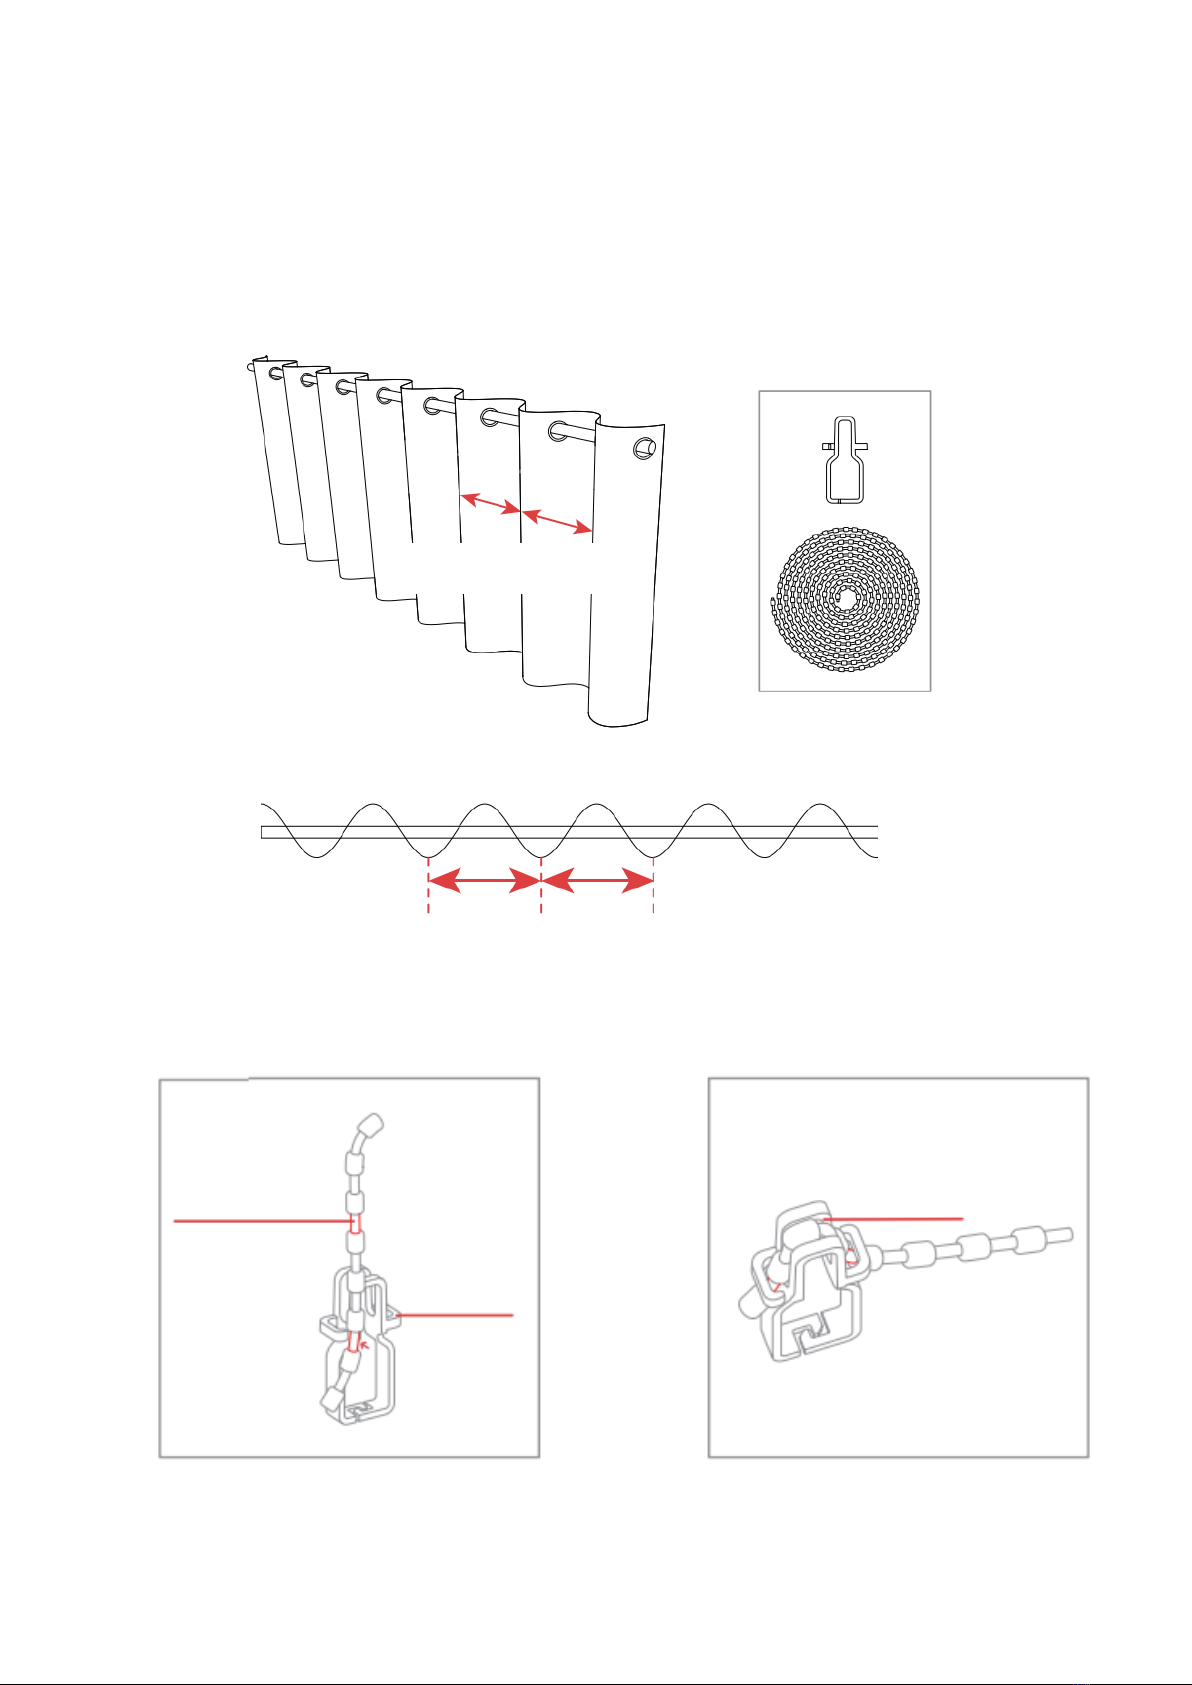
Check your curtain rail
The curtain rail's diameter supported by SwitchBot Curtain Rod 2 is as follows.
If your curtain rail doesn't work well with SwitchBot Curtain (Rod 2), please seek support
at support@wondertechlabs.com
Diameter

6
Step1: Add SwicthBot Curtain in the app
Create a SwitchBot account or sign in from the app's profile page. Then add it to your
account. Learn more at: support.switch-bot.com/hc/en-us/articles/4405925949463
Step 2: Install on your Curtain Track
Push the button to remove the hook from the SwitchBot Curtain's body.
Stretchable Hook Arm

7
1. Ring Top Curtains
1. Close your curtain and remove the first hook from it.
2. Pull and put one side of the hooks onto your curtain rod.
3. Put the main body (attached with the other hook) onto the rod, pull down the
hook and install it on the main body.

8
4. Finish by adjusting the position of the SwitchBot Curtain to keep it perpendicular
to the ground, make sure the logo faces indoor. Put SwitchBot Curtain behind
your curtain.
2. Grommet Curtains
1. Close your curtain, install SwitchBot Curtain at the back of this type of curtain.
2. Pull one of the hooks down and hang it between the first and second grommet.

9
3. Put the main body (attached with the other hook) onto the rod, pull down the
hook and install it on the main body.
4. Finish by adjusting the position of the SwitchBot Curtain to keep it perpendicular
to the ground, make sure the logo faces indoor. Put SwitchBot Curtain behind
your curtain.

10
3. Grommet Curtains (Optional)
This is an alternative way of installation for grommet curtains when regular method
does not work well. This would require beads and beads fixer.
Close the curtain and make sure the distances between each fold line are about the
same.
Install the beads onto the beads fixer as shown below.
Caution: Make sure that there are 3 beads between two holders.
Same distance
Top view
Back
Same distance
Front
Beads (starting
part)
Holder
Indent

11
Start from the first beads fixer, measure the distance between the first and the third
grommet.
Install the beads onto the the second beads fixer in the same way.
Based on the distance between the first and second beads fixer, find the positions for
the other beads fixer.
Third Grommet
First Grommet

12
Install the beads fixer on the top of the grommets, make sure that the beads is stretched
straight. Leave a grommet every 2 beads fixers. Install as shown below and make sure to
close the beads fixer firmly. After installation is completed, cut off the rest of the beads
or hide it behind the curtain.
1. Close your curtain, install SwitchBot Curtain at the back of this type of curtain.

13
2. Pull one of the hooks down and hang it between the first and second grommet.
3. Put the main body (attached with the other hook) onto the rod, pull down the
hook and install it on the main body.
4. Finish by adjusting the position of the SwitchBot Curtain to keep it perpendicular
to the ground, make sure the logo faces indoor. Put SwitchBot Curtain behind
your curtain.

14
4. Tab Top Curtains
Grab the clips provided in the box.
Attach a clip on the first tab.
Attach the remaining clips on other tabs.
Open
Attach towards this way.
First tab
The opposite way
First tab

15
All other clips should be attached the opposite way against the first clip. Make sure all
the clips are sitting on the top of the rod and are aligned with each other. From the
second clip, the tail of one clip should be able to touch the head of the next clip.
1. Close your curtain, install SwitchBot Curtain between the first and second tab.
2. Pull and put one side of hooks onto your curtain rod.
Clip tail aligned
with clip head
First clip

16
3. Put the main body (attached with the other hook) onto the rod, pull down the
hook and install it on the main body.
4. Finish by adjusting the position of the SwitchBot Curtain to keep it perpendicular
to the ground, make sure the logo faces indoor. Put SwitchBot Curtain behind
your curtain.
5. Back Tab Curtains
Grab the clips provided in the box.
Open

17
Attach clips on the first tab.
Attach clips on every other tab.
All other clips should be attached the opposite way to the first clip. Make sure all clips
are sitting on the top of the rod and are aligned with each other. From the second clip,
the tail of one clip should be able to touch the head of the next clip.
Attach towards this way
First tab
First tab
The opposite way
Clip tail aligned
with clip head
Top view
First clip

18
1. Close your curtain, install SwitchBot Curtain at the back of this type of curtain.
2. Pull one of the hooks down and hang it between the first and second grommet.
3. Put the main body (attached with the other hook) onto the rod, pull down the
hook and install it on the main body.

19
4. Finish by adjusting the position of the SwitchBot Curtain to keep it perpendicular
to the ground, make sure the logo faces indoor. Put SwitchBot Curtain behind
your curtain.
How to Control Double Side Curtain
If you are using a double side curtain, we recommend you to purchase 2 SwitchBot
Curtains for better performance.
If you have only purchased one SwitchBot Curtain, you can use the clips provided to put
together the middle part to turn them into one curtain.
Note: Using a single SwitchBot Curtain to control a double side curtain may affect user's
experience.

20
Step 3: Calibration
Calibration is for your SwitchBot Curtain to adapt to your existing curtain track. You
need to calibrate before you can control it from your phone or every time you change
the open mode in the app. You can also redo the calibra-tion on the settings page.
Control
App Control
Open and close the curtain at your fingertips. We offer intuitive app control for iOS and
Android, with weekly/bi-weekly updates following feedback from you. OTA firmware
update is also available for better user experience.
Touch & Go
When SwitchBot Curtain senses you drawing the curtain for more than 5cm, it kick in
and do the work for you. You only need to pull one side of a double side curtain. You
may turn off this function from advanced settings.
*5cm is the best threshold we tested as it lowers the possibility of false trigger by your
pets.
Other manuals for Curtain Rod 2
1
Table of contents
Languages:
Other SwitchBot Home Automation manuals
Popular Home Automation manuals by other brands

Essence
Essence WeR@Home user guide

ENER-J
ENER-J SHA5316 quick start guide

Bellman & Symfon
Bellman & Symfon Visit Installer's guide

Muller licht
Muller licht TINT STARTER SET 404013 instruction manual

ETEKCITY
ETEKCITY ESW01-USA manual

Honeywell
Honeywell Tuxedo Touch Series Home Automation System user guide

Emos
Emos P5532 manual

Energeeks
Energeeks EG-BW003MC Quick installation guide

e-sylife
e-sylife Water Module Quick installation guide

nVent Hoffman
nVent Hoffman RackChiller CDU800 Operation and instruction manual

Lutron Electronics
Lutron Electronics Caseta Pico Paddle Remote quick start guide

Vertilux
Vertilux VTi CELTIC Programming instructions