Symbol PDT 8100 Series Technical Document

Supported Equipment Manual
For the 8140 Device Manufactured by Symbol Technologies

Copyright ©1996 - 2006 by Connect, Inc.
All rights reserved. This document may not be reproduced in full or in part, in any form,
without prior written permission of Connect Inc., 1701 Quincy Avenue, Suites 5 & 6,
Naperville, IL 60540.
Connect, Inc. makes no representation or warranties with respect to the contents of this
document and specifically disclaims any implied warranties of merchantability or fitness
for any particular purpose. Further, Connect, Inc. reserves the right to revise this
publication and to make changes to it from time to time without obligation to notify any
person or organization of such revision or changes.
Trademarks
OpenAir Linux™, OpenAir Windows™, OpenAir 400™, PowerNet AirLinc™,
PowerNet Twin Client™, and PowerNet OpenAir™ are trademarks of Connect, Inc.
Other product names mentioned in this manual may be trademarks or registered
trademarks of their respective companies and are hereby acknowledged.
Production
This manual was written, edited, and produced by:
Connect, Inc.
1701 Quincy Avenue,
Suites 5 & 6
Naperville, IL 60540
www.connectrf.com
Printed in the U.S.A.
Please let us know about any errors in this document at:
http://207.241.78.223/isoxpert/calltrak.nsf/WebTracking?OpenForm

Table of Contents
Chapter 1 • Introduction.............................................................................................1-1
Description………………… ..........................................................................................1-1
Pictures……………………………..................................................................................1-2
Setup Requirements…….............................................................................................1-5
Accessories……………….............................................................................................1-5
Synchronization Tools….............................................................................................1-5
Release Notes…………….............................................................................................1-6
Chapter 2 • Terminal Setup........................................................................................2-1
Downloading from the WEB........................................................................................2-1
Running Setup from a Download File ........................................................................2-1
Installation…………………...........................................................................................2-2
Running the Manager…………....................................................................................2-4
Quick Start…………………...........................................................................................2-5
Configuring the Manager....................................................................................2-5
Booting the Terminal ........................................................................................2-12
Configuring the 8140 Terminal for Download...................................................2-13
Starting a Telnet Session .................................................................................2-14
Standard Setup…………….........................................................................................2-14
Setup Using Twin Client Manager....................................................................2-14
Importing Custom Configurations.....................................................................2-20
Terminal Setup Using Twin Client Menus ........................................................2-21
Authorizing PowerNet.......................................................................................2-23
Software Management……........................................................................................2-29
Airloader Auto-Configuration ............................................................................2-29
Mobile Device Manager (MDM) Features.........................................................2-34
Sending Program and Configuration Files to the Terminal...............................2-44
Chapter 3 • Keypad Configuration............................................................................3-1
8140 28-Key Terminal……. ..........................................................................................3-1
Diagrams ............................................................................................................3-1
Table ..................................................................................................................3-4
8140 37-Key Terminal……. ..........................................................................................3-7
Diagrams ............................................................................................................3-7
Table ................................................................................................................3-10
Supported Equipment Manual
•
March, 2006 iii
8140 47-Key Terminal……. ........................................................................................3-13
Diagrams ..........................................................................................................3-13
Table ................................................................................................................3-16
Chapter 4 • Error Message Resolution Guide..........................................................4-1
iv Supported Equipment Manual
•
March, 2006

Chapter 1 • Introduction
Description
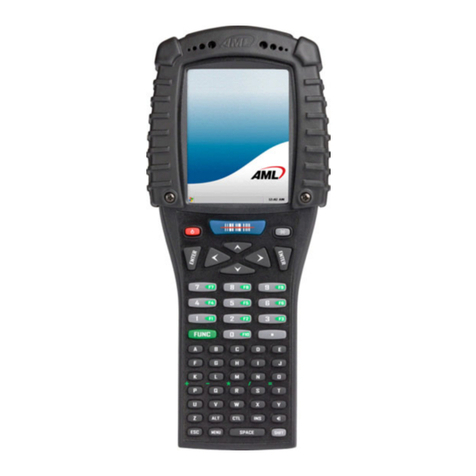
The PDT 8100 is a versatile, large-screen hand-held that delivers the functionality of
Pocket PC or Windows Mobile with tactile, key-based data entry. Multiple keyboard
options, the 28-key numeric keyboard, the 37-key alphanumeric keyboard, and the 47-
key alphanumeric keyboard, are available for maximum data entry efficiency in different
environments. The PDT 8100 is sealed to IP54 standards to meet the needs of many
industrial environments. Communication options include batch, Wireless Local Area
Network (WLAN), and Wireless Wide Area Network (WWAN) connectivity.
The PDT 8100 features a large easy-to-read 1/4 VGA display, a backlit keyboard, and a
rechargeable extended-use lithium-ion battery. The PDT 8100 Series operates at 206
MHz, and is equipped with 32 MB or 64 MB of RAM and 32 MB of ROM. The user-
accessible CF slot, which can accommodate a flash memory card, offers expansion
possibilities.
To learn more about the PDT 8100 Series, visit www.symbol.com.
Supported Equipment Manual
•
March, 2006
1-1

Introduction
Pictures
28-Key
Supported Equipment Manual •March, 2006
1-2

Pictures
37-Key
Supported Equipment Manual
•
March, 2006
1-3

Introduction
47-Key
Supported Equipment Manual •March, 2006
1-4

Setup Requirements
Setup Requirements
Installation of PowerNet Twin Client requires, at a minimum, the following:
• A Pentium-class processor
• 32 MB of RAM
• 10 MB of free hard disk space available
• Microsoft Windows Pocket PC or Windows Mobile operating system
ActiveSync needs to be installed on the PC before downloading files to the terminal.
For instructions, go to www.MSDN.Microsoft.com.
Accessories
Each 8140 terminal requires a 1550 mAH lithium-ion battery (p/n 21-52319-01).
The following optional accessories are available from Symbol.
• DEX Cable (CBL 8100-100-DEX) adds magstripe capabilities.
• Autocharge Cable (VCA 8100-00) connects to the cigarette lighter in a
vehicle to charge the terminal.
• Printer Cables (CBL8100-100-MON1, CBL8100-100-ELT, CBL8100-100-ON2,
CBL8100-100-ZEB, or CBL8100-100-CTC)
• Single-Slot Serial Charging Cradle (CRD 8100-1000S) charges and synchronizes the
PDT 8100 terminal with a desktop computer.
• Four-Slot Ethernet Cradle (CRD 8100-4000E) charges the PDT 8100 and
synchronizes the terminal with a desktop computer.
• Vehicle Cradle (VCD 8100-R000) powers the terminal and charges its battery, and
can be used to communicate with other devices such as printers.
• Magnetic Stripe Reader Attachment (MSR 8100-100) snaps on to the PDT 8100 to
add magstripe capabilities.
• Clip-On Modem Module (MDM 8100-100) allows dial-up connections of the PDT
8100 terminal to a remote host computer, while maintaining the portability of the
terminal.
• Symbol Software Developer’s Kit (SDK) for the PDT 8100 Pocket PC.
• Carrying Case (p/n 11-53814-01)
Synchronization Tools
Pocket PC/Windows Mobile devices require at least version 3.1 of ActiveSync for
desktop synchronization and communication. Active Sync 3.1 is freely downloadable
from the Microsoft web site, at www.microsoft.com/pocketpc/downloads/activesync.asp.
Supported Equipment Manual
•
March, 2006
1-5

Introduction
Release Notes
Version d 11-29-04 GWK: This patch adds support for Pocket PC and WIN Mobile
for the Symbol 8140.
Supported Equipment Manual •March, 2006
1-6

Chapter 2 • Terminal Setup
Downloading from the WEB
The PowerNet Twin Client software package can be downloaded from the Connect web
site at http://www.connectrf.com. Click on Partner Services and then click on Software
Downloads. Select the file named PowerNet Twin Client for Symbol.
Running Setup from a Download File
The downloaded file is a compressed archive. After extraction using a utility such as
WinZip or PKWARE, folders are created on the hard disk as shown in the following
figure.
Click on the Disk1 folder to view the files as shown in the following figure.
Click on the Setup application and proceed to the following section entitled Installation
for further instructions.
Supported Equipment Manual
•
March, 2006
2-1

Terminal Setup
Installation
The InstallShield wizard runs and presents the following screen.
Click on Next to begin the installation process.
To change the default Destination Location, click on Browse and select a location. Then
click on Next.
Supported Equipment Manual •March, 2006
2-2

Software Management
The default folder is PowerNet. This default may be changed either by selecting an
existing program group or by typing in a new name at the prompt. Then click on Next.
Read the warning. Select Yes to continue with the installation, and No to close the setup.
Supported Equipment Manual
•
March, 2006
2-3

Terminal Setup
When the installation is complete, reboot the system to initialize the Twin Client
software.
a. To reboot the system immediately, click on Finish.
b. To reboot later, click on the option to restart the computer later, and click on Finish.
Running the Manager
The PowerNet Twin Client Manager is the utility that manages the terminal software and
configurations.
Select Start,Programs,PowerNet,and Twin Client Manager. The PowerNet Twin
Client Manager screen appears as shown in the following figure. This is the
administrator's main screen, and all functions are accessed from its menu bar, toolbar, and
tabs.
Menu Bar
The menu bar provides access to the functions used to configure the terminals and
manage their software.
Supported Equipment Manual •March, 2006
2-4

Software Management
Toolbar
Found under the menu bar, the toolbar provides shortcuts to major features. The toolbar
can be turned on or off by changing the Toolbar parameter found on the Viewmenu. The
shortcuts available from the toolbar are as follows:
Create a new terminal configuration.
Open an existing terminal configuration.
Save the current terminal configuration.
Download the configuration to the terminal.
Download software to the terminal.
Configure terminals automatically over the wireless network.
View the PowerNet Twin Client Manager version.
The PowerNet Twin Client Manager is now successfully installed and ready for use. The
section below entitled Quick Start provides detailed instructions for quickly configuring
the terminal and starting a Telnet session.
Quick Start
This section describes how to prepare the Twin Client Manager and the Symbol terminal
for a Telnet session with the host. Following an initial serial download, the terminal
software and configuration are managed automatically, over the wireless network.
Note: Symbol terminals are normally delivered with Symbol files pre-installed. However,
if the terminal does not have those files installed refer to the section entitled
Downloading Symbol 8140 Terminal Files before proceeding.
Configuring the Manager
The first step is to configure the Twin Client Manager to meet site-specific requirements,
and then prepare it for the automatic management of the terminal software and IP
addresses. This simple procedure will require only a few minutes to complete.
Setting the Emulation
Click on Start, Programs, PowerNet, and Twin Client Manager. Select the Settings
menu, as shown below.
Supported Equipment Manual
•
March, 2006
2-5

Terminal Setup
Click on Emulation, select the desired emulation, and then click on OK.
Setting the Servers
The Servers are the Telnet host systems the terminals will access.
To set these addresses from the Settings menu, click on Servers.
Supported Equipment Manual •March, 2006
2-6

Software Management
Then click on Add.
Note: Use the Load button if you want to load an .svr file. Use the Save As button if you
want to save your file as an .svr file.
Enter the server name, IP address, IP port (normally 23 for Telnet servers), and emulation
type. Click on OK. Repeat this step for each Telnet server the terminals are required to
access. If an error is made in the server name, IP address, IP port number, or terminal
emulation type, click on the line that is in error and then click on the Edit button to make
the corrections.
Terminal AirLoader and AirBEAM Operations
In the Twin Client menu under Settings, choose Terminal Operation.
Supported Equipment Manual
•
March, 2006
2-7

Terminal Setup
Run AirLoader on terminal can be selected, the AirLoader server IP address can be
entered, and the Windows CE options of Run application at startup and Hide task bar can
be selected, as shown below. Also, there is an option to Use GUI menus and screens that
makes the terminal program act more "Windows-like". Click on OK after entering
information.
See the AirBEAM Operation section in the Symbol Twin Client manual for instructions
on the AirBEAM option in this screen.
Setting Terminal Model and COM Port
The terminal model is 8140, and the default serial connection is through COM1. To select
a specific Symbol terminal model and keypad, or to change the COM port assignment,
click on the Options menu as shown.
To maintain compatibility with existing Symbol Telnet client keyboard layouts, a specific
terminal model and keypad must be selected from the Terminal Model window.
Supported Equipment Manual •March, 2006
2-8

Software Management
The following illustrates the terminal model option to select based on your terminal
model, under Settings, Options, and Terminal Model.
Terminal Model Terminal Model Option
8140
8140
Note: Click on New the first time around to ensure that all defaults are set, especially
when changing emulations.
Saving the Configuration
Click on File and Save As. Enter a name for this configuration.
For the purposes of this example, the name is vt100.
Supported Equipment Manual
•
March, 2006
2-9

Terminal Setup
Setting Airloader Auto-Configuration
The configuration download and IP address assignment for each terminal will take place
automatically by setting the Airloader Auto-Configuration options.
Click on the Airloader option in the Tools menu.
Note: If the Airloader Auto-Configuration window does not display the options, click on
the Advanced<< button.
If multiple network adapters are installed on the PC, ensure that the desired network
adapter is selected. The adapter selection can be changed by clicking on the Change
button.
Supported Equipment Manual •March, 2006
2-10
Other manuals for PDT 8100 Series
5
This manual suits for next models
1
Table of contents
Other Symbol PDA manuals

Symbol
Symbol MC9000-G Installation and operation manual

Symbol
Symbol MC70 User manual

Symbol
Symbol WT4090 User manual

Symbol
Symbol MC50 User manual

Symbol
Symbol MC70 User manual

Symbol
Symbol SPT 1500 User manual

Symbol
Symbol PPT 8800 Installation and operation manual

Symbol
Symbol PDT 6100 Series Installation and operation manual

Symbol
Symbol MC9000-K Installation and operation manual