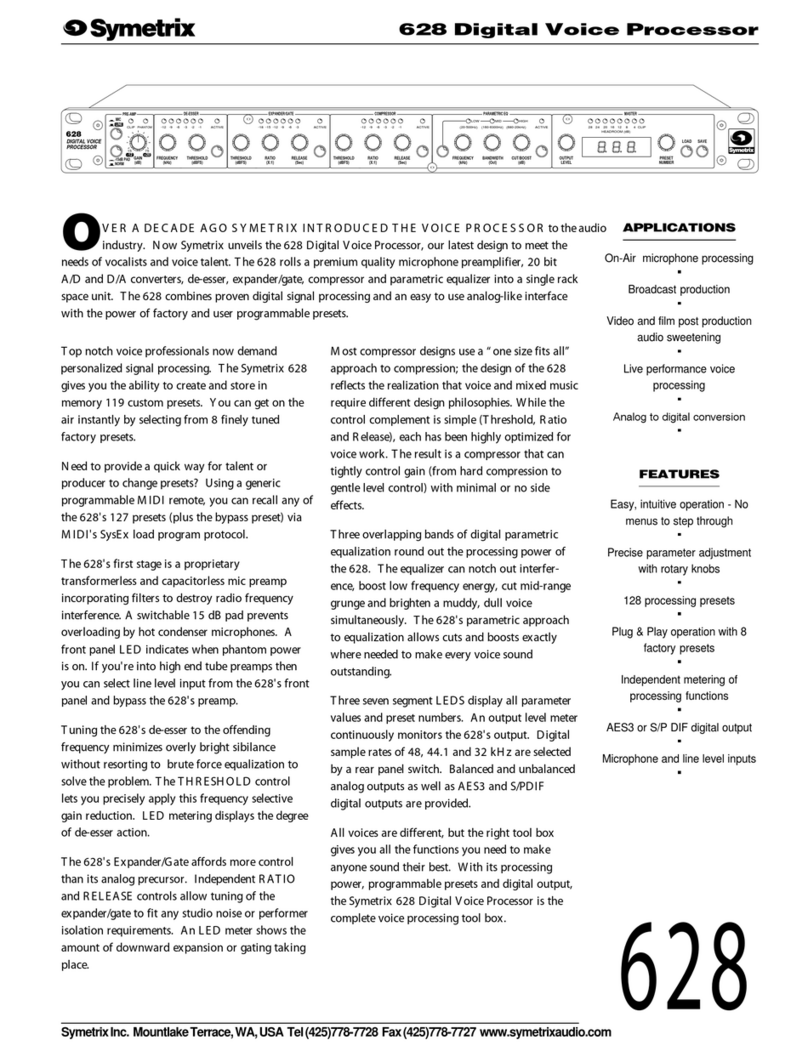
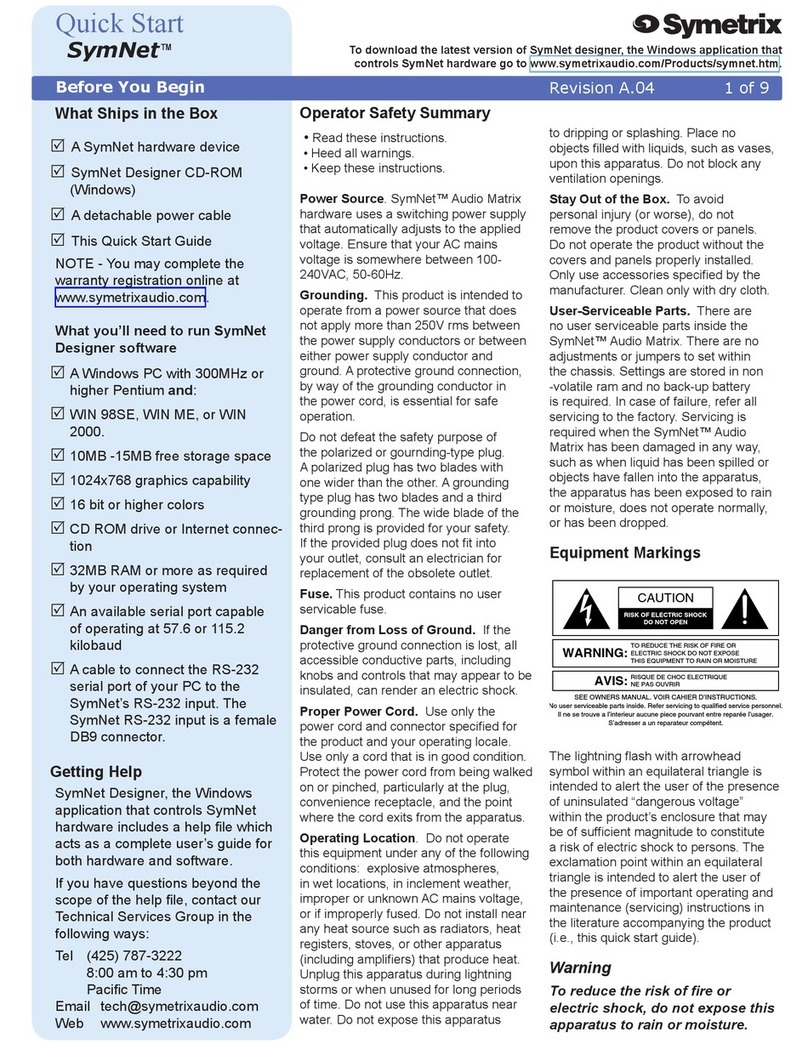
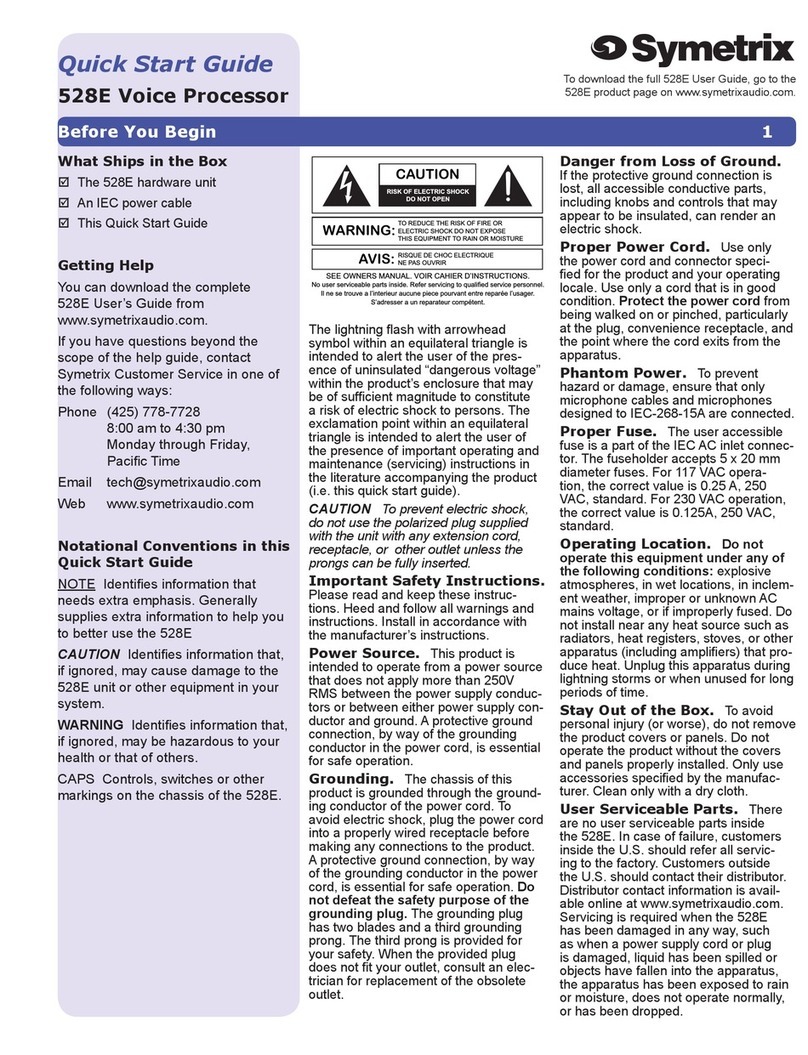
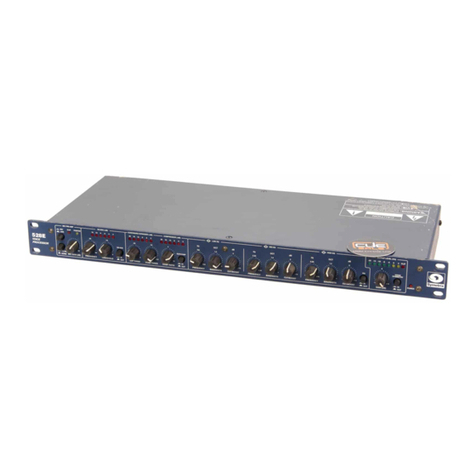
Symetrix 528E User manual

www.SymetrixAudio.com
User’s Guide
®
528E VOICE
PROCESSOR

®
6408 216th St. SW | Mountlake Terrace, WA 98043 | USA | Tel: +1 (425) 778.7728 | Fax: +1 (425) 778.7727
User’s Guide: 528E Voice Processor

www.SymetrixAudio.com
®
1
!
The lightning flash with arrowhead symbol
within an equilateral triangle is intended to
alert the user of the presence of uninsulated
“dangerous voltage” within the product’s
enclosure that may be of sufficient magnitude to
constitute a risk of electric shock to persons. The
exclamation point within an equilateral triangle
is intended to alert the user of the presence of
important operating and maintenance (servic-
ing) instructions in the literature accompanying
the product (i.e. this User’s Guide).
1
!
CAUTION: To prevent electric shock, do not use
the polarized plug supplied with the unit with
any extension cord, receptacle, or other outlet
unless the prongs can be fully inserted.
1
!
Power Source: The 528E Voice Processor hard-
ware is configured at the factory for domestic or
export markets. Ensure that your AC mains volt-
age matches that of your power supply. Refer
to rear panel marking for correct AC source
voltage. Use only the power cord and connector
specified for the product and your operating
locale. A protective ground connection, by way
of the grounding conductor in the power cord,
is essential for safe operation. The appliance
inlet and coupler shall remain readily operable
once the apparatus has been installed.
1
!
User Serviceable Parts: There are no user
serviceable parts inside this Symetrix product.
In case of failure, customers inside the U.S.
should refer all servicing to the Symetrix factory.
Customers outside the U.S. should refer all
servicing to an authorized Symetrix distributor.
Distributor contact
information is available online at
http://www.SymetrixAudio.com.
"7*4
/&1"40673*3
*MOFTFUSPVWFBMJOUFSJFVSBVDVOFQJFDFQPVSWBOUFOUSFSFQBSÊFMVTBHFS
4&&08/&34."/6"-70*3$")*&3%*/4536$5*0/4
4BESFTTFSBVOSFQBSBUFVSDPNQÊUFOU
3*426&%&$)0$&-&$53*26&
/PVTFSTFSWJDFBCMFQBSUTJOTJEF3FGFSTFSWJDJOHUPRVBMJGJFETFSWJDFQFSTPOOFM
$"65*0/
8"3/*/(
503&%6$&5)&3*4,0''*3&03
&-&$53*$4)0$,%0/05&9104&
5)*4&26*1.&/5503"*/03.0*4563&
%0/0501&/
3*4,0'&-&$53*$4)0$,
Important Safety
Instructions.
!Read these instructions.
@Keep these instructions.
#Heed all warnings.
$Follow all instructions.
%Do not use this apparatus near water. This
apparatus shall not be exposed to dripping or
splashing and no objects filled with liquids,
such as vases, shall be placed on the apparatus.
^Clean only with dry cloth.
&Do not block any ventilation openings. Install
only in accordance with the manufacturer’s
instructions.
*Do not install near any heat sources such as
radiators, heat registers, stoves, or other appa-
ratus (including amplifiers) that produce heat.
(This apparatus shall be connected to a mains
socket outlet with a protective earthing con-
nection. Do not defeat the safety purpose of the
polarized or grounding-type plug. A polarized
plug has two blades with one wider than the
other. A grounding type plug has two blades
and a third grounding prong. The wide blade or
the third prong are provided for your safety. If
the provided plug does not fit into your outlet,
consult an electrician for replacement of the
obsolete outlet.
BL Protect the power cord from being walked on
or pinched particularly at plugs, convenience
receptacles, and the point where they exit from
the apparatus.
BM Only use attachments/accessories specified by
the manufacturer.
BN Use only with the cart, stand,
tripod, bracket, or table speci-
fied by the manufacturer, or
sold with the apparatus. When
a cart is used, use caution when
moving the cart/apparatus combination to avoid
injury from tip-over.
BO Unplug this apparatus during lightning storms
or when unused for long periods of time.
BP Refer all servicing to qualified service person-
nel. Servicing is required when the apparatus
has been damaged in any way, such as power-
supply cord or plug cord is damaged, liquid
has been spilled or objects have fallen into the
apparatus, the apparatus has been exposed to
rain or moisture, does not operate normally, or
has been dropped.
Safety
1
Page
Before You Begin
What Ships in the Box
øA 528E hardware unit.
øA detachable power cord.
øThis User’s Guide.
Getting Help
If you have questions beyond
the scope of this User’s Guide, contact our
Customer Support Group in the following ways:
Tel: +1 (425) 778-7728
8:00 am to 4:30 pm
Monday through Friday,
Pacific Time
Web: http://www.SymetrixAudio.com
This device complies with part 15 of the FCC Rules. Operation is
subject to the following two conditions: (1) This device may not cause
harmful interference, and (2) this device must accept any interference
received, including interference that may cause undesired operation.
This Class B Digital apparatus meets all requirements of the Canadian
Interference-Causing Equipment Regulations
Cet appariel numerique de la classe B respecte toutes les Exigences
du Reglement sur le materiel brouilleur du Canada.

®
6408 216th St. SW | Mountlake Terrace, WA 98043 | USA | Tel: +1 (425) 778.7728 | Fax: +1 (425) 778.7727
Introduction: First Time Setup
Rear Panel Connection / Setting
Output Connect to input of console, tape
recorder, etc.
Line Input Connect line-level source here.
Mic Input Connect microphone here.
Phantom Power Depress if mic requires
phantom powering.
2
Page
User’s Guide: 528E Voice Processor
Introduction
Fast First Time Setup
The Symetrix 528E is a single-channel Voice Processor
intended for use in voice-over studios, broadcast studios,
sound-reinforcement, music and speech recording,
and post-production. Simply stated, the 528E consists
of a high-quality microphone preamp coupled to a
three-band parametric equalizer, a de-esser, and a
dynamic range processor. It is everything you would
have at your disposal in a world-class mixing console.
The 528E accepts both mic and line inputs. Of course,
while we use the term “Voice Processor” for the 528E,
it is perfectly at home with any signal, vocal or not.
The microphone input uses a balanced-transformerless
design using an integrated circuit specifically developed
for this application. The 528E’s microphone input works
with any phantom-powered condenser microphone
or any low-impedance microphone having a bal-
anced, floating output. The line input uses a balanced
transformerless design. The line input’s design uses
matched resistors to attain a high, wideband, CMRR
(common-mode rejection ratio) and multistage RFI filters
to prevent Radio Frequency interference problems.
The de-esser operates by selectively removing the
high frequencies from the input signal when sibilant
sounds are present and exceed the threshold level.
The filter frequency can be varied over a wide range
to accommodate different speakers and languages.
The dynamic range processor combines an interactive
compressor/limiter and a downward expander. Typically,
the downward expander helps reduce studio noise as
well as the artifacts of close miking. The compressor/
limiter gives you overall control over the dynamic range
of the output signal and helps maintain a high overall
signal level. The three-band parametric equalizer is a
reciprocal-curve design. An unusual leapfrog topology
minimizes the number of amplifiers in the signal path
while ensuring that each frequency band interacts
with its neighbor in a desirable and musical fashion.
The 528E’s output section can drive balanced
loads at line or mic levels. A line-level unbalanced
output is also provided. For broadcast applications,
a switchable voice symmetry circuit helps make
speech waveforms more symmetrical, which makes
better use of the transmitter’s output power.
Each of the dynamics processors have individual
six-segment LED displays and an eight-segment display
monitors the overall output level. All inputs and
outputs are available via XLR connectors and the
connection points between the individual processors
can be accessed via TRS phone jacks. The interstage
patching may be used to change the insertion order
of the processors or to insert additional processing.
Follow these instructions to get your 528E up-and-
running as quickly as possible. The intent of this section
is fast setup. If you need something clarified, then
you’ll find the answer elsewhere in this manual.
Connections
Connect a Mic or Line level source to the appropriate
input connector on the rear of the 528E. Be sure to set
the Mic / Line switch to the appropriate position and be
sure to turn on phantom power if using a microphone
that requires it. Next, connect the appropriate output of
the 528E to your monitoring system or mixing console.
Finally, connect the 528E to an AC source of the proper
voltage and frequency as marked on the rear of the unit.
Caution: Failure to connect the 528E to the proper AC
mains voltage may cause fire and/or internal damage.
Warning: Lethal voltages are present inside
the chassis. There are no user serviceable
parts inside the chassis. Refer all service to
qualified service personnel or to the factory.
If you are using a condenser microphone, refer
to “Phantom Powering Condenser Microphones”
before depressing the Phantom Power switch.

®
www.SymetrixAudio.com
Settings
Set the controls and switches on the front
of the 528E as per the table below.
You can now power on the 528E and it should pass
signal. The POWER LED should be illuminated and the
OUTPUT LEVEL LED display should show some activity.
We can now move on to fine tuning your settings.
Mic Preamp Gain
Set the MIC GAIN control so that the OUTPUT LEVEL
LED display indicates a signal between -10 and 0 VU.
The CLIP LED should almost never light. If it does,
decrease the MIC GAIN control until it does not. Any loss
in gain can be made up for later in the signal chain.
De-Esser Settings
The De-Esser is used to reduce the level of
objectionable sibilant sounds (S and T sounds).
Engage the De-Esser by pressing the DE-ESS IN /
OUT button IN. Set the THRESHOLD control so that
the de-esser gain reduction LED display shows about
12 dB of reduction. Now, “tune” the FREQUENCY
control for the maximum sibilance reduction.
Finally, reduce the setting of the THRESHOLD control
until you reduce the sibilance to a tolerable level
without harming the quality of the audio signal.
Downward Expander Settings
Use the Expander to reduce room noise or other
low level or background noise. Set the THRESHOLD
control to allow low level speech sounds to pass
while still blocking out room sound or noise.
Compressor Settings
Use the COMP THRES control to determine the level
at which the compressor starts to work. As the sound
level increases above the set threshold, you will see the
gain reduction LED display start to work indicating the
amount of gain reduction taking place. Generally 3 to 6
dB is sufficient, unless you are using a low compression
ratio (below 2:1), or you want a special effect. Pick a ratio
suited to the task at hand: low ratios and low thresholds
for unobtrusive level control, medium ratios for overall
level control and consistency, high ratios (greater than
8:1) for limiting or in-your-face sorts of sounds.
Equalizer Settings
Equalization is entirely dependent upon many factors
and should generally be used to correct or enhance
the frequency content of the signal. For example, the
default settings should be close for the male voice. For
female voices, the LOW EQ range shifts up to 200 or
300 Hz and the MID EQ range shifts up to 3-5 kHz.
If you are using a microphone that exhibits proximity
effect, then you’ll probably need to reduce (cut) the
bass (LOW EQ) response somewhat. 3-6 dB should be
fine, but you’ll have to compromise between a big full
sound and the overbearing low frequency content. A bit
of MID EQ will help make voices cut through and seem
louder. The HIGH EQ can add brightness and intimacy.
It will take some tuning and experimentation based on
the signal source, microphone used and personal taste.
Output Settings
For many applications, setting the output GAIN control
to 0 dB works fine. If you are adding a lot of EQ, this
will tend to cause an overall level increase. Thus, you
may need to lower the output GAIN appropriately.
Likewise, if you are using a fair amount of compres-
sion, you may need to add some gain to compensate
for the gain reduction in the compressor section. You
should adjust the output GAIN control so that it provides
enough signal level to your connections downstream,
yet still prevents the CLIP LED from illuminating.
The output CLIP LED monitors both the equalizer
and the output stage. Large amounts of EQ boost and/
or high signal levels can cause CLIP indications. If this
occurs, lower the signal level via the GAIN control.
It is also possible for the output stage to clip if a
processor, inserted via the OUTPUT STAGE INPUT jack,
is contributing gain to the overall signal path. In this
case, either lower the gain of the inserted processor
or reduce the setting of the output GAIN control.
Introduction: First Time Setup... continued
Front Panel ControlSetting
MIC / LINE As required
-15 PAD Out
MIC GAIN 12 o’clock
DE-ESS FREQUENCY 3K (12 o’clock)
DE-ESS THRESHOLD 0 (Full CW)
DE-ESS IN / OUT Out
DOWNWARD EXPANDER EXP THRES BYPASS (Full CCW)
COMPRESSOR COMP THRES +20 (Full CW)
COMPRESSOR COMP RATIO 2 (12 o’clock)
EXP/COMP IN / OUT Out
VOICE SYMMETRY IN / OUT Out
LOW EQ FREQUENCY 160 Hz (12 o’clock)
LOW EQ BANDWIDTH 1.5 octaves (12 o’clock)
LOW EQ CUT/BOOST 0 (12 o’clock)
MID EQ FREQUENCY 2.5K (12 o’clock)
MID EQ BANDWIDTH 1.5 octaves (12 o’clock)
MID EQ CUT/BOOST 0 (12 o’clock)
HIGH EQ FREQUENCY 6.8K (12 o’clock)
HIGH EQ BANDWIDTH 1.5 octaves (12 o’clock)
HIGH EQ CUT/BOOST 0 (12 o’clock)
EQ IN / OUT Out
GAIN 0 (12 o’clock)
3
Page

®
6408 216th St. SW | Mountlake Terrace, WA 98043 | USA | Tel: +1 (425) 778.7728 | Fax: +1 (425) 778.7727
Mic Preamp
MIC/LINE Selects between the Mic input (switch in) and Line input (switch
out). -15 PAD Inserts 15 dB pad for strong mic signals.
MIC GAIN(dB) Sets the gain of the mic preamp for best compromise
between signal-to-noise ratio and headroom.
CLIP Monitors inputs (mic and line) for clipping. Illumi-
nates 3 dB below the actual clip point.
PHANTOM Illuminates when 48V phantom power is present at the microphone input
connector. The phantom power switch is located on the rear panel.
De-Esser
FREQUENCY Sets the rolloff (cutoff) frequency of the de-esser.
THRESHOLD Sets the threshold level for the de-esser. Signals above this
level cause de-esser action, signals below do not.
DE-ESS Hard-wire bypasses the de-esser. The de-esser is
active when this switch is in. IN/OUT
LED Display Indicates the amount of de-esser activity at any instant in time.
Downward Expander / Compressor
EXP THRES Sets the threshold level for the downward expander. Signals below
this threshold are downward expanded (reduced in level).
EXPANDER Indicates the amount of de-esser activity at any instant in time. LED Display
COMP THRES Sets the threshold level for the compressor. Signals above this
threshold cause gain reduction in the compressor.
COMP RATIO Sets the compression ratio of the compressor.
EXP/COMP Defeats the downward expander /compres-
sor. This is not a hard-wire bypass. IN/OUT
COMPRESSOR Indicates the amount of compressor activity (gain reduc-
tion) at any given instant in time. LED Display
Parametric EQ Low
FREQUENCY Varies the center frequency of the low-frequency equalizer from 16 Hz to 500 Hz.
BANDWIDTH Varies the bandwidth of the low-frequency equal-
izer from 0.3 to 4 octaves. (Q = 0.27 to 4.8).
CUT/BOOST Set the degree of boost or cut +/- 15 dB.
Parametric EQ Mid
FREQUENCY Varies the center frequency of the low-frequency
equalizer from 160 Hz to 6.3k Hz.
BANDWIDTH Varies the bandwidth of the low-frequency equal-
izer from 0.3 to 4 octaves. (Q = 0.27 to 4.8).
CUT/BOOST Set the degree of boost or cut +/- 15 dB.
Parametric EQ High
FREQUENCY Varies the center frequency of the low-frequency
equalizer from 680 Hz to 22 kHz.
BANDWIDTH Varies the bandwidth of the low-frequency equal-
izer from 0.3 to 4 octaves. (Q = 0.27 to 4.8).
CUT/BOOST Set the degree of boost or cut +/- 15 dB.
EQ IN/OUT Hard-wire bypasses the entire equalizer.
Front and Rear Panel Overview
4
Page
User’s Guide: 528E Voice Processor

®
www.SymetrixAudio.com
Output Section
GAIN Sets the overall gain of the 528E’s output over a +/- 15
dB range. NOTE: The actual adjustment point is in the
expander/compressor’s VCA, which is pre-EQ.
VOICE SYMMETRY Inserts speech waveform asymmetry correction into the signal path.
OUTPUT LED Indicates the peak output level of the 528E relative to the balanced output.
The 0 VU LED on the display corresponds to +4 dBu at the balanced output.
For unbalanced applications, the actual output level is 6 dB lower than that
shown by the display. NOTE: If the internal mic-level output switch has been
depressed, the output level is -40 dBu when the display indicates 0 VU.
POWER LED Indicates the presence of AC power.
Power
AC INPUT IEC power connector. Connect only to appropriate AC power source.
Refer to rear panel marking for correct AC source voltage.
SERIAL NUMBER Please note the serial number for future reference. Should your
528E ever require service, Symetrix Customer Service will need
this information in order to process your repair request.
Output Stage I/O
BALANCED OUTPUT XLR male connector. Balanced, line level output. This output may be
converted to a mic level output. See Output Level Switch section.
UNBALANCED TRS phone jack (wired for unbalanced operation). Provides a line
OUTPUT level unbalanced output. This jack is unaffected by the
Mic Level Output Configuration switch mentioned above.
OUTPUT STAGE INPUT
TRS phone jack (wired for unbalanced operation). This is the input
to the output stage. Inserting a connector into this jack will interrupt
any signal coming from previous (upstream) modules of the 528E.
Equalizer I/O
OUTPUT TRS phone jack (wired unbalanced). This is the output of
the equalizer. Inserting a connector into this jack does not
interrupt signal flow to the 528E’s output stage.
INPUT TRS phone jack (wired unbalanced). This is the input to
the equalizer. Inserting a connector into this jack inter-
rupts signal flow from the Expander / Compressor.
Expander/Compressor I/O
OUTPUT TRS phone jack (wired unbalanced). This is the output of
the expander / compressor. Inserting a connector into this
jack does not interrupt signal flow to the equalizer.
SIDECHAIN TRS phone jack wired as an insert jack. (Tip = return, Ring = Send). Use this
jack trigger or “key” the compressor / expander from an external source.
INPUT TRS phone jack (wired unbalanced). This is the input to
the expander / compressor. Inserting a connector into
this jack interrupts signal flow from the de-esser.
Front and Rear Panel Overview... continued
5
Page

®
6408 216th St. SW | Mountlake Terrace, WA 98043 | USA | Tel: +1 (425) 778.7728 | Fax: +1 (425) 778.7727
De-esser I/O
OUTPUT TRS phone jack (wired unbalanced). This is the output of the
de-esser. Inserting a connector into this jack does not inter-
rupt signal flow to the 528E’s expander / compressor.
INPUT TRS phone jack (wired unbalanced). This is the input to the
expander / compressor. Inserting a connector into this jack
interrupts signal flow from the mic / line inputs.
Preamp Stage I/O
PREAMP STAGE TRS phone jack (wired unbalanced). This is the output of the
OUTPUT mic / line preamp. Inserting a connector into this jack will
not interrupt signal flow to the 528E’s de-esser.
LINE INPUT XLR female connector providing a 10k Ohm balanced bridging line
input intended for signals ranging from -10 dBu to +4 dBu.
MIC INPUT XLR female connector providing a balanced input suitable for low imped-
ance microphones. 48V phantom powering is available at this connector.
PHANTOM POWER Pushbutton switch enabling 48V phantom power on the MIC INPUT.
Front and Rear Panel Overview... continued
6
Page
User’s Guide: 528E Voice Processor

®
www.SymetrixAudio.com
Basics
The Symetrix 528E Voice Processor combines Symetrix’
program controlled interactive dynamic range processing
technique with a three-band parametric equalizer. This
combination of processors is similar to a voiceover or
vocal signal processing chain as used in a recording
or voiceover studio. “Program controlled” means the
528E’s dynamic range processor section analyzes
incoming signals, then adjusts its release time to
match the transient characteristics of those signals.
This section of the manual contains a tutorial on
the basics of dynamic range processing and equaliza-
tion: the two key ingredients in the 528E. The tutorial
information is intended to provide a background for the
information found in the remainder of this manual.
Dynamic Range Processing
Dynamic range processors are used to fit wide-
range signals into narrow-range transmission or
storage channels. The dynamic range of acoustical
signals found in real life usually far exceeds our
capacity to store or transmit them. Confronted with
this dilemma, audio engineers usually reach for a
compressor/limiter or downward expander as a means
to fit two-pound signals into one-pound bags.
Compressor/limiters respond quickly to transients,
and gently to normal speech level changes which keeps
overall levels in check. The downward expander’s
operation is the inverse of the compressor/limiter which
prevents “pumping” and “breathing” even when high
ratio compression is necessary. Because the compressor/
limiter and the downward expander are interactive, the
528E always responds appropriately, while providing
automatic control over a wide range of input levels.
Strictly speaking, the terms compressor and
limiter refer to two different devices. Oftentimes
the two are combined into a single device called
a compressor/limiter. Compressor/limiters usu-
ally perform as either a compressor or a limiter,
but not both at once. Functionally, a compressor/
limiter is a device that lets the user define, or pre-
determine, the maximum level of an audio signal.
Expanders and gates are the functional opposites of
compressors and limiters. Compressors continuously
reduce the dynamic range of signals that are above
threshold, while expanders continuously increase the
dynamic range of signals that are below threshold. Limit-
ers can be thought of as very high ratio compressors, and
gates can be thought of as very high ratio expanders.
In addition to their roles as remedial signal proces-
sors, compressors also have a creative role. You can
use a compressor to increase the apparent sustain
of a guitar, increase apparent loudness, improve the
consistency of a bass by removing or reducing level
changes, and many other things. Generally speaking,
the settings for these applications are somewhat
extreme, so experimentation is the name of the game.
Defining Dynamic Range
To begin a discussion of dynamic range proces-
sors it’s necessary to have a working definition of
dynamic range. The term is really self-descriptive,
but has two distinctly different uses:
To describe the actual range of signal fluctua-
tions that are going through the equipment.
To define the maximum allowable range of signal
fluctuations that can be put through the equipment.
The usual unit of measure for audio
signals is the decibel (dB).
Dynamic Range as a Specification
The maximum usable range of operation
for a particular circuit or piece of gear is the
distance in dB between the noise floor and the
maximum output level. In this context, dynamic
range is used as an equipment specification.
Noise floor is defined as the lower limit of a circuit’s
operating level, and is a function of its self-generated
electrical noise. Very noisy circuits have a high noise
floor, quiet circuits have a low noise floor. All circuits
have a noise floor, unless they are operating at -460
degrees Fahrenheit (absolute zero). The maximum
output level of a circuit is the upper limit of the operat-
ing level, and is the level at which clipping begins
and is a function of the internal power supply voltage.
To put levels in perspective they must be referenced
to some nominal operating level, like 0 dBm. That’s
why noise specs are stated as negative numbers.
In the case of the 528E, noise is referred to the
input, and stated as equivalent input noise (EIN). The
noise specification is given this way because the gain
of the 528E’s input stage is variable, so the actual
signal-to-noise performance of the unit becomes a
function of how much gain is used in the preamp.
To find the signal-to-noise ratio at 0 dBm output,
algebraically add the preamp gain to the EIN.1
Since maximum output level is usually greater than
0 dBm, it’s stated as plus something. The 528E’s
maximum output level is +18 dBm into a 600-Ohm
balanced load, which is 18 dB above 0 dBm. The
difference between the noise floor and the onset
of clipping is the dynamic range. To find the 528E’s
dynamic range with 50 dB preamp gain, subtract -89
from 18. The result (113 dB) is the dynamic range.
Voice Processing Tutorial
7
Page

®
6408 216th St. SW | Mountlake Terrace, WA 98043 | USA | Tel: +1 (425) 778.7728 | Fax: +1 (425) 778.7727
Dynamic Range of Sounds and Signals
The other definition of dynamic range describes
actual level changes, or the range over which signals
fluctuate. The signals under discussion here are electri-
cal representations of sounds, so it follows that sound
has dynamic range. The dynamic range of the human
voice, from a whisper to a shout, is well over 100 dB.
Thus, the microphone converts the sound pressure of a
voice going from a whisper to a shout into an electri-
cal output signal having the same dynamic range.
Why Dynamic Range Processors are Necessary
For signals to stay below distortion and above noise,
their actual dynamic range must be kept within the
specified dynamic range of the circuits through which
those signals flow. Unfortunately, the actual dynamic
range of real world signals often exceeds the avail-
able dynamic range of even the best equipment.
For example, the dynamic range of the best analog
tape recorders is around 80 dB, while digital recorders
top out at around 96 dB. As good as these machines are,
there’s still not quite enough room for very wide dynamic
range signals. In order to maintain a 60 dB signal-to-
noise ratio (to keep the signals 60 dB above the noise
floor), the dynamic range of signals stored on the analog
tape machine would have to be restricted by 20 dB,
while the digital recorder would be restricted by 36 dB.
A compressor or limiter is often used to reduce
dynamic range by setting an upper limit on the larger
signals. In some cases, it’s better to put processing
to work on the lower end of the dynamic range than
on the upper end. In other words, instead of reduc-
ing the amount of change at the upper end of the
dynamic range with a compressor or limiter, increas-
ing the amount of change at the lower end of the
dynamic range with a downward expander or gate.
Compressors are to Downward Expanders as
Limiters are to Gates
Compressors reduce the dynamic range of their output
whenever the input signal is above threshold, while
downward expanders increase the dynamic range of their
output whenever the input signal is below threshold.
Compressors, limiters, expanders, and gates
increase or decrease signal levels by some ratio.
Compressors usually have an adjustable ratio, the
ratio of the input level to the output level, which is
generally user-adjustable. A compressor operat-
ing with a 2:1 ratio allows only a 1 dB increase in
output level for every 2 dB increase in input level.
Limiters usually have a nonadjustable ratio that
is very high (greater than 10:1). At 10:1, the limiter
allows only a 1 dB increase in the output level for
every 10 dB increase in the input level. Limiters
can be thought of as high ratio, high threshold
compressors. They are intended to “stay out of the
way” until the level goes above threshold. However,
above threshold their action is very definite.
The Threshold Concept
The threshold is the level at which a dynamic range
processor’s activity begins. In operation, the dynamic
range processor’s sensing circuitry constantly “looks
at” the incoming signal and compares it to a reference
level, which is called the threshold level. In practice that
reference level is set by the operator via the threshold
control. Remember, compressors and limiters respond
when signals at the input are above threshold, while
downward expanders and gates respond only when
signals at the input are lower than the defined threshold.
The VCA - Voltage Controlled Amplifier
The action of any dynamic range processor depends
on some method of changing the gain based on some
external signal. Typically this takes the form of a
special sort of amplifier whose gain is controlled by a
DC voltage. That part of the circuit is called a voltage
controlled amplifier, or VCA. Inside the 528E a separate
buffered audio signal is sent to a group of circuits
that comprise the detector (envelope follower to you
synthesists). The detector circuits turn the AC audio
signal into a DC control voltage, which is sent to the
VCA under the direction of the front panel controls.
Linear vs. Downward Expanders
Expander operation is easily misunderstood
unless it’s remembered that what’s being expanded
is the dynamics, or changes, of signals pass-
ing through the circuit. Expanders come in two
very different types: linear, and downward.
Linear expanders increase the dynamic range of
all signals, no matter what their actual level. The
linear expander simply makes all changes greater
by some ratio, which is sometimes user adjust-
able. In the real world, linear expanders aren’t too
practical because clipping occurs when signals just
below maximum output level are expanded.
For instance, an unprocessed signal 3 dB below
clipping that increases 2 dB won’t distort, because it’s
still 1 dB below maximum. But if that same signal is
passed through an expander operating at a 1:2 ratio,
the same 2 dB change at the expander’s input becomes
a 4 dB change at its output. However, that signal
would be 1 dB over maximum, causing distortion.
Linear expanders must be used with care, because
very few systems have enough headroom to handle
the upward dynamic range increase they produce.
Voice Processing Tutorial... continued
8
Page
User’s Guide: 528E Voice Processor
®
www.SymetrixAudio.com
The kind of processor most commonly called an
expander is really a downward expander, because it
only affects signals below threshold. This gives the
operator control over the expander’s activities, allow-
ing it to be used to expand the usable dynamic range
of the system without running out of headroom.
Note: in the interests of clarity and brevity, the
term expander will be defined as a downward
expander from this point forward in this manual.
How Expanders Increase Usable Dynamic Range
The lower limit restriction of a system is the noise
floor, which is usually well below the 528E’s lowest
expander threshold (-50 dBu). It’s important to keep
in mind that while the signal levels may change
greatly, the noise usually doesn’t change very much.
The action of the expander increases the dynamic
range of all signals below threshold. This action
increases the apparent loudness of signals, while
decreasing the apparent loudness of the noise.
For example, an expander operating at a ratio of 1:2
will cause an input signal that falls 10 dB below thresh-
old to fall 20 dB at its output. The downward action of
the expander reduces the noise floor by the same ratio
applied to the signal. Since the relationship between
the signal and the noise stays the same, the noise
is reduced 20 dB by the action of expander, which is
responding to a 10 dB drop in the signal with its 1:2 ratio.
De-essers
A de-esser is another type of dynamic range controller
that’s specially designed to regulate high frequency
content. The technique was originally developed
for motion picture dialogue recording, when it was
discovered that speech sounded more natural and
pleasing when the accentuation of sibilants was
reduced. By sensing and limiting certain selected
frequencies, the de-esser is intended to provide more
specific control over some of the higher frequency
vocal sounds that tend to become overemphasized
especially when the talker is close-miked.
Many sibilant vocal sounds like “s,” “sh,” and “t”
are very difficult to reproduce electronically, because
they contain a large percentage of very high frequency
harmonics. But because these sounds are essential
to the intelligibility of speech, they cannot be simply
removed with equalization. In fact, to help maintain
articulation many sound engineers boost the higher
frequencies of the vocal spectrum (3 kHz to 8 kHz),
and/or use microphones with “presence curves.”
However, in certain individuals sibilant sounds are
already over-accentuated, and any kind of high
frequency boost only exacerbates the situation.
The 528E’s de-esser controls excessive sibilant and
fricative vocal sounds, which can often be as much as
12 dB louder than the rest of the spectrum. It’s activity
is similar to a frequency conscious compressor/limiter
(with an equalizer boosting the high frequencies in the
sidechain). Unlike a compressor/limiter however, the
de-esser operates only on the frequencies selected and
above. Unlike an equalizer, the de-esser can reduce
the offending sounds without sacrificing intelligibility,
because it operates dynamically, removing only sounds
that are disproportionately loud, and only those that
fall within the operator-selected control range.
De-essers usually include controls that allow the
operator to determine which frequencies are controlled,
and how much those frequencies are actually attenuated.
The 528E’s de-esser controls are frequency, which is
variable from 800 Hz to 8 kHz, and threshold, which
may be set from 0 dB to -30 dB. In other words, the
528E’s de-esser will attenuate selected frequencies
between 800 Hz and 8 kHz as much as 20 dB.
Sidechain Processing
The sidechain is a patch point in the control
circuit of a dynamic range processor, which pro-
vides access to the part of the circuitry that tells
the VCA what to do. The 528E’s sidechain routes
through a rear panel TRS jack that allows the
control signal to be processed outside the unit.
Refer to the block diagram in a later section. Notice the
sidechain connections that come from the compressor/
limiter/expander section. They allow access to the audio
input of the control circuit (a fancy envelope follower
by any other name) for the dynamic range processor.
This control signal is derived from, but kept totally
separate from, the audio signal path. That means the
control signal can be processed outside the 528E without
actually processing the signal that’s going through
the VCA (the audio signal itself). This presents some
very interesting possibilities for changing or improv-
ing the operation of the dynamic range processor.
The best use of the sidechain connections is to make
the action of the 528E’s dynamics processor frequency
dependent, that is, to make it respond more (or less)
to certain frequencies. Because the audio signal and
the control signal remain completely separate (even
while the control circuit tells the VCA whether to turn
the gain up or down), you can equalize the sidechain
without changing the EQ in the main audio path.
Removing unwanted frequencies from the control
signal before it actually reaches the VCA prevents
those frequencies from being used to create gain
changes. Applications utilizing the sidechain
may be found in the Applications section.
Voice Processing Tutorial... continued
9
Page

®
6408 216th St. SW | Mountlake Terrace, WA 98043 | USA | Tel: +1 (425) 778.7728 | Fax: +1 (425) 778.7727
Equalization
Equalization is one of the most powerful tools
available to the audio engineer. It is, quite possibly,
the first signal modification device that most people
experience (aside from the volume control). This
experience takes the form of using the tone controls
found on most consumer audio equipment. Even in
this primitive form, simple tone controls can shape
and alter a sound, giving us pleasure or pain, evoking
emotion, or simply enhancing our listening pleasure.
The parametric EQ in the 528E provides both
creative and corrective frequency shaping - it can
be used to create a more pleasing sound, and to
correct frequency response problems. The equalizer
has a symmetrical ±15 dB boost/cut response.
The term “parametric” simply refers to the fact that the
primary operating parameters of the equalizer may be
altered by the user. The user adjustable parameters are:
CENTER FREQUENCY (or fc, expressed in Hz),
is defined as the frequency of the middle of the
bell shaped response curve formed by a filter.
BANDWIDTH (sometimes called “Q” or
selectivity, expressed in octaves or parts of an
octave), is the width of the bell shaped curve,
measured between its -3 dB points.
CUT or BOOST (expressed in dB), is
given in dB, at the center frequency.
Equalization Tutorial
Equalization is nothing more than selectively (or not)
amplifying a signal based on frequency. Since audio
signals consist of combinations of fundamental signals
and their harmonics, changing the tonality or the spectral
balance of a signal involves nothing more than altering
the relationship of the fundamental to its harmonics, and
of the harmonics to themselves. Each harmonic is respon-
sible for one aspect of the audible character of a signal;
knowing these relationships allows you to quickly zero-in
on the correct frequency range of the signal and apply
boost or cut to enhance or correct what you are hearing.
The audio spectrum has several critical por-
tions that are responsible for our perceptions
of sounds that we hear: [see table below]
Power and Fullness
In the very low bass region lies the threshold of feel-
ing, where the lowest sounds, like wind, room effects,
and distant thunder, are felt, rather than heard. In the
upper half of the first octave of this range, research has
shown that the fundamentals of piano, organ and even
the harp reach well into this range. Harvey Fletcher (of
Fletcher-Munson fame) charted the sensitivity of the ear
for various parts of the spectrum at levels that are lower
than those of reality. Fletcher’s compensation curves (the
well known Fletcher-Munson curves) show that for equal
loudness in this range at lower recorded and reproduced
levels shows requirements for tremendous boosts, on the
order of 10 to 30 dB. Aside from the subjective effects of
this range, the ability to control unwanted sounds in this
range is equally important to subdue stage rumble and
outside traffic noise (especially important where there
are subways beneath buildings!). Overemphasis caused
by close cardioid microphone placement can cause
muddiness in the overall sound; attenuating (cutting) the
very-low-bass region can greatly improve overall clarity.
Rhythm and Musical Foundation
In the bass region, most of the low, grave tones
of the drum and piano can be found. Here we can
also find the fundamentals of the rhythm section, as
well as the foundation of all musical structure.
It was Leopold Stowkowski who said “If I had a thousand
bass viols I could use them all!” This is not as extreme as
it may sound. A bass viol, even though it is reinforced by
its sounding board, generally plays single notes and pos-
sesses little dynamic range. In a large orchestra, as many
as eight bass viols may be used. A total of 1000 bass viols
in this case would only give an additional 21 dB of level,
which is not an inordinate amount given a glance at Mr.
Fletcher’s equal loudness curves. Pay attention to this range
because the overall musical balance of your program can be
controlled by equalizing or attenuating the 100 Hz range.
Voice Processing Tutorial... continued
Range Frequencies Musical Location
Very Low Bass 16-64 Hz 1st and 2nd octaves.
Bass 64-256 Hz 3rd and 4th octaves.
Midrange 256-2048 Hz 5th, 6th, and 7th octaves.
“Lisping” Quality 3000 Hz Between the 7th and 8th octaves.
Presence Range 4750-5000 Hz Between the 8th and 9th octaves.
Brilliance 6500-16 kHz Part of the 9th through the 10th octave.
10
Page
User’s Guide: 528E Voice Processor
®
www.SymetrixAudio.com
Telephone Quality
The ear is reasonably sensitive in the midrange
frequencies, and sound restricted to this range has a
telephone-like quality (which is generally why telephone-
quality frequency response covers the 300-3 kHz range).
If you make the 6th octave (500-1024 Hz) louder
with respect to the other octaves, the subjective result
is a horn-like quality. If you emphasize the 7th octave
(1000-2000 Hz), the effect is one of tinniness.
The fundamental tones in most music lie equally above
and below middle C (261 Hz), from 128 to 512 Hz. As most
instruments are rich in the first overtones, the majority
of sound energy is found up to the 2.5 kHz range. Music
editors and others engaged in listening to music over
long periods find that listening fatigue can be reduced by
attenuating the 5th, 6th, and 7th octaves by about 5 dB.
Lisping Quality
The 3 kHz range delivers a generous stimulus to
the ear. At very loud levels the region of greatest
ear sensitivity shifts downward from 5 kHz; this is
why many “PA” speakers have broad peaks in this
region. A characteristic of low-level signals peaked
at 3 kHz is a “lisping” quality, and the total inability
to distinguish labial sounds such as m, b, and v.
In wide-range lower level systems, a peak in the 3
kHz region has a masking effect on important recogni-
tion sounds, and on others which lie above 4 kHz.
Brilliance and clarity are lost and without attenuation
of this region, an unconscious strain with increasing
fatigue is felt according to the amount of 3 kHz boost.
Presence Range
The usual band affecting clarity in male speech is 3000
to 6000 Hz. In a woman’s voice, the fundamentals are
roughly an octave higher than a man’s, and a woman’s
range of consonant clarity lies between 5000 and 8000
Hz (the high-end of this range approaches a region
of hearing insensitivity in humans). Furthermore, the
total range of a woman’s voice is about half that of a
mans, stimulating fewer hearing nerves, and for this
reason, is consequently still weaker upon reception.
Wide range sounds, especially those of singing voices, have
fundamentals with harmonics in the 5 kHz region of good ear
sensitivity. Voices that are powerful or rich with harmonics at
5 kHz sound especially pleasing, clear and full. Male opera
singers are particularly favored with 5 kHz sounds, women
less so. In popular music, this range shifts downward some-
what. It follows that voices deficient in the 5 kHz range can be
enhanced in listening value by a generous boost on the order
of 5 to 8 dB at 5 kHz. A secondary benefit of this boost is an
apparent increase in level; a 6 dB rise at 5 kHz frequently
gives an apparent increase of 3 dB to the overall signal.
Attenuating the 5 kHz range on instruments gives a
“transparent” quality to the sound, providing, of course,
that the remainder of the signal is otherwise wide range.
Microphones having a dip in this region lack the “punch”
or “presence” to which we (Americans) are accustomed.
Brilliance
Unvoiced consonants attributed to tooth, tongue and
lip sounds are high in frequency, and reach the 10 kHz
range. These frequencies account for some clarity and
most brilliance, even though they contain less than 2% of
the total speech energy. This also holds true for musical
instruments; especially percussion. Boosting or cutting
this range affects clarity and naturalness. In speech, the
9th and 10th octaves impart intimacy although too much
emphasis can make secondary speech sounds (lip smack-
ing, etc.) objectionable (a good case for a expander).
Some microphones having a rise at the higher
frequencies (especially omni microphones) benefit
from some attenuation in this region. Those micro-
phones having under damped diaphragms may ring
at these frequencies, causing an annoying sibilant
distortion on speech. On musical forms using hand
percussion, boosting this range frequently results
in an astonishing and pleasing feeling of clarity.
Conclusions
When the article containing the above excerpts
was written (probably around 1963), stereo was just
becoming a commercial reality (you could still purchase
mono and stereo versions of an LP and there were still
more FM stations broadcasting in mono than stereo),
and as many mixers contained rotary mix pots as those
that used slide pots. The value of individual channel
equalization was known, but it was both technologically
and financially prohibitive. The article concludes thusly:
“With the advent of stereo and three-channel
recording, nearly three times the equipment, with
more elaboration, seems indicated, and expan-
sion of console area in the horizontal plane offers
the only direction in which to proceed. But a
single engineer has arms only so long.”
How times have changed!
Using the Parametric Equalizer
Great care must be exercised when using equaliza-
tion. The following paragraphs give some general
hints and precautions for using the 528E’s parametric
equalizer (or any other equalizer, for that matter).
Voice Processing Tutorial... continued
11
Page

®
6408 216th St. SW | Mountlake Terrace, WA 98043 | USA | Tel: +1 (425) 778.7728 | Fax: +1 (425) 778.7727
Beware of Distortion and Noise
When a frequency or group of frequencies are
boosted, the overall operating level is boosted as
well. For example, 12 dB of boost (no matter what the
frequency) increases the 528E’s output level 12 dB (at
that frequency). This kind of boost reduces headroom
by 12 dB in every circuit from the 528E’s own line
driver to the last device in the signal chain (transmitter,
tape machine, or what have you). Unless signal levels
are very low to begin with, the 528E’s output gain
will have to be reduced to compensate for increased
levels whenever the equalizer is used for boost.
The Clip LED in the Output LED meter monitors
levels in the equalizer as well as at the output of
the 528E. If the Clip LED glows, try switching the
equalizer to Bypass. If the LED still glows, reduce the
setting of the Output Gain control. If switching the
equalizer to Bypass eliminates the clip indication,
then the input level must be reduced via the Mic Gain
control or by lowering the level of the line input.
On the other hand, if the levels within the 528E
are too low to start with, using the equalizer for
boost may increase noise to unacceptable levels.
If levels are too low, increase the preamp gain (or
the output level of the device feeding the line input).
Know What You Are Listening To
Low frequency boost may increase the level of some
frequencies that cannot be heard, for one reason or
another. Many high quality microphones are capable of
generating substantial output at very low frequencies
(below 50 Hz) which cannot be adequately reproduced by
most monitor speakers or headphones. Be aware that the
true effects of low frequency boost may not be audible,
and may actually result in a “muddy” or distorted sound.
Use Wide Peaks, Narrow Dips
In general, the human ear prefers wide bandwidth
peaks and narrow bandwidth dips. Boosting a narrow
bandwidth produces a sound usually perceived as
“offensive,” while boosting wider bandwidths (.7
octave or greater) usually results in a sound deemed
“musical.” It has also been observed that very few
people will notice anything’s missing when a narrow
bandwidth (.3 octave or less) is cut, even when it’s
cut as much as 30 dB. But, cut a wide bandwidth and
the resulting sound quality is often called “empty.”
Tuning the EQ/Notch Filter
To “tune” the equalizer, use full boost. For both boost
and cut, the 528E’s parametric equalizer is intended to
be put to work on specific frequencies. To find a particu-
lar frequency “by ear” (the method used by everyone
who doesn’t have a real-time analyzer), turn the cut/
boost control all the way up to +15 dB (be very careful
of feedback if you are monitoring on a loudspeaker!).
Set the bandwidth for about .3 octave (max CCW). Tune
the frequency control until you distinctly hear the part
of the sound you wish to control. Then, adjust the cut/
boost control for the appropriate amount of change,
and readjust the bandwidth control if necessary.
Equalizing for Speech
In broadcast, equalizers are often used to create
a sonic personality for the station’s on-air talent. In
production applications, it is practical to write down
each person’s settings. In broadcast applications
(on-air), most stations try to find a single composite
setting that works for all of their on-air talent. If your
station’s on-air talent is comprised of both men and
women then finding a single, compromise setting
becomes more difficult. A possibly more workable
solution might be to use a single-D3 microphone (so it
has proximity effect) and to vary the working distance
to alter the low-frequency response somewhat.
Some general thoughts on speech equalization:
! Try to use wider bandwidths. Narrower bandwidths
(1/2 octave and less) are less audible (harder to
hear) and are generally only useful for remedial
work. Broader bandwidths are less obnoxious,
more pleasing sounding, and easier to work with
(especially if you’re boosting a range of frequencies).
@ Try to avoid massive amounts of boost or cut.
If you’re only trying to impart a flavor (like
sprinkling salt and pepper on a meal), then 6-8
dB of boost or cut should be all that you need.
# A wide bandwidth cut is equivalent to a boost
at the frequencies surrounding the cut.
$A quick way to figure out what’s going on is to set
the level of one band of the equalizer to full boost
(+15 dB), then switch to the frequency control and
vary the frequency of that band of the equalizer
while listening to program material fed through
the unit. This usually makes quick work out of
finding the region that you want to work on. Now
reduce the level setting to something tasteful.
A common problem when trying to set an equalizer
for someone’s voice is converting the descriptive adjec-
tives that people use in describing the character of a
voice into the numbers that make equalizers happy.
The following table list some commonly used adjec-
tives and their corresponding frequency ranges. You
can use the table on the following page as a guide.
Voice Processing Tutorial... continued
12
Page
User’s Guide: 528E Voice Processor
®
www.SymetrixAudio.com
To tailor your station’s announce sound, begin with
an idea of what general sound you want. Since you
only have three general locations that you can equalize
at, you’ll need to begin with the aspects of your sound
that are most important. The choice of microphone is
very important, since every microphone imparts its own
equalization to any sound that it hears. If you want a
large, “ballsy” sound, you ought to think about single-D
cardioid microphones such as those made by AKG,
Shure, Neumann, Sennheiser, and EV (like the RE38N/D
or ND series) or a ribbon microphone such as the RCA
77DX. The built-in bass boost caused by close talking a
single-D microphone (proximity effect) can be tailored
or tamed with careful equalization, which also reduces
room rumble at the same time. Last, since the proximity
effect increases with decreasing source-microphone
distance, a skilled user can substantially change their
sound simply by moving in or out from the microphone.
If clarity is your goal, then a variable-D4 microphone
such as the EV RE-20, RE-27 or RE-18 or an omni-
directional type such as the EV RE50 or AKG414 (with the
pattern set to omni) is a good choice as these types do
not emphasize the bass frequencies when you close-talk
them. On the negative side, any room rumble present
with the microphone will be boosted along with the
voice if you try to equalize at the lower frequencies.
Next, add or remove low frequencies in the
100-300 Hz range until you get a weight or fullness
that is pleasing. Next add midrange boost in the
2.5 kHz to 5 kHz range to add punch and presence
(experiment with the bandwidth control!), and
finally add or remove frequencies in the 10000+ Hz
range to get the sense of brilliance that you want.
The chart on the next page shows the relation-
ships of many different instruments, and a piano
keyboard along with the frequencies involved.
Notes
1. Equivalent input noise (EIN) is a method of modeling the noise performance of a preamp as the signal level of an equivalent noise source connected
to the input of a noiseless preamplifier. The thermal noise of a 150-Ohm resistor is about -133dBV; this represents the theoretical best case.
2. The majority of the material in Section 2.2 is taken from “Equalizing for Spectral Character,” Langevin Corporation, 1966 Catalog.
3. A single-D microphone is a directional microphone having its rear-entry port(s) spaced at a single distance from the diaphragm.
Single-D microphones are always characterized by proximity effect, a rise in the bass response at short working distances.
4.A variable-D cardioid microphone has multiple rear entry ports spaced at varying distances from its diaphragm.
Variable-D microphones have little or no proximity effect. Variable-D is a trademark of Electro-Voice Inc.
Range Description (women) Range Description (men)
100-250 Hz Fullness 75-200 Hz “Balls”, rumble, heaviness
250-400 Hz Bassiness, bigness 200-300 Hz Bassiness, bigness
400-600 Hz Warmth 400-600 Hz Chesty
600 Hz-1 kHz Volume 600 Hz-1 kHz Volume
2 kHz-4 kHz Clarity 2 kHz-4 kHz Clarity
3 kHz - 5 kHz Nasal, yell, presence 3 kHz-5kHz Nasal, yell, presence
5 kHz-8 kHz Enunciation, intimacy 5 kHz-8 kHz Enunciation, intimacy
10 kHz up Air, mouth noises 10 kHz up Air, mouth noises
Voice Processing Tutorial... continued
13
Page

®
6408 216th St. SW | Mountlake Terrace, WA 98043 | USA | Tel: +1 (425) 778.7728 | Fax: +1 (425) 778.7727
C
D
E
F
G
A
B
G
D
C
E
F
A
B
G
D
C
E
F
A
B
G
D
C
E
F
A
B
G
D
C
E
F
A
B
G
D
C
E
F
A
B
G
D
C
E
F
A
B
G
D
C
E
F
A
B
C
D
000 0 00011 1 111 1 2222 2 223 3 333 3 3444 4 444 5 555 5 556 6 6666 6 777 7 777 8 888 8 8899 9 999 9
A
F
E
G
B
A
C
F
E
D
G
B
BASS
BARITONE
TENOR
ALTO
SOPRANO
BASS VIOL
CELLO
VIOLA
VIOLIN
KETTLE DRUM
BASS TUBA
BASSOON
BASS CLARINET
TROMBONE
FRENCH HORN
TRUMPET
CLARINET
OBOE
FLUTE
PICCOLO
WIND
INSTRUMENTS
STRING
INSTRUMENTS
HUMAN
VOICE
BASS
TREBLE
16.35
18.35
20.60
21.83
24.50
27.50
30.87
32.70
36.71
41.20
43.65
49.00
55.00
61.74
65.41
73.42
82.41
87.31
98.00
110.00
123.47
130.81
146.83
164.81
174.61
196.00
220.00
246.94
261.63
293.66
329.63
349.43
392.00
440.00
493.88
523.25
587.33
659.26
698.46
783.99
880.00
987.77
1046.50
1174.70
1318.50
1396.90
1568.00
1760.00
1975.50
2093.00
2349.30
2637.00
2793.80
3136.00
3520.00
3951.10
4186.00
4698.60
5274.00
5587.60
6272.00
7040.00
7902.20
8372.00
9393.20
10548.00
11175.20
12544.00
14080.00
15804.40
Figure 2-2. Relationships of Musical instruments, Piano, and actual frequencies.
Voice Processing Tutorial... continued
14
Page
User’s Guide: 528E Voice Processor

®
www.SymetrixAudio.com
Block Diagram
This section is intended for more advanced users. If
you are a first-time user, we recommend that you start
out by using the procedure found in “Fast Setup.”
Block Diagram
Please take a moment and take note of the following:
7The equalizer and de-esser are hard-wire
bypassed by their In/Out switches.
7The interstage patch points use TRS jacks
wired for unbalanced operation.
7The interstage patch points are half-normalled.
The send jack does not break the signal flow.
The output level of the 528E can be set to either
line level or mic level. The switch for this function
is internal to the unit. Refer to Appendix A.
7 # : 1" 4 4
*/1654
065165
#"-"/$&%
065165
6/#"-"/$&%
*/065
1)"/50.
108&3
4611-:
E#1"% 13&".1
.*$("*/ '3&26&/$: 5)3&4)0-%
%&&44
*/065
$-*1
.*$-*/&
&2
*/065
&2
-08
&2
.*%
&2
)*()
*/5&3/"-
065165-&7&-
4&-&$548*5$)
70*$&4:..&53:
*/065
065165-&7&-%*41-":
065165-&7&-
4&-&$5*0/
$*3$6*5
06516545"(&
8*5)4:..&53:
$033&$5*0/$*3$6*5
108&3
4611-:
015*0/"-
108&348*5$)
065165
5)6.1
.65&
$*3$6*5
&2$-*1%&5&$5*0/
'3&26&/$: #"/%8*%5) $65#0045 '3&26&/$: #"/%8*%5) $65#0045 '3&26&/$: #"/%8*%5) $65#0045
%0 8/ 8"3%
&91"/%&3
$0.13&4403
%&&44
&91
5)3&4
$0.1
5)3&4
$0.1
3 "5 * 0
&91$0.1
*/065
&91$0.1
065165
&91"/%&3$0.13&4403
&95&3/"-4*%&$)"*/
3*/(4&/%
5*13&563/
&2
*/165
&2
065165
06516545"(&
*/165
("*/
Installation
The 528E may be installed freestanding or rack
mounted. Rubber feet are included for freestanding
use. No special ventilation requirements are necessary.
Installation Requirements
Mechanical: One rack space (1.75 inches) required, 12.5
inches depth (including connector allowance). Rear
chassis support recommended for road applications.
Electrical: 105-125V ac, 12.5 Watts maximum.
210-250V ac, 50 Hz, 12.5W maximum (export).
Connectors: XLR-3 female for inputs, XLR-3
male and TRS 1/4-inch female for outputs,
Pin 2 of the XLR connectors is “Hot.”
The sidechain access jack output uses a TRS jack
wired as an insert jack (tip=return, ring=send).
The interstage patch points use TRS jacks with the ring
and sleeve connections connected to circuit ground. The
jacks are half-normalled (only input breaks normal).
Using the 528E
15
Page

®
6408 216th St. SW | Mountlake Terrace, WA 98043 | USA | Tel: +1 (425) 778.7728 | Fax: +1 (425) 778.7727
Using the 528E... continued
Level Setting
For optimum noise performance, correct level set-
tings are a must, especially for microphone sources.
You should operate the 528E’s mic preamp at the
highest gain possible without overload. Extremely hot
signals may require using the -15 dB pad switch.
The 528E expects line level signals to fall in
the +4 dBu region. Lower signal levels are okay,
but the noise performance may suffer as there
is no gain trim control for the line input.
The Clip LED in the mic input section of the 528E
actually monitors the output of the Mic-Line switch. If
the LED glows, and you are using the Mic input, then
reduce the setting of the Mic Gain control until the
LED no longer glows. If you are using the Line input,
reduce the level of the device driving the 528E.
The Clip LED in the Output LED meter monitors
levels in the equalizer as well as at the output of
the 528E. If the Clip LED glows, try switching the
equalizer to Bypass. If the LED still glows, reduce the
setting of the Output Gain control. If switching the
equalizer to Bypass eliminates the clip indication,
then the input level must be reduced via the Mic Gain
control or by lowering the level of the line input.
Operational Details
This section describes the details of operating the 528E.
Usage information can be found later in this section.
The 528E accepts monaural analog input
signals at mic or line level, processes them, and
delivers them back to you as balanced line, unbal-
anced line or balanced mic level signals.
Stand-alone Operation
A vast majority of users use the 528E as a
stand-alone device. Here the 528E replaces their
usual microphone preamp and either feeds their
tape machine or workstation directly, in essence
becoming a one-input, one-output console.
For best results, the 528E should replace the mic
preamp in your console or recording chain. If you have
to plug the 528E into a microphone input (-40 dBu
nominal level), then you’ll need to pad (attenuate)
the output of the 528E down to microphone level. An
internal jumper connection reduces the 528E’s output
to this level. Although a far preferable connection
would be to bypass your console’s mic preamp, this will
work. When configured for mic-level output, the 528E’s
circuitry doesn’t care if phantom powering is or isn’t
present at the console’s mic input. Appendix A contains
instructions for altering the output level of the 528E.
Note: Padding (attenuating) the output of the 528E
back to microphone level is a workable solution towards
interfacing the 528E into a console or system having only
microphone level inputs. However workable, the ultimate
performance of the 528E will be limited by the per-
formance of your system’s existing microphone preamps.
If you can find a way to bypass the existing microphone
preamps in your system, do so. It’ll be worth the trouble.
'30/51"/&-
h.*$h104*5*0/
64#"6%*0
*/5&3'"$&
48*5$)*/
*/1654&-&$5
-*/&*/165#"-"/$&%065165 .*$*/165
1)"/50.
108&3
6/#"-"/$&%
065165 065165*/165065165*/165
5*13&563/
3*/(4&/%
4*%&$)"*/065165*/165065165*/165
13&".145"(&&91"/%&3$0.13&4403 %&&4406516545"(& &26"-*;&3
+48V
BYPASS
16
Page
User’s Guide: 528E Voice Processor
®
www.SymetrixAudio.com
Using the 528E... continued
Using the 528E as a Channel Insert Device
The 528E can also be used as a channel-
insert device with your console. Use the 528E’s
line input and line output as shown below.
'30/51"/&-
48*5$)*/z-*/&h
065104*5*0/
*/1654&-&$5
3&563/*/165
50$)"//&-1"5$)
1"5$)4&/%065165
'30.$)"//&-
-*/&*/165#"-"/$&%065165 .*$*/165
1)"/50.
108&3
6/#"-"/$&%
065165 065165*/165065165*/165
5*13&563/
3*/(4&/%
4*%&$)"*/065165*/165065165*/165
13&".145"(&&91"/%&3$0.13&4403 %&&4406516545"(& &26"-*;&3
+48V
BYPASS
Using the 528E in an Effects Loop
Signal processors used in a console’s effects (send-
receive) loop should not be insert or series processors. A
series processor means that you have to break the signal
path to insert the processor. Since using the effects loop
does not break the signal path, we don’t recommend
that you connect the 528E here. Use the channel-insert
jacks as described under the previous heading or insert
the 528E between your console and your tape machine.
Using the Patch Points
Located on the rear panel are several TRS jacks. These
jacks are the connections between the various processors
that make up the 528E. The jacks are half-normalled,
which means that without any plugs inserted, the signal
flows through them via internal switching contacts. The
term “half normal” means that only the input or return
jack has switching contacts; inserting a plug into the
output or send jack does not break the signal path. This
allows you to access the signal at various points in the
528E’s signal path for use with external processors.
The patch point jacks can be used to insert additional
processing into the signal path or perhaps to rearrange
the sequence in which the individual processors receive
the input signal. Still another possibility would be to use
the parametric equalizer in the sidechain of the compres-
sor/downward expander (for additional information
on using the sidechain, see the end of this section).
Inserting Additional Processing
The illustration shown on the next page shows
an external processor inserted between the 528E’s
equalizer and its output stage. To insert additional
(external) processing into the 528E’s signal path:
!Decide where in the signal path you wish
to insert the external processor.
@Patch the appropriate output jack on the
528E to the input jack of the external proces-
sor. Use either a TRS or TS patchcord.
#Patch the output jack of the external proces-
sor to the corresponding input jack on the
528E. Use either a TRS or TS patchcord.
17
Page

®
6408 216th St. SW | Mountlake Terrace, WA 98043 | USA | Tel: +1 (425) 778.7728 | Fax: +1 (425) 778.7727
Using the 528E... continued
An insert or series processor is one that is inserted
in series with the signal to be modified. Generally
speaking, series processors have a wet-dry mix control,
however compressors, expanders, gates, equalizers, as
well as the 528E, are all series processors that don’t.
Changing the Sequence of Processing
You may wish to change the sequence of processing
within the 528E to allow the signal processors to work on
the input signal in a particular way (your way). A good
example of this is the compressor: should the equalizer
precede or follow the compressor. Most studio engineers
would have the equalizer follow the compressor, like it
normally does in the 528E. In broadcast, many engineers
prefer the opposite; the compressor receives the output
of the equalizer. The figure right illustrates this patch.
Using the Equalizer in the Sidechain
For some applications, you may want the 528E’s
equalizer in its sidechain rather than in the signal
path. Doing so makes both the compression and
downward expansion frequency conscious. The figure
right illustrates this patch. You can find out more
about using the sidechain later in the next section.
Tips and Techniques for Using the 528E
Following are some tips and techniques for using
the 528E. You should consider any settings given as
starting points for developing your own settings.
Metering
The 528E has several LED bargraphs that serve as
gain reduction and output meters. The gain-reduction
meters indicate the change, from unity gain, for their
respective function and the LEDs read (and move) from
right to left. When operating as a level meter, the LEDs
read (and move) from left to right. Each meter has its
own scale markings, as shown on the front panel.
Gain Setting
There are two places to adjust the gain of the
528E: at the mic input, before any processing,
and at the output. An understanding of this topic
is essential to getting the most from your 528E.
A more basic discussion can be found under the
heading, “Level Setting,” in the previous section.
First, the mic input gains. You make best use of
the 528Es signal-to-noise ratio by ensuring that your
mic-level input signals are adjusted to fit within
the headroom of the mic preamp. Doing so ensures
optimum dynamic range through the mic preamp and
succeeding processors. With the De-esser, Expander/
Compressor, and EQ sections temporarily set to Bypass
and the Output Gain control set to 0 dB (12:00 o’clock),
set the Mic Gain control so that the Output Level display
indicates levels in the -10 to 0 VU range. The Clip LED
should never illuminate on signal peaks. Remember
to restore the settings of the various bypass switches.
Finally, the Output Gain. After adjusting all of
the other processors, set this control so that the
0 VU LED on the Output Level meter illuminates.
The red Clip LED should never illuminate.
The output Clip LED also monitors the EQ sec-
tion. If the Clip LED illuminates, reduce the Output
Gain control setting slightly. You may need to
increase the gain of some device following the
528E to achieve the same overall level.
&95&3/"-"6%*0130$&4403
*/165065165
/05&53454i:u$"#-&
4&&1"(&'03%&4$3*15*0/
"/%8*3*/(%*"(3".
18
Page
User’s Guide: 528E Voice Processor
Other manuals for 528E
3
Table of contents
Other Symetrix Computer Hardware manuals

Symetrix
Symetrix 528 User manual

Symetrix
Symetrix 528E User manual

Symetrix
Symetrix SymNet Series User manual

Symetrix
Symetrix 628 Digital Voice Processor User manual

Symetrix
Symetrix 527E User manual

Symetrix
Symetrix 258E User manual

Symetrix
Symetrix 528E User manual

Symetrix
Symetrix 628 Digital Voice Processor User manual

Symetrix
Symetrix 628 Digital Voice Processor User manual

Symetrix
Symetrix 528E User manual