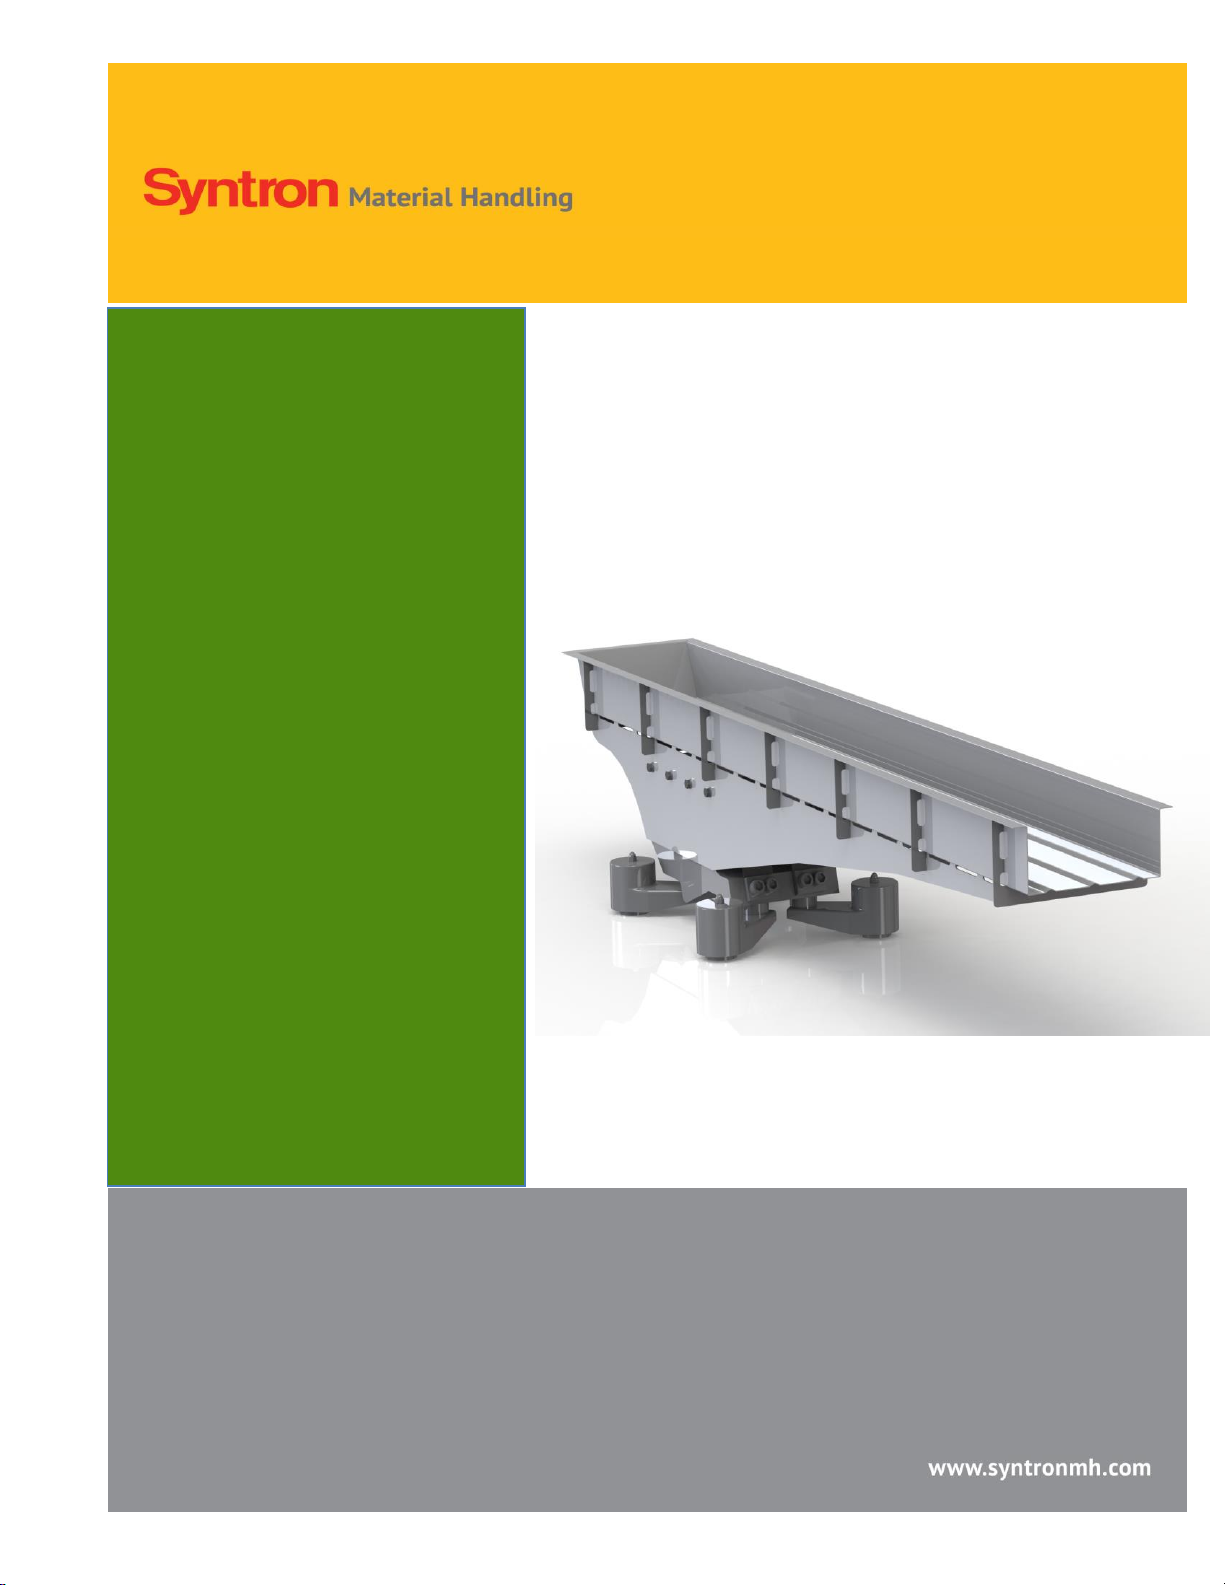
Syntron Material Handling BF-4-ALF User manual


1
Service Manual
Syntron® Electromagnetic Feeder
Models: BF-4-ALF and
BF-4-ASLF (stainless steel hardware)
■ Installation ■ Operation ■ Maintenance

2
TABLE OF CONTENTS
Safety Warnings 3
Introduction 3
Inspection and Long Term Storage 4
Theory of Operation 4
Installation 5
Installing the Control 6
Operation 7
Maintenance 7
Spring Replacement 8
Magnet Replacement 8
Air Gap Adjustment 9
Measuring the Stroke 11
Troubleshooting 12
Operating Specifications 12
Parts Diagram 13
Parts List 14
Torque Specifications 15

3
SAFETY INSTRUCTIONS
The purpose of safety symbols is to attract your attention to possible danger. Safety symbols, and their
explanations, deserve careful attention and understanding. The Safety warnings do not by themselves
eliminate any danger. The instructions or warnings they give are not substitutes for proper safety
procedures.
SYMBOL MEANING
Safety Alert Symbol: Indicates DANGER, WARNING,OR CAUTION.
Attention is required in order to avoid serious personal injury. This symbol may also be
used in conjunction with other symbols or pictographs.
NOTE Notes advise you of information or instructions vital to the operation or maintenance of the
Equipment.
IMPORTANT SAFETY INFORMATION
READ ALL INSTRUCTIONS BEFORE OPERATING
•Upon receipt, unpack and inspect the unit for damges that may have occurred during
shipment. If damage is found, contact the shipping carrier and Syntron Material Handling
immediately.
•Read instructions carefully. Be familiar with the controls and proper use of the unit.
•Do not operate the unit when Tired, ill, or under the influence of alcohol, drugs or medication.
Product safety labels must remain highly visible on the equipment. Establish a regular schedule to check
visibility. If you need to replace safety labels, contact Syntron Material Handling for an additional supply
free of charge.
The instructionsand data inthis manual are vitalto the proper installationand operation of thisequipment.
In order to avoid delays due to faulty installation and operation of this equipment. In order to avoid faulty
installation and operation, please see that these instructions are read by the persons who will install,
operate and maintain this equipment.
NOTE: Supporting information, such as drawings, may be attached to the manual. The information
contained therein takes precedence over corresponding information printed in this manual.

4
INTRODUCTION
The Syntron® BF-4-
ALF/ASLF (low
frequency)
Electromagnetic Feeder
is a dynamically
balanced, two-mass
isolated vibrating system,
consisting of a trough and
trough mounting bracket,
coupled to the drive
assembly by leaf springs.
The BF-4 feeder can
accommodate a large
range of trough sizes with
a
maximum trough length of 120 inches (3048 mm), and a maximum feed rate of 50 feet (15.24 m) per
minute.
Because of its unique design, the BF-4 is ideal for feeding various types of products such as snacks and
vegtables, to packaging and processing equipment such asmulti-head weigh scales and filling machines.
The BF-4 has along trough overhang that reduces product reduces product degradation by allowing the
feeder discharge to be positioned as close to the scale or transfer point as possible, minimizing product
drop.
INSPECTION AND STORAGE
WARNING: Do not drop the control or feeder; the force of the impact may damage the coponents.
Upon receipt, carefully unpack and inspect the feeder for any damage that may have occurred during
shipment. If damage is found, contact the shipping carrier and Syntron Material Handling immediately.
If the feeder is to be stored for an extended period of time, store it indoors, in its original shipping carton,
in a clean, dry area protected from extreme heat. Plug all holes to prevent dirt, rodents and insects from
entering. SMH advises placing a corrosion preventive inside the control box. Apply oil or rust preventive
to the hardware, and completely cover the unit with a waterproof covering.
WARNING: Do not oil the spring assemblies. Oiling the spring assemblies will destroy the
clamping effect of the spring pads against one another. No lubrication is required for electromagnetic
feeders.
THEORY OF OPERATION

5
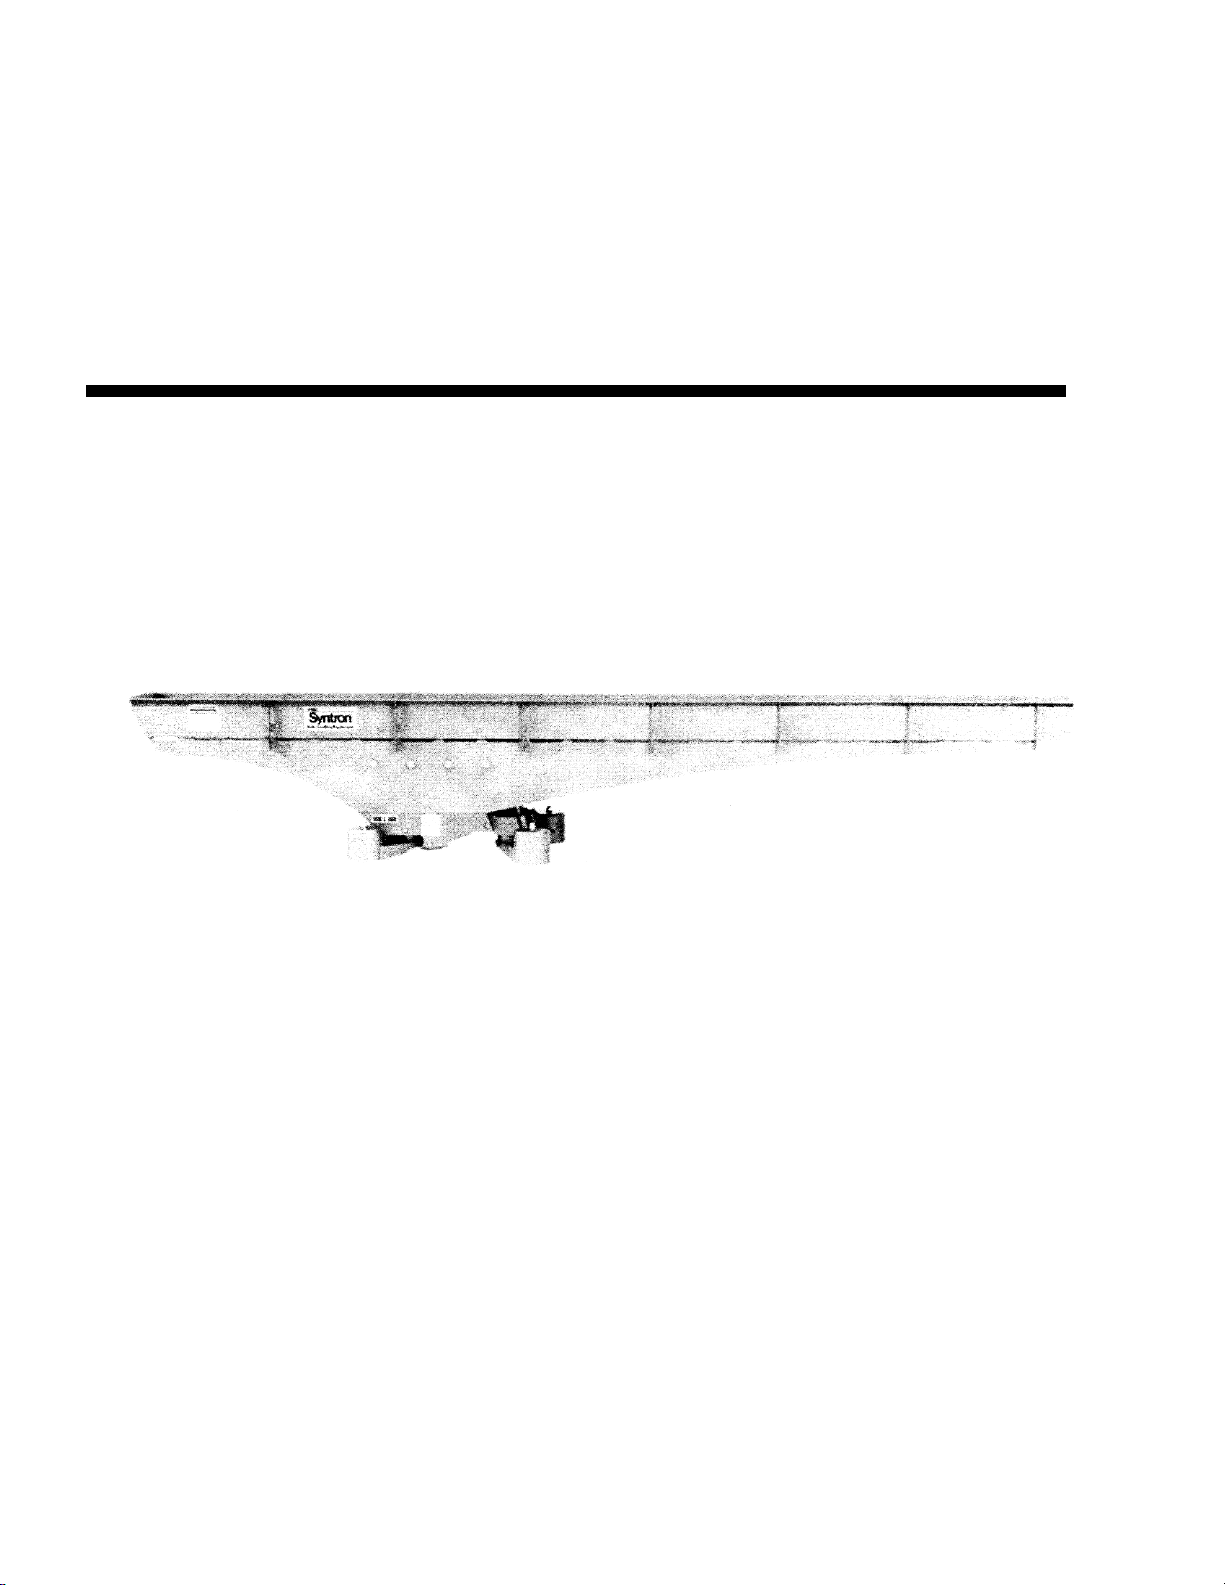
The BF-4-ALF/SLF is an electromagnetic feeder that
uses current to energize the electromagnet (coil) and
power the feeder. Rectified Alternating Current (AC) is
applied to the magnet assembly of the drive, pulling the
armature and entire trough assembly down and back
toward the drive during this portion of the stroke. When
the power is cycled off, the springs return the trough
assembly and drive back to the “at rest” position. The
trough assembly moves up and forward through this
portion of the stroke.Refer to Figure 3 for the trough
description of how material conveys on the feeder.
A timing algorithm in the micro processor supplies power
to the drive at the proper voltage and freqency. The UMC
Control and drive unit can be supplied for either 50Hz or 60Hz line freqency operation.
CAUTION: Do not operate the BF-4-ALF/ASLF Feeder and control on a supply frreqency otherthan
designated frequency.
CAUTION: During normal operation, the feeder performs with a smooth, even stroke. If a loud
striking noise occurs, immediately turn off the unit and refer to the Air Gap Adjustment instructions in this
manual.
Using the pulsating action described above, the trough assembly moves particles being conveyed
forward, the pulls back and allows them to land downstream. Repeating this action at 1800 cycles per
minute (60Hz), or 2000 cycles per minute(50Hz) causes the material to convey smoothly along theentire
length of the trough to the discharge.
Figure 3 illustrates material flow along the trough surface. Each cycle moves the material forward and
upward, and further along toward the discharge. The rate
feed is controlled by the intensity of the magnetic pull,
which is varied by the control.
During a powered half-cycle, the trough surface travels
between its lowest point (A) to its highest limit (C). The
trough travels at its greatest velocity between (A) and (B);
although still traveling up and forward, the trough
decelerates between (B) and (C). On the upward stroke,
the particle of material is in contact with the trough from
(A) to (B). At point (B), the velocity of the particle
becomes greater than the trough, and the particle leaves the trough on a free-flight trajectory from (B) to
(D). The particle lands back on the trough surface at a position further forward (D). This completes one
cycle.
INSTALLATION
WARNING: Do not lift the feeder by the trough. This could cause the air gap to become
misadjusted and damage the trough or drive unit.

6
When installing the feeder, consideration must be given to the area of support that will safely carry the
full
weight of the feeder under loaded conditions. The feeder must be located on the supporting structure
by
1/2-inch (12.5 mm) dia X 3/4-inch (16 mm) locating pins (pins not provided by Syntron Material
Handling).
Thebottom spring cup for the coil spring provides for a 1/2-inch (12.5 mm) dia. x 3/4-inch (16 mm)
locating pin.
Refer to Figure 4 for the outline dimensions of the BF-4-ALF/ASFL Feeder drive. For trough dimensions,
refer to the layout drawings provided with the equipment.
Figure 4
CAUTION: The feeder must not come in contactwith any rigid object or adjacent surface that could
hamper its vibrating action. Any connections (such as dust seals) between the trough and adjacent
objects must be flexible, preferably cloth or rubber. A one-inch (25 mm) clearance must be maintained.
INSTALLING THE CONTROL
The separate control assembly should be installed on a wall as close to the feeder as possible, in a clean
dry, vibration-free location. There must be adequate ventilationto ensure prolonged service life of the
control components. The acceptable operating temperature range for this control is 30F to 150F (-1C
to 65C) If the temperature of the control exceeds the suggested operating temperature, range, contact
Syntron Material Handling.
INSTALLING THE CONTROL (cont’d)

7
WARNING: The electrical power supply connection to the SMH-supplied control must be made
through a customer supplied safety disconnect switch mounted next to the control. Incorporation of an
emergency stop may also be required, per local electrical codes.
WARNING: The unit must be properly grounded and verified at installation.
The conductors between the feeder and the control must be sufficient to carry the current and voltage
indicated on the equipment nameplate. When the feeder and control are properly installed and all wiring
is complete, the feeder is ready for operation.
OPERATION
WARNING: Before operating the feeder, be sure the control cover is closed and secured.
NOTE: The BF-4-ALF/ASLF Feeder and UMC-30 Control are preset at the factory and do not require
adjustment. If a replacement Control or Printed Circuit Board is purchased, they will need to be
matched to
the feeder as specified in the control instruction manual provided with the Control.
WARNING: During normal operation, the feeder performs with a smooth, even stroke. If a loud
striking noise occurs, immediately turn off the unit and verify that the feeder drive and or trough are not
contacting any adjacent object or structure.
Striking occurs when the faces of the armature and core make contact. Striking can result in serious
damage to the unit. To correct a striking condition, refer to the Air Gap instructions on page 10.
With the feeder operating satisfactorily, load the trough with the material to be conveyed and adjust the
control knob to the desired output. The material will flow along the trough surface in a smooth, controlled
rate of feed toward the discharge end of the trough. Refer to the UMC-30 Service Manual for additional
setup procedures.
NOTE: The UMC-30 Control must be adjusted with a “Soft Start Setting” of 1.2 seconds.
MAINTENANCE
WARNING: Disconnect the power supply at the customer supplied safetydisconnect switch before
performing any maintenance work.
MAINTENANCE (cont’d)
Some materials may adhere to the trough surfaces. If permitted to build up, these deposits increase the
weight of the feeder pan causing the feeder to operate at a reduced stroke. Material buildup on the

8
trough should be removed daily. Look for buildup at the rear of the feeder trough, particularly around and
under the hopper opening. A clean, dry, compressed air supply is recommended for routine cleaning.
WARNING: Do not oil the spring assemblies. Oiling the spring assemblies will destroy the
clamping effect of the spring pads against one another. No lubrication is required for electromagnetic
feeders.
Any sign of excessive heat or burned components is an indication of trouble. Under normal operating
conditions, feeder coils run warm, but never too hot to touch. At the first sign of overheating, immediately
investigate and correct the cause.
SPRING REPLACEMENT
WARNING: Disconnect the power supply at the safety disconnect switch before performing any
maintenance work.
If a spring needs replaced, SMH recommends replacing all the springs rather than only the defective
one(s).
Work on one spring stack at a time. Start with a rear spring stack and note the location and arrangement
of each spring, spacer, and clamp. Remove the bolts that secure the leaf springs to the base and the
bolts that hold the springs to the trough mounting bracket.
Install the new spring assembly in the reverse order to which the old assembly was removed. Replace
the cap screws and torque as specified on page 11. DO NOT OVERTORQUE.
MAGNET REPLACEMENT
Before and during magnet replacement, refer to Figure 5 on page 11.
WARNING: Operating feeder with the side plates removed will cause it to overstroke.
DANGER: Disconnect and remove feeder power cable from the power supply.
If it is necessary to replace the magnet assembly, remove the right side plate and side gasket to expose
the magnet. Next, remove the two magnet locking screws on the bottom of the drive and the two magnet
adjusting screws on the rear of the drive. Then remove the ground wire and strain relief from the base
casting Refer to figure 5.
It should now be possible to remove the magnet assembly with power cable and replace it. Once the
magnet is in position, attach the ground wire with ground wire screw; insert the magnet assembly locking
screws and the magnet adjusting screws (sealing urethane compression spring and teflon washer on the
2-
MAGNET REPLACEMENT (cont’d)

9
1/4 –nch long upper magnet adjusting screw only).). Make sure that the threads on the adjusting screws
have been cleaned and Locktite #242 has been applied to the threads.
NOTE: Once the magnet assembly has been replaced the air gap will need readjusted. Feeler gauges
are used to measure thickness or distance between the magnet and armature. This thickness or distance
is referred to as the ”air gap”.
When the drive is not energized (power is off), the static air gap can be measured with a feeler gauge.
Set the air gap at 0.185 inches (4.7mm) and snug down the magnet locking screws and the magnet
adjusting screws (it is important that the air gap is parrallel side to side and top to bottom). Replace the
side gasket and securely reattach the side plate. Refer to the Air Gap Instructions below to make the
final adjustments.
AIR GAP ADJUSTMENT
The air gap is the space between the faces of the armature and the magnet assembly. Proper air gap
adjustment is critical to good feeder performance.
The air gap is properly set at the factory (when a feeder with trough is supplied). Re-adjustment should
rarely be required. However, if high voltage is applied to the feeder, or if the air gap has been moved out
of adjustment, an adjustment of the air gap will be necessary.
Adjusting the air gap is a very delicate procedure, and may require operation time to obtain the proper
setting. The air gap is correct when the armature and magnet faces are as close as possible without
striking when maximum current is applied to the feeder.
WARNING: If the unit makes a loud striking noise while operating, immediately shut off power to
the unit.
If the air gap is adjusted so that the armature and magnet are too close, they will make contact during
feeder operation. This is called striking. A striking condition will cause severe mechanical damage
(broken springs, cracked trough or base, cracked armature or magnet assembly).
If the air gap is adjusted so that the armature and magnet are too far apart, the current draw will be
excessive. A high-current condition will result in coil burn-out, failure of control components, or reduced
material feed.
WARNING: Never open the air gap more than necessary. An excessive air gap draws more
current which will result in poor feeder performance and possibly damage the unit.
To adjust the air gap, the feeder must be empty of all material with the trough and all side plates installed.
Refer to the following instructions to adjust the air gap, and to identify the adjustment screws used to
adjust the air gap. Remove these adjustment screws, clean the threads, and reinstall them with Locktite
#242 applied to the threads.
AIR GAP ADJUSTMENT (cont’d)
To open the air gap:

10
1. Loosen the lower socket head adjustment screw. This is the screw (without the rubber washer)
located on the back of the base casting between the rear spring sets.
2. Tighten the upper socket head adjustment screw. This screw is located directly above the lower
socket head adjustment screw.
3. Once the appropriate gap is attained, tighten the magnet assembly locking screws.
4. When the magnet assembly locking screws are tight, secure both adjustment screws.
5. Finally, turn the unit on to confirm that it does not strike or rattle. If the unit strikes, readjust the air
gap. If the rattles:
A.) Check to make sure that all the magnet screws are secure.
B.) Check to make sure that the longitudinal pan ribs are not contacting the base casting.
To close (tighten) the air gap:
1. Loosen the upper socket head adjustment screw.
2. Tighten the lower socket head adjustment screw. This screw is located on the back of the base
casting between the rear spring sets.
3. Once the appropriate air gap is attained, tighten the magnet assembly locking screws.
4. When the magnet assembly locking screws are tight, secure the upper and lower adjustment
screws.
5. Finally, turn the unit on to confirm that it does not strike or rattle. If the unit strikes, readjust the air
gap. If the unit rattles:
A.) Check to make sure that all the magnet screws are secure.
B.) Check to make sure that the longitudinal pan ribs are not contacting the base casting.

11
MEASURING THE STROKE
Feeder stroke can be easily measured with a stroke gauge. BF-4-ALF / ASLF Feeders leave the factory
with a correctly positioned metal stroke gauge attached to the side of the trough rib. Refer to Figure 6.
While the feeder is operating, the inner lines of the gauge appear as an X, and the stroke should be read
at the intersection of the X. Refer to Figure 7.
The position and quality of the individual stroke gauge may cause a variance of up to .010 inches (0.25
mm), which is acceptable.

12
TROUBLESHOOTING
PROBLEM
CAUSE
CORRECTION
Line voltage is below voltage
indicated on nameplate
Increase line voltage as
designated on the nameplate.
Unit in contact with rigid object.
Isolate the unit.
Spring action may be hampered.
Remove and clean spring
assemblies
Defective leaf springs
*Replace.

13
Material buildup on trough pan
Clean trough pan
Feeder operates too fast.
Excessive line voltage (a striking
will condition occur).
Reduce line voltage as
designated on the nameplate
Unit hums, will not vibrate.
Defective SCR in the control
*Replace
Unit fails to operate.
No power to the control.
Check for broken or grounded
lines.
Defective switch or fuse.
*Replace.
Defective SCR in the control.
*Replace.
Feeder coil may be shorted or
open.
*Replace coil
Short circuit in wiring.
Repair.
Open winding on rheostat.
*Replace.
*Replace only with parts recommended or supplied by SMH.
NOTE: Some items are equipped with removeable options such as screen panels or covers,
these items must be in place during operation or damage to the feeder will occur.
OPERATING SPECIFICATIONS
PARTS DIAGRAM –BF-4-ALF / ASLF
Feeder
Model
Max.
Trough
Weight
Minimum
Natural
Frequency
Coils
Operating
Voltage
Maximum
Current
(Nameplate)
Expected
Current
(Ref.
only)
Minimum
Dynamic
Air Gap
Trough Stroke
Range
(Maximum
Trough Weights)
BF-4-ALF
110#
1775
1775
1975
1975
235T12
515T15
275T12
515T15
230/60
460/60
220/230/50
380/50
9.0
4.5
9.0
4.5
.160 (.140 MIN.)
.160 (.140 MIN.)
.140 (.120 MIN.)
.140 (.120 MIN.)

14

15
PARTS LIST
ITEM DESCRIPTION QTY PART NO.
A Trough Mounting Bracket 1 D-300278
Hex Hd Cap Screw 3/8”-16 UNRC-2A x 3 Lg Gr 5 ] 2 H0343124
Hex Hd. Cap Screw 3/8”-16 UNRC-2A x 3 Lg (SS) ] ONLY H0311403
Flat Washer 3/8 Zn. Pl. } 2 H0117001
Flat Washer 3/8 (SS) } ONLY H0177002
Locktite #242 Threadlocker Adhesive/Sealant As Req’d 0185X012
B Magnet and Cable Assembly, 230V/60 Hz 1 D-300276-J
Magnet and Cable Assembly, 460V/60 Hz 1 D-300276-K
Magnet and Cable Assembly, 220 - 230V/50 Hz 1 D-300276-L
Magnet and Cable Assembly, 380V/50 Hz 1 D-300276-K
C Ground Wire Assembly 1 C-300039-A
Hex Hd. Mach. Screw (1/4-20 x 1/2) Br. 1 H0300802
Lockwasher, 1/4 Int. Tooth 1 H0112705
D Right-Hand Side Plate 1 D-300136-1
Hex socket Hd. Cap Screw (3/8”-16 x 1-3/4”) Zn. Pl. ] 6 H0451418
Hex Socket Hd. Cap Screw (3/8”-16 x 1-3/4”)(SS) ] ONLY H0451302
E Label (Adjustment) 1 A-195774
F Nameplate 1 A62245
Label Warning 4 B225294
G Label (Disc. Elec.) 2 A-125694
H HH Shoulder Scr 1/2-20 2 B-300007
Flat Washer 5/8 Zn. Pl. } 2 H0117501
Flat Washer 5/8 (SS) } ONLY H0117502
Belleville Washer 5/8 ] 2 0013X115
Belleville Washer 5/8 (SS) ] ONLY 0013X131
K Hex Socket Hd. Cap Screw (3/8”-24 x 1-3/4”) Full Thread } 1 H0452428
Hex Socket Hd. Cap Screw (3/8”-24 x 1-3/4”) Full Thread (SS) } ONLY H0452534
Hex Socket Hd. Cap Screw (3/8”-24 x 2-1/4”) Full Thread(Upper) ] 1 H0454628
Hex Socket Hd. XP Screw (3/8”-24 x 2-1/4”) Full Thread (SS) ] ONLY H0454734
* Urethane Compression Spring 1 0241X030
* Teflon Washer 1 0336X010
Flat Washer 3/8 Zn.Pl. } 1 H0117001
Flat Washer 3/8 (SS) } ONLY H0117002
Locktite #242 Threadlocker Adhesive/Sealant As Req’d 0185X012
M Side Gasket 2 D-300140-1
P Carbon/Epoxy Spring 0.134 Tk (4 Rear, 4 Front) 8 C-300138-3
Carbon/Epoxy Spring 0.084 Tk As Req’d C-300138-4
Q Spring Spacer 24 B-300141-1
R Strain Relief 1 0102X080
S Hex Socket Hd. Cap Screw (7/8”-9 UNRC-3A x 2-1/2”) Zn.Pl. ] 16 H0454233
Hex Socket Hd. Cap Screw (7/8”-9 UNRC-3A x 2-1/2”) (SS) ] ONLY H0454133
T Spring Clamp Bar 8 B-300142-1
U Base and Armature Assembly 1 D-300274-A
Hex Soc Set Screw ¼” – 20 x 3/8” (SS) 1 H0431402
V Left-Hand Side Plate 1 D-300136-2
Hex Socket Hd. Cap Screw (3/8”-16 x 1-3/4”) Zn. Pl. } 6 H0451418

16
PARTS LIST (cont’d)
Hex Socket Hd. Cap Screw (3/8”-16 x 1-3/4”)(SS) } ONLY H0451302
W Isolator Housing 4 D-300531-AA
X Neoprene Spring Cap 8 0241X022
Y Coil Spring 4 0274X016
Z Hex Head Cap Scew 3/8”-16 x 1 ½” Zn. Pl. ] 4 H0310601
Hex Head Cap Scew 3/8”-16 x 1 ½” (SS) ] Only H0340296
Lockwasher 3/8” Zn. Pl. } 4 H0113209
Lockwasher 3/8” (SS) } Only H0113210
AA Acorn Nut 1/2” – 13 4 H0104007
Hex Head Cap Screw 1/2” - 13 x 1 1/2” Z Pl. ] 4 H315401
Hex Head Cap Screw 1/2” - 13 x 1 1/2” (SS) ] Only H315403
Lockwasher 1/2” Z Pl. } 4 H0113609
Lockwasher 1/2” (SS) } Only H0113610
Plainwasher 1/2” Z Pl. ] 4 H0117301
Plainwasher 1/2” (SS) ] Only H0117202
AB Ground Strap 1 6510-014-D
AC Drive Screws 2 H0457102
Do not remove or paint over safety labels or nameplate.
Indicates Stainless Steel Hardware
* Used with Upper Core Adjustment Screw
TORQUE SPECIFICATIONS
TORQUE VALUES
ITEM
DRY FASTENERS
*LUBRICATED FASTENERS
(EEZ Instead-A-Led or Equivalent
**LOCKTITE APPLIED
(#242)
H
55 ft lb (74.6 Nm)
40 ft lb (54.2 Nm)
D,V
47 ft lb (67.7 Nm)
35 ft lb (47.5 Nm)
A
---
---
23 ft lb (31.2 Nm)
S
---
350 ft lb (474.5 Nm)
K
(lower only)
---
---
37 ft lb (50 Nm)
* Standard zinc plated fasteners are considered ”Lubricated”
** Stainless steel fasteners are considered ”Dry)

17
Important
This service manual is provided to assist in the operation and maintenance of your Syntron Material Handling LLC
equipment.
Requests for additional manuals or replacement parts should be directed to the address listed at the end of this page:
Please be sure to include the following information when ordering replacement parts:
1. Machine model name
2. Factory Order Number
3. Quantity of parts required
4. Syntron part number (from manual)
5. Description of part
6. Shipping instructions
Syntron Material Handling reserves the right to alter at any time, without notice and without liability or
other obligations on its part, materials, equipment specifications, and models. Syntron Material
Handling also reserves the right to discontinue the manufacture of models, parts, and components
thereof.
Your satisfaction is very important to us. Please direct any comments, questions, or concerns to
our Marketing Communications Department.

Corporate Office
P.O. Box 1370
Tupelo, Mississippi 38802
Phone: 662.869.5711
Fax: 662.869.7449
Tupelo
2730 Hwy 145 South
Saltillo, Mississippi 38866
Phone: 662.869.5711
Fax: 662.869.7493
Toll Free: 800.356.4898
info@syntronmh.com
Changshu
#2 Road No. 1
Changshu Export Processing Zone
Changshu, Jiangsu, China 215513
Phone: +86 0512.52299002
Fax: +86 0512.52297228
info@syntronmh.com
Form No. SM0527_122214 Printed in U.S.A
This manual suits for next models
1
Table of contents
Other Syntron Material Handling Industrial Equipment manuals
Popular Industrial Equipment manuals by other brands

ITEM
ITEM LED Light Fitting 15W Notes on Use and Installation

Movex
Movex Track-O CROSS-COUNTRY UTILITY operating manual

Rockwell Automation
Rockwell Automation Allen-Bradley IntelliVAC 1503VC-BMC5 user manual

Jäger
Jäger Z100-H642.15 S3W2 manual

Kval
Kval Commander III Operation manual

GESTRA
GESTRA FPS 11 Original Installation & Operating Manual