Systec LPD User manual

Load Palletizing Device

________________________________________________________________________________________________________________
PRODUCT SERVICE MANUAL LOAD PALLETIZING DEVICE
2
ISSUE DATE: 1 August 2020
Table of Contents
1. INTRODUCTION ...................................................... 3
2. SAFETY .................................................................... 4
2.1 LOCKOUT/TAGOUT PROCEDURE ............................ 4
2.2 ELECTRICAL SAFETY ............................................. 4
2.3 SAFETY LABELS ................................................... 5
2.3.1 NEVER STAND OR WALK ON ANY
CONVEYORS ............................................................ 5
2.3.2 EXERCISE CAUTION WHEN WORKING ON
AUTOMATIC EQUIPMENT ....................................... 5
2.3.3 NEVER OPERATE EQUIPMENT WITHOUT
SAFETY GUARDS ...................................................... 5
2.3.4 SHOCK HAZARD ........................................ 5
2.3.5 BE SURE TO LOCKOUT BEFORE SERVICING
OR MAINTAINING EQUIPMENT .............................. 6
2.3.6 STAY CLEAR OF MOVING PARTS ............... 6
2.4 OTHER PRECAUTIONS .......................................... 6
2.5 SAFETY GUARDS ................................................. 6
2.6 WATCH FOR TRIP HAZARDS ................................. 6
3. OPERATION OVERVIEW ......................................... 6
3.1 INSTALLATION ADVICE ......................................... 7
3.2 SETTINGS & ADJUSTMENTS .................................. 7
3.2.1 Load Lifting Fork Assembly ....................... 7
3.2.2 Carriage Guide Rollers .............................. 8
3.2.3 Plow and Dampers ................................... 8
3.2.4 Backboard Assembly ................................ 8
3.3 CYCLES ............................................................. 8
3.3.1 Load Cycle No Pallet (Bypass Mode) ........ 8
3.3.2 Load Cycle with Pallet ............................... 8
3.3.3 Pusher Cycle .............................................. 8
3.4 OPERATION LEVELS ............................................. 9
3.4.1 Manual Jog Controls ................................. 9
3.4.2 Auto Pallet Selection ................................. 9
3.4.3 Bypass Mode ............................................ 9
4. COMPUTER CONTROLS .......................................... 9
4.1 HOW TO USE THE COMPUTER PANEL ..................... 9
4.2 CONTROL BASICS ............................................... 9
4.2.1 Run Manually Using Jog Controls ........... 10
4.3 HOW TO SETUP THE DEVICE AND RUN DIAGNOSTICS
10
4.3.1 Pallet Select Screen ................................. 11
4.3.2 Asi Diagnostics ........................................ 11
4.4 HOW TO CORRECT DEVICE FAULTS ...................... 11
4.4.1 View Faults with the LPD ........................ 11
4.4.2 LPD Control Faults .................................. 12
5. GENERAL MAINTENANCE ..................................... 13
5.1 CLEANING ....................................................... 14
5.2 LUBRICATION ................................................... 14
6. PREVENTIVE MAINTENANCE ............................... 15
6.1 MAINTENANCE TABLES ...................................... 15
6.1.1 Recommended Daily Preventive
Maintenance Table ............................................... 15
6.1.2 Recommended Periodic Preventive
Maintenance Table ............................................... 16
6.2 PREVENTIVE MAINTENANCE SCHEDULE ................ 17
6.3 PREVENTIVE MAINTENANCE CHECKLIST ................ 18
6.4 REPLACING COMPONENTS ................................. 19
6.4.1 Replace the Centering Device Wheels .... 19
6.4.2 Replace the Carriage Wheels ................. 19
6.4.3 Replace Fork Encoders [DWG 068D014] 19
6.4.4 Replace Lift Motor [DWG 068D001] ...... 19
6.4.5 Replace the Pallet Infeed Pusher Motor
[DWG 068D005 (3 of 3)] ....................................... 19
6.4.6 Replace the Servo Motor or Gearbox [DWG
068B013] ............................................................... 19
6.4.7 Replace the Fork Assembly ..................... 20
6.4.8 Replace the Pallet Centering Device Air
Cylinder [DWG 068D004 (1 of 4)] ........................ 20
6.5 SPARE PARTS ................................................... 21
6.6 BILL OF MATERIALS .......................................... 23
Supplemental Materials
• Maintenance Guide – PAM Lines
• HMI User Guide

________________________________________________________________________________________________________________
PRODUCT SERVICE MANUAL LOAD PALLETIZING DEVICE
3
1. Introduction

________________________________________________________________________________________________________________
PRODUCT SERVICE MANUAL LOAD PALLETIZING DEVICE
4
2. Safety
You need to understand the cautions,
warnings and dangers outlined in this chapter
for your own safety, and the safety of all
employees and visitors. You also need to
consider it as part of your safety guidelines and
procedures. The SAFETY procedures supplied
below are not meant to replace your
employee’s established safety procedures.
SYSTEC urges that all personnel working
on, or around conveyor equipment and devices
receive proper training on the correct
operation, safety precautions, maintenance
and service of the equipment.
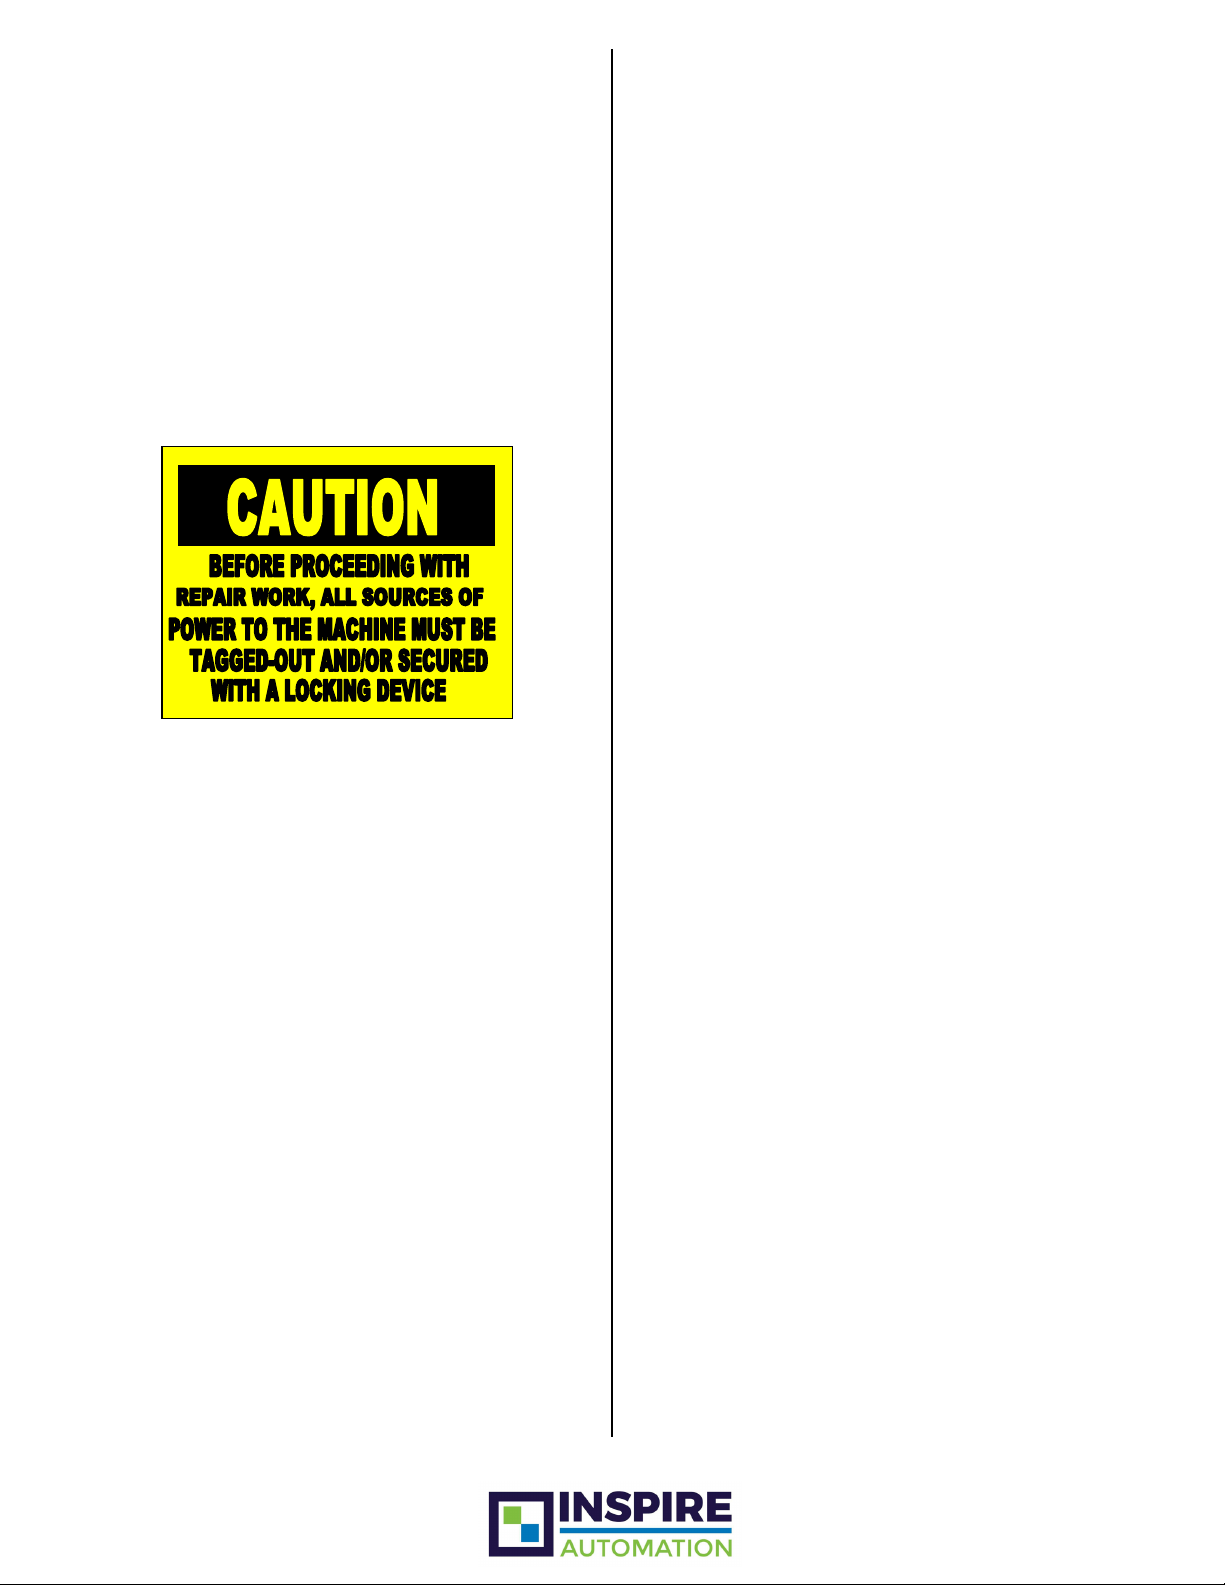
2.1 Lockout/Tagout Procedure
Most industrial accidents are caused by
the uncontrolled release of hazardous energy.
Many of these accidents can be prevented by
proper lockout/tagout procedures. In the
United States, refer to OSHA Subpart J
1910.147 for proper standards.
SYSTEC Powered Conveyors and
Machine Devices are equipped with a motor
disconnect switch at each motor location which
can be used for device lockout. See Figure 2-1
below.
After maintenance is completed,
replace all guards that were removed and
ensure that no unsafe condition exists. Make
sure all personnel are clear before removing
the lockouts and activating the controls.
For OSHA Compliance Information:
Call 800-321-OSHA (6742)
Figure 2-1 Two Motor Disconnect Switches
2.2 Electrical Safety
The conveyor system operates on 230-
575 VAC incoming electrical power and has
numerous electrical and electronic
components having the potential to shock
operators and maintenance personnel.
Failure to follow instructions and heed the
WARNINGS concerning electrical
components could result in injury or death,
and damage to the equipment. Points
where electrical shock can occur are control
panels, control consoles, transformers,
junction boxes, electrical motors, power
receptacles, the ends of the wire-ways, and
anywhere else cables and wires are
connected. For your safety and that of
others, please follow these guidelines and
warnings:
• Keep electrical components dry.
• Do not operate the equipment or system if any
wires, cables or power leads appear to be frayed or
damaged.
• Do not operate the equipment or system with any
control enclosure open, unless required for
maintenance or troubleshooting by experienced and
qualified personnel.
• Do not work on electrical components unless
authorized to do so.
• Immediately shut the equipment or system down if
sparks, smoke, fire, or extreme heat is generated at
any electrical component.
• Do not work on energized electrical components
unless there are two or more qualified people
present.
• When working on electrical components, make
certain electric power disconnect handles and
switches are in the OFF position. (Comply with OSHA
Lockout/Tagout procedures).
• Lock and attach DANGER tags to circuit breakers and
switches that have been opened to perform
maintenance. (Comply with OSHA Lockout/Tagout
procedures).
• Verify terminal connections prior to disconnecting or
connecting any wires.
• When troubleshooting electrical component
problems, verify power is OFF with a multimeter.
• If an electrical component requires electrical
isolation or removal to perform maintenance,
ensure that all miscellaneous attaching hardware

________________________________________________________________________________________________________________
PRODUCT SERVICE MANUAL LOAD PALLETIZING DEVICE
5
(i.e., screws, nuts, washers, insulator washers,
insulator bushings and gaskets) is serviceable and
properly reinstalled after removal.
• Do not bypass or override safety switches or devices.
• Brief all personnel in the area on any electrical
hazard or abnormal conditions.
• Ensure there is adequate light for working on
electrical components.
• Keep liquids and conductive material away from
electrical receptacles.
2.3 Safety Labels
Several safety labels are placed on the
equipment to warn you of the safety concerns
of the equipment. These labels are placed for
your protection and their warnings should be
taken seriously. Please follow the instructions,
whether they are written or illustrated with a
pictogram.
2.3.1 NEVER STAND OR WALK ON ANY
CONVEYORS
NEVER STAND OR WALK on a conveyor.
The rollers can turn freely or could start turning
under power at any time. Walking across
conveyors should only be done at designated
crosswalks and only on crossover walk plates,
never on the rollers.
Figure 2-2 DO NOT Walk on Conveyors Use Cross Walks
Only label
2.3.2 EXERCISE CAUTION WHEN WORKING
ON AUTOMATIC EQUIPMENT
Be aware of the conveyors and other
areas of the system where automatic
equipment is installed. Most conveyors and
related equipment run in automatic. The
equipment may start or stop at any given time.
External devices, such as photo-eyes or
switches may remotely activate the equipment.
For this reason, caution should be taken when
working around the conveyors, devices and
controls for the overall system.
Figure 2-3 CAUTION Automatic Equipment will start At
Any Time label
2.3.3 NEVER OPERATE EQUIPMENT
WITHOUT SAFETY GUARDS
Safety guards have been installed on the
equipment to minimize injury. Never remove
them during normal operations. If you remove
or disconnect them for service or maintenance,
always replace them as they were originally
installed before resuming operation.
Figure 2-4 CAUTION Do Not Operate This Machine
Without Guards in Place label
2.3.4 SHOCK HAZARD
Shock hazards can occur at numerous
locations. These can include control panels,
operator control consoles, transformers,
junction boxes, electrical motor power

________________________________________________________________________________________________________________
PRODUCT SERVICE MANUAL LOAD PALLETIZING DEVICE
6
receptacles, the ends of wire-ways and
anywhere else cables and wires are connected.
Please exercise extreme caution when
operating in the vicinity of electrical
components.
Service should be performed only by
qualified and trained personnel.
2.3.5 BE SURE TO LOCKOUT BEFORE
SERVICING OR MAINTAINING EQUIPMENT
This label is placed near the motor
disconnect switch.
Figure 2-5 CAUTION Before Proceeding with Repair
Work, All Sources of Power to the Machine Must be
Tagged-Out and/or Secured with a Locking Device
label
2.3.6 STAY CLEAR OF MOVING PARTS
Generally, moving parts within the
conveyors or mobile conveyors can create, or
are direct pinch points. Material handling
systems, such as SYSTEC conveyors and devices,
must have some moving parts exposed, such as
rollers, to do the job for which it is intended.
Although SYSTEC safeguards against
injury as much as possible, some "pinch points"
inherently exist. Extreme caution should be
used to avoid these potentially hazardous
areas.
2.4 Other Precautions
• Wear the proper safety equipment,
such as earplugs, safety glasses, hard
hats, safety shoes and safety harnesses.
• Always use proper equipment for lifting
and pulling and make sure it is rigged
safely. Use machine dollies to move
heavy machinery.
• When starting or testing any motor,
make sure of proper direction of
rotation. Improper rotation can cause
damage to equipment and/or personal
injury.
• Do not crawl under any conveyors that
are not supported properly.
2.5 Safety Guards
Safety guards should be checked for
proper mounting. Guards that are damaged to
the extent that they no longer function should
be replaced. If you must remove or disconnect
guards for service or maintenance, always
replace them as they were originally installed.
2.6 Watch for Trip Hazards
Some areas of equipment or conveyors
require guarding that extends outside the
parameters of the conveyor itself. This guarding
is in place to keep personnel from entering a
potential hazardous situation yet must remain
below the rollers' surface to avoid interference
with the loads on the conveyors. The extended
guarding can itself become a potential trip
hazard. Extra caution should be extended for
potential trip hazards in the work area.
3. Operation Overview
A load entering the Load Palletizing
Device is measured by a photoeye. The
measurement is used to center the load along
the length of the heads. As the load is centered
and stopped inside the device, the heads
advance toward the load and force the load to
the center of the conveyor, squaring the load at
the same time. Once the load is centered and
squared, it is lifted by the head and load lifting
forks.
The forklifting drive is located on the
top of the carriage frame. The drive is designed
to lift up to 5000 lb (2270 kg) in 1.5 seconds

________________________________________________________________________________________________________________
PRODUCT SERVICE MANUAL LOAD PALLETIZING DEVICE
7
and fault out in 1.7 seconds. Hard urethane
dampers are installed to absorb the lifting
shock and two lock pin holes are provided to
support the raised head during maintenance.
Two proximity switches, mounted on a slide
hanging from the carriage frame, control the up
and down movement of the forks.
Meanwhile, a pallet is delivered to the
device at the pallet infeed point. The pallet
centering device is actuated by an air cylinder
connected to slides by cables. The factory air
pressure setting is 40 PSI. The centering heads
engage to center and square the pallet, which
puts the pallet in direct line with the centered
and squared load. Next, the pusher head
engages and delivers the pallet to the center of
the conveyor. The pallet infeed pusher is driven
by a chain and sprocket drive. An encoder
mounted on the drive shaft controls the pusher
displacement and a panel drive controls
acceleration and torque delivered to the pallet.
The load lift forks retract to deliver the
load onto the pallet and the palletized load
advances downstream. The next load to be
palletized is released simultaneously for the
same operation.
3.1 Installation Advice
All of the pallet insertion equipment will
center on the thru conveyor: a standard 126”
(3200mm) or optional 180” (4572mm) length
conveyor. The distance from the center of the
main line to the front edge of the delivered
pallet is 144” (3657.6mm). This dimension must
be maintained in order to accommodate the
full range of pallet sizes (from 24” x 24” to 48” x
84”). This will also allow adequate room for the
pallet delivery device to miss the pallet pusher
and pallet centering device.
The V-track of the carriage drive
assembly should be located 9 3/8” (238mm) off
the center line of the thru conveyor (approx. 1
3/8” or 35mm from the tension frame). These
V-tracks need to be leveled to the thru
conveyor. During installation, the carriage drive
assembly can help align the V-tracks. There are
2 alignment bolts on each end of these
assemblies, these bolts match holes in the V-
track plate and have been numbered during
set-up and testing at the SYSTEC plant. Do not
use them as jack screws.
Verify the V-tracks and carriage drives
are square and aligned with the opposing drive
set. Remove the servo drive chain and roll the
carriage assembly over the V-tracks and
lowered drive shaft. Roll the carriage from front
to back a few times to seat the V-tracks under
the carriage. Lag the V-tracks in place through
the slotted holes.
Using the eight jack screws, raise the
drive assembly so the pitch lines of the pinion
gears and gear racks align. Shim around the lag
bolt holes that are adjacent to the jack screws
on the drive assembly and lag the drives. Verify
gear-rack tooth engagement and shaft
straightness. Again, roll the carriage back and
forth over the free drive shaft to check the
location and square of the carriage to V-track
and gear engagement. One or more of the
racks have slots in them for adjustment. During
assembly at the SYSTEC plant, these gear racks
were pinned after alignment and testing and
should not need re-mounting.
The mechanical switches for the
carriage maximum travel and home positions
can be positioned while the carriage is free.
3.2 Settings & Adjustments
3.2.1 Load Lifting Fork Assembly
Figure 3-1 Forks Lifting Load

________________________________________________________________________________________________________________
PRODUCT SERVICE MANUAL LOAD PALLETIZING DEVICE
8
The fork assembly is powered in and
out by a rack and pinion drive and is guided by
cam followers. The side to side movement of
the fork assembly should be limited to 1/8”
(3mm) max. The cams can be adjusted in and
out. Verify the fork assembly is set square on
the rack. The encoder responsible for
controlling the forks’ position is located on this
drive shaft.
The load lifting forks should lie at least
½” (13 mm) below and parallel to the top of the
thru conveyor rolls when the fork assembly is
lowered and resting on the rubber pads. This
allows the plow teeth to be lower than the top
of the conveyor rollers as the plow rolls on the
forks.
Forks can extend 24 inches (609.6mm)
beyond front plate to 1 inch (25.4mm) behind
front plate. Individual fork adjustments can also
be made. By using the fork clamping
assemblies, the individual forks can be moved
right and left, and the fork tips can be moved
up and down.
3.2.2 Carriage Guide Rollers
In order for the forks to be parallel to
the rolls, the carriage V-tracks and Thru
Conveyor must be level. This should be taken
care of during installation, using the supplied
shims if necessary. Also, the yoke roll total
clearance around the vertical carriage columns
should be 1/16” (1.5mm). If the clearance
exceeds 1/8” (3mm), larger 2-1/4” (57mm)
outer diameter yoke rolls can be installed.
3.2.3 Plow and Dampers
Plow pressure against the product
waster sheet (or product) is accomplished using
the weight of the plow itself and either (or
both) a hydraulic damper or spring assembly.
The damper produces a constant force against
the product and supports the plow as it
retracts. The hydraulic damper can be adjusted
by detaching the top end from the backboard.
Then the force can be increased or decreased
by pulling the rod out as far as possible and
turning counterclockwise or clockwise.
CAUTION: The dampers must close to
stop the machine as the backboard contacts
the product. Both dampers on the plow should
be adjusted the same, as should both plows.
The spring assembly provides extra plow force
at the end of the stroke. Different combinations
of springs and chain links will change the
amount and timing of that force.
The angle of the plow blade can be
adjusted by the height of the rubber pads in the
vertical cam follower slot. A ½” (13 mm) rubber
pad was installed at the SYSTEC plant
3.2.4 Backboard Assembly
Located on the backboard assembly is a
set of proximity switches which control the load
centering stroke of the machine. These
switches read the location of the cam follower
on the plow. Also attached to the backboard is
the proximity flag for the up and down machine
motion. These proximity switches are located
on an adjusting slide attached to the carriage
frame.
3.3 Cycles
The operation of the Load Palletizing
Device is divided into three separate cycles:
Load Cycle No Pallet or Bypass Mode, Load
Cycle with Pallet, and Pusher Cycle.
3.3.1 Load Cycle No Pallet (Bypass Mode)
The load moves straight through the
Load Palletizing Device without a pallet being
placed under it.
3.3.2 Load Cycle with Pallet
The load is centered and raised inside
the device to allow the placing of a pallet
underneath the load. Once a pallet has been
positioned, the load is lowered onto the pallet
and the palletized load exits the device.
3.3.3 Pusher Cycle
The pusher positions the pallet under a
raised load inside the device.

________________________________________________________________________________________________________________
PRODUCT SERVICE MANUAL LOAD PALLETIZING DEVICE
9
3.4 Operation Levels
The Load Palletizing Device can operate
in either Manual Jog Controls mode or with
Auto Pallet Selection enabled. The different
cycles allow correcting a problem in one area
without affecting the operation in other areas.
3.4.1 Manual Jog Controls
The operator uses push buttons and
switches on the panel to manually run the
device. The operator has full control minus
some safeguards to protect the machine. The
operator is given more control when on the
Service Screen. These controls are generally
only used to correct problems that occurred
while in automatic. The controls for the device
allow opening and closing the heads, raising
and lowering the heads, running the forks in
and out, running the pallet pusher forward and
reverse, and closing and opening the pallet
centering device.
Once a cycle has started, use the
Manual Jog Controls to completely cancel a
cycle. The manual jog controls can produce the
actions that would normally indicate that the
cycle has finished.
3.4.2 Auto Pallet Selection
The pallet type may be either manually
chosen or transferred to the Load Palletizing
Device automatically. The only information the
device needs for each load is the type of pallet
to be used. If the Pallet Selection is in manual,
the operator needs to enter the pallet type for
each load once it is in position upstream of the
Load Palletizing Device. In automatic, the pallet
type is selected at the stripper console, either
by the operator or by the Bar Code Scanner.
When the load moves to the Load Palletizing
Device, the pallet type is automatically sent to
the device controls.
3.4.3 Bypass Mode
In addition to the above modes, the
device also has a Bypass Mode. When the
Bypass mode is selected, loads will move
straight through the device and all of the
other cycles are disabled. This mode would
generally only be used when there is a problem
with the device that cannot be immediately
repaired or corrected.
4. Computer Controls
The operator controls equipment using
a high-performance computer panel, which
incorporates the latest technology to provide
an easy-to-use touch screen.
4.1 How to Use the Computer
Panel
The computer panel is made up of three
areas: Display/Touch Screen, Numeric
Membrane Keypad and Function Keys. The
Display/Touch Screen allows the operator to
touch the screen to carry out commands.
Function keys allow the operator to go to
different screens. When a pallet type needs to
be changed, use the keypad to enter the
number desired. Then use the ENTER key when
the desired number has been completed.
4.2 Control Basics
Figure 4-1 Title Screen
After turning on the control power, the
TITLE SCREEN appears (See Figure 4-1).
When the Title Screen appears, press F1
to enable all drives. Press F7 to home plow
heads before continuing to other operations.
Function Keys on Title Screen:
F1 = Drive Power On/Off

________________________________________________________________________________________________________________
PRODUCT SERVICE MANUAL LOAD PALLETIZING DEVICE
10
F2 = Status Screen
F3 = Service Screen (Authorized Personnel Only)
F4 = Pallet Select
F5 = ASi Diagnostics
F6 = Faults
F7 = Home Heads
Figure 4-2 Status Screen
4.2.1 Run Manually Using Jog Controls
When problems occur in automatic, the
operator may choose to use the manual jog
controls on the panel (see Figure 4-3).
Figure 4-3 Full Control Panel including jog controls
Use as follows:
• To stop the device immediately, use the
EMERGENCY STOP button in the upper left
corner.
• When the switch is set to Bypass, loads will
move straight through the device and all of
the other cycles are disabled. This mode
could be used when there is a problem with
the device, and it cannot be immediately
repaired.
• Control power to the device by using the
PULL ON/PUSH OFF button.
• To open or close the heads of the device,
use the PLOW switch.
• To lower or raise the heads, use the LIFT
PULL UP/PUSH DOWN button.
• To jog the thru conveyor forward or
reverse, use the CONVEYOR switch.
• To release the conveyor, use the other thru
conveyor MANUAL RELEASE switch.
• To jog a pallet forward or reverse use the
PALLET PUSHER switch located on the
status screen.(See Figure 4-2)
• To open or close the pallet pusher device,
use the CENTERING DEVICE CYCLE switch
located on the status screen.(See Figure 4-
2)
4.3 How to Setup the Device and
Run Diagnostics
The Service Screen is used to setup the
device or to diagnose problems with the
equipment.
Figure 4-4 Service Screen
NOTE: The Service Screen is reserved for
authorized service personnel use only. Using it
may cause unwarranted damage to the system.
To Setup the Device:
1. Access the SERVICE Screen (F3) (See Figure
4-4)
2. Press button next to Enter Access Code (the
system is password protected)
3. Enter the Access Code using the keypad.
4. Press ENTER
5. When finished with this screen, select F8 to
return to the MAIN SCREEN.

________________________________________________________________________________________________________________
PRODUCT SERVICE MANUAL LOAD PALLETIZING DEVICE
11
4.3.1 Pallet Select Screen
Press F4 Pallet Select from the Main
Screen to reach the Pallet Select Screen. (See
Figure 4-5).
Figure 4-5 Pallet Select Screen
• Press F1 to program type number.
• Press F2 to program length.
4.3.2 Asi Diagnostics
Press F5 from the main menu screen to
reach the Asi Network Status Screen (see Figure
4-6).
Figure 4-6 Diagnostic Screen
The on or off condition is indicated by
the illuminated digit. Consult SST Module
Manual for troubleshooting. Press PG DN to see
the control module status screen (see Figure 4-
7).
Figure 4-7 Control Module Status Screen
The status of the LPD control modules
are indicated by the illuminated digit next to
the description.
4.4 How to Correct Device Faults
4.4.1 View Faults with the LPD
• The STATUS Screen will show when the
device has faulted. Both a flashing auto
pushbutton and a rotating beacon indicate
a fault condition.
• Press F6 from the main menu to view the
FAULT SCREEN (See Figure 4-8).
Figure 4-8 Fault Screen
• Either a Control Fault or a Servo Fault on X1
or X2 has occurred.
• Press PG DN to view control faults or X1 FLT
or X2 FLT to view servo faults
• The fault clears automatically after the fault
condition has been corrected.

________________________________________________________________________________________________________________
PRODUCT SERVICE MANUAL LOAD PALLETIZING DEVICE
12
4.4.2 LPD Control Faults
8000 – Loss of Control Power – Control power
has been detected as being off. Check control
power buttons and all Emergency stop
equipment to ensure personnel safety before
restarting equipment.
8001 – Axis Emergency Stop Condition – A
Servo Module in the control has detected an
Emergency stop condition. Check for a Servo
Module fault code displayed on X1 FLT or X2
FLT or a possible Servo Drive problem.
8002 – Axis Over travel Alarm – A LPD plow
over travel limit switch has been detected as
being tripped. Enter the Service Screen and
Enable Override and press the appropriate jog
key to jog the plow off of the tripped limit.
8003 – Motor 1B Fork Assembly Motor
Off/Trip Fault – The Fork Assembly Motor MSP
has been detected as being off or tripped.
Check for obstructions in the fork assembly
path and make sure that all personnel are clear
before resetting the MSP. Check for possible VF
Drive faults or motor problems.
8004 – Motor 1A Carriage Lift Assembly Motor
Off/Trip Fault - The Carriage Lift Assembly
Motor MSP has been detected as being off or
tripped. Check for obstructions in the Lift
assembly path and make sure that all personnel
are clear before resetting the MSP. Check for
possible mechanical or motor problems.
8005 – Motor 2B Fork Assembly Motor
Off/Trip Fault - The Fork Assembly Motor MSP
has been detected as being off or tripped.
Check for obstructions in the fork assembly
path and make sure that all personnel are clear
before resetting the MSP. Check for possible VF
Drive faults or motor problems.
8006 – Motor 2A Carriage Lift Assembly Motor
Off/Trip Fault - The Carriage Lift Assembly
Motor MSP has been detected as being off or
tripped. Check for obstructions in the Lift
assembly path and make sure that all personnel
are clear before resetting the MSP. Check for
possible mechanical or motor problems.
8007 – Motor 5 Pallet Pusher Motor Off/Trip
Fault – The Pallet Pusher Motor MSP has been
detected as being off or tripped. Check for
obstructions in the Pallet Pusher path and make
sure that all personnel are clear before
resetting the MSP. Check for possible VF Drive
faults or motor problems.
8008 – Motor 6 Conveyor Motor Off/Trip Fault
- The Conveyor Motor MSP has been detected
as being off or tripped. Check for obstructions
in the conveyor belt path and make sure that all
personnel are clear before resetting the MSP.
Check for possible VF Drive faults or motor
problems.
8009 – Pallet Centering Device Cycle Failure –
The Pallet Centering Device has detected a
cycle failure. This fault can be caused by a
possible lack of an air supply or bad solenoid
(SOL1). Another possible problem could be a
reverse limit proximity switch failure (PX1).
8010 – Pallet Pusher Cycle Time Failure - The
Pallet Pusher has had a cycle time failure. This
fault occurs if the pallet pusher is detected as
running to long. Check for obstructions in the
pusher path, a possible damaged pallet or a
misadjusted proximity switch (PX2-PX3).
8011 – Pallet Pusher Proximity Switch Failure –
Both the forward proximity switch (PX3) and
the reverse proximity switch (PX2) have been
detected in a “On” condition. Check the
adjustment of each switch or for a possible bad
switch.
8012 – Motor 1B Fork Assembly Motor Cycle
Time Failure - The Fork Assembly has had a
cycle time failure. This fault occurs if the fork
assembly is detected as running to long. Check
for obstructions in the fork assembly path, a
possible damaged gear or a misadjusted
proximity switch (PX10-PX11).
8013 – Motor 1B Fork Assembly Proximity
Switch Failure - Both the forward proximity
switch (PX11) and the reverse proximity switch
(PX10) have been detected in a “On” condition.
Check the adjustment of each switch or for a
possible bad switch.

________________________________________________________________________________________________________________
PRODUCT SERVICE MANUAL LOAD PALLETIZING DEVICE
13
8014 – Carriage Lift Motor 1A Cycle Time
Failure - The Carriage Lift Assembly has had a
cycle time failure. This fault occurs if the
Carriage Lift assembly is detected as running to
long. Check for obstructions in the Lift assembly
path, a possible damaged gear or a misadjusted
proximity switch (PX12-PX13).
8015 – Carriage Lift Motor 1A Proximity Switch
Failure - Both the up proximity switch (PX12)
and the down proximity switch (PX13) have
been detected in a “On” condition. Check the
adjustment of each switch or for a possible bad
switch.
8016 – X Axis 1 Plow Cycle Time Failure – This
Fault Occurs when the Plow home proximity
switch (PX15) has been detected in the “Off”
condition and the Plow collapsed proximity
switch (PX14) has not been detected in a
predetermined time. Check the adjustment of
both plow proximity switches.
8017 – X Axis 1 Plow Proximity Switch Failure -
Both the home proximity switch (PX15) and the
collapsed proximity switch (PX14) have been
detected in a “On” condition. Check the
adjustment of each switch or for a possible bad
switch.
8018 – Motor 2B Fork Assembly Motor Cycle
Time Failure - The Fork Assembly has had a
cycle time failure. This fault occurs if the fork
assembly is detected as running to long. Check
for obstructions in the fork assembly path, a
possible damaged gear or a misadjusted
proximity switch (PX20-PX21).
8019 – Motor 2B Fork Assembly Proximity
Switch Failure - Both the forward proximity
switch (PX21) and the reverse proximity switch
(PX20) have been detected in a “On” condition.
Check the adjustment of each switch or for a
possible bad switch.
8020 – Carriage Lift Motor 2A Cycle Time
Failure - The Carriage Lift Assembly has had a
cycle time failure. This fault occurs if the
Carriage Lift assembly is detected as running to
long. Check for obstructions in the Lift assembly
path, a possible damaged gear or a
misadjusted proximity switch (PX22-PX23).
8021 – Carriage Lift Motor 2A Proximity Switch
Failure - Both the up proximity switch (PX22)
and the down proximity switch (PX23) have
been detected in a “On” condition. Check the
adjustment of each switch or for a possible bad
switch.
8022 – X Axis 2 Plow Cycle Time Failure - This
Fault Occurs when the Plow home proximity
switch (PX25) has been detected in the “Off”
condition and the Plow collapsed proximity
switch (PX24) has not been detected in a
predetermined time. Check the adjustment of
both plow proximity switches.
8023 – X Axis 2 Plow Proximity Switch Failure -
Both the home proximity switch (PX25) and the
collapsed proximity switch (PX24) have been
detected in a “On” condition. Check the
adjustment of each switch or for a possible bad
switch.
8024 – Carriage Lift Sequence Fault – This fault
occurs when one side of the carriage makes
either the up or down proximity switch .5
seconds before the other side. Make sure that
the up and down proximity switches are
adjusted to the same locations on both sides
for equal lifting and lowering of the carriage
assembly.
8025 – Carriage X Axis 1 Servo Drive Fault - The
servo drive for X Axis 1 has been detected as
having a fault condition. Look at the Servo Drive
numeric display to see the fault code. Refer to
the Servo Drive Manual for fault information.
8026 – Carriage X Axis 2 Servo Drive Fault - The
servo drive for X Axis 2 has been detected as
having a fault condition. Look at the Servo Drive
numeric display to see the fault code. Refer to
the Servo Drive Manual for fault information.
5. General Maintenance
A comprehensive maintenance program
is essential to ensure accurate and dependable
performance by any automated material

________________________________________________________________________________________________________________
PRODUCT SERVICE MANUAL LOAD PALLETIZING DEVICE
14
handling system. The maintenance program
must conform to national, state and local safety
guidelines and standards. It should also include
extensive training of all operators and
maintenance personnel.
SYSTEC devices have been designed to
require minimal maintenance. Quality
materials, components and intelligent design
features have been incorporated into the
system to ensure a long, useful operating life.
However, failure to observe standard
equipment monitoring, cleaning, adjustment,
servicing and repair procedures could result in
personal injury or death, equipment damage,
component wear and equipment down time.
This section is by no means an exhaustive list of
items that should be maintained and checked.
The information described in the following
passages and tables should be used as a
general guide for the establishment of a
comprehensive conveyor system maintenance
program.
______________________________________
WARNING: Although the system was designed
with safety foremost in mind, the existence of
pneumatic devices, moving mechanical devices,
and electrical components make the system
inherently hazardous. Read all the established
safety standards and the Safety section of this
manual prior to operation or performing
maintenance on the equipment and/or system.
An effective maintenance program
should include visual inspections, routine
cleaning, prescribed intervals for maintaining
and servicing components, quick repair of
damaged or worn parts, and a safe
comprehensive set of procedures. A major part
of keeping machinery and electronics in a fully
functional state is to prevent conditions that
could cause damage or unnecessary wear to
the equipment. Foreign items such as rags, ties,
assembly parts, fasteners, screws and tools
should be kept away from any of the system’s
moving parts. Failure to do so could cause
failure of components or entire assemblies.
Electronic components should be kept free
from moisture and dirt. Panels and access
covers should be reinstalled after being
removed for maintenance or cleaning. Before
starting up the system for operation or
maintenance, make a visual inspection of the
system’s conveyors, pneumatic actuators,
electrical enclosures, electric motors, and
power cables. Check for debris, damage, and
parts failure. Look for broken or leaking
pneumatic airlines, frayed power cables,
excessive wear of moving parts, signs of metal
fatigue, and any obvious changes in appearance
of components. Check to see that rags, spare
parts, and tools have been removed from the
area prior to applying power to the system.
5.1 Cleaning
Although the system was designed to
operate in a heavy-duty industrial environment,
it can be adversely affected by the buildup of
fluids, debris, and excessive dust. The system
should be periodically checked to ensure all
moving parts are kept free of excessive dust
and debris. Excessive buildup of dirt, dust,
debris, oil, and/or grease will increase friction
and put undue stress on bearings, shafts,
chains, pneumatic cylinders, sprockets, and
power units. Components should be cleaned
with appropriate solutions.
Periodic cleaning may prevent down
time. Particular attention should be taken to
ensure that photo-eyes lenses are kept clean of
dust and debris. Excessive dust will adversely
affect accurate photo-eye measurements and
“sensing” of passing loads.
Although it may seem like simple
housekeeping, cleaning under conveyors is
actually preventive maintenance. Remove all
scrap and debris from the conveyor area. Scrap
and loose materials that may get caught up in
the belt, drive motor, and take-ups and could
result in belt mis-tracking and bearing wear.
5.2 Lubrication
Check the oil level after the first four
weeks of operation by removing the fill plug. If
oil level is even with the lower lip of the fill
hole, no oil is required. If oil cannot be seen, fill

________________________________________________________________________________________________________________
PRODUCT SERVICE MANUAL LOAD PALLETIZING DEVICE
15
to the edge. All oil levels and oil quality must be
checked every 2,500 hours.
If the oil is contaminated, burned or
waxed, change the oil immediately and flush
out the box if necessary.
The recommended interval for changing
lubricant is every 2,500 operating hours or 6
months, whichever comes first. When the
recommended lubricant is not available, it is
permissible to use a lubricant having equivalent
characteristics, but it is not recommended that
lubricants of different brands be mixed. Under
no circumstances should synthetic lubricants of
differing grades be mixed. Use the following:
EXXON OIL – Cylesstic TK 460 Oil
MOBILE OIL – 600W Cylinder Oil
TEXACO OIL – Vanguard 460 Oil
OR EQUIVALENT
6. Preventive Maintenance
The Load Palletizing Device Preventive
Maintenance Schedule (Figure 6-3) will assist in
identifying components that require routine
maintenance. The schedule identifies the
recommended interval and type of service
required to keep the machine in optimum
operating condition. The items on the matrix
should be included in your regular maintenance
schedule and must be maintained in order to
uphold warranty status on new units.
Procedural steps for maintenance are covered
in general earlier in this section of the manual.
The Load Palletizing Device Preventive
Maintenance Checklist (Figure 6-4) is provided
to record each preventive maintenance
check, if you do not currently have a similar
form. The checklist can be used to keep your
maintenance records on file for reference, and
can also be useful identifying above-normal
adjustments, use of lubrications, loose
mounting, etc.
After the first four weeks of operation,
inspect each of the items on the Load
Palletizing Device Preventive Maintenance
Schedule, as shown below. Begin your
scheduled maintenance on the conveyor from
that day forward.
Please note that all SYSTEC load-carrying
rollers and tension rollers are sealed, non-
servicing, pre-lubricated-for-life bearings. Some
cast housing bearings are equipped with grease
fittings for re-lubrication.
6.1 Maintenance Tables
Periodic inspection, cleaning and
adjustment of certain conveyor system
components is essential in keeping the system
operating properly. The following tables
provide lists of these items and the
recommended actions and frequencies
required to keep them operating properly. Use
local maintenance procedures to correct
deficiencies and repair damaged items found
during these periodic checks. See
recommended daily and periodic preventive
maintenance tables, (Figures 6-1 and 6-2).
6.1.1 Recommended Daily Preventive Maintenance Table
Recommended Daily Inspection, Cleaning, and Adjustments
Item
Action
Emergency Stop Switches, push buttons, and other
safety devices and guards
• Check for proper actuation and installation.
Replace and/or repair as required.
Photo-eyes (photo-sensors, photo-switches)
• Visually inspect for lens cleanliness and proper
adjustment/alignment. Clean daily or as required
by environmental conditions. Adjust as required.
Conveyors, pushbutton stations, and automated
devices
• Inspect for obvious damage, loose components,
and excess accumulation of dirt, debris, or
moisture. Repair, clean, and/or dry as required.
Figure 6-1 Recommended Daily Preventive Maintenance Table

________________________________________________________________________________________________________________
PRODUCT SERVICE MANUAL LOAD PALLETIZING DEVICE
16
6.1.2 Recommended Periodic Preventive Maintenance Table
Recommended Periodic Inspection, Cleaning, and Adjustments
Item
Action
Frequency
PLR, PLRA Conveyor -
General
• Check load-carrying rollers for wear and/or
damage.
Monthly
• Listen to motors, bearings, and gear reducers for
unusual or excessive noise.
• Check tension rollers for wear and/or damage.
• Check motors for excessive heat.
• Check all mounting hardware is properly secured.
• Inspect gear reducers for oil leaks.
• Inspect PVC belt for wear and delamination.
Semi-annually
• Inspect all components (bearings, pillow block
bearings, tension roller, etc.) for wear and proper
operation.
• Remove and clean all guards.
Annually
Brakes
• Check floor mounted brakes for proper actuation
and braking power.
Monthly
General cleaning under
conveyors and devices
• Remove all scrap material and debris from under
conveyor and devices.
Weekly
Photo-eye
• Check mounting and alignment
Monthly
Reducers
• Change gearbox oil
2,500 hours or six
months whichever
comes first.
Conveyors, pushbutton
stations, and
automated devices
• Inspect for obvious damage, loose components,
and excess accumulation of dirt, debris, or
moisture. Repair, clean, and/or dry as required.
Monthly
Control Panel
Enclosures
• Inspect all components and connections for
damage.
• Inspect for and treat corrosion.
• Clean components with a brush or oil/water free
air.
Annually
PLC / SLC
• Change battery
Annually
Guide Wheels
• Check mounting, tighten as required
• Check for excessive wear on all guide rollers
Monthly
UHMW Wear pads
• Check for wear
Annually
Figure 6-2 Recommended Periodic Preventive Maintenance Table

________________________________________________________________________________________________________________
PRODUCT SERVICE MANUAL LOAD PALLETIZING DEVICE
17
6.2 Preventive Maintenance Schedule
Load Palletizing Device Conveyor Preventive Maintenance Schedule
Period
(Months)
Check/Service
Other
Six-Month
Checks
Mounting
Wear
Lube
Adjust
Clean
Align
3
6
9
12
3
6
9
12
3
6
9
12
3
6
9
12
3
6
9
12
3
6
9
12
Dr. Thru
Conveyor
Dr. Head
In/Out
Dr. Pallet
Head
Dr. Head
Raise, R
Dr. Head
Raise, L
Dr. Fork, R
Dr. Fork, L
Bearings
Chains
Sprockets
Cables
Racks
Pinions
Guide Rollers
UHMW Wear
Blocks
Photoeye
Limit
Switches
Proximity
Switches
Figure 6-3 Load Palletizing Device Preventive Maintenance Schedule

________________________________________________________________________________________________________________
PRODUCT SERVICE MANUAL LOAD PALLETIZING DEVICE
18
6.3 Preventive Maintenance Checklist
Load Palletizing Device Preventative Maintenance Checklist
Date of Inspection:
Inspected By:
Use this form when inspecting SYSTEC Load Palletizing Device.
Keep copies of all inspections on permanent file for reference.
Check/Service
Service Performed
1
2
3
4
5
6
7
8
Gearmotor
Oil Level
Oil Color
Oil Viscosity
Mounting
Check/Service
Service Performed (Overall Components)
Bearings
Chains
Sprockets
Cables
Racks
Pinions
Guide Rollers
Steel Wear
Blocks
UHMW Wear
Blocks
Photoeye
Limit Switches
Proximity
Switches
Shaft Encoders
Figure 6-4 Load Palletizing Device Preventive Maintenance Checklist

________________________________________________________________________________________________________________
PRODUCT SERVICE MANUAL LOAD PALLETIZING DEVICE
19
6.4 Replacing Components
6.4.1 Replace the Centering Device Wheels
1. WARNING: Perform LOCKOUT/ TAGOUT PROCEDURES. Failure to comply could result in personal
injury and/or equipment damage.
2. Remove Pallet Centering Tables.
3. Remove the 3 securing bolts from wheel assembly [DWG 068b030 (4 of 5)].
4. Remove alignment pins [DWG 068030 (5 of 5)].
5. Replace worn parts and re-assemble.
6.4.2 Replace the Carriage Wheels
1. WARNING: Perform LOCKOUT/TAGOUT PROCEDURES. Failure to comply could result in personal
injury and/or equipment damage.
2. Remove hold-down cams from carriage drive assembly and lift wheel off V-track.
3. Remove lock nut for clamp pin. [DWG 068D001]
4. Replace worn parts and re-assemble.
6.4.3 Replace Fork Encoders
[DWG 068D014]
1. WARNING: Perform LOCKOUT/TAGOUT PROCEDURES. Failure to comply could result in personal
injury and/or equipment damage.
2. On the far side away from the motor, remove flange bearing, pillow block bearing and pinion gear.
3. Loosen encoder clamp collar and torque arm screw and slide encoder off the shaft.
4. Replace encoder, bearings, pinion gear, spacer shims and adjust gear train pitch lines.
6.4.4 Replace Lift Motor
[DWG 068D001]
1. WARNING: Perform LOCKOUT/TAGOUT PROCEDURES. Failure to comply could result in personal
injury and/or equipment damage.
2. Raise forks and unhook chain spring.
3. Either use column safety pins or lower carriage to rest position on rubber pads.
4. Manually release motor brake and verify lift chains are not tensioned.
5. Remove sprockets, guards, bearings, and then replace the motor.
6.4.5 Replace the Pallet Infeed Pusher Motor [DWG 068D005 (3 of 3)]
1. WARNING: Perform LOCKOUT/TAGOUT PROCEDURES. Failure to comply could result in personal
injury and/or equipment damage.
2. Remove motor flange bolts an replace motor.
6.4.6 Replace the Servo Motor or Gearbox [DWG 068B013]
1. WARNING: Perform LOCKOUT/TAGOUT PROCEDURES. Failure to comply could result in personal
injury and/or equipment damage.
2. Unplug servo motor and remove drive chain to line shaft.
3. Replace parts as required.

________________________________________________________________________________________________________________
PRODUCT SERVICE MANUAL LOAD PALLETIZING DEVICE
20
6.4.7 Replace the Fork Assembly
1. WARNING: Perform LOCKOUT/TAGOUT PROCEDURES. Failure to comply could result in personal
injury and/or equipment damage.
2. Remove ½” clamp bolts and replaced fork assembly.
3. Adjust fork location.
6.4.8 Replace the Pallet Centering Device Air Cylinder
[DWG 068D004 (1 of 4)]
1. WARNING: Perform LOCKOUT/TAGOUT PROCEDURES. Failure to comply could result in personal
injury and/or equipment damage.
2. Remove pallet slide tables.
3. Disconnect air supply and bleed air pressure.
4. Unbolt air cylinder and cables.
5. Replace items required.
6. Verify system moves freely; check spacer placement.
7. Procedure to set the pneumatics on the LPD Plough Plate:
The gauges and solenoids are mounted on plate as shown
below. Set the pressure regulator to 0.4MPa
Wind the pressure relief valve knob anti-clockwise to set it
to the minimum pressure build up.
Manually close the LPD on to the load and check that the
base sheet is fully folded and correctly creased.
If the pressure is not sufficient to fold the base sheets, then
turn the pressure relief knob by half a turn clockwise to
increase the resistance and repeat the test. Keep repeating
this sequence for both heads until the base sheets are correctly folded.
The pneumatic cylinders that actuate the LPD plough plates have an adjustable cushion built in to each end of
the cylinder as shown above. This is set and adjusted by means of a screw with lock nut at each end of the
cylinder.
It is normally advisable to set to near the maximum amount of available cushioning for this application.
To adjust the extending cushioning use the screws at the rod end. Release both rod end lock nuts and turn the
screws clockwise until it is just tight on both cylinders. Operate the plough plate with the solenoid manual
buttons and check the motion. You should see that it is very slow at the end of the stroke. The cylinder is now
set at maximum cushioning effect.
Turn both rod end screws anti-clockwise ¼ turn and operate the plough plates to check the motion. More ¼
turns can be made until the plates show a slight slowing before stopping. Do not adjust so far that the plate
slams against its end stop. When satisfied tighten up the lock nuts.
To adjust the retract cushioning carry out the same procedure on the cylinder blank end screws. Ensure that
both cylinders on a single plough plate have the same degree of cushioning to avoid unnecessary stresses on the
plough plate fr
Table of contents