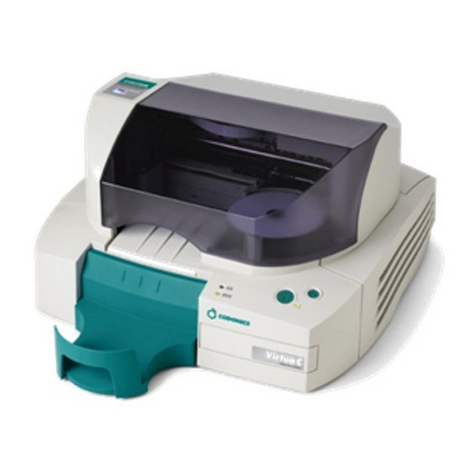
Systor DiscMaster 101P Manual instruction


Copyright © 2008 Systor. All Rights Reserved.
Manual revision 1.5

Table of Contents
DiscMaster 101P - Introduction....................................................................9
Minimum System Requirements...............................................................9
Unpacking and Inspection..........................................................................10
The Printer Parts..........................................................................................11
The Quick Start Guide.................................................................................13
Step 1 - Insert Software CD....................................................................14
Step 2 – Plug In......................................................................................15
Step 2 – Plug In......................................................................................16
Step 3 – Remove Foam..........................................................................17
Step 4 – Connecting the DiscMaster......................................................18
Step 5 – Power On.................................................................................19
Step 6 – Installing DiscWorks.................................................................20
Step 7 – Install Print Driver.....................................................................21
Step 8 – Disc Baskets ............................................................................25
Step 9 – Install Ink..................................................................................26
Step 10 – Start DiscDirect......................................................................28
Step 11 – Ink Alignment .........................................................................29
Step 12 – Load Printable Disc................................................................30
Step 13 – Cartridge Setup......................................................................31
Step 14 – Best Arrows............................................................................33
Step 16 – Calibrate Print Position...........................................................36
DiscDirect – Printing and Burning.............................................................44
Job Types...............................................................................................47
Print Only Mode......................................................................................48
Data Burn Mode.....................................................................................49
Options Button ................................................................................53
Audio Burn Mode....................................................................................55
Mixed Burn Mode...................................................................................58
Disc to Image Mode ...............................................................................62
Streaming Mode.....................................................................................64
Auto Insert Mode....................................................................................66
Auto Insert Example:.......................................................................67
Open Jobs Tab.......................................................................................68
File Types...............................................................................................70
DiscDirect Properties..............................................................................71
Unit Properties.............................................................................................73
Sample Session: Burning a CD/DVD ....................................................75
5

DiscStudio – Graphics Design ...................................................................83
Navigation ..............................................................................................84
Included Fonts, Backgrounds and Clipart...............................................85
Opening and Saving Files ......................................................................86
Starting a New File..........................................................................86
Saving a File ...................................................................................86
Opening a File.................................................................................87
Selecting a Template.......................................................................88
CD/DVD Disc Settings............................................................................89
Using the Drawing Tools ........................................................................90
Using the Drawing Tools ........................................................................91
General Notes.................................................................................92
Description of the Drawing Tools............................................................94
Open Curve Tool.............................................................................94
Closed Curve Tool...........................................................................95
Freehand.........................................................................................96
Polygon...........................................................................................97
Rectangle........................................................................................98
Rounded Rectangle.........................................................................99
Ellipse............................................................................................100
Halo...............................................................................................101
Arc.................................................................................................102
Line ...............................................................................................104
Clipart............................................................................................105
Arrow.............................................................................................106
Text...............................................................................................107
Manipulating Objects............................................................................108
Line and Fill Properties.........................................................................111
Patterns and Gradients .................................................................112
Fill Image.......................................................................................113
Fill Pattern.....................................................................................114
Fill Gradient...................................................................................115
Duplicating Objects ..............................................................................116
Using Levels.........................................................................................117
Transparency and Levels.....................................................................119
Zoom....................................................................................................120
Using Backgrounds and Clipart............................................................121
Adjusting the Background Image ..................................................122
Adding Your Own Backgrounds or Clipart.....................................123
Insert Data Field...................................................................................124
Data Field List: ..............................................................................125
Text ......................................................................................................126
Adding Text to your Label .............................................................126
A Sample Text Session........................................................................127
Step 1 – Entering the Text.............................................................127
Step 2 – Setting the Typeface and Size........................................128
Wordwrap......................................................................................129
6
Effects...........................................................................................131
Edge:.............................................................................................132
Questions and Answers (FAQ) DiscStudio...........................................134
Sample Session: Printing a CD/DVD....................................................137
Printer Properties Setup................................................................137
Printing a CD/DVD ........................................................................141
Uninstalling DiscStudio.........................................................................150
Supplies .....................................................................................................151
Ink Cartridges.......................................................................................151
CDs and DVDs.....................................................................................152
Transporting Your DiscMaster unit..........................................................153
DiscMaster 101P AutoPrinter and CD/DVD Publisher FAQ....................155
Robotic Issues......................................................................................155
Printing Issues......................................................................................156
General Issues.....................................................................................158
FCC Compliance Statement......................................................................161
7

8

DiscMaster 101P - Introduction
This manual covers setup and operation of the DiscMaster 101P
CD/DVD Publisher AND the DiscMaster 101P Auto Printer and
the included driver and operational software. Though both units
share most functions, certain software and disc burning operations
mentioned in this manual do not apply to the DiscMaster 101P Auto
Printer. Hereafter both the DiscMaster 101P CD/DVD Publisher and
the DiscMaster 101P Auto Printer will be referred to as the
DiscMaster unit unless features specific to each unit need to be
noted. The DiscMaster 101P CD/DVD Publisher can run completely
unattended, printing and burning up to 1001CD or DVD discs per
session.
This manual is intended to:
Familiarize you with the basic operation of your new DiscMaster
unit.
Provide a quick and easy guide to publishing your first disc, using
the included DiscStudio and DiscDirect software.
Minimum System Requirements
Your system should meet the minimum requirements for running
the DiscMaster unit and the DiscWorks software:
Minimum 733 MHz Pentium or equivalent
Windows 2000, XP, 2003 Server or Vista
Minimum 512 MB RAM
Minimum 50MB Hard Disc Space (Minimum 1.5GB Hard Disc
Space if installing all included clipart and background
images). Additional Hard Disc space will be required to copy
CD/DVD discs.
One Available USB 2.0 port (disc burning not supported
with USB 1.1)
DVD-ROM drive (for software installation)
If your system falls below these requirements, the speed and
stability of the DiscMaster unit will be affected.
1Printing 100 discs requires the Systor Kiosk Kit to be installed.
9

Unpacking and Inspection
Please inspect the DiscMaster carton to ensure no damage has
occurred during shipping. Open the carton and remove the parts
box located at the back of the shipping box. Lift the printer out
carefully and remove the foam supports and plastic bag. Open the
parts box and verify that all of listed parts are included with your
unit:
DiscMaster 101P CD/DVD Publisher OR DiscMaster 101P
Auto Printer
(2) Black plastic disc baskets
12VDC 4.16A Power Supply
Universal Power Cord
(3) Blank Sample Ink-jet Printable CDs
Tri-Color (CMY) Ink Cartridge
Black (K) Ink Cartridge
Software Install disc
USB 2.0 Cable
Setup and operation manual
Quick start guide
NOTE: Do NOT attempt to remove the internal foam
packing inside the DiscMaster unit at this time.
IMPORTANT: The shipping carton and custom designed packaging
must be saved to avoid damage in case you ever need to transport
or ship your DiscMaster unit.
10

The Printer Parts
The illustration below shows the DiscMaster 101P CD/DVD Publisher
(the DiscMaster 101P Auto Printer is the same with the exclusion of
the CD/DVD Recorder and its associated parts) with the front cover
open to help you get to know your printer components.
Please note that there are NO user serviceable parts in the
DiscMaster unit (except ink cartridges) and any alteration of
included components will void your warranty.
The Front Cover (not shown) protects the precision mechanism of
your DiscMaster unit from potential damage. This cover must be
closed during printing and burning operations as internal sensors
will not allow operation with the cover open.
The Disc Transport Robot guides the discs within the DiscMaster
unit allowing completely automated operation.
This is a very precise mechanism that has been carefully aligned at
the factory. Never manually move the Disc Transport Robot as,
this can affect alignment and possibly damage the unit. To realign
the Disc Transport Robot see page 71
The Print Tray located in the center of the DiscMaster unit and
holds the ink-jet printable disc while being printed
The Color Ink Carrier is colored light green and holds the Color
(CMY) Ink cartridge (Lexmark 17 or 27) in place during operation.
The Black Ink Carrier is colored dark green and holds the Black
(K) Ink cartridge (Lexmark 16 or 26) in place during operation.
11

The Printer Parts (continued)
The Power Button turns the DiscMaster unit ON or Off, the
DiscMaster unit will turn on automatically when plugged in
(EXCEPT for the first time that the unit is plugged in with the Disc
Transport Robot in the parked position).
The Control Button with the front cover open, pressing the control
button will move the Ink cartridges into the center position for
easier access when changing Ink cartridges. After closing the front
cover, the cartridges will move back to the Ready to Print position.
This button is also used to reset the printer if any errors occur.
The Control Lights are the two LEDs which show the status of the
printer. The Green lighted LED indicates that the printer is powered
on. The Red LED gives indication of any errors occurring and the
position of the ink cartridges while changing cartridges.
The Input Disc Basket is where you load up to 50 blank ink-jet
Printable discs prior to Printing/Burning operations during normal
operation.
The Output Disc Basket is where the Disc Transport Robot places
the completed Printed/Burned discs during normal operation.
The CD/DVD Recorder is the unit in the DiscMaster 101P CD/DVD
Publisher where data is burned onto the blank ink-jet Printable
discs.
The Recorder Open/Close Button is used to manually eject discs
from the CD/DVD recorder.
Normally only used if an error occurs during disc burning such as
loss of power.
The Center Output Area is where your DiscMaster unit will
automatically place bad/rejected discs during normal operation. A
disc may be rejected for a number of reasons such as,
bad/unburnable media, improper disc size, or power loss during
operation. This area is also used as an output area with installation
of the optional Systor 100 Disc Kiosk Kit.
12

The Quick Start Guide
To properly and quickly install your DiscMaster unit and the
DiscWorks software, please follow the included Quickstart Guide.
The following sections of this manual give the same information
though with more detailed information.
13

Step 1 - Insert Software CD
If you have previously installed DiscStudio as a stand-alone
program, we recommend uninstalling that copy of DiscStudio to
avoid having two copies in different locations. See page 148 for
this procedure.
Always place the DiscMaster 101P Setup CD into the CD-ROM or
DVD drive of your computer, BEFORE connecting your computer to
the DiscMaster unit.
14

Step 1 - Insert Software CD (continued)
The following screen will appear if autorun is enabled on your
computer. DO NOT click NEXT at this point.
Note: If this screen does not appear you can manually
execute the setup program by browsing to the drive in
to which you placed the DiscMaster 101P Setup CD and
double click the Setup.exe program on the CD.
15

Step 2 – Plug In
Unpack the AC Adapter plug-in to the nearest AC power outlet and
plug-in the male DC plug to the rear female power port of the
DiscMaster unit.
DO NOT PRESS THE POWER BUTTON at this time.
16

Step 3 – Remove Foam
After power is applied, the Disc Transport Robot will move from
the park position. Lift the front cover and remove the 2 foam
blocks as shown. If the robot has not moved, ensure that the
power adapter is correctly plugged in.
IMPORTANT: Save the foam packing in case you need to
transport / ship the printer in future.
All foam blocks MUST BE removed before using your printer!
Close the front cover before proceeding to the next step.
17

Step 4 – Connecting the DiscMaster
With your computer turned on, plug the flat end of the USB cable
(1) into an available USB 2.0 connection on your computer. Plug
the square end of the cable (2) into the USB port on the
DiscMaster.
18

Step 5 – Power On
Once you have removed the packing foam (step 3), and connected
the DiscMaster to your computer (step 4), briefly press the power
button. The green LED will illuminate.
At this time, your computer will automatically discover the
DiscMaster unit and prompt you to install the printer driver.
To ensure the correct version of the driver is installed DO NOT
let Windows automatically install a driver for your DiscMaster
unit. Only install an approved driver from your DiscMaster 101P
CD-ROM.
Now you can either go Step 6 which installs the DiscWorks
software or skip ahead to Step 7 which installs only the printer
driver and you may install DiscWorks at a later time.
19

Step 6 – Installing DiscWorks
In Step 1 (page 15) you inserting the software CD and DiscWorks
opened the window shown below. Once you have completed the
previous steps (Steps 2-5), click “Next” on the installer screen.
Follow the onscreen wizard to install DiscWorks.
20

Step 7 – Install Print Driver
Windows will automatically detect the DiscMaster unit and display
the following screen. Select the option “No, not at this time.”
Then click “Next.”
21

Step 7 – Install Print Driver (continued)
Select the option “Install from a list or specific location
(Advanced)”. Then select “Next.”
22
Table of contents
Other Systor Disc Duplicator manuals
Popular Disc Duplicator manuals by other brands

Diskology
Diskology Disk Jockey PRO IT quick start guide

MicroBoards Technology
MicroBoards Technology GX Disc Printer Quick reference guide

Rimage
Rimage 2000i 6.5-7.1 Service Pack 1 instructions

Riso
Riso RZ3xx Series Technical manual

Addonics Technologies
Addonics Technologies Jasper II SID user guide

Vantec
Vantec NexStar NST-DP100S3 User manual user manual