TAKACAT Sport User manual

Takacat Sport
Owner's Manual

Takacat - Asia, Middle East & Australia Page | 2
Please be sure to observe the information on the type plate attached to the rear HIN plate and the
instructions on the inside of the driving tubes.
CONTENTS:
Introduction ………………………….………………………………………………………………………………….……. 3
Takacat Sport Diagram …………………………………………………………………………………………………… 3
Assembly Instructions ………………………………………………………………………………………….………… 4
Cleaning Instructions …………………………………………………………………………………………………….. 8
Repair Instructions ………………………………………………………………………………………………………… 8
Towing / Anchoring /Mooring………………………………………………………………………………………… 8
Motoring……………….. ……………………………………………………………………………………………………… 8
Beaching ………………………………………………………………………………………………………………………… 9
Important Notes ……..……………………………………………………………………………………………………… 9
Builders Plate / HIN Plate………………………………………………………………………………………………… 9
Sport Specifications ….………………………………………………………………………………………………..…. 11
Contact ……..………………………...……………………………………………………………………………………….. 12

Takacat - Asia, Middle East & Australia Page | 3
INTRODUCTION
Congratulations on the purchase of your new Takacat Sport!
This information sheet is to assist with the assembly, operation and storage of your inflatable boat
with safety and enjoyment in mind.
International Standards ISO 4892-3:2006
Built to International Standard ISO/6185
CE tested to 2013/53/EU
TAKACAT SPORT DIAGRAM:
1. Inflatable tubes
2. Air deck floor
3. Inflation valves
4. Oar rowlocks
5. Motor mount boards
6. Top & bottom stainless steel transom tubes
7. Internal & external safety lines
8. Quick release wheel fittings
9. Slot for air deck D ring / connect with webbing strap (Under Bow)
1
2
3
4
5
6
7
8
9

Takacat - Asia, Middle East & Australia Page | 4
ASSEMBLY INSTRUCTIONS:
STEP 1:
Open the box and get out the boat hull tubes. Unfold and open out on a clean, flat surface.
(LX Pictured)
STEP 2:
Locate the inflator valve at the rear of the hulls and inflate to 3 psi with the included hand pump or
optional electric pump. Don’t forget to activate the check valve in the inflation valve by pressing down
on the centre pin and turning it ¼ turn in either direction. If the check valve is popped up, it won’t let
any air escape.
NB: The pressures should be at the heat of the day so if the setting up on a cold morning either re
check the pressure at the heat of the day or allow for some pressure/expansion by not inflating to the
max pressure
NB: If you are finding the valve leaking a little air after pumping up, this is common as the boats are
all handmade and the valves can loosen when deflated and packed for shipping. Just use the valve
tool in the repair kit and tighten a ¼ turn and it should help tighten the valve.
Note - Fixation seam:
When you have inflated the driving tubes you will see a split seam. This seam is
not a defect but a so-called fixation seam, which is set during the production
process so that the connecting bottom can be glued at right angles to the two
driving hoses. When inflating, this fixation seam opens up and the separated
stitch threads can be seen, which rub away over time.
STEP 3:
From the rear – insert the lower transom bar into the lower set of tubes on the boat hulls. The stainless
tab should be facing up when installed properly.

Takacat - Asia, Middle East & Australia Page | 5
(NB: The black flaps in the photos below are no longer on the boats as there has been a design change in 2021 – new
photos will be coming soon)
Note – Using a mixture of soap and water will make inserting the bar easier.
STEP 4:
From the front, insert the upper transom bar into the upper set of tubes on the boat hulls. The stainless
tab should be facing down when insert properly. Note – Using a mixture of soap and water will make
inserting the bar easier.
STEP 5:
Slot the smaller motor mount board inside the Tube Transom.
STEP 6:
Creating a sandwich, assemble the rest of the transom. The bolt passes from the rear to the front with
the rubber washer between the wooden motor mount boards.
Proper sandwich order below:
a) Bolt b) SS Washer c) Back Board d) Rubber Washer e) Front Board f) SS Washer g) Hand Nut
Tighten firmly by hand, no tools required

Takacat - Asia, Middle East & Australia Page | 6
STEP 7:
Unroll the inflatable floor and insert into its position. There is no need to get it perfectly under each
hull tube, but the rear of the floor should be flush with the Lower Transom Bar.
Insert D-Rings on the bottom of the air deck floor, through the slots in the boat floor fabric layer. Lash
the two D-Rings together with the included webbing strap.
STEP 8:
Inflate the floor to 10 psi. While inflating the airdeck floor, be sure to pause and walk on the floor to
push it into place. Don’t forget to activate the check valve by pressing down on the centre pin and
turning it ¼ turn in either direction. If it is popped up it wont let any air escape. When taking the
pump out, do it quickly as you wont loose much air. NB: If you are finding the valve leaking a little air
after pumping up, this is common as the boats are handmade and the valves can loosen when
packing for shipping. Just use the valve and tighten a ¼ turn and it should tighten the valve again.
STEP 9:
Inflate the Inflatable Seat. The seat can be inflated to a pressure that is most comfortable. The seat is
designed for comfortable rowing and can also be used as a throwable flotation device if needed. 10.
Assemble each oar and install. Be sure to attach retaining nut to prevent losing oars when in use.

Takacat - Asia, Middle East & Australia Page | 7
STEP 11:
If you opted for the Quick Release Wheels, install them now in the down position. When in the down
position, the wheels provide enough heigh to mount a 15” short shaft outboard in the upright position.
Note – Wheels are side specific so please make sure you mount them with the tyres facing inward
when in the down position to prevent friction damage to the boat hulls Please note: that all Takacat
models are designed to be use with a short shaft (15” shaft) outboard only.
STEP 12:
If you opted for the Quick Release Rod Holder, install them now into the Upper Transom Bar.
STEP 13:
After launching your boat into the water, check the pressure in the hulls to verify you still have 3 psi
hull air pressure. If the water is cooler than the air temperature, the air inside the hulls will condense
causing a pressure drop. Use the manual pump to inflate back to 3 psi hull pressure if needed. Well
done – now you are set up with your new Takacat.

Takacat - Asia, Middle East & Australia Page | 8
CLEANING INSTRUCTIONS:
Rinse your boat with clean fresh water whenever possible after each use. At the end of each season
it is recommended you wash it with Takacat Boat wash or a soapy water (plant based) and fully rinse
after. We recommend the Takacat Boat Wash and cleaners.
Let it fully dry before rolling the boat up and putting it back in its storage bag.
Store your boat inside the storage bags provided and in a dry place.
Important – DO NOT use a vinyl preserving agent on fabric surfaces. Chemicals in such agents will dry
out the fabric and this will void any warranty.
REPAIR INSTRUCTIONS:
We do not include adhesive with our repair kit. Be sure to purchase pvc boat adhesive to complete
your repair kit. Follow the repair instructions on the adhesive packaging or look for better instructions
online via you tube or contact sales@takacatasia.com or [email protected]om.au for more details. For
larger repairs, we recommend you take your Takacat to a local inflatable boat service centre.
TOWING / ANCHORING / MOORING
Takacat Inflatable must be empty when it is towed by another boat. The towing line should be rigged
to the bridle between the two bow D-Rings. The inflatable must be under constant supervision when
it is being towed. Anchoring and mooring line should be secured to the same bridle mentioned above.
ROWING A TAKACAT:
Inflatable catamarans are supplied with 2 oars and oar locks. Please make sure the seat is properly
inflated and installed prior to use.
Install the oars in oar lock pins, attach oar lock pin cap screws prior to use.
NOTE: Do not use oars as leavers as they will break.
MOTORING:
WARNING: DO NOT OVERPOWER AND EXCEED THE MAXIMUM WEIGHT OF THE MOTOR
Overpowering can result in severe handling and/or stability problems with serious consequences.
When the boat is being powered, passengers should hold onto the lifeline in order to avoid falling
overboard.
When operating the motor-powered boat, sit on one of the hulls or on the supplied inflatable seat.

Takacat - Asia, Middle East & Australia Page | 9
Rapid acceleration should be avoided to prevent falling overboard backwards. Regular check should
be made on the motor attachment screws.
Loose screws will cause erratic boat operation and possible the loss of your outboard motor! Onboard,
check that the loads are not chafing or puncturing the boat skin.
BEACHING:
Remember to lift the motor shaft when coming into the beach otherwise you can cause significant
damage to your motor.
Do not drag the Takacat inflatable boat across rocks, sand, gravel or on pavement as damage may
occur to the boat skin.
If the boat is temporarily left on a beach part of the boat should be left in the water so that the internal
heat caused by exposure to sunlight can escape and so that air pressure in the tubes can decrease.
Cover the boat with a UV Protective Boat Cover to block direct exposure to sunlight if the boat is to
be stored in direct sunlight for an extended period of time.
Covers can be purchased from your local dealer.
IMPORTANT NOTES:
1. Performance enhancement: The Takacats are catamaran inflatable boats. In catamaran
inflatables, the tunnel effect can cause ventilation at the propeller in certain swells, i.e. the propeller
shovels air, which leads to a reduction in thrust and a drop in speed. To avoid ventilation, the use of
Permatrim (TM) Hydrofoil plates is highly recommended. They are made of marine aluminium,
increase the outboard's anti-ventilation plate four times and significantly reduces ventilation. In
addition, their lateral fins optimise the handling of the dinghy.
2. For absolute performance it is recommended to use "cupped" propellers, i.e. the propeller edges
and the propeller tips are slightly angled. This service is offered by professional propeller
workshops. Cupping of a propeller leads to an increase in pitch, i.e. the propeller usually has to be
chosen one pitch lower.
3. Engine - Trim position - When a person is sailing the boat is trimmed stern down, i.e. the engine
may have to be trimmed to the stern to prevent the boat from running too steeply. If I am sailing
with more than one person, the boat is usually trimmed neutral or bow-heavy, i.e. the engine must
be trimmed away from the stern so that the bow rises and does not plough into the water.
4. The driving tubes of the Takacats are equipped with safety relief valves. This ensures that any
dangerous overpressure is dissipated in the event of strong sunlight to prevent damage to the tubes.
If the outside temperature then drops again, this can lead to the air pressures no longer
representing the correct values. Therefore, always check the correct air pressure values of the
carrying hoses and the high pressure floor before each journey. If heat changes during the day,
always check the pressure values of all air-filled components and correct them to the correct
pressure values to avoid damage. The high pressure floor is not equipped with a pressure relief
valve. Therefore, avoid too much sunlight on the high pressure floor and check and correct the air

Takacat - Asia, Middle East & Australia Page | 10
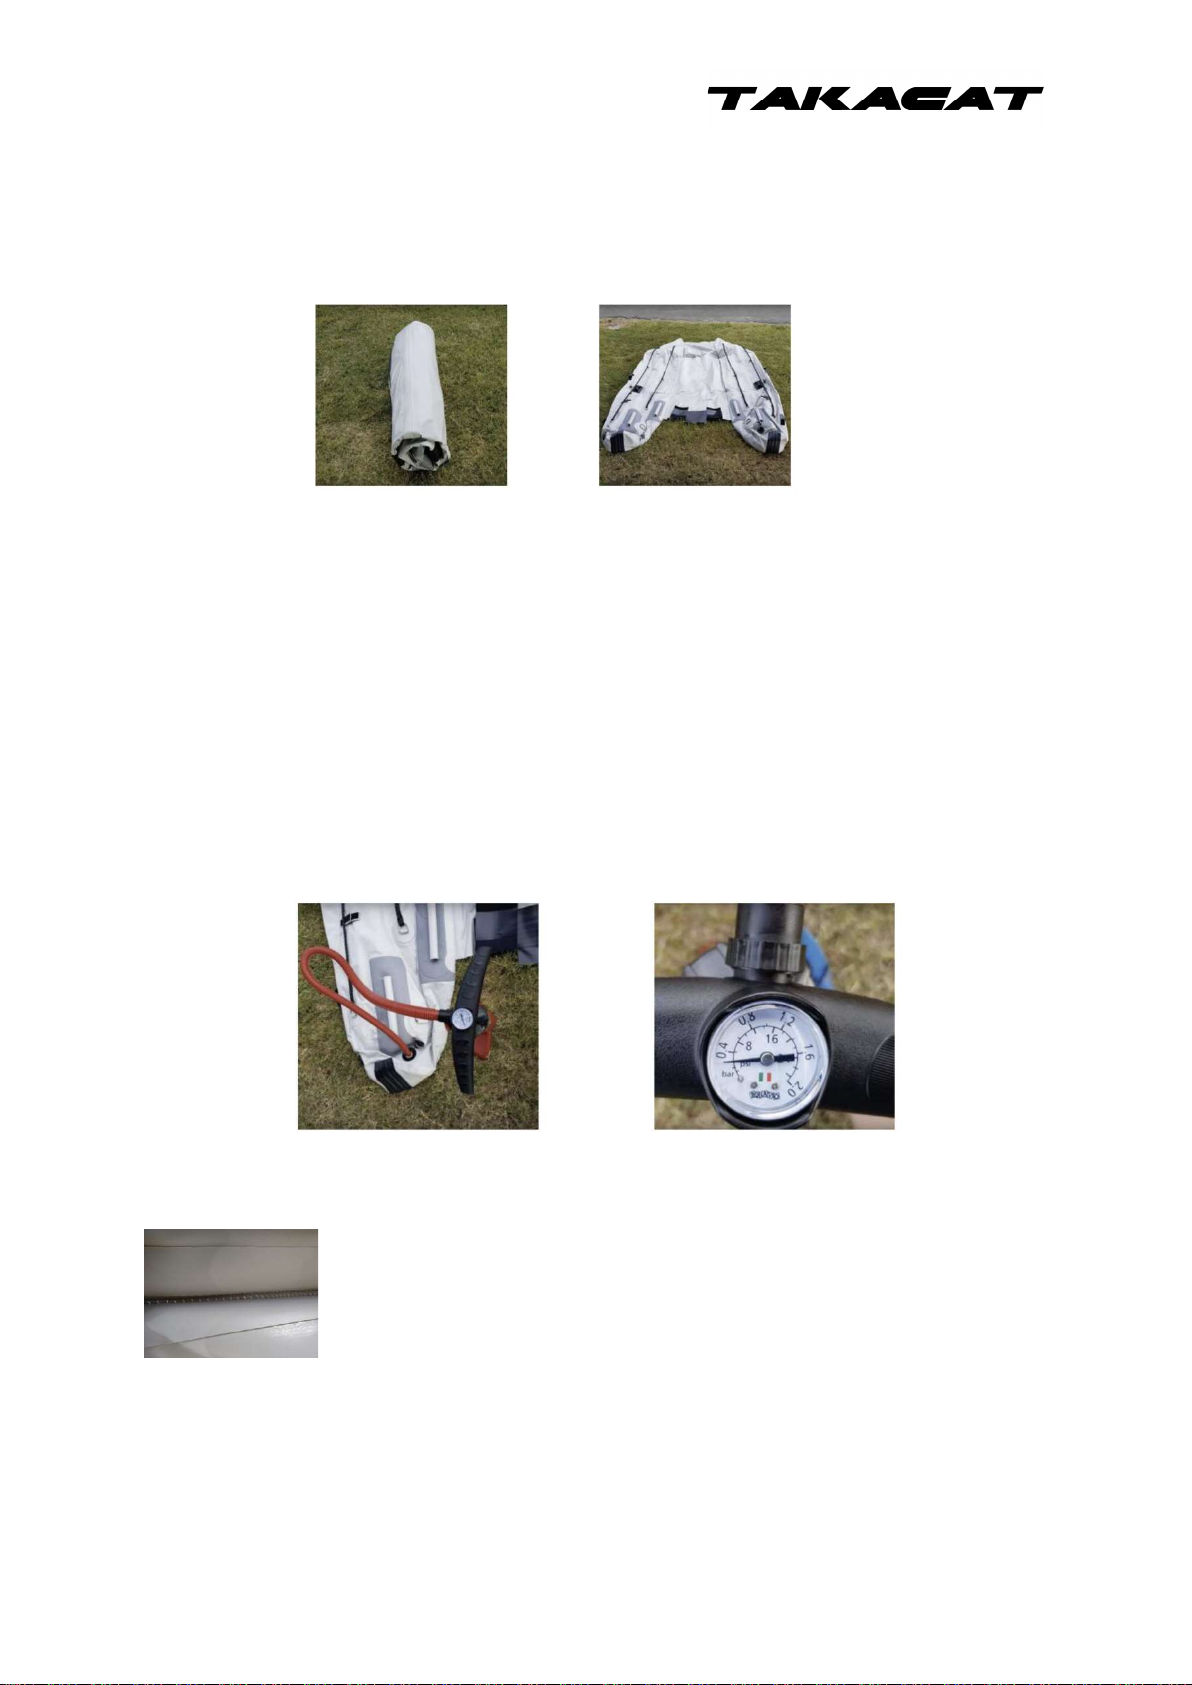
pressure values if necessary. When the dinghy is not in use, we strongly recommend storage in the
shade or under a cover to avoid excessive heating and increase of air pressure in the tubes and the
high pressure floor. An inflatable boat that remains inflated for several days can lose pressure.
According to ISO 6185 a pressure loss of 20% within 24 hours is permissible.
5. With inflatable boats, it can happen that the valve seats settle slightly after production due to
heat fluctuations and movement, and air escapes as a result. In this case there are two valve keys in
the repair box. The valve key with the smaller teeth is compatible with the air inlet/outlet valves,
the valve key with the coarser teeth is compatible with the two overpressure safety valves. Using
the appropriate valve key, turn the valve insert slightly to the left to allow the lower sliding friction
to take effect and then turn it hand-tight to the right=>
https://www.youtube.com/watch?v=wLY4nj24-BE
6. At least before each trip, check the correct fit and strength of the transom components, including
the transom screw connections and the fastenings of any outboard motor that may be installed. It is
essential that you follow the instructions and safety regulations of the outboard manufacturer. The
Takacats are designed exclusively for outboards with short shaft. Outboards with long shaft or
extra long shaft must not be used.
7. The transom mounts including the screw connections are made of stainless steel grade 304, also
known as V2A steel. V2A-steel is harder than V4A-steel due to the higher carbon content but not
permanently seawater resistant, i.e. after each seawater operation the Takacat, especially the
transom construction incl. slip wheels, must be washed with fresh water, rinsed and dried. If you
use the Takacat as a tender it is sufficient if the rinsing with fresh water (freshwater) is done after
the return to the mother ship. If necessary a stainless steel cleaner and a seawater resistant
stainless steel protector is recommended, see www.inoxliner.com
The transom tubes must not be used as towing brackets. Only the tow rings in the stern and bow
area are used for towing. To avoid damage, it is essential to ensure smooth gas changes.
8. The transom plates are made of glued boat plywood with additional protective coating. The
wooden plates must be checked regularly for damage and repainted if necessary. The transom
plates are not designed for use as permanent watercraft. If the boat is to remain in water for a
longer period of time, the transom plates must be treated with an additional protective coating.
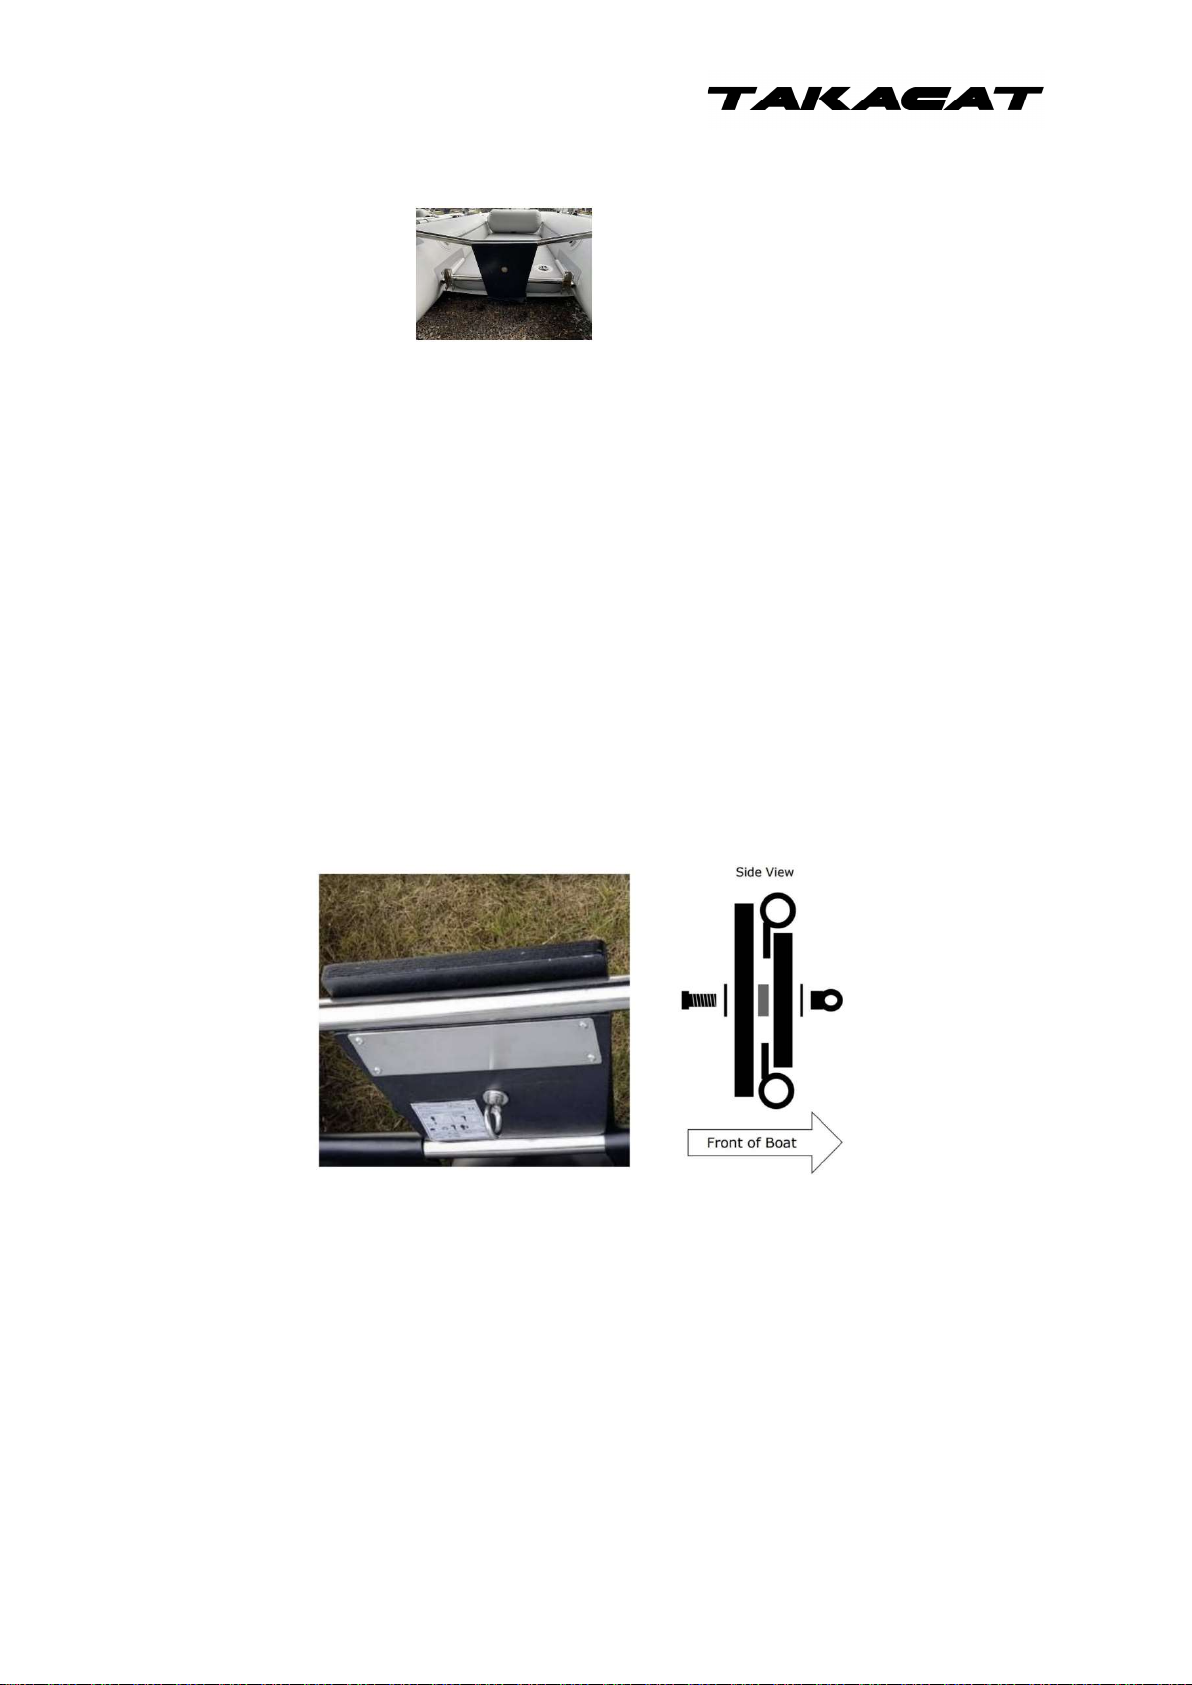
9. When installing an outboard (short shaft), it is essential to ensure that the support plates of the
toggle fittings of the outboard mounting do not press in the upper transom rod and cause structural
damage. If necessary use a spacer plate (applies only to open transom).
10. The driving tubes of the Takacats are provided with protective strips on the undersides.
Nevertheless you must avoid contact with sharp-edged objects to prevent damage. It is strongly
recommended to move the dinghy with extra care in areas with low water depth.
11. Avoid damaging the carrying hoses and the high pressure air floor of the Takacat with pointed
and/or sharp-edged objects.
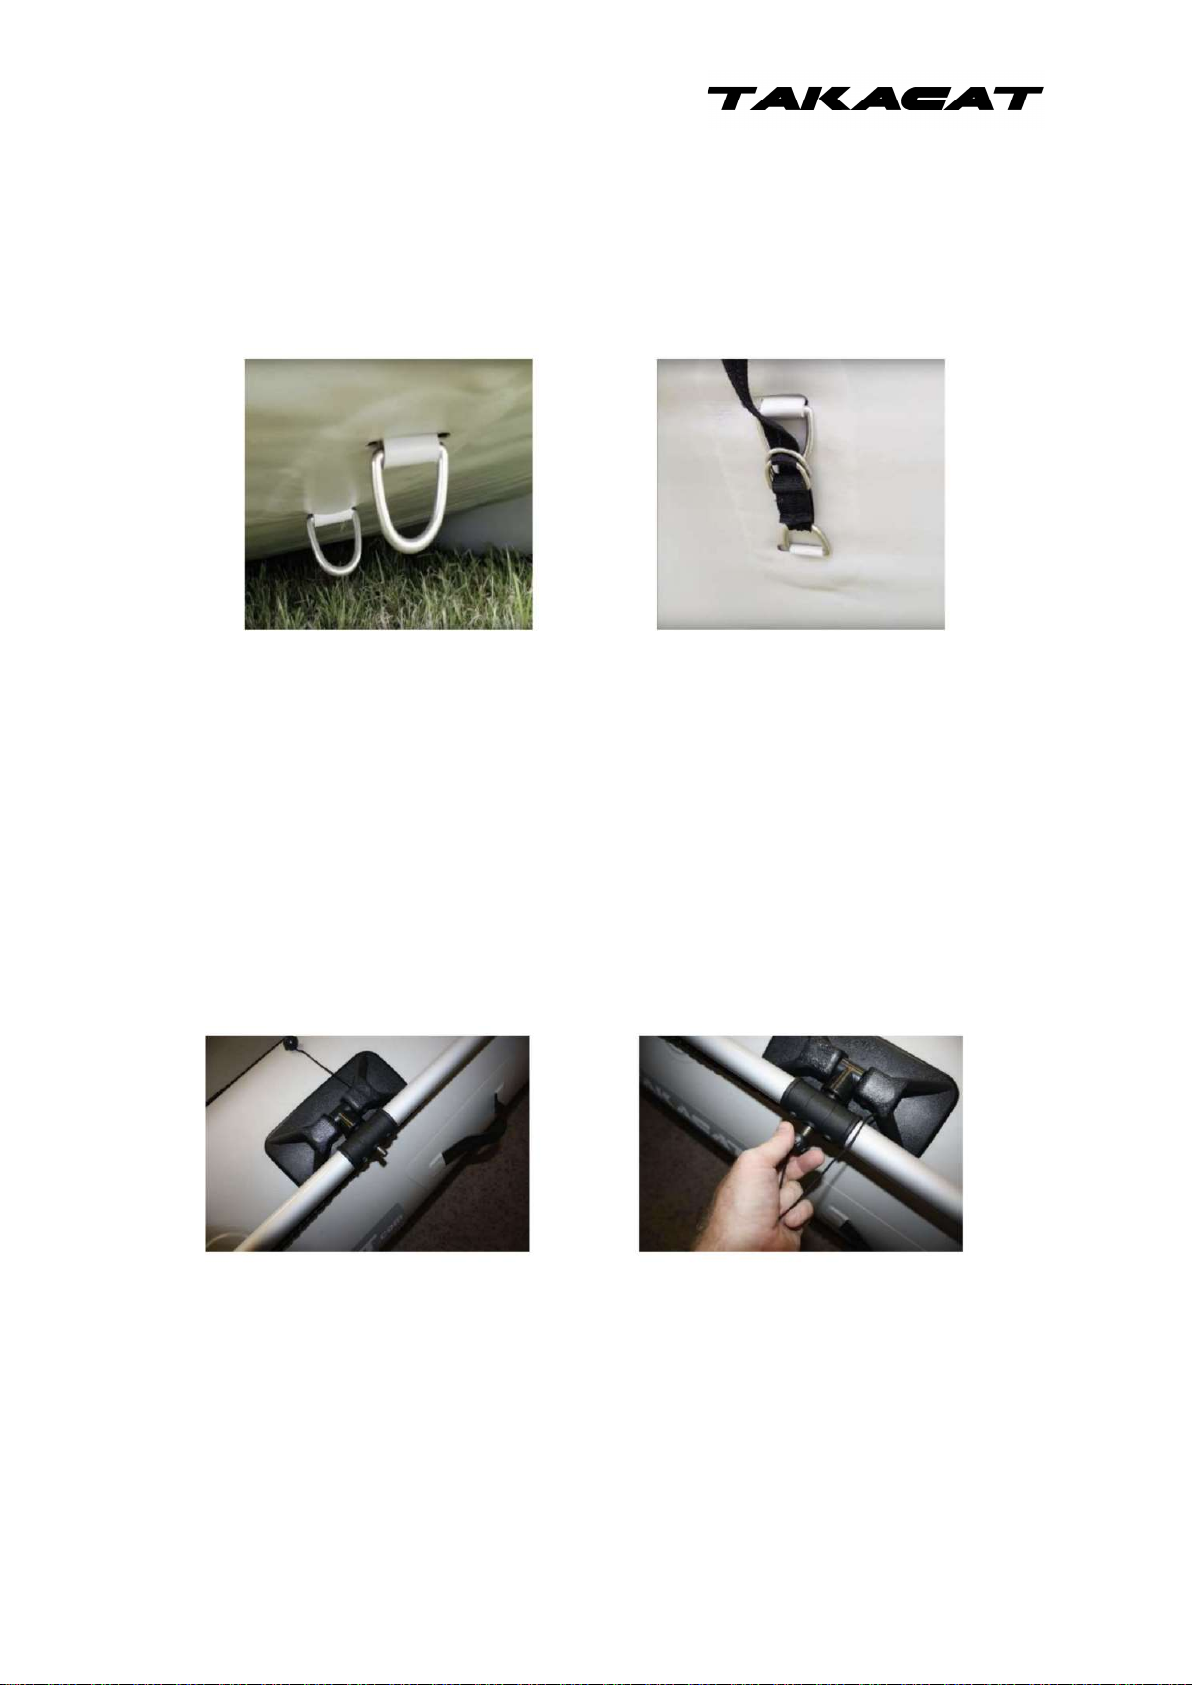
12. Transport on the davits - It is best to put shackles through the holes of the transom wheel
suspension and fix them. These can then be used as rear lifting positions (applies only to open
transoms only). For the bow it is best to use a line that acts like a sling that supports under the boat.
Normally this line is guided through the outer D-rings on the Sport or the central D-rings on the LX,

Takacat - Asia, Middle East & Australia Page | 11
so that the sling does not slide aft during lifting. In heavy weather, it is recommended that the
Takacat be pulled in because of the possible peak loads at the lifting points.
13. The tubes and the high pressure floor must be cleaned and dried before packing into the storage
bags. For cleaning the PVC or Hypalon hoses, the market offers a wide range of cleaning and care
products.
14. In your own interest and in the interest of any persons travelling with you, make sure that all
necessary safety precautions have been taken and that all necessary rescue equipment is carried
and, if necessary, put on.
15. If you do not have a formal boating qualification, we recommend that you attend a boat safety
course where you will learn the skills of good seamanship, such as navigation, safety, environment,
boat handling, line handling, anchoring, troubleshooting engine problems and how to react
appropriately in an emergency. The knowledge you learn in a boat safety course can be helpful and
life-saving in an emergency.
A boat assigned to design category C is intended for operation in wind conditions with Beaufort
Strengths up to 6 and the corresponding wave heights (significant wave heights up to 2 m). Such
conditions may occur on unprotected inland waters, estuaries and in coastal waters in moderate
weather conditions.
All Takacat boats are manufactured based on ISO 6185-2. © TAKACAT
BUILDERS PLATE / HIN PLATE
The watercraft identification number (WIN/HIN) of the inflatable boat is located on the type plate
attached to the inside transom board and, from year of construction 2020, also on the lower hull
bottom in the starboard stern area.
The identification number is composed as follows, by way of example:
NZ = New Zealand, TAK = manufacturer's abbreviation for Air Yacht Ltd, TA078 = serial number, B =
month, 0 = year of manufacture 2020, 20 = model year 2020.
The manufacturer's plate also provides information regarding the manufacturer, ISO standard
according to which the boat is manufactured (e.g. ISO 6185-2), CE design class e.g. "C", max. number
of persons, max. load, max. engine, max. pressure of the hose chambers.

Takacat - Asia, Middle East & Australia Page | 12
SPORT SPECIFICATIONS:
All information contained in this website has been compiled with the greatest care and to the best of
our knowledge. Nevertheless, errors cannot be completely ruled out. For this reason, TAKACAT feels
obliged to point out that it can accept neither a guarantee nor the legal responsibility or any liability
for consequences resulting from incorrect information. T he specifications of the products which
TAKACAT distributes and/or offers as a dealer have been adopted by the respective manufacturer.
TAKACAT accepts no responsibility for their accuracy. Maximum specifications apply under optimum
conditions (environment, system configuration, software, etc.).
Distributor (ASIA):
Ocean Portables NZ Ltd - T/A Takacat Asia
PO Box 35003
Browns Bay
Auckland 0753
New Zealand
Email: [email protected]om / Web: www.takacatasia.com
Ph: +6421907110
Distributor (AUSTRALIA):
Ocean Portables NZ Ltd - T/A Takacat Australia
P O Box 35003
Browns Bay
Auckland 0753
New Zealand
Email: [email protected]m.au / Web: www.takacat.com.au
Ph: +6421907110
Please note – Takacat (Ocean Portables NZ Ltd) does not take responsibility for any misuse of this
inflatable catamaran. Remember others around you and those onboard and always be a responsible
skipper.
Table of contents
Other TAKACAT Boat manuals

TAKACAT
TAKACAT T340LS User manual

TAKACAT
TAKACAT T240L User manual

TAKACAT
TAKACAT GO Series User manual

TAKACAT
TAKACAT T S Series User manual

TAKACAT
TAKACAT T380S User manual

TAKACAT
TAKACAT LX Series User manual

TAKACAT
TAKACAT T240G User manual

TAKACAT
TAKACAT T LX Series User manual

TAKACAT
TAKACAT T260LX User manual

TAKACAT
TAKACAT LX Series User manual
Popular Boat manuals by other brands

OceanFlyer
OceanFlyer Grand Banks 49' Classic operating manual

Hallberg-Rassy
Hallberg-Rassy 38 user manual

Tige
Tige RZX owner's manual

PURSUIT
PURSUIT 2270 CENTER CONSOLE owner's manual

Hobie
Hobie Quest 13 Assembly instructions

Horizon Yacht Charters
Horizon Yacht Charters Lagoon 440 'Fly Bye' 2006 Information & operation manual