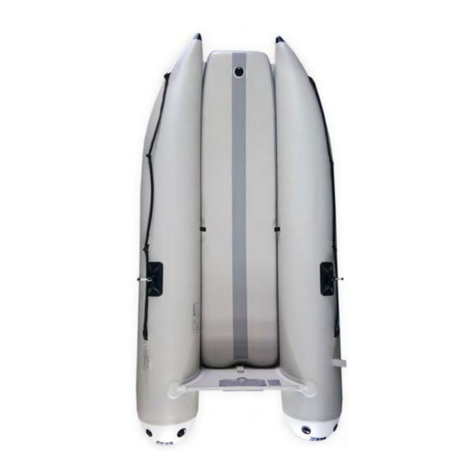
TAKACAT T380S User manual

Owners Manual – T240S to T380S:
Boat Manufacturer:
AIR YACHT Ltd. - 3 Owens Rd, Epsom - Auckland 10 3 - Neuseeland - www.takacat.com
Please note the information given on the rating late attached on the transom late and the
information on the inside of the tubes.
Assem ly boat:
1. First, the lower Transom rod must be inserted from behind into the two little tubes.
A little bit water or a little bit dish soap makes them easier to slide into.
The transverse pressure plate of the transom rod or the Screwing tongues with the drill holes must
face u . You can see it on the videos.
. Then the upper Transom rod must be inserted from the front into the upper two little tubes.
A little bit water or a little bit dish soap makes them easier to slide into.
The transverse pressure plate of the transom rod or the Screwing tongues with the drill holes must
face down. You can see it on the videos.
3. Then the both catamaran tubes must be inflated to 0mbar. Maximum pressure is 50mbar. The
Halkey-Roberts valve must be set to inflate, meaning the valve mechanism must pop out a bit.
4. When the two tubes are inflated, the two bottom flaps must be placed around the lower transom
bar and closed.
5. Then the floor must be inserted, best position is in contact with the bow, and inflated to a minimum
of 600mbar. The maximum pressure is 689mbar. The Halkey-Roberts valve must be set to inflate,
meaning the valve mechanism must pop out a bit. When inflating, always press the ground slightly

on the sides.
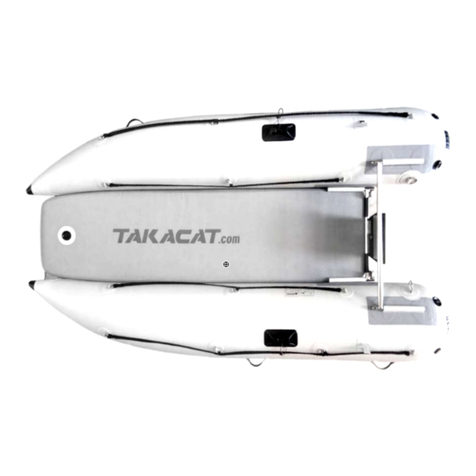
6. Transom late with 4-socket inbus screw connection:
Attach the transom plate to the four fastening tongues using the inbus screws provided. The screws
are guided with an attached circlip and an attached washer from the inside out through the
mounting tabs in the transom plate and first by hand in the back pressed nuts. Please make sure
that the screws can be easily screwed into the nuts. Make sure that there is a circlip and a washer
under each screw head. The final fixing is done with the help of the included Allen key. Tighten the
screws well hand-tight, do not use brute force when screwing. There is an additional little spacer
plate included in the delivery package which you have to use if you want to install an engine at the
transom plate. This little spacer plate is placed under the motor bolting.
Dou le transom late with central screw fixing:
The following basic video descripes how the transom has to be assembled:
https://www.youtube.com/watch?v=BTRTezVRcF0&feature
Place the smaller transom plate with the rating plate from the front onto the stainless steel
receptacles of the transom tubes and insert the central fastening nut through the attachment hole
with a slotted spacer. Insert the rear transom plate also the fixing screw and coat the last threads of
the fixing screw, e.g. light with transparent lubricant from Liqui Moly. Then hand-tighten the ring
nut with a shim under it. Fix the central transom mounting with a 17 mm socket wrench and a lock
nut for the ring nut. Do not use brute force when screwing. Do not use brute force when screwing.
Lubricating the threads serves to revent the threads of the screw and ring nut from caking, for
which V4A stainless steel tends.
7. Inflate the included flat seat with 00mbar, position it where you need it. You can fixed it at the
inside rings.
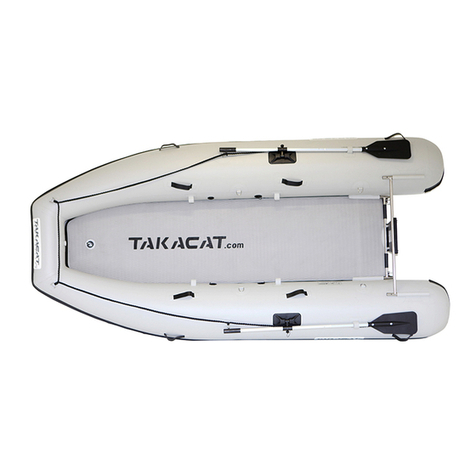
8. Finaly the two oars must be assembled and mounted on the oarlocks and be fixed at the end.
9. The optional wheels are plugged into the corresponding brackets on the lower transom mount on
the left and right. The optimum position is given when the wheels are inside. This ensures that the
maximum left-to-right deflection is available to a possibly installed outboard motor when switching
to the floating position. The wheels must be inflated so that they have a correct rolling behavior and
float in case of loss in the water or at the dock and do not sink.
10.The optional fishing rod holders are inserted from the inside into the left and right retainers of the
upper transom mount until the interlock heads indicate proper seating.
Maintenance:
Regularly check valves, stitching, ribbons, hooks, screws and nuts on your Takacat boat. Pontoons are more
alive than a plastic hull and their constant movement can cause fatigue damage. It is important to keep the
pontoons sufficiently inflated. Under-inflation will cause more water resistance and thus slowing. Regularly
check the pontoon mounts to the transom and hull and other joints in the tubes. In smaller inflatables
between any loose floorboards and pontoons, it is important to keep areas clean from dirt and debris that
could rub and wear down the pontoon.
Cleaning basically requires no more than a cleanser, a brush and a sponge for managing the cleaning and
maintenance of the boats pontoons.
Soap: Mix the soap with water according to instructions on the package. Scrub the pontoons with a sponge
or scrubbing brush. Rinse off with water. Never use high pressure when cleaning the boat, it can damage
the stitches or fabric of the pontoons, etc.
Storage:
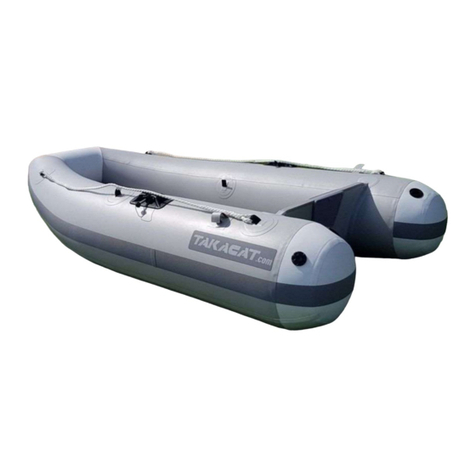
TAKACAT Sport or Lite inflatables can be stored either inflated or in a storage case. When stored in a bag,
the bag must be dry. Take this opportunity to clean sand etc. from between the floorboard and pontoons.
When it comes to winter, there are some basic tips. The boat does best not to stand in freezing
temperatures, although it is not a must to have it indoors. If you cover the boat, do not use a vinyl tarp and
let some air out of the pontoons.
Notice:
1. Check the correct seating and proper strength of the transom components at least before each ride,
including the screw connections on the transom and the attachments of any outboards installed. It
is essential to follow the instructions and safety regulations of the outboard manufacturer.
. The Takacat tubes are equipped with safety relief valves. This ensures that any dangerous excess
pressure is dissipated in strong sunlight to prevent damage to the tubes. If the outside temperature
then drops again, this may cause the air pressures to be no longer the correct values. Therefore,
always check the correct air pressure values of the tubes and the high pressure floor before each
ride. In the event of heat changes during the day, be sure to check the pressure values of all air-
filled components and correct them to the correct pressure values to avoid damage. The high
pressure floor is not equipped with a pressure relief valve. Therefore avoid excessive sunlight on the
high-pressure floor and check and, if necessary, correct the air pressure values. When the boat is
not in use, we strongly recommend that you store it in the shade or under a cover to avoid
overheating and increased air pressure in the hoses and in the high pressure floor. An inflatable
boat that remains inflated over several days can lose pressure. According to ISO 6185, a ressure
dro of 20% is allowed within 24 hours.
3. The transom mounts are made of 304 grade stainless steel, also known as V A steel. V A steel is
harder than V4A steel due to the higher carbon content but is not permanently seawater resistant,
i. After every use of seawater, the Takacat, especially the transom construction incl. slip wheels,
must be washed off with fresh water, rinsed and dried. If you use the takacat as a tender then it is
sufficient if the rinsing with fresh water takes place after returning to the mothership.
If required, a stainless steel cleaner and a seawater-proof stainless steel protector are
recommended, see www.inoxliner.com
4. The tubes of the Takacats are provided on the underside with protective strips. Nevertheless, you
must avoid contact with sharp objects to prevent damage. It is urgent to move the dinghy with
utmost care in areas of shallow water. Be sure not to damage the Takacat's hoses and high-pressure
airfloor with sharp and / or sharp-edged objects.
5. In your own interest and in the interests of any persons traveling with you, make sure that all
necessary safety precautions have been taken and that all necessary rescue equipment has been
carried and if necessary created.
6. If you do not have a formal boating training, we recommend that you take a boat safety course in
which you learn the skills of good seamanship, such as: Navigation, safety, the environment, boat
handling, linen handling, docking, troubleshooting engine problems, and appropriate responses in
emergencies. The skills you learn in a boating course are never wasted and can not only be hel ful
in an emergency, but also life-saving.
7. If you want to have best performance with minimum ventilation events on the prop the use of a
Permatrim hydrofoil late is highly recommended. Made from marine aluminum, these hydrofoil
plates quadruple the outboard's anti-ventilation plate and significantly reduce ventilation. In
addition, they stabilize the handling of the inflatable boat as a fixed trim panel with their lateral
fins.

Performance Tuning:
PermatrimTM Hydrofoil - A marine accessory for
your outboard or sternleg that will improve the
handling and performance characteristics of your
boat:
•By eliminating ventilation
By increasing the size of the factory
cavitation plate, by up to four times.
PermatrimTM reduces the chance for the
propeller to create an air pocket - the
cause of cavitation.
•Im roves rough water handling and
sto s or oising
A PermatrimTM enables alot more control
of trim angles and the ability to eliminate
porpoising, to plane at a lower speed.
•Hel s boats get onto the lane faster
By forcing the water the propeller normally throws out the top, downwards and rearward,
PermatrimTM gives more thrust and lift.
•Lowers laning s eed
By having more lift, a PermatrimTM enables boats to stay on the plane at lower speeds.
•Im roves fuel economy
Because boats fitted with a PermatrimTM have more lift in the stern, the hull performs more
efficiently when on the plane, as well as being able to plane at lower speeds. More efficiency must
result in fuel savings.
Manufactured from Marine Grade Aluminum. Powder coated for maximum corrosion resistance. Designed
and manufactured in New Zealand.
S ecifications:
T240S
•Length: ,40m Width: 1,40m Tube Diameter: 0,4 m
•Max. Person: Max. Loading: 300kg Design Category: D
•Max. Enginepower: 4,4 kw Max. Engine Mass: 30kg Length of Shaft: S
•Weight of Tubes: 1kg Weight of Transom: 3kg Air Chambers: + 1 (HD-Floor)
T260S
•Length: ,60m Width: 1,56m Tube Diameter: 0,48m
•Max. Person: 3 Max. Loading: 360kg CE – Design Category: C
•Max. Engine Power: 6kw Max. Engine Mass: 60kg Length of Shaft: S
•Weight of Tubes: 3,5kg Weight of Transom: 4,5kg Air Chambers: + 1 (HD-Floor)

T300S
•Length: 3,00m Width: 1,66m Tube Diameter: 0,48m
•Max. Person: 4 Max. Loading: 367kg CE – Design Category: C
•Max. Engine Power: 7,5kw Max. Engine Mass: 60kg Length of Shaft: S
•Weight of Tubes: 8,5kg Weigth of Transom: 4,5kg Air Chambers: + 1 (HD-Floor)
T340S
•Length: 3,40m Width: 1,66m Tube Diameter: 0,48m
•Max. Person: 5 Max. Loading: 513kg CE – Design Category: C
•Max. Engine Power: 11kw Max. Engine Mass: 60kg Length of Shaft: S
•Weigth of Tubes: 3 ,5kg Weight of Transom: 4,5kg Air Chambers: + 1 (HD-Floor)
T380S
•Length: 3,80m Width: 1,66m Tube Diameter: 0,48m
•Max. Person: 6 Max. Loading: 640kg CE – Design Category: C
•Max. Engine Power: 15kw Max. Engine Mass: 105kg Length of Shaft: S
•Weight of Tubes: 40,5kg Weigth of Transom: 4,5kg Air Chambers: 4 + 1 (HD-Floor)
All information contained herein has been compiled with the utmost care and to the best of our knowledge.
Nevertheless, mistakes can not be completely ruled out. For this reason, Hacker-Bootstechnik (Owner
Friedel Hacker - Dipl.-Ing.) Has been made to point out that they do not assume any warranty or legal
responsibility or any liability for consequences resulting from incorrect information can. The specifications
of the products which Hacker-Bootstechnik distributes and / or offers as a dealer were taken over by the
respective manufacturer. Hacker-Bootstechnik accepts no liability for their accuracy. Maximum figures apply
under optimal conditions (environment, system configuration, software, etc.). We are always grateful for
the notification of any errors. Changes and errors excepted.
General Im orter:
HACKER-Bootstechnik
Inh. Friedel Hacker (Dipl.-Ing.)
Leibnizstraße 3
53498 Bad Breisig (Germany)
Tel.: +49 633- 00360
Fax: +49 633- 00361
Email: info@takacat.de
Web: www.takacat.de / www.takacat.com
This manual suits for next models
9
Table of contents
Other TAKACAT Boat manuals

TAKACAT
TAKACAT T240G User manual

TAKACAT
TAKACAT Sport User manual

TAKACAT
TAKACAT LX Series User manual

TAKACAT
TAKACAT T340LS User manual

TAKACAT
TAKACAT T LX Series User manual

TAKACAT
TAKACAT T S Series User manual

TAKACAT
TAKACAT GO Series User manual

TAKACAT
TAKACAT T240L User manual

TAKACAT
TAKACAT T260LX User manual

TAKACAT
TAKACAT LX Series User manual