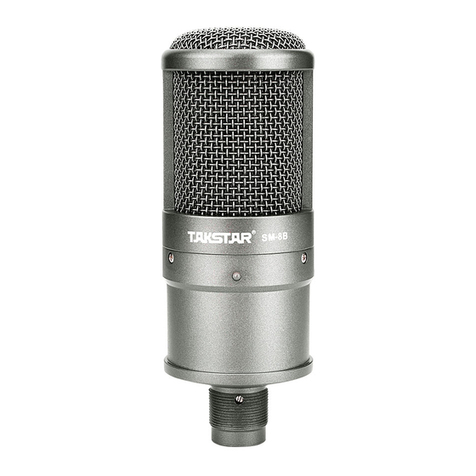
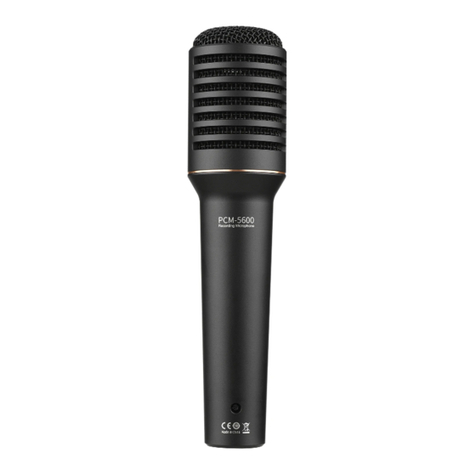
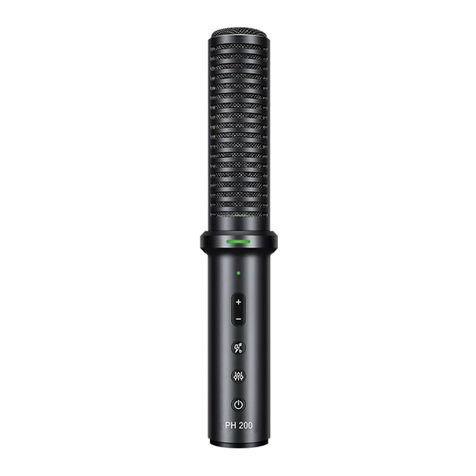
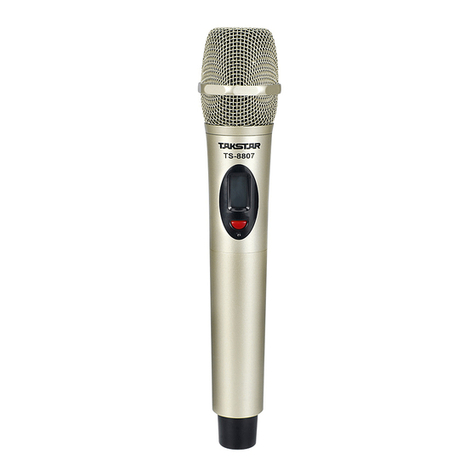
Takstar TS-3310UH User manual

Wireless Microphone
TS-3310UH
无线麦克风

前言
产品特性
产品配置
TS-3310UH 接收机
音频输出线
电源适配器
手持麦克风
5号电池
1台
1条
1个
2支
4节
1
TS-3310UH 无线麦克风
尊敬的用户:
感谢您选购得胜TS-3310UH 无线麦克风,为了您能够更好的了解使用本产品,建议您在使用
前仔细阅读本说明书。
若存在有疑问或者您有宝贵的建议,可通过拨打得胜官方服务热线
400 6828 333或微信扫描二维码关注得胜官方公众号与我们联系。
话筒防滑圈
说明书
2个
1份
•
• 特设频道ID码识别功能,有效防止外界或频道之间串扰出现噪声
• LCD 显示工作信息,人机对话一目了然
• 接收机具备一键自动扫频功能,能自动快速选取无干扰频道使用
• 红外对频方式,只需轻松一按,即可完成发射机与接收机频道同步,使用方便
• 具备独立的平衡(XLR)及非平衡(6.3插座)的混合输出,方便设备连接
采用UHF高性能集成电路设计,多频道可供选择,有效改善接收死角,提高接收稳定度

学校教室、KTV、会议、家庭娱乐和户外演出
适用范围
技术参数
2
TS-3310UH 无线麦克风
•
• 频率稳定度:±10ppm
• 灵敏度:10dBuV
• 邻道抑制:65dB
• 镜像频率抑制:75dB
• 音频输出:200MV
• 输出阻抗:XLR接头:200Q 1/4”接头:1K
• 信噪比:100dB
• 失真度:<0.1%
频率范围:470-932MHz(分段设计) • 失真度:<0.1%
• 频率响应:50Hz-18KHz
• 接收距离:100 (m)
• 功能显示方式:LCD
• 电源供应:DC 12V
• 尺寸:482*490*44mm
• 重量:约4650g
• 材质:铁壳,铝面板
接收机
• 470-932MHz(分段设计)
• 频率稳定度:±10ppm
• 发射功率:10mW
• 发射距离:100(m)
• 谐波抑制:65dB以上
频率范围: • 调制方式:FM
• 最大调制度:75K
• 工作电压:3V
• 工作电流:120mA
• 功能显示方式:LCD
发射机
注:以上数据由得胜实验室测试得到。

功能示意
① 功能按键:用于通道选择、频率调整、对频、扫频等工作;
② 液晶显示:显示对频工作状态、频率、接收信号电平等信息;
③ IR红外对频窗口:配合“SET”键,将频率参数传至发射机;
④ 电源开关:控制机内电源供应。
3
TS-3310UH 无线麦克风
接收机正面板:
① 天线:A/B天线;
② 音频平衡输出:采用“XLR”型插座,提供各通道独立信号输出;
③ 混合音频输出:将两路的音频信号混合成一路输出;
④ 电源插座:连接DC 12V电源至输入插座;插座的中心电极连接正电压。
接收机背面板:
6 .2 00 643.700
IR
SET
RF AF CHG CHG RFAF
FREQ UENCY M HZ FREQ UENCY M HZ
SE T POW ER
②④
③
③
①
①
ANT-B MIC-B OUTPUT MIX OUTPUT POWER MIC-A OUTPUT ANT-A
DC13-15V
450mA
① ①② ②③ ④

4
TS-3310UH 无线麦克风
① RF指示:显示接收信号强度;
② AF指示:显示声音信号强弱;
③ FREQUENCY:显示当前工作频率;
④ G:显示默认群组;
⑤ CH:显示默认频道。
LCD液晶屏幕显示:
① 网头及音头模组:网头用以保护将声音转换成电信号的
音头模组,并能防止麦克风放置在台面时滚动;
② 显示屏:显示工作频率、电池电量等信息;
③ 电源开关:用于开启/关闭发射机电源;
④ 麦克风管体:管端装配网头、音头模组、管体内装电池、
发射电路板、尾部内置发射天线;
⑤ IR红外对频窗口:配合接收机 “SET”键,将频率参数
传至发射器(红外窗口在尾管内部);
⑥ 电池仓:用于装入AA电池2节(请注意电池放置的极性)。
手持发射器:
①②
③
④ ⑤
6 .200 643.700
RF AF CHG CHG RFAF
FR EQUEN CY MHZ FR EQUEN CY MHZ
POW ER
①
②
③
④
POW ER
⑤
⑥

使用说明
1. 手动频率调节
在初始界面下,短按两下“SET”按键,待调整通道的显示屏闪烁选频,点按“ ”键与“▼”键▲
可调节当前使用的频率,当已调整到需要使用的频率时,停止短按,频率跳动停止,频率调整
成功。打开发射机电源,将发射机上的红外接收窗口“IR”与接收机上的红外发射窗口“IR”
成直线相对(对频距离可选择在10cm-30cm之间),此时点按“SET”键,屏幕窗口显示如下
图对频界面后显示对频搜索信息,对频成功后,接收器和发射器频率显示一致。如果对频不成
功可重新点按“SET”键继续对频,直至对频成功。
2. 红外对频操作
在初始界面下选定使用频道后,打开发射设备电源,将发射设备上的红外接收窗口“IR”与接
收设备的红外发射窗口“IR”窗口成直线相对(对频距离可选择在10cm-30cm之间),此时短
按一下“SET”键,屏幕窗口显示如下图对频界面后显示对频搜索信息,对频成功后,接收器和
发射器频率显示一致。如果对频不成功,可重新短按“SET”键继续对频,直至对频成功。
5
TS-3310UH 无线麦克风
3. 频率编号调节
在初始界面状态下,点按“SET”按键三下,待频率编号显示闪烁,按“ ”键与“▼”键调节至▲
所需频率编号(共“00~14”个频率编号数字可供调节),频率编号选定后按“SET”键确认。
4. 自动扫描操作
在初始界面状态下,点按“SET”按键四下,然后点按对应通道的“ ”或“▼”键,接收机的对▲
应通道进行自动扫描状态,频率会跳动,当扫描到干净频点时频率跳动停止,此时点按“SET”
键,屏幕窗口显示如下图对频界面后显示对频搜索信息,再打开发射机电源,将发射机上的红外
接收窗口“IR”对准接收机上的“IR”红外发射窗口即可。
(注意:在多套使用时,前面对上频率的需打开发射机,在对下一套接收机进行自动扫描)
5. 音量调节
在初始界面状态下,可通过点按对应通道的“ ”或“▼”键进入音量调节调整至所需音量(共▲
31级)。
6 .200 643.700
IR
SET
RF AF CHG CHG RFAF
FRE QUEN CY MHZ FRE QUEN CY MHZ
SE T PO WE R
643.700
IR
SET
RF AF CHG CHG RFAF
FRE QUEN CY MHZ FRE QUEN CY MHZ
SE T PO WE R
ir

安全警示
6
TS-3310UH 无线麦克风
为避免电击、过高温度、着火、辐射、爆炸、机械危险以及使用不当等可能造成的人身伤害
或财产损失,使用本产品前,请仔细阅读并遵守以下事项:
1. 使用产品时请确认所连接设备与本产品功率是否匹配以及合理调整音量大小,不要在超过产品
功率及大音量下长时间使用,以免造成产品异常;
2. 使用中若发现有异常(如冒烟、异味等),请立即关闭电源开关并拔掉电源插头,然后将产品
送经销商检修;
3. 若产品需要使用可拆装电池时,严禁使用外壳绝缘材料破损的电池;请不要为非充电电池充电;
4. 废弃电池需放入指定的分类垃圾桶,不可作为儿童玩具或直接丢弃,以免造成安全隐患或影响
环境;
5. 本产品及附件都应放置在室内干燥通风处,勿长期存放在潮湿、灰尘多的环境,使用中避免靠
近火源,雨淋、进水、过度碰撞、抛掷、振动本机及覆盖通风孔,避免损坏其功能;
6. 若产品需要固定于墙壁或天花板上时,请确保固定到位,防止因固定强度不足导致产品发生跌
落危险;
7. 使用该产品时需遵守相关安全规定,法律法规明确禁止使用场合请勿使用本机,以免导致意外
事故;
8. 请不要自行拆机改装或维修,以防止出现人身伤害,如有问题或服务需求请联系当地经销商跟
进处理。
故障排除
故障现象 故障原因
发射器、接收机无指示 发射器电池耗尽,接收机电源未接好
接收机无射频信号 收发不同频或超出接收范围
有射频信号,但无音频信号 发射器麦克风未接入
音频信号背景噪音太大 接收输出电平低,有干扰信号或接收机未装天线,
信噪比下降
音频信号失真 发射器的咪头与嘴巴距离太近,接收机输出电平过高
使用距离较短,信号不稳定 接收机天线设置不当,周围有强电磁干扰

环保说明
7
TS-3310UH 无线麦克风

Preface
Features
Package Contents
TS-3310UH Receiver
Audio Output Cable
Power Adapter
Handheld Microphone
AA Battery
1 pc
1 pc
1 pc
2 pcs
4 pcs
8
TS-3310UH
Dear Customer,
Thank you for purchasing Takstar TS-3310UH Wireless Microphone. In order to better
understand and use the product, please read this manual carefully.
If you have any questions or suggestions, please contact our local dealer.
Mic Anti-Roll Ring
User Manual
2 pcs
1 pc
Wireless Microphone
•
better stability and nook coverage
• Special channel ID code (tone-key) function effectively prevents crosstalk
• Intuitive work status overview on LCD display
• One-key scan function on receiver automatically finds the best available channel
• IR sync to easily sync transmitter and receiver in one easy press
• Independent balanced XLR and unbalanced 6.3 combo output
High-performance UHF integrated circuit, multiple frequency channels selectable,

Classroom, KTV, conference, family entertainment and outdoor performance
Applications
Specifications
9
•
• Frequency Stability: ± 10ppm
• Sensitivity: 10dBuV
• Adjacent Channel Rejection: 65dB
• Image Frequency Rejection: 75dB
• Audio Output: 200mV
• Output Impedance: XLR connector: 200Q;
1/4”connector: 1K
• S/N Ratio: 100dB
Frequency Range: 470-932MHz (segmented) • Distortion: <0.1%
• Frequency Response: 50Hz-18KHz
• Receiving Distance: 100 (m)
• Function Display: LCD
• Power Supply: DC 12V
• Dimension: 482*490*44mm
• Weight: approx. 4650g
• Material: iron case, aluminum panel
Receiver
•
• Frequency Stability:± 10ppm
• Transmit Power: 10mW
• Receiving Distance: 100 (m)
• Harmonic Suppression: >65dB
Frequency Range: 470-932MHz (segmented) • Modulation: FM
• Max Modulation Degree: 75K
• Operating Voltage: 3V
• Operating Current: 120mA
• Function Display: LCD
Transmitter
Note: The above data is measured by Takstar laboratory.
TS-3310UH Wireless Microphone

Function Descriptions
① Function Button: used to select channel, adjust/sync/scan frequency, etc.
② LCD Display: displays sync status, frequency, received signal level, etc.
③ IR Sync Window: sends frequency parameters to transmitter, used in conjunction with
the [SET] button.
④ Power Switch: controls receiver power supply.
10
Receiver Front Panel
① Antenna: A/B antenna.
② Audio Balanced Output: XLR type socket, provides independent signal output for each
channel.
③ Mixed Audio Output: mixes audio signals of both channels into one output.
④ Power Socket: connects to DC 12V power supply; the center electrode connects to
positive voltage.
Receiver Rear Panel
6 .2 00 643.700
IR
SET
RF AF CHG CHG RFAF
FREQ UENCY M HZ FREQ UENCY M HZ
SE T POW ER
②④
③
③
①
①
ANT-B MIC-B OUTPUT MIX OUTPUT POWER MIC-A OUTPUT ANT-A
DC13-15V
450mA
① ①② ②③ ④
TS-3310UH Wireless Microphone

POW ER
①
②
③
④
POW ER
⑤
⑥
11
① RF Indicator: displays the received signal strength.
② AF Indicator: displays the audio signal strength.
③ FREQUENCY: displays the operating frequency.
④ G: displays the default group.
⑤ CH: displays the default channel.
LCD Display
① Mic Grille & Capsule: the mic grille protects the capsule
which converts sound into electrical signal, and prevents
the mic from rolling on the table.
② Display Screen: shows information such as operating
frequency and battery power.
③ Power Switch: for turning on/off the transmitter power.
④ Mic Body: assembles the grille and capsule on the top,
houses the battery and transmitting circuit board inside,
and includes an internal transmitting antenna at the bottom.
⑤ IR Sync Window: receives frequency parameters from
receiver, used in conjunction with the [SET] button on
receiver. (placed on mic body behind screw cover).
⑥ Battery Compartment: for loading 2pcs AA batteries
(please observe the polarity of battery placement).
Handheld Transmitter
①②
③
④ ⑤
6 .200 643.700
RF AF CHG CHG RFAF
FR EQUEN CY MHZ FR EQUEN CY MHZ
TS-3310UH Wireless Microphone

Operation Instructions
1. Adjust Frequency Manually
On home screen, short press [SET] button twice, then short press [ ] or [▼] of the corresponding ▲
channel to adjust its operating frequency to desired, and stop pressing until the frequency
stops blinking. Next, turn on the transmitter power, align both IR windows of the transmitter
and the receiver (at 10~30cm distance), short press [SET] to start syncing, in which case the
screen will display the IR interface and subsequently the syncing process as shown in
below figure. Once synced, the frequencies shown on the receiver and the transmitter should
be the same. Retry by short pressing [SET] again if it fails to sync.
2. IR Sync
On home screen after selecting a desired operating channel, turn on the transmitter power,
align both IR windows of the transmitter and the receiver (at 10~30cm distance), short press
[SET] to start syncing, in which case the screen will display the IR interface and subsequently
the syncing process as shown in below figure. Once synced, the frequencies shown on the
receiver and the transmitter should be the same. Retry by short pressing [SET] again if it fails
to sync.
12
3. Adjust Frequency Numbering
On home screen, short press [SET] button three times, then short press [ ] or [▼] of the ▲
corresponding channel to adjust the frequency number to desired (selectable from 1~14),
and press [SET] to confirm.
4. Auto Scan
On home screen, short press [SET] button four times, then short press [ ] or [▼] of a channel ▲
to start automatic frequency scan for the corresponding channel. The frequency on
screen keeps changing until it finds a clean frequency. Next, turn on the transmitter power,
align both IR windows of the transmitter and the receiver (at 10~30cm distance), short
press [SET] to start syncing.
(Note: when using multiple sets together, keep the already-paired transmitters on while
performing auto scan on the next receiver set.)
5. Adjust Volume
On home screen, short press [ ] or [▼] of the corresponding channel to adjust its volume ▲
level (31 levels in total).
6 .200 643.700
IR
SET
RF AF CHG CHG RFAF
FRE QUEN CY MHZ FRE QUEN CY MHZ
SE T PO WE R
643.700
IR
SET
RF AF CHG CHG RFAF
FRE QUEN CY MHZ FRE QUEN CY MHZ
SE T PO WE R
ir
TS-3310UH Wireless Microphone

Safety Instructions
13
To avoid electric shock, overheat, fire, radiation, explosion, mechanical risk and injury or
property loss due to improper use, please read and observe the following items before use:
1. Please check if the power of the connected equipment matches with that of this product
before operation. Adjust the volume to proper level during operation. Do not operate at over-
power or high-volume level for extended time to avoid product malfunction or hearing
impairment.
2. If there is any abnormality during use (e.g. smoke, strange odor), please kill the power
switch and unplug from power source, then send the product to the local dealer for repair.
3. Never use any replacement battery with broken insulation. Do not charge non-chargeable
battery.
4. Dispose waste batteries in designated dustbin for sorting. Do not use them as children's toy
nor discard directly to avoid health risk or environmental damage.
5. Keep this product and its accessories in a dry and ventilated area. Do not store in a humid or
dusty area for extended time. Keep away from fire, rain, liquid intrusion, bumping, throwing,
vibrating, or from blocking any ventilation openings, to prevent malfunction.
6. The product must, if applicable, be fixed firmly in place if installed on walls or ceilings at
adequate strength to prevent from falling.
7. Please abide by safety rules during operation. Do not use the product in places prohibited
by laws or regulations to avoid accident.
8. Do not disassemble or repair the product by yourself to avoid injury. If you have any
questions or require any services, please contact our local dealer.
Troubleshooting
Issue Cause
No response on transmitter or receiver
screen.
Transmitter battery is dead; receiver power supply is not properly
connected.
No RF signal on receiver. Different frequency between transmitter and receiver; or out of
effective range.
Has RF signal but no AF. Transmitter mic is not connected.
Loud background noise in audio signal. Low output level on receiver; there is interference signal; receiver
antennas are not installed, lowering S/N ratio.
Audio signal distortion. Speak too close to the transmitter mic. Receiver output level is
too high.
Short operating distance, unstable
signal.
Receiver antennas are not properly installed; or there is strong
electromagnetic interference around.
TS-3310UH Wireless Microphone

14
TS-3310UH Wireless Microphone

Table of contents
Other Takstar Microphone manuals

Takstar
Takstar UC-2R User manual

Takstar
Takstar TA-60 User manual

Takstar
Takstar DG-K10USB User manual

Takstar
Takstar PCM-5600 User manual

Takstar
Takstar TS-6310 User manual
Takstar
Takstar PH 125 User manual

Takstar
Takstar SC Series User manual
Takstar
Takstar SGC-600 User manual

Takstar
Takstar SM-7B-L User manual

Takstar
Takstar CM-60 User manual
Takstar
Takstar HM-200W User manual

Takstar
Takstar S360 User manual

Takstar
Takstar SM-18 PURE User manual

Takstar
Takstar TS-6310 User manual

Takstar
Takstar TA-58 User manual

Takstar
Takstar TS-8808HH User manual

Takstar
Takstar V1 User manual

Takstar
Takstar PC-K320 User manual

Takstar
Takstar G5 User manual

Takstar
Takstar MS-118 User manual