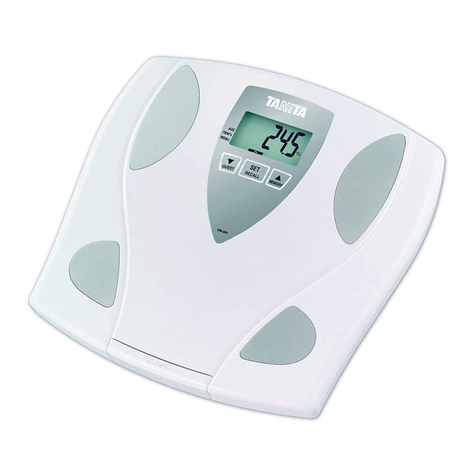
Tanita KW-210 User manual

The illustrations used in this manual are for illustration purposes
and may differ from the actual product.
Digital Scale
KW-210
Instruction Manual
Before Use How to Use If Necessary
Safety Notes……………………… 2
Cautions ………………………… 3
Name of Parts …………………… 4
Preparation for Use ……………… 5
Cleaning ………………………… 8
Troubleshooting ………………… 9
Product Specification ………… 10
Operating Instruction …………… 7
Table of contents
Please read this Instruction Manual carefully and keep it handy for future reference.
NOT LEGAL FOR TRADE
・
Inserting/Replacing the Batteries
……… 5
・Using the AC Adapter ……………… 5
・Auto power off time setting ………… 6
・Location Code Setting ……………… 6
・Unit switching ………………………… 6
・Standard weighing …………………… 7
・Tare weighing ………………………… 7

・Never disassemble or modify the equipment. This may result in electric shock or bodily injury, or
affect the accuracy of the product.
・Do not throw batteries onto a fire. Doing so may cause them to explode.
・When carrying the scale, hold the base firmly with
both hands. Dropping the scale may cause damage or injury.
・Be careful not to drop this scale when handling with
wet hands or when the scale is wet.
Doing so may result in dropping the scale, resulting
in damage to the scale or injury.
・When using the scale with the AC adapter, do not use
in locations where the scale may be splashed with
water.
The waterproof performance of the scale may not
be maintained, which may result in malfunction or
electric shock.
・Do not insert your fingers into gaps etc. in the scale. Doing so may result in injury.
・Be sure to insert the batteries with the “+” and “-“
symbols in the correct orientation.Do not use old and
new batteries or use different types of batteries
together.
Doing so may result in the battery fluid leaking,
heat generation or explosion of the batteries which
may result in injury or damage to the scale.
・When using the AC adapter, do not handle the plug
with wet hands.
・Do not overload the electrical socket by connecting
multiple extension cords, etc.
This may cause an electric shock.
Doing so may result in fire.
2
Before Use
Safety Notes
In this Instruction Manual and description of the equipment, there are various caution symbols that will
enable you to use this equipment safely and correctly so as to prevent harm to you and other people
as well as loss or damage to your property.
Warning
Caution
Warning
This symbol indicates the risk of death or serious injury if the safety instructions
are ignored or the equipment is misused.
This symbol indicates the risk of physical injury and/or damage to the equipment
if the safety instructions are ignored or the equipment is misused.
Caution

Cautions for Dust Proofing/Water Proofing
Instructions
Before Use
3
Cautions
This scale is designed to meet IEC IP67 (dustproof/waterproof) standards, but when used in certain
conditions the dustproof/waterproof functionality of the scale cannot be maintained. Additionally, such
conditions may result in damage or malfunctions, and may prevent the scale from measuring
accurately. Be sure to obey the following.
Failure to obey these instructions may prevent the scale from measuring correctly, and may cause
damage to the scale or result in malfunction.
■Do not use when the battery cover or rubber cap (when the AC adapter is not being used) are removed.
■ Do not allow water that is hotter than 40℃(104℉) or steam to come into contact with this scale.
■Do not wash this scale in a dishwasher.
■Do not leave this scale in water.
■Do not use this scale when it is wet.
■Do not touch the ventilation filter or the area around the filter.
■Do not allow substances such as oil (soot) or chemicals, or anything other than water to come into contact with
the ventilation filter or the area around the filter.
■Do not touch the bellows unless cleaning the scale.
■Be careful not to damage the bellows when cleaning.
■Do not open and close the battery cover in locations where there is a lot of sand or dust, etc.
■Use in a stable, flat location.
■ After moving the scale to a location that has more than a 10℃(50℉)temperature difference from the previous
location,leave for at least 2 hours before use.
■Use near lighting equipment (inverter fluorescent lamp), medical equipment (microwave therapy equipment),
induction cookers, microwave ovens, communication devices (mobile phones, etc.) and other such devices may
cause malfunction due to interference.
■When powdered substances, etc. are slowly added to the scale when zero is displayed, the display may not
change. In such cases, place a slightly larger amount on the scale and then reduce to the required amount, or
increase the speed at which the substance is placed on the scale.
■Do not place in a location that is exposed to direct sunlight, near a heater or directly in line with the air output from
an air conditioner.
■Do not expose the scale to excessive shock or vibration.
■Do not use or store the scale in an extremely hot or cold location, or in a location that experiences extreme
temperature differences.
■Do not use boiling water or chemicals such as benzene, thinner or bleach on the scale.

Ventilation filter
Slide lock
(catch for opening the battery cover)
Rubber cap
(for AC adapter)
Silicone feet (4)
Internal pressure
adjustment cover
Battery cover
Opening slot for internal pressure
adjustment cover (using a coin)
Rubber packing
Before Use
4
Name of Parts
Accessories
Instruction Manual
Front of Unit
Back of Unit
Inside the Internal Pressure
Adjustment Cover
Inside the Internal Pressure
Adjustment Cover
Battery box interiorBattery box interior
Measuring Plate
(stainless steel)
Upper plate Upper plate
fixing screw
First, remove the battery cover
in order to open the internal
pressure adjustment cover.
Bellows
Hole for upper plate fixing screw
Operation buttons
Internal pressure
adjustment cover (back)
Internal pressure
adjustment rubber

①
②
②
How to Use
5
Preparation for Use
Using the AC Adapter
Doing so may result in malfunction.
ImportantImportant
■Before opening the battery cover, check that there is no water etc. around the battery cover.
■After closing the battery cover, be sure to check that all four corners are tightly closed.
■When the AC adapter is used, the IEC IP67 standard (dustproof/waterproof) functions cannot be maintained.
■Do not use in locations where the scale may be splashed with water. Doing so may result in malfunctions or
electric shock.
Remove the rubber cap and connect the AC adapter as shown
in the figure on the right.
Inserting/Replacing the Batteries
• Be sure to remove the measuring plate before turning the scale over, as failure to do so will result in the
measuring plate falling off the scale.
• The provided batteries are fitted in the factory before shipment and may therefore have a short lifespan.
• Be sure to dispose of old batteries according to the disposal procedure prescribed in your area.
Open the battery coverOpen the battery cover Insert the batteriesInsert the batteries
①Insert the bottom section first,
②
Press the
○
marked parts on both sides of
the upper section to securely close the cover.
①Insert the bottom section first,
②
Press the
○
marked parts on both sides of
the upper section to securely close the cover.
When the batteries are depleted, “Lo” appears in the display and the power automatically turns off.
Promptly replace the batteries with four new alkaline batteries within the recommended use limit.
Do not use new and old batteries or different types of batteries together.
The AC adapter is an option.
Purchase a 6V DC 200mA output
centre minus plug compatible AC
adapter separately.
(Use an adapter that has an output
current greater than 200mA.)
Connect the AC adapterConnect the AC adapter
Caution
Caution

60 min.Continuation
30 min.10 min.
Press to save the set time and setting ends.
・When is not pressed, the set value will not be saved and
the power will turn off 30 seconds later.
How to Use
6
Preparation for Use
Auto Power Off Time Setting
Unit Switching
Location Code Setting
Auto power off is a function to turn the power off automatically when no operation is executed after the set time
has passed.
2
3
1
Press to select the set time you desire.
Different locations across the world have different gravitational pulls. These differences affect the accuracy of
the weight measurement. You can obtain the most accurate weight readings by selecting the correct gravity
setting on the scale according to your geographical location.
Time can be set to 10 minutes, 30 minutes or 60 minutes.
shows that auto power off is not implemented.
4
When the power is on, press and hold , and then press to switch the unit.(for the g/lb-oz version)
When is displayed, press to displaycurrent time setting.
1.When the power is off, press and release while pressing .
2.Press once to select , then press .
3.Select your location code by repeatedly pressing the . Refer to the Location Code Map.
4.Press to save the setting, then the scale is automatically turned off.
(Default is “10 minutes.”)
Press and release the while holding down the to show .
Note: Press to toggle between and .
(Refer to the Location Code Map)

7
After flashes, is displayed.
Place an object on the tray to measure.
Conduct the operation of “normal measurement,” place the tare such as a
tray or bag, and stabilise the display.
・When measuring continuously, remove the object to be measured
from the tray, confirm that is displayed, and measure again.
・When the measurement stabilizes the mark is displayed.
Standard weighing
Tare weighing
■Do not place anything on the measuring plate when turning the power on.
■Do not place any objects to be weighed directly on the upper plate. Always use the provided measuring plate.
■ appears in the display if the total weight of the container and contents exceeds 5000g/11lb (10000g
/22lb when the maximum weight is 10kg/22lb)
If the display value is less than -5000g/-11lb(-10000g/-22lb when the maximum weight is 10kg/22lb),
appears in the display.
Press .
Press . The display becomes .
1
When is pressed, the power turns off.
3
2
2
Place an object to be measured on the tare,and measure.
3
1
Operating Instruction
How to Use

8
■Do not use chemicals such as benzene, thinner or bleach, etc.
■Be sure to check that the battery cover and rubber cap (for the AC adapter) are securely closed before cleaning
the scale.
■Do not open the internal pressure adjustment cover other than for cleaning.
1.Remove the measuring plate, loosen the upper plate fixing screw and
remove the upper plate.
2.Clean the parts.
Wipe gently with a wet cloth. The parts can also be washed using a
sponge or soft cloth soaked in neutral detergent.
• Do not use water that is hotter than 40℃(104℉).
• Be careful handling parts as wet parts will be slippery.
3.Use a dry cloth to thoroughly dry the parts.
1.Remove the internal pressure adjustment cover that is attached to
the battery cover using a coin.
2.Use a cotton bud, etc. to wipe away dirt and moisture from the inside.
Be careful not to damage the internal pressure adjustment rubber.
3.Press the internal pressure adjustment cover to close it.
Press firmly as it is designed to fit tightly.
4.Close the battery cover.
Cleaning
Parts other than the internal pressure adjustment rubber
Internal pressure adjustment rubber
Do not wash in a dishwasher.
Do not wash if the battery cover is removed.
Do not touch the ventilation filter.
If Necessary
Caution
Caution

If Necessary
9
Troubleshooting
PagePlease check.Symptom
When you think that the equipment has trouble, check the following symptoms before asking for repair.
3,7
is displayed
and the power turns off.
or
is displayed.
・The scale needs to be repaired. Please contact your retailer.
5
No display appears even
is pressed.
・ When using the equipment with an AC adapter Check
connection between the DC jack and the AC adapter jack
and between the plug and the outlet.
・ When using the equipment with batteries, batteries may be
running low. Check after replacing with new batteries.
5
is displayed. ・ Batteries are running low.
Replace with new ones immediately.
・ Precise measurement cannot be performed in a place with
vibration.
Move the equipment to a different place before use.
7
・Weighing capacity is exceeded.
is displayed
during measurement.

If Necessary
10
Product Specification
*1IP67 is the IEC (International Electrotechnical Commission) 60529 standard defined as the “complete prevention
against the ingress of fine particles” and “no ingress of water in a quantity that can affect the device functions
after submersion at a depth of 1m for 30 minutes”.
*2AC adapter is an option. (See P5).
・The product design and specifications may be changed at any time without prior notice.
Type
Maximum measurement
/Minimum display
Waterproof Protection Class
Power consumption
Power supply
Battery life
Body size/Upper plate size
Product mass
KW-210
Average 0.02W
5kg/1g (11lb/0.05oz) 10kg/2g (22lb/0.1oz)
DC6V LR6(15A,AA) ×4 pieces (not included)
AC adapter - DC6V 200mA centre minus*2
Approximately 300 hours
Approximately 2.2kg (4.8lb)
D263×W200×H114mm(D10.4×W7.9×H4.5in)
/D182×W182mm (D7.2×W7.2)
IP67*1(When run on batteries)

Not allowed to mix batteries with consumer wastes!
As consumer you are legally bound to return used or discharged batteries. You can deposit your
old batteries at the public collecting points in your town, or wherever the corresponding batteries
are sold and specifically marked collecting boxes have been set up. In case of scrapping the
apparatus, the batteries should be removed from it and deposited at the collecting points as well.
Batteries: Pb Pb = Battery contains lead,
Cd Cd = Battery contains cadmium,
Hg Hg = Battery contains mercury.
Notice:
These marks can be found out on contaminant-containing
This device meets the EMC Directive 2004/108/EC and the RoHS Directive 2011/65/EU.
11

TANITA Corporation of America Inc.
2625 South Clearbrook Drive
Arlington Heights, IL 60005 USA.
Tel: +1-847-640-9241
Fax: +1-847-640-9261
www.tanita.com
Representative
TANITA Europe B.V.
Hoogoorddreef 56-E
1101 BE Amsterdam
The Netherlands
Tel: +31-20-560-2970
Fax: +31-20-560-2988
www.tanita.eu
TANITA Health Equipment H.K. Ltd.
Unit 301-303 3/F Wing On Plaza,
62 Mody Road, Tsimshatsui East,
Kowloon, Hong Kong
Tel: +852-2834-3917
Fax: +852-2838-8667
www.tanita.asia
TANITA India Private Limited
A-502, Mittal Commercia,
Off. M. V. Road (Andheri Kurla Road),
Marol, Andheri - East,
Mumbai, India 400 059
Tel: +91-22-3192-6107
Fax: +91-22-2859-9143
www.tanita.co.in
TANITA (Shanghai) Trading Co. Ltd.
Room 8005, 887 Huai Hai Zhong Lu, Shanghai
The People’s Republic of China
Tel: +86-21-6474-6803
Fax: +86-21-6474-7901
www.tanita.com.cn
Manufacturer
TANITA Corporation
1-14-2, Maeno-Cho, Itabashi-ku,
Tokyo, Japan 174-8630
Tel: +81(0)-3-3968-7048
Fax: +81(0)-3-3968-2661
www.tanita.co.jp
ISO 9001 Certified
© 2014 TANITA Corporation KW2107611(1)-1409FA
Table of contents
Other Tanita Scale manuals

Tanita
Tanita 1584 User manual

Tanita
Tanita BF-683W User manual

Tanita
Tanita RD-901 innerScan Dual Operating instructions

Tanita
Tanita WB-100MA User manual

Tanita
Tanita BC-731 User manual

Tanita
Tanita UM-071 User manual

Tanita
Tanita Body Composition Analyzer 410 User manual

Tanita
Tanita KW-002 User manual

Tanita
Tanita BF-684W User manual

Tanita
Tanita BF-662W User manual

Tanita
Tanita UM-060 User manual

Tanita
Tanita BF-522 User manual

Tanita
Tanita BF-572 User manual

Tanita
Tanita UM-041F User manual

Tanita
Tanita HD-332 User manual

Tanita
Tanita Ironman BC-350 User manual

Tanita
Tanita HD 372 User manual

Tanita
Tanita BC-1000 User manual

Tanita
Tanita HD-335 User manual

Tanita
Tanita UM-040 User manual