Targa MF 100 Quick guide

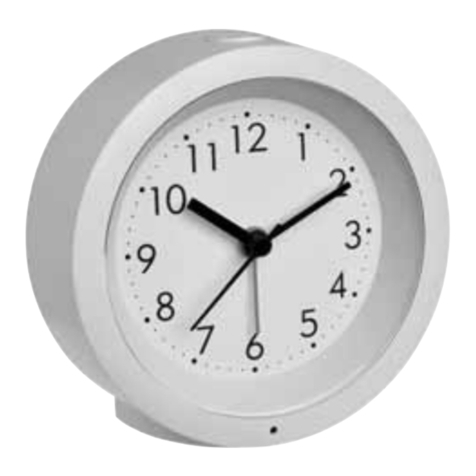
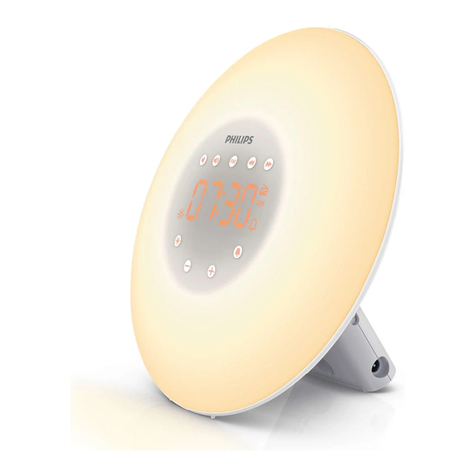
Dual-Colour Lighting Alarm Clock MF 100
Operating and Safety Instructions
Kaksivärivalaistu herätyskello MF 100
Käyttö- ja turvaohjeet
Alarmklocka MF 100 med flerfärgad belysning
Användnings- och säkerhetsinstruktioner
Vækkeur med to-farvet lys, MF 100
Brugs- og sikkerhedsanvisninger
Ρολόι Ξυπνητήρι µεφωτισµόδύο
χρωµάτων MF 100
Οδηγίες για την λειτουργία και την ασφάλεια
Wecker mit Farbwechsler MF 100
Bedienungs- und Sicherheitshinweise
IAN 46755
Version / Versio / Έκδοση v1.4

2 - English
Introduction
Thank you for purchasing this dual-colour lighting alarm clock.
By turning the alarm clock you can easily toggle between the clock and
date, indoor temperature, alarm time or timer display. The housing and the
display of the alarm clock is illuminated in two alternating colours. When
turning the housing or when the alarm sounds the alternating lights start
blinking.
Package Contents
-Dual-Colour Lighting Alarm Clock MF 100
-3 Batteries type AAA, 1.5 V
-User’s Manual with operating and service instructions
Table of Contents
Introduction.................................................................................................2
Important Safety Instructions......................................................................3
Operation....................................................................................................6
Appendix ..................................................................................................12

English - 3
Important Safety Instructions
Before you use this device for the first time, please read the following
notes in this manual and heed all warnings, even if you are familiar with
handling electronic devices. Keep this manual safe for future reference. If
you sell the device or pass it on, it is essential you hand over this manual
also.
This icon denotes important information for the safe operation
of the product and for the user’s safety.
This symbol denotes further information on the topic.
Operating Environment
The device is not for use in environments with high temperatures or
humidity (e.g. bathrooms), and must be kept free of dust. Operating
temperature and operating humidity: 5°C to 40°C, max. 90% RH. The
device may not be used outdoors or in tropical climates. This product has
not been designed for corporate or commercial applications. Use the
product in domestic environments for private applications only. Any use
other than that mentioned above does not correspond to the intended use.

4 - English
Always make sure that:
-no direct heat sources (e.g. heating) can affect the device;
-no direct sunlight or artificial light reaches the device;
-the device is never placed in the immediate vicinity of magnetic fields
(e.g. loudspeakers);
-no fire sources (e.g. burning candles) are placed on or near the device;
-no foreign bodies are introduced into the device;
-the device should not be subject to any sharp temperature changes;
-the device is not subject to excessive shocks and vibrations;
Children and Persons with Disabilities
Electrical appliances do not belong in the hands of children. People with
disabilities should only use electrical devices in appropriate circumstances.
Do not allow children or persons with disabilities to use electrical devices
when not under supervision. These may not comprehend the presence of
potential risks. Batteries and small parts represent potential choking
hazards. Keep the batteries in a safe place. If a battery is swallowed, seek
medical help immediately. Keep the packaging away from children and
persons with disabilities too as there is danger of suffocation.

English - 5
Batteries
Insert the batteries with the correct polarity. Never try to recharge the
batteries and under no circumstances throw them into fire. Remove
batteries when the device is not to be used for a long time. Non-intended
use may cause explosion and danger to life.
Conformity Notice
This device has been tested and approved for compliance
with the basic and other relevant requirements of the EMC
Directive 2004/108/EC. The corresponding Declaration of
Conformity can be found at the end of this User's Manual.

6 - English
Operation
Figure: Back panel of the clock
1 RESET
To reset all settings.
2 ADJ
To select digits while programming.
To toggle between 12 and 24 hour display.
To toggle between Centigrade and Fahrenheit temperature display
3 SET
To initialise a programming task.
4 Speaker
5 Battery compartment

English - 7
Inserting the Batteries
Insert the supplied batteries into the device.
-Open the alarm clock’s battery compartment (5) by pushing the back
panel cover in the direction contrary to the arrow mark.
-Insert the supplied batteries (size AAA) into the unit. Make sure that the
batteries are properly aligned according to the polarity (+ and -). The
correct polarity is labelled on the batteries and inside the battery
compartment.
-Slide the battery compartment cover onto the alarm clock housing.
When the time display is very dimmed it is time to replace the batteries.
When this happens, replace the batteries with new batteries of the
same type. After replacing the batteries it is necessary to set all
parameters again.
Technical Specifications
Model Dual-Colour Lighting Alarm Clock Auriol MF 100
Power Supply 3 Batteries type AAA, 1.5 V
Weight 68 g (without batteries)
Dimensions 76 x 76 x 38 mm (W x H x D)

8 - English
The Display
To toggle between the different alarm clock display modes, simply turn the
housing.
[6] [7]
[8] [9]
Figure: Clock operating modes

English - 9
Description of Illustration
[6] Time and date
[7] Alarm time
[8] Countdown timer
[9] Temperature display
Setting the Time and the Date
For the time format you can toggle between 12 and 24-hour display. Press
the ADJ button (2) to toggle between the different formats. This selection
will also apply to the alarm time.
If you select the 12-hours format, any afternoon hours will be displayed
with the “PM” mark.
-Turn the housing so that the clock is displayed (see figure [6]).
-Press the SET button (3) once. The hour indicator will start blinking.
-Press the ADJ button (2) multiple times to set the hour.
You can also keep the ADJ button (2) pressed down to accelerate the
digit adjustment.
-Press the SET button (3) again. The minute indicator will start blinking.
-Press the ADJ button (2) multiple times to set the minutes.
-Continue setting the month, the day and the year.
-After you have set the year, you are done.

10 - English
If you accidentally press the SET button (3) again, the hours start
blinking again. Press the SET button (3) as many times as necessary
until no digits are blinking.
Setting the Alarm Time
This function allows you to set your everyday alarm.
-Turn the housing so that the alarm clock is displayed (see figure [7]).
-Press the SET button (3) once. The hour indicator will start blinking.
-Press the ADJ button (2) multiple times to set the alarm hour.
You can also keep the ADJ button (2) pressed down to accelerate the
digit adjustment.
-Press the SET button (3) again. The minute indicator will start blinking.
-Press the ADJ button (2) multiple times to set the alarm minutes.
-Press the SET button (3) again. You have finished setting the alarm
and the alarm becomes enabled automatically.
A bell icon indicates that the alarm has been enabled.
To disable the alarm, press the SET button (3) once.
At the set alarm time, the device will emit an acoustic alarm signal.
Additionally, the housing will start blinking, alternating its dual colours.
Press any button or turn the device to disable the alarm. The set alarm
time will remain active, however, and the alarm will trigger again after 24
hours.
To set a new alarm time or to re-enable a previously disabled alarm,
simply repeat the steps for setting the alarm time.

English - 11
Setting a Countdown Timer
You can set a countdown time for maximum 99 minutes and 59 seconds
delay.
-Turn the housing so that the countdown timer is displayed (see figure
[8]). By default the display shows “00:00”.
-Press the SET button (3) once. The minute indicator will start blinking.
-Press the ADJ button (2) multiple times to set the countdown minutes.
You can also keep the ADJ button (2) pressed down to accelerate the
digit adjustment.
-Press the SET button (3) again. The second indicator will start blinking.
-Press the ADJ button (2) multiple times to set the countdown seconds.
-Press the SET button (3) again. You have finished setting the
countdown timer and the timer becomes enabled automatically.
After the set delay has expired, the device will emit an acoustic alarm
signal. Press any button to mute the sound. The countdown time will show
“00:00” and is therefore disabled.
Turning the housing when the alarm sounds will also mute the acoustic
signal. If you turn the housing back to the countdown timer display, the
previously set countdown time will show and the countdown starts
again from the beginning.
Displaying the Temperature
Turn the housing so that the temperature is displayed (see figure [9]).
You can choose between the units of measure degrees Centigrade and
Fahrenheit. Press the ADJ button (2) to toggle between the different units

12 - English
of measure. The currently selected units of measure are indicated by the
corresponding icon.
Resetting All Settings
Use a thin object (e.g. a paperclip) to press the RESET button (1) once. All
clock settings will be restored to the factory-default values.
Appendix
Repair and Maintenance
Repairs are required when this device has been damaged in any way, for
example, when liquid has entered the product, when the product has been
exposed to rain, when the product does not work normally or if the product
has been dropped. If smoke, unusual noises or smells are noticed, remove
the batteries immediately. In these cases the device should not be used
further and should be inspected by authorized service personnel. Please
contact qualified personnel when repair is needed. Never open the
housing of the device, or the accessories. Only use a clean, dry cloth for
cleaning. Never use any corrosive liquids.

English - 13
Disposal of Old and Defective Devices
Devices marked with this symbol are subject to the European
Directive 2002/96/EC. All electric and electronic devices
must be disposed of separately from household waste at
established bodies. Avoid hazards to the environment and
dangers to your personal health by disposing of the device
properly.
For further information about proper disposal, contact your local
government or disposal bodies. Respect the environment. Old batteries do
not belong in with domestic waste. They must be handed in to a collection
point for old batteries.
Recycle the packaging material properly also. Cardboard packaging can
be taken to paper recycling containers or public collection points for
recycling. Any films or plastic contained in the packaging should be taken
to your public collection points.

14 - English
Warranty Information
The guarantee period is for 3 years as of date of purchase. For any
guarantee claims, please have your proof of purchase ready, and phone
our hotline:
TARGA GmbH
Postfach 22 44
D-59482 Soest
Germany
Phone: 0207 - 36 50 744
TARGA GmbH
Postfach 22 44
D-59482 Soest
Germany
Phone: 01 - 242 15 83

Suomi - 15
Johdanto
Kiitämme sinua tämän kaksivärivalaistun herätyskellon hankinnan
johdosta.
Herätyskellon koteloa kääntämällä vaihdetaan näyttötilaa, joita ovat
kellonaika ja päivämäärä, sisälämpötila, hälytysaika tai ajastin.
Herätyskellon kotelo ja näyttö on valaistu kahdella vuorottelevalla
värivalolla. Kun koteloa käännetään tai kun herätys käynnistyy,
vuorottelevat värivalot alkavat vilkkua.
Pakkauksen sisältö
-Kaksivärivalaistu herätyskello MF 100
-3 AAA-paristoa 1,5 V
-Käyttöopas, jossa on käyttö- ja hoito-ohjeet
Sisällysluettelo
Johdanto...................................................................................................15
Tärkeitä turvaohjeita.................................................................................16
Käyttö .......................................................................................................19
Liite...........................................................................................................25

16 - Suomi
Tärkeitä turvaohjeita
Ennen kuin käytät laitetta ensimmäistä kertaa, lue seuraavat
huomautukset tästä käyttöoppaasta ja noudata kaikkia varoituksia, vaikka
olisitkin tottunut käyttämään sähkölaitteita. Säilytä tämä käyttöopas
myöhempää käyttöä varten. Jos myyt laitteen tai luovutat sen toiselle
käyttäjälle, anna sen mukana myös tämä käyttöopas.
Tämä kuvake tarkoittaa tärkeitä tuotteen ja käyttäjän
turvallisuutta koskevia tietoja.
Tämä kuvake tarkoittaa lisätietoja aiheesta.
Käyttöympäristö
Laitetta ei ole tarkoitettu käytettäväksi ympäristöissä, joissa on korkea
lämpötila tai kosteus (esim. kylpyhuone), ja se on pidettävä pölyttömänä.
Käyttöpaikan lämpötila ja ilmankosteus: 5–40°C, suhteellinen kosteus
enintään 90 %. Laite ei sovellu käytettäväksi ulkona tai trooppisilla alueilla.
Tätä tuotetta ei ole tarkoitettu yrityskäyttöön eikä kaupallisiin sovelluksiin.
Tuote soveltuu vain kotikäyttöön. Muu kuin edellä mainittu käyttö ei vastaa
tarkoitettua käyttötapaa.
Huolehdi seuraavasta:

Suomi - 17
-Älä säilytä sitä lämmönlähteiden (esim. lämmityslaitteen) lähellä.
-Estä auringonvalon tai keinovalon kohdistuminen suoraan laitteeseen.
-Älä sijoita laitetta magneettikenttien (esim. kaiuttimien) välittömään
läheisyyteen.
-Laitetta ei saa sijoittaa avotulen (esim. palavan kynttilän) lähelle.
-Älä työnnä laitteeseen vieraita esineitä.
-Suojaa laite nopeilta lämpötilan vaihteluilta.
-Suojaa laite kovilta kolhuilta ja tärinältä.
Lapset ja toimintarajoitteiset henkilöt
Sähkölaitteet on pidettävä lasten ulottumattomissa. Toimintarajoitteiset
henkilöt saavat käyttää sähkölaitteita vain valvotuissa oloissa. Älä anna
lasten tai toimintarajoitteisten henkilöiden käyttää sähkölaitteita ilman
valvontaa. He eivät ehkä ymmärrä mahdollisia vaaratekijöitä. Paristot ja
pienet osat saattavat aiheuttaa tukehtumisvaaran. Säilytä paristoja
turvallisessa paikassa. Ota välittömästi yhteyttä lääkäriin, jos akku tai
paristo on nielty. Säilytä pakkausmateriaalit poissa lasten ja
toimintarajoitteisten henkilöiden ulottuvilta, sillä ne voivat aiheuttaa
tukehtumisvaaran.

18 - Suomi
Paristot
Aseta paristot paikalleen oikein päin. Älä yritä ladata paristoja äläkä
milloinkaan heitä niitä tuleen. Poista paristot, jos laitetta ei käytetä pitkään
aikaan. Laitteen väärinkäyttö voi aiheuttaa räjähdyksen ja hengenvaaran.
Vaatimustenmukaisuuslauseke
Tämä laite on testattu EMC-direktiivin 2004/108/EY
perusvaatimusten ja muiden olennaisten vaatimusten
mukaisesti. Tätä vastaava vaatimustenmukaisuuslauseke
on tämän käyttöoppaan lopussa.

Suomi - 19
Käyttö
Kuva: Kellon takapaneeli
1 RESET
Kaikkien asetusten nollaus.
2 ADJ
Numeroiden valinta asetusten ohjelmoinnissa.
12 tai 24 tunnin kellon valinta.
Celsius- tai Fahrenheit-asteiden valinta lämpötilanäyttöön.
3 SET
Asetusten ohjelmoinnin aloitus.
4 Kaiutin
5 Paristolokero

20 - Suomi
Paristojen asentaminen
Aseta mukana toimitetut paristot kelloon.
-Avaa kellon paristolokero (5) työntämällä takapaneelin kantta
päinvastaiseen suuntaan kuin nuolimerkki osoittaa.
-Aseta kellon mukana toimitetut AAA-paristot lokeroon. Varmista, että
paristot tulevat oikein päin napaisuusmerkkien (+ ja -) mukaisesti.
Paristoissa ja paristolokeron sisällä on napaisuusmerkinnät.
-Työnnä paristolokeron kansi paikalleen kellon koteloon.
Vaihda paristot siinä vaiheessa, kun kellon aikanäyttö on himmennyt
huomattavasti. Kun näin tapahtuu, vaihda tilalle uudet, saman tyyppiset
paristot. Paristojen vaihdon jälkeen kaikki asetukset täytyy valita
uudelleen.
Tekniset tiedot
Malli Kaksivärivalaistu herätyskello Auriol MF 100
Virtalähde 3 AAA-paristoa 1,5 V
Paino 68 g (ilman paristoja)
Ulkomitat 76 x 76 x 38 mm (L x K x S)
Table of contents
Languages:
