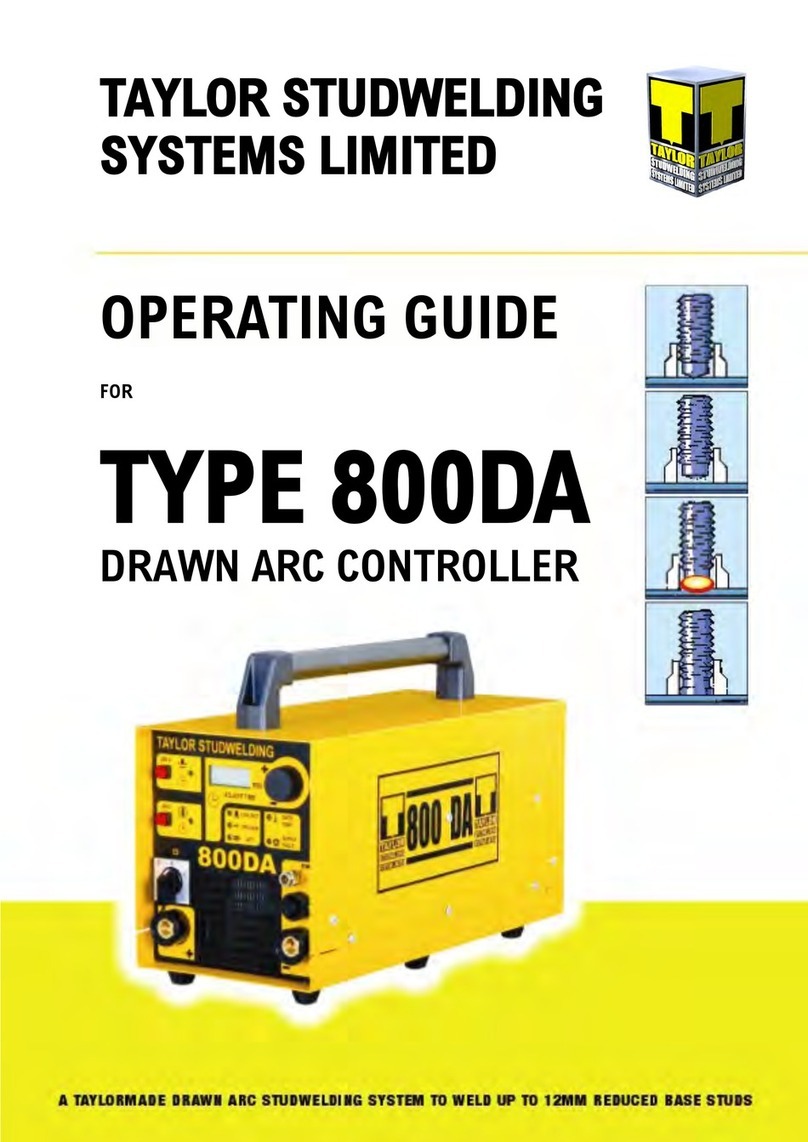
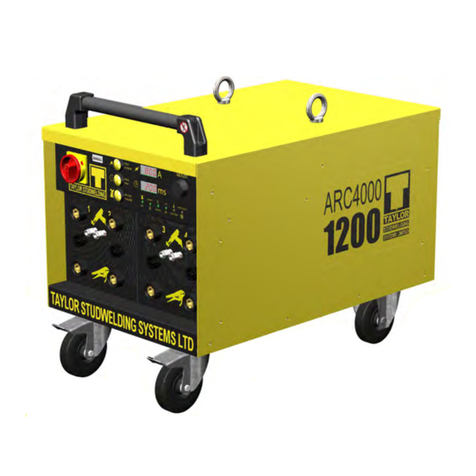
Taylor i16 User manual

V-1C
1
OPERATING GUIDE
FOR
TYPE i16
DRAWN ARC CONTROLLER
TAYLOR STUDWELDING
SYSTEMS LIMITED

V-1C
2
INDEX
PAGE No. CONTENT
3USEFUL INFORMATION.
5IMPORTANT SAFETY INFORMATION.
7INTRODUCTION TO STUDWELDING.
8GUIDE TO EXTERNAL FEATURES.
11 SETTING UP AND WELDING.
15 WELDING TIME AND CURRENT SETTINGS.
16 VISUAL WELD INSPECTION.
17 WELD TESTING.
20 STUDWELDING TECHNIQUES.
23 PARTS LIST & EXPLODED DIAGRAMS.
31 CIRCUIT SCHEMATIC.
33 ACCESSORIES.
34 EC DECLARATION OF CONFORMITY.

V-1C
3
USEFUL INFORMATION
MANUFACTURERS DETAILS
TAYLOR STUDWELDING SYSTEMS LIMITED
COMMERCIAL ROAD
DEWSBURY
WEST YORKSHIRE
WF13 2BD
ENGLAND
TELEPHONE :+44 (0)1924 452123
FACSIMILE :+44 (0)1924 430059
email :sales@taylor-studwelding.com
WEB :www.taylor-studwelding.com
SALES DIRECT TEL :+44 (0)1924 487703
TECHNICAL HELPLINE :+44 (0)1924 487701
You may wish to record the details of your controller below as this informaon will help
with any technical assistance you may require:
PURPOSE AND CONTENT OF THIS GUIDE
This guide has been wrien for :
• The personnel of the end-user responsible for the installaon and maintenance of the
controller.
• The operator of the welding controller.
This guide contains informaon relang to :
• Installaon and connecon.
• Operaon.
• Technical specicaons and parameters.
• Spare parts.
CONTROLLER SERIAL No.
DATE PURCHASED.

V-1C
4
USEFUL INFORMATION
FURTHER INFORMATION
Should you require addional technical informaon, please contact us directly (details
on previous page) or our local agent / distributor (details of agents etc. can be obtained
from us).
This guide contains important informaon which is a pre-requisite for safe Operaon
of the equipment. The operang personnel must be able to consult this guide when
necessary. In the interests of safety, make this guide available to your personnel in good
me.
If the equipment is sold / passed on, please hand over this manual to the new owner
and if possible please inform us of the name and address of the new owner, in case we
need to contact him regarding the safety of the machine.
PLEASE READ THIS GUIDE CAREFULLY BEFORE INSTALLING OR OPERATING THE
CONTROLLER.
PLEASE OBSERVE CAREFULLY ALL SAFETY PROCEDURES/INSTRUCTIONS.
DUE TO THE POWER REQUIREMENTS AND ELECTROMAGNETIC EMISSIONS
PRODUCED DURING NORMAL USE, THIS MACHINE MUST ONLY BE OPERATED IN
AN INDUSTRIAL ENVIRONMENT.
THIS MACHINE OPERATES FROM A MAINS SUPPLY OF 400V AC @ 50Hz
NEVER REMOVE ANY PORTION OF THE UNIT HOUSING WITHOUT FIRST
ISOLATING THE CONTROLLER FROM THE MAINS ELECTRICAL SUPPLY.
NEVER OBSTRUCT THE UNDERSIDE, FRONT OR REAR PANELS AS THIS MAY
CAUSE THE UNIT TO OVERHEAT DURING OPERATION.
DO NOT USE THIS WELDING POWER SOURCE FOR PIPE THAWING OR
IN CONDITIONS OF RAIN OR SNOWFALL.
THIS EQUIPMENT HAS BEEN EMC TESTED AND APPROVED IN ACCORDANCE
WITH BS EN 60974-10 (CATEGORY 2).
Taylor Studwelding Systems Limited reserves the right to amend the contents of this guide without nocaon.

V-1C
5
IMPORTANT SAFETY INFORMATION !
PROTECT YOURSELF AND OTHERS !
Read and understand these safety notes.
1. ELECTRICAL
No poron of the outer cover of the welding controller should be removed by anyone other
than suitably qualied personnel and never whilst mains power is connected.
ALWAYS DISCONNECT THE MAINS LEAD BEFORE ATTEMPTING ANY MAINTENANCE.
BEWARE - RISK OF ELECTRIC SHOCK !
Do not use any uids to clean electrical components as these may penetrate into the
electrical system.
Installaon must be according to the seng up procedure detailed on page 11 of this guide
and must be in line with naonal, regional and local safety codes.
2. FIRE
During welding small parcles of very hot metal are expelled. Ensure that no combusble
materials can be ignited by these.
3. PERSONNEL SAFETY
Arc rays can burn your eyes and skin and noise can damage your hearing. Operators and
personnel working in close proximity must wear suitable eye, ear and body protecon.
Fumes and gases can seriously harm your health. Use the equipment only in a suitably
venlated area. If venlaon is inadequate, then appropriate fume extracon equipment
must be used.
Hot metal spaer can cause re and burns. Appropriate clothing must be worn. Clothing
made from, or soiled with, combusble materials must NOT be worn.
Have a re exnguisher nearby and know how to use it.
Magnec elds from high currents can aect heart pacemakers or other electronically
controlled medical devices. It is imperave that all personnel likely to come into the vicinity
of any welding plant are warned of the possible risks before entering the area.
4. MAINTENANCE
All cables must be inspected regularly to ensure that no danger exists from worn or
damaged insulaon or from unsound electrical connecons. Special note should be made
of the cables close to the pistol, where maximum wear occurs. As well as producing
inconsistent welds, worn cables can overheat or spark, giving rise to the risk of re.

V-1C
6
IMPORTANT SAFETY INFORMATION !
5. TRAINING
Use of the equipment must be limited to authorised personnel only who must be suitably
trained and must have read and understood this manual. This manual must be made
available to all operators at all mes. Further copies of this manual may be purchased from
the manufacturer. Measures must be taken to prevent the use of this equipment by
unauthorised personnel.
6. LIMITATIONS OF USE
The mass of the welding controller is 37kg and is suitable for 2 person liing. It is ed with
appropriate carrying handles to allow liing by hand. The controller is suitable for use in an
environment with increased risk of electric shock.
6. INSTALLATION
Ensure that the site chosen for the equipment is able to support the weight of the
equipment and that it will not fall or cause a danger in the course of its normal operaon.
Do not hang connecng cables over sharp edges and do not install connecng cables near
heat sources or via trac routes where people may trip over them or they may be
damaged by the passage of vehicles (forklis etc).
7. INTERFERENCE
During welding operaons, intense magnec and electrical elds are unavoidably produced
which may interfere with other sensive Electronic equipment.
All Taylor Studwelding equipment is designed, manufactured and tested to conform the
current appropriate European standards and direcves regarding electromagnec
emissions and immunity and as such is safe to use in any normal environment.
8. DISPOSAL
The equipment either wholly or any of its component parts may be disposed of as part of
general industrial waste or passed to a scrap merchant. None of the components used in
the manufacture are toxic, carcinogenic or harmful to health in their “as supplied”
condion.

V-1C
7
INTRODUCTION TO STUDWELDING
The Taylor Studwelding i16 Drawn Arc controller when matched with an appropriate pistol
and earth cables is intended for precision stud welding up to 16 mm diameter reduced base
studs. The controller is easily transportable and has been designed to operate with a
minimum amount of maintenance.
The energy required to carry out the welding operaon is derived from a fully micro-
processor controlled power inverter inside the controller.
Taylor Studwelding Systems Ltd pistols are modern, ergonomically designed and oer
maximum comfort in handling with minimum operator fague.
THE PROCESS
The process of drawn arc studwelding is long established and well proven. The basic steps
are as follows :
• A measured amount of weld stud protrusion is set at the welding pistol.
• Once in posion, the pistol lis the stud away from the work-piece, simultaneously
striking an arc between the two.
• Both the p of the weld stud and the surface of the work-piece melt as the arc is
sustained for a pre-determined interval.
• At the compleon of the pre-determined interval, the pistol returns the weld stud to
the molten pool on the work-piece, thus forming a weld.
The most common and tradional drawn arc welds have a weld duraon greater than
100ms and employ the use of a single use ceramic arc shield, commonly referred to as a
ferrule. This ferrule helps to protect the arc during the weld and assists in formaon of the
nal llet. Post welding the ferrule is removed and disposed of.
It is possible to stud weld without a ferrule. This method is more commonly employed with
welds having a duraon of less than 100ms and this type of weld is referred to as short
cycle stud welding. Although no ferrule is employed, it is recommended pracce in short
cycle welding to employ a suitable shielding gas to reduce the amount of porosity in the
completed weld and improve weld quality.

V-1C
8
GUIDE TO EXTERNAL FEATURES
FRONT PANEL
1. CARRYING HANDLES
2. MULTI-FUNCTION DISPLAY
3. INDICATOR LEDS (SEE PAGE 9)
4. WELDING EARTH SOCKET
5. VENT - DO NOT OBSTRUCT!
1
2
3
4
5
6
7
8
9
10
11
6. CONTROL KNOB/PUSHBUTTON
7. ON/OFF SWITCH
8. SHIELDING GAS INLET
9. WELDING PISTOL SOCKET
10. SHIELDING GAS OUTLET
11. PISTOL CONTROL SOCKET

V-1C
9
GUIDE TO EXTERNAL FEATURES
CONTROL PANEL
1. MULTI-FUNCTION DISPLAY UNIT - USED TO SELECT OPERATIONAL PARAMETERS ETC. AND
REPORT BACK INFORMATION
2. CONTACT/ERROR LED - DURING NORMAL WELDING OPERATIONS THIS LED GLOWS AMBER
TO INDICATE STUD TO PLATE CONTACT WITHOUT WHICH A WELD CANNOT TAKE PLACE. IF
AN ERROR OR FAULT CONDITION OCCURS, THIS LED GLOWS RED TO DRAW ATTENTION TO
THE OCCURRENCE. FURTHER INFORMATION IS DISPLAYED ON THE MULTI-FUNCTION DISPLAY
3. TRIGGER LED - INDICATES THAT PISTOL TRIGGER HAS BEEN ACTIVATED
4. GAS LED - INDICATES THAT SHIELDING GAS FLOW IS ACTIVATED
5. GUN LIFT LED - INDICATES THAT THE GUN LIFT HAS BEEN ACTIVATED
6. WELD LED - INDICATES THAT THE WELD CURRENT HAS BEEN ACTIVATED
7. CONTROL KNOB - INCORPORATING PUSH BUTTON FUNCTION - USED FOR INTERACTION WITH
MULTI-FUNCTION DISPLAY
1
2
3
4
5
67

V-1C
10
GUIDE TO EXTERNAL FEATURES
BACK PANEL
1. 4m CABLE WITH 3 Ph MAINS CONNECTOR
2. 3 Ph MAINS CABLE INLET GLAND
3. RATING/SERIAL PLATE
4. VENTILLATION GRILLE - ! DO NOT OBSTRUCT !
1
2
3
4

V-1C
11
SETTING UP AND WELDING
Set up the control unit at the place of work, ensuring that the
mains switch is in the OFF posion.
Plug the controller into a suitable three phase AC supply with a
32A motor rated fuse/breaker.
Plug the welding earth cables into the controller. Note that the
cable end weld plug has a peg which mates with the key slot in
the panel mounted socket.
IMPORTANT! Secure the connectors with a clockwise turn unl
they lock. Failure to do this may result in damage to the
connectors during welding.
Aach the welding earth clamps to the work piece at
approximately 180° to each other; this will help prevent "arc-
blow" when welding takes place. Prior to ng the clamps,
ensure that the contact area of the work piece is free from
rust, paint, grease etc., as this will result in a poor welding
connecon.
Plug the welding pistol cable into the controller. Note that the
cable end weld plug has a peg which mates with the key slot in
the panel mounted socket.
IMPORTANT! Secure the connectors with a clockwise turn unl
they lock. Failure to do this may result in damage to the
connectors during welding.
Plug the pistol control cable into the controller. Note that the
cable end plug and panel-mounng socket are keyed to
prevent incorrect ng. Push the plug rmly home and twist
the locking ring to secure the plug in posion.
Set up the welding pistol according to the instrucons in the
operang guide supplied with the pistol.

V-1C
12
SETTING UP AND WELDING
If oponal shielding gas is to be used during welding. Aach the
bole supply to the controller via the front panel using a suitable
self-sealing push-on socket.
Connect the gas pipe from the pistol to the output socket on the
front panel (oponal).
If the mains supply is switched. Turn ON the mains supply.
Turn ON the controller using the switch on the front panel. The
controller will run through a start-up self-test during which the
mul-funcon display will cycle through a welcome screen and
show the current rmware version etc. also various indicators
etc. on the front panel will ash, before seling to a display
showing the last user setup. At this point the controller is ready
to use at the sengs employed during the previous operang
period.
However. If a sengs change is required it is possible to do so
from this point by pressing the control knob. This will toggle the
display. The display will show 2 opons:
->Change
Load
With the indicator (->) aligned with the word Sengs.
The 2 opons oer alternave paths to achieve the required
welding parameter set up for the job in hand. Opon Change is
used to manually select a new set of parameters for the next
welding operaon.
Whilst opon Load is used to load a set of pre-exisng welding
parameters from the controllers internal memory.

V-1C
13
SETTING UP AND WELDING
By rotang the control knob, select either:
->Change or Change
Load ->Load
And press the control knob to conrm selecon.
Selecng Change will take you through the following series of manual weld parameter
seng screens:
CURRENT TIME GAS SAVE
Beginning with CURRENT. Set the desired parameter value by turning the control knob then
press the control knob to lock-in the parameter and move to the next screens (TIME, GAS).
Repeat these steps to adjust and lock-in the TIME and GAS parameters. The nal screen
SAVE, invites you to save the parameters you have set into one of the 20 available memory
locaons in the controller. Select the locaon (1 - 20) by turning the control knob and
nalise the save by pressing the control knob which will return you to the normal operang
mode screen, which will now display the parameters you have set.
If you have already saved parameters in one or more of the
memory locaons, you may wish to select Load at the selecon
screen (see above). You can then select (by turning the control
knob) which of the 20 memory locaons you wish to load from
and select this parameter set by pressing the control knob. This
will load the parameters from the selected memory locaon
and return you to the normal operang screen, displaying the
loaded parameters.

V-1C
14
SETTING UP AND WELDING
Set up the welding pistol in-line with the operang guide
supplied with the pistol. Ensuring that there is sucient stud
protrusion and that the stud is centred in the ferrule/foot
assembly. Place the pistol perpendicular to the work piece with
the stud touching down at the desired locaon to be welded.
Press down on the pistol unl the ceramic ferrule rests rmly on
the work piece. Press the trigger to iniate the weld sequence
(see graphic below). See the secon on STUDWELDING TECHNIQUES for further advice.
Having welded the stud, draw the pistol vercally o the stud.
Failure to do this may cause the split nes of the chuck to
splay out. This will result in the chuck and stud arcing together
during subsequent welds.
Finally, remove the ferrule by lightly tapping
unl it shaers and visually inspect the weld.
For a guide to the inspecon of the welded
stud see the secons on VISUAL WELD
INSPECTION and WELD TESTING.
1. PREPARE PISTOL 2. POSITION PISTOL 3. TRIGGER. LIFT & PILOT ARC
4. MAIN ARC & FUSION 5. ARC STOPS, PISTOL PLUNGES 6. WELD COMPLETE. WITHDRAW

V-1C
15
WELDING TIME AND CURRENT SETTINGS
This page is intended as a guide to seng your
machine.
A set of basic formulae as dened by the Brish
Standard BS EN ISO 14555:2014 (European
Standard EN ISO 14555:2014) Annex A.2.7.2.2
and Annex A.2.7.2.4 may be used to calculate the
current and me sengs to weld any stud.
These formulae when applied to standard studs
give results shown in the table on this page. A
graphical representaon of the data is also
illustrated below.
The sengs generated in the table are only
intended as a starng point. It is possible that the sengs will give sasfactory results
without adjustment, but
in reality the quality of
the welding results is
governed by many
variable factors. These
include, most obviously,
the welding me, current
and arc-gap (pistol li) as
covered in the table, but
can also include factors
such as stud and work-
piece material type and
condion, ambient
temperature, relave
humidity, quality of
supply etc. All of these
factors can act on the
weld to change the
outcome. It is
recommended that in all
instances, you need to
carry out sample welds in
your actual condions
and environment. This
will enable you to alter
the sengs, where
necessary, to achieve
welds that are most
acceptable to you.
STUD
TYPE
ACTUAL
DIAMETER
(mm)
WELD
CURRENT
(A)
WELD
TIME
(ms)
5FB 5400 100
6RB 4.7 376 94
6FB 6480 120
8RB 6.2 496 124
8FB 8640 160
10RB 7.9 632 158
10FB 10 800 200
12RB 9.5 760 190
16RB 13.5 1100 400
WELD CURRENT - EN ISO 14555
0
200
400
600
800
1000
1200
1400
1600
1800
2000
5FB 6RB 6FB 8RB 8FB 10RB 10FB 12RB 12FB 16RB 16FB 19FB 20RB 20FB
STUD SIZE
CURRENT (A)
WELD TIME - EN ISO 14555
0
0.1
0.2
0.3
0.4
0.5
0.6
0.7
0.8
0.9
5FB 6RB 6FB 8RB 8FB 10RB 10FB 12RB 12FB 16RB 16FB 19FB 20RB 20FB
STUD SIZE
WELD TIME (s)

V-1C
16
VISUAL WELD INSPECTION
This page will help you to recognise a poor weld when you see one and give some of the
possible explanaons as to how it may have occurred. Your test welds should look like the
rst example diagram in the series and once you transfer to the actual job, periodic checks
should be made to ensure that your welding is consistently good.
POINTS TO LOOK FOR IRRESPECTIVE OF PROCESS USED.
• L.A.W. (Length Aer Welding). This should be correct to within + 0 / - 1 mm.
• The base llet of the welded stud is complete.
• The welded stud is perpendicular to the work-piece.
WHEN USING A CERAMIC FERRULE.
This diagram is an example of a good normal weld, fullling the criteria above i.e. The
LAW is correct, the stud has a complete, well formed and even llet and is also
perpendicular to the work-piece.
The following examples will help you to recognise the most common types of poor
weld, explain the possible causes of these problems and how to remedy them.
EXAMPLE 1
PROBLEM : Insucient heat, causing the L.A.W. to be too long and the llet to
be underdeveloped and/or incomplete.
REMEDY : Increase the welding me (see page 13).
EXAMPLE 2
PROBLEM : Excessive heat, causing the L.A.W. to be too short and the llet to be
too large and messy, spreading out under the ferrule and/or
splashing up the threads.
REMEDY : Reduce the welding me (see page 13).
EXAMPLE 3
PROBLEM : The ferrule is not being held rmly against the work-piece and/or
the stud is binding against the ferrule.
REMEDY : Hold the pistol rmly down to the work-piece (see page 14) and
reset the alignment of the stud and ferrule (refer to your pistol
setup guide).
EXAMPLE 4
PROBLEM : Insucient stud protrusion set on the pistol and/or the stud is
binding against the ferrule.
REMEDY : Adjust stud protrusion to correct seng (refer to your pistol setup
guide).
EXAMPLE 5
PROBLEM : Poor alignment i.e. stud is not perpendicular to the work- piece.
REMEDY : Hold the pistol perpendicular to the work-piece (see page 14).
NOTE : If the misalignment is only slight and in all other aspects the weld is
good, then the weld may be salvaged by tapping straight with a so
mallet.
✓

V-1C
17
WELD TESTING
There are two factors which should receive special aenon in establishing visually whether or not
a stud weld is sound. These are :
• The length aer weld (L.A.W.) of the stud should be correct. That is to say that a stud which is
intended to be 50 mm long aer welding, should be correct within +0/-1 mm. A word of
explanaon is perhaps needed on this point. All studs produced include a "weld allowance".
This allowance is so arranged for the dierent diameters of stud, that it will be completely
melted during the welding process, provided of course that the correct condions have been
established and the correct values of current and me are used.
• The llet of metal formed around the base of the stud should be well formed, reasonably
evenly distributed, completely free from blow holes and of a silver blue colour.
These two factors combined form the basis of all visual stud weld examinaon. It should be the aim
of every operator to produce these results.
Under normal condions a stud welded to clean mild steel plate of adequate thickness having the
correct L.A.W. and llet formaon. as described above, will be a sasfactory weld.
It should be remembered, however, that dierent applicaons or condions will produce slightly
dierent visual results, parcularly in the appearance of the llet, i.e.. Slightly rusty, dirty or oily
plate will produce blow holes in the llet, in proporon to the degree of plate contaminaon.
Welding close to some magnec obstrucon may produce uneven llet distribuon. Too much
power will produce a llet that ows too easily and is lost either up in the threads of the stud or out
through the ferrule vents, while too lile power may not melt sucient material to form a complete
llet.
It is important, therefore, to judge the degree to which these possible variaons will aect the weld
strength, but in general, provided that the L.A.W. is correct and the llet formaon is not unsightly,
a visual examinaon is all that is required.
Further tesng may be carried out on a "percentage of producon" basis, and the methods used fall
into the classes outlined below.
1. DESTRUCTIVE TESTING.
Should only be used on studs welded to samples and test pieces.
• Hammering a stud over may look spectacular, but it is not a sasfactory test, as the direcon
and force behind the blows is uncontrolled, as also is the point at which the impact takes
place. The length, diameter and type of stud also have an eect on the results obtained.
• Bending the stud over by using a tube of approximately the same bore as the stud diameter.
This method is preferred to hammering, but again no conclusive evidence as to the strength
of the weld is obtained.
• Loading the stud by the use of washers / spacer and a nut unl the stud breaks. This method
is much more conclusive and should show that the weld is in fact stronger than the stud. Use
of a suitably calibrated torque wrench for this test will give an indicaon of the U.T.S.
developed by the stud material under test.

V-1C
18
WELD TESTING
2. NON DESTRUCTIVE TESTING.
Generally the most praccal way of tesng threaded stud welds, without destroying the
stud, is with the use of proof tests. A torque wrench is parcularly useful for this purpose.
Below and overleaf are some tables which you may nd useful. However, it must be noted
that :
• Formulas & data shown are intended for guidance only.
• In applicaons where control of preload is important, the torque - tension
relaonship should be determined experimentally on the actual parts involved
including any lubricants.
• The coecient of fricon (k) varies with material, surface nish and lubricity of
threads and bearing areas of fastened parts.
• For standard steel screws it is 0.19 to 0.25 and 0.13 to 0.17 for plated screws. An-
seize materials and lubricants can lower k to 0.05. For some stainless steel threads
and parts not coated or lubricated k may be as high as 0.33
• All the gures are approximate and do not form part of any specicaon.
• Designers and speciers must sasfy themselves that the studs and materials chosen
are suitable for their parcular applicaon.
All torque gures are calculated by the formula : T = kDP
Where :T = Torque (Nm)
D = Eecve Stud Diameter (m)
k = Coecient of Fricon (0.2 used for calculaons)
Material properes: (N/mm²) (N/mm²) (N/mm²)
UTS Yield Safe
Mild Steel (4.8) 420 340 272
Stainless Steel (1.4301) 540 350 280
Note: safe loads are 80% of the yield

V-1C
19
Stud loads - Full Base Drawn Arc Studs (kN)
Torque required to reach the loads above (Nm)
Stud loads - Reduced Base drawn Arc Studs (kN)
Torque required to reach the loads above (Nm)
Mild Steel Mild Steel Mild Steel Stainless
Steel
Stainless
Steel
Stainless
Steel
Thread UTS Yield Safe UTS Yield Safe
M5 x 0.8 5.8 4.7 3.7 7.4 4.8 3.8
M6 x 1.0 8.2 6.6 5.3 10.6 6.8 5.4
M8 x 1.25 15.2 12.3 9.8 19.6 12.7 10.1
M10 x 1.5 23.8 19.2 15.4 30.6 19.8 15.8
M12 x 1.75 34.6 28.0 22.4 44.5 28.8 23.1
Mild Steel Mild Steel Mild Steel Stainless
Steel
Stainless
Steel
Stainless
Steel
Thread UTS Yield Safe UTS Yield Safe
M5 x 0.8 4.9 4.0 3.2 6.3 4.1 3.3
M6 x 1.0 8.2 6.7 5.3 10.6 6.9 5.5
M8 x 1.25 20.7 16.8 13.4 26.7 17.3 13.8
M10 x 1.5 40.5 32.8 26.2 52.1 33.8 27.0
M12 x 1.75 71.0 57.5 46.0 91.3 59.2 47.4
WELD TESTING
Mild Steel Mild Steel Mild Steel Stainless
Steel
Stainless
Steel
Stainless
Steel
Thread UTS Yield Safe UTS Yield Safe
M6 x 1.0 7.2 5.8 4.7 9.3 6.0 4.8
M8 x 1.25 12.6 10.2 8.2 16.3 10.5 8.4
M10 x 1.5 20.5 16.6 13.3 26.4 17.1 13.7
M12 x 1.75 29.7 24.0 19.2 38.2 24.8 19.8
Mild Steel Mild Steel Mild Steel Stainless
Steel
Stainless
Steel
Stainless
Steel
Thread UTS Yield Safe UTS Yield Safe
M6 x 1.0 6.8 5.5 4.4 8.8 5.7 4.6
M8 x 1.25 15.7 12.7 10.2 20.2 13.1 10.5
M10 x 1.5 32.5 26.3 21.1 41.8 27.1 21.7
M12 x 1.75 56.6 45.8 36.6 72.7 47.1 37.7

V-1C
20
STUDWELDING TECHNIQUES
The operang instrucons given previously in this guide apply to the majority of general
applicaons where it is possible to use the pistol in the down hand posion and with standard cable
lengths. For many applicaons these condions do not apply and the following notes will give some
guidance as to the methods used to obtain sasfactory results for a variety of applicaons.
1. WELDING TO A PLATE IN THE HORIZONTAL POSITION.
In this posion there is a tendency for the weld metal to run to the underside of the stud during
welding, due to the acon of gravity, resulng in an uneven llet. The eect is more noceable as
stud diameter increases and generally speaking it is not recommended that studs of 12 mm
diameter and over be welded to vercal plates for this reason. The essenal requirement to obtain
sasfactory llet formaon is to use the shortest weld me possible with increased welding current.
Welding to a vercal surface reduces the maximum size of the stud a given power source will weld.
It must be remembered, that greater care is required to ensure that the stud is perpendicular to the
work piece. A special tripod foot aachment can be supplied if required. Take parcular care to
keep the ferrule grip, foot adapter and chuck clean.
2. WELDING TO A PLATE IN THE OVERHEAD POSITION.
IMPORTANT ! You must protect your face and shoulders with a helmet and cape before carrying out
overhead welding operaons. Weld spaer can do a lot of damage !
Firstly, obtain sasfactory weld sengs in the down hand posion before making aempts in the
overhead posion. Since the weld metal is transferred from stud to plate in small parcles in the
down hand posion, it follows that, when welding overhead, the transfer takes place against
gravity. As with vercal welding the best results will be achieved using the shortest possible weld
me with increased welding current.
It is important that the ferrule grip, foot adapter and chuck are kept free from spaer build up as
this can cause stud return problems or possibly short out/bridge out the weld.
3. PISTOL ADJUSTMENTS WHEN WELDING IN THE VERTICAL OR OVERHEAD POSITIONS.
Problems may be encountered when welding in the vercal or overhead posions with a damped
pistol. To prevent problems occurring, where it is possible to do so, the damping eect should be
removed or turned o.
Welding can then connue as outlined in secons 1. and 2.
4. USING LONG CABLE LENGTHS.
Frequently the pistol must be used some distance from the nearest available mains supply, for
instance on board ship, in power staons and building construcon, in workshops building large pre
-fabricated structures etc. In these cases long lengths of welding cable are used and it must be
realised at the outset that, the longer the cables the smaller the maximum diameter of stud which
can be welded with a given power source.
To help get over this problem, if larger diameter studs are to be welded with long lengths of cable,
increase the welding cable conductor size.
Try to avoid running the pistol cables and the earth cables alongside each other as this can cause a
choking eect, reducing power. Also avoid coiling any excess cable as this will have the same eect.
This manual suits for next models
1
Table of contents
Other Taylor Controllers manuals
Popular Controllers manuals by other brands

Victron energy
Victron energy Isolated SmartSolar MPPT RS 450/100 manual

Parker
Parker A4WO Product bulletin

TKH
TKH KEYPROCESSOR Pluto installation instructions

Carel
Carel compactSteam CHF quick start guide

AUTOTERM
AUTOTERM Comfort Control PU-CC quick start guide

INSTEON
INSTEON KeypadLinc 2487S quick start guide