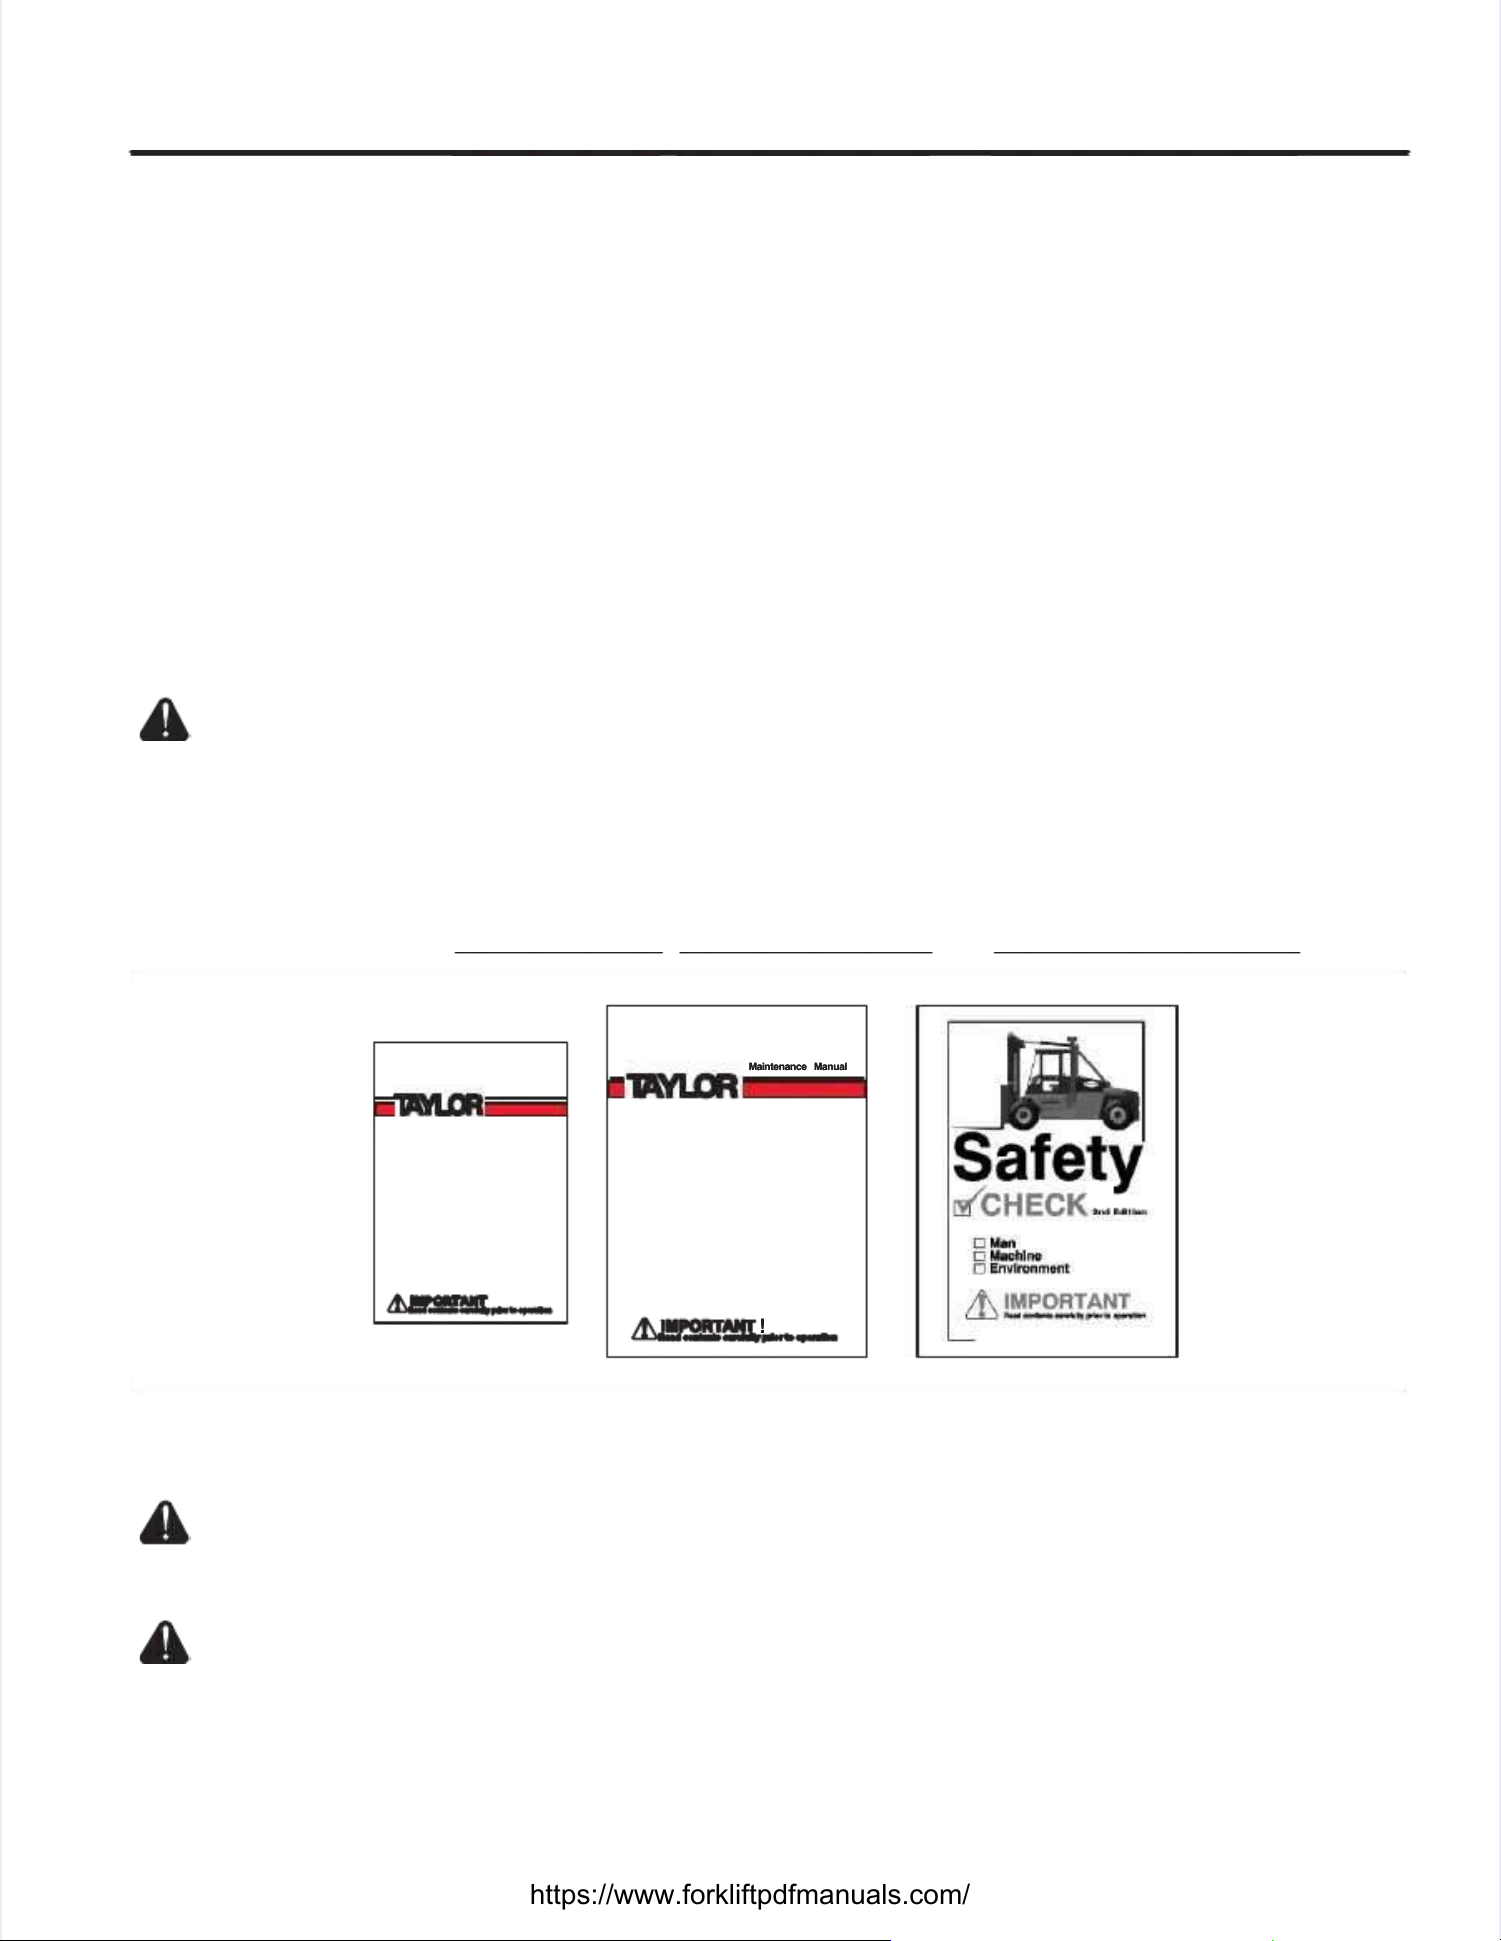
Taylor TX180S User manual

Maintenance ManualMaintenance Manual
TX180S – 360LTX180S – 360L
TXH300L, TXH350L, TXH400LTXH300L, TXH350L, TXH400L
TXB180S – 300LTXB180S – 300L
https://www.forkliftpdfmanuals.com/

TX / TXH / TXB 180S - 400L (Rev. 4/23/07)
https://www.forkliftpdfmanuals.com/

TX / TXH / TXB 180S - 400L (4/07)
Observe The Following Precautions For Maximum Safety Of Machine OperationObserve The Following Precautions For Maximum Safety Of Machine Operation
1.1. Only traiOnly trained and resned and responsibponsible operatle operators shalors shall be permitl be permitted to hanted to handle loads wdle loads with thiith this trucks truck..
2.2. OperatOperate the te the truck fruck from throm the operate operator’s seor’s seat onlat onlyy. . Do noDo not alt allow rlow riders.iders.
3.3. TTest hydrest hydraulic coaulic controls fntrols for proper resor proper response befponse before usinore using the machig the machine.ne.
4.4. Know yKnow your loaour load. d. Do not Do not attemattempt to lpt to lift or ift or transptransport loort loads in eads in excess xcess of ratof rated capaed capacitycity..
5.5. When the load obsWhen the load obstructtructs the views the view, operate t, operate the truck in the rehe truck in the reverse raverse range (excenge (except when clipt when climb-mb-
ing ramps).ing ramps).
6.6. Do noDo not stt stand oand or worr work undk under an eer an elevlevateated load load.d.
7.7. TTranransposport trt the lohe load load low and tw and tiltilted baed back.ck.
8.8. AvAvoid oid sudsudden den stostops ps witwith a h a loaload.d.
9.9. EvenlEvenly disy distributtribute the e the weight weight of thof the load e load on boton both forkh forks.s.
10.10. Back down a ramp in excBack down a ramp in excess of 10 percent when loaded.ess of 10 percent when loaded.
11.11. Do not move the truck Do not move the truck until the brake pressure reaches a suntil the brake pressure reaches a safe operating level.afe operating level.
12.12. Have defects repaired immediatelyHave defects repaired immediately. . Do not operate Do not operate a truck a truck with damaged or with damaged or defectivedefective
systems.systems.
13.13. When leaving truck, liftWhen leaving truck, lifting mechanism shall be fully lowing mechanism shall be fully lowered, controls shall be neutralized,ered, controls shall be neutralized,
parking brake set, power shut ofparking brake set, power shut off, and key removf, and key removed. ed. Block wheels if on Block wheels if on incline.incline.
https://www.forkliftpdfmanuals.com/

TMW-057-5 (3/05)
TMW-057-5 (3/05)
LIMITED LIMITED WAWARRANTYRRANTY
Products manufactured by Taylor Machine Works, Inc. (“Taylor”) and sold are warranted by Taylor to be free fromProducts manufactured by Taylor Machine Works, Inc. (“Taylor”) and sold are warranted by Taylor to be free from
defects in material and workmanship, under normal use and service, defects in material and workmanship, under normal use and service, when Twhen Taylor products are operated at oraylor products are operated at or
below rated capacity* below rated capacity* in accordance with operatinin accordance with operating instructions.g instructions.
This warranty is limited to This warranty is limited to repair or replacement, (as Taylor may elect, and at repair or replacement, (as Taylor may elect, and at an establishment authorized byan establishment authorized by
TTaylor) of such parts aylor) of such parts as shall appear to Taylor upon inspection to have been defective in material oras shall appear to Taylor upon inspection to have been defective in material or
workmanship.workmanship.
This warranty period shall begin on the delivery date of the product to the Purchaser and end on whicheverThis warranty period shall begin on the delivery date of the product to the Purchaser and end on whichever
occurs first of the warranty period, twelve (12) months or two thousand (2000) hours. occurs first of the warranty period, twelve (12) months or two thousand (2000) hours. During this period, TDuring this period, Tayloraylor
will provide genuine Taylor parts, labor, and travel time to replace or repair any part furnished by Taylor and foundwill provide genuine Taylor parts, labor, and travel time to replace or repair any part furnished by Taylor and found
to be defective in material and workmato be defective in material and workmanship.** nship.** If a defect in material and workmanshIf a defect in material and workmanship is found during the twelveip is found during the twelve
(12) months and/or two thousand (2000) hours whichever occurs (12) months and/or two thousand (2000) hours whichever occurs first of the warranty period, Tfirst of the warranty period, Taylor will replaceaylor will replace
lubricating oil, filters, antifrelubricating oil, filters, antifreeze, and other service items made unusable by eze, and other service items made unusable by the defect. the defect. Only genuine TOnly genuine Taylor partsaylor parts
provided by Taprovided by Taylor’s Sudden Service, Inc. will be used during ylor’s Sudden Service, Inc. will be used during the warranty period.the warranty period.
THE FOLLOWING ITEMS ARE NOT COVERED BY THIS WARRANTY:THE FOLLOWING ITEMS ARE NOT COVERED BY THIS WARRANTY:
1.1. NormaNormal maintenal maintenance servnce services and partices and parts or supplies uses or supplies used therein incd therein includingluding, without lim, without limitatiitation, en-on, en-
gine tune-up, wheel alignment, brake and linkage adjustment, lubrication services, tightening andgine tune-up, wheel alignment, brake and linkage adjustment, lubrication services, tightening and
adjusting such as bolts, adjusting such as bolts, screws, hoses, fittings, etc., replacement of fuses, bulbs, filters, tune-upscrews, hoses, fittings, etc., replacement of fuses, bulbs, filters, tune-up
parts, fluids and brake and clutch linings, glass; shop supplies such as rags, oil dry, hand soaps,parts, fluids and brake and clutch linings, glass; shop supplies such as rags, oil dry, hand soaps,
degreasers, cleaning solutions including brake clean, etc.; and adjustments which are a part ofdegreasers, cleaning solutions including brake clean, etc.; and adjustments which are a part of
the required or recommended predelivery inspection and periodic the required or recommended predelivery inspection and periodic inspections in accordance withinspections in accordance with
Operator’s Manual. Operator’s Manual. Electrical Electrical and electronic and electronic components including components including wiring will be wiring will be excluded afterexcluded after
the first six (6) months or one thousand (1000) hours of the first six (6) months or one thousand (1000) hours of operation. operation. Electronic control modulesElectronic control modules
(ECM’s) for the engine and (ECM’s) for the engine and transmission, and Ttransmission, and Taylor Integrated Control Saylor Integrated Control System (TICS) modulesystem (TICS) modules
are not included in this exclusion and are covered under the standard warranty period.are not included in this exclusion and are covered under the standard warranty period.
2.2. Leaks duLeaks due to o-re to o-ring failing failures and ures and fittinfittings aftgs after one huer one hundred (ndred (100) ho100) hours of opurs of operatieration.on.
3.3. NormaNormal deteriol deterioratioration of appearn of appearance due to uance due to use and expose and exposure; or csure; or conditionditions resuons resulting frlting from mis-om mis-
use, negligence, or accident.use, negligence, or accident.
4.4. Any produAny product on which anct on which any of the reqy of the required or reuired or recommcommended perended periodic insiodic inspectiopections or servns or services haveices have
not been made.not been made.
5.5. Any partAny parts or accesss or accessories, inories, installestalled on the produd on the product which wect which were not manure not manufactufactured or instred or installed byalled by
TTaylor whether or not aylor whether or not such parts or accessories were such parts or accessories were selected, recommended or installed by selected, recommended or installed by TTay-ay-
lor (including without limitation, engines, tireslor (including without limitation, engines, tires, batteries, air conditioners, , batteries, air conditioners, air dryers, etc.). air dryers, etc.). SuchSuch
parts or accessories shall be covered by the warranties given by the manufacturers thereof andparts or accessories shall be covered by the warranties given by the manufacturers thereof and
any claim thereof shall be made any claim thereof shall be made to such manufacturers.to such manufacturers.
6.6. Loss of timLoss of time, inconve, inconveniencenience, loss of equie, loss of equipment uspment use, othee, other consequr consequentiaential damages or otl damages or other mather mat--
ters not specifically included.ters not specifically included.
Taylor parts and assemblies which are furnished and installed under this warranty are themselves withinTaylor parts and assemblies which are furnished and installed under this warranty are themselves within
the coverage of the machine warranty and are covered only for the duration of the original machinethe coverage of the machine warranty and are covered only for the duration of the original machine
warranty period.warranty period.
NOTE:NOTE: All International warAll International warranty parts shipments arranty parts shipments are Fe F.O.B. point of debar.O.B. point of debarkation, duties, tarifkation, duties, tariffs, or localfs, or local
taxes excluded.taxes excluded.
This warranty is expressly in lieu of any other warranties, expressed or implied, including any warranty ofThis warranty is expressly in lieu of any other warranties, expressed or implied, including any warranty of
merchantability or fitness for a particular purpose.merchantability or fitness for a particular purpose.
Replacement parts are warrantReplacement parts are warranted for ninety (90) days to be free from defects in material or workmed for ninety (90) days to be free from defects in material or workmanship. anship. PartsParts
only, no labor.only, no labor.
TTaylor Machine Works, Inc. does aylor Machine Works, Inc. does not authorize any person not authorize any person to create (for Taylor) any other obligation or to create (for Taylor) any other obligation or liability inliability in
connection with Taylor products.connection with Taylor products.
*For example, *For example, a machine rated a machine rated capacity at any capacity at any stipulated loastipulated load center is the d center is the rated lift rated lift capacity at less capacity at less thanthan
load center. load center. That is, a machine rated at 20,000 pounds at 24-inch load center connotes 20,000 poundsThat is, a machine rated at 20,000 pounds at 24-inch load center connotes 20,000 pounds
is the maximum lift capacity even though the load center may be less than 24-inches. is the maximum lift capacity even though the load center may be less than 24-inches. Subjecting TSubjecting Tayloraylor
products to conditions or loads exceeding those products to conditions or loads exceeding those stipulated is justification for immediate cancellatistipulated is justification for immediate cancellation ofon of
warranty for products involved.warranty for products involved.
**T**Travel reimbursemravel reimbursement will be ent will be limited to limited to six (6) hours msix (6) hours maximum paiaximum paid per claim, d per claim, or to the nor to the nearest Tearest Tayloraylor
Machine Works’ dealer location in the assigned territory in which the truck Machine Works’ dealer location in the assigned territory in which the truck is based.is based.
TAYLOR MACHINE WORKS, INC.TAYLOR MACHINE WORKS, INC.
650 North Church Avenue650 North Church Avenue
Louisville, Mississippi 39339Louisville, Mississippi 39339
(662) 773-3421 / Fax 662-773-9146(662) 773-3421 / Fax 662-773-9146
https://www.forkliftpdfmanuals.com/

https://www.forkliftpdfmanuals.com/

Introduction
Introduction
TTX X / / TTXXH H / / TTXXB B 118800S S - - 440000L L ((44//0077))IInnttrroo--11
This manual is to be used as a guide for lubrication and maintenance as well as general equipment care.This manual is to be used as a guide for lubrication and maintenance as well as general equipment care.
A separate section A separate section is provided to is provided to discuss each major component discuss each major component or system. or system. This method of preThis method of presentingsenting
the maintenance instructions enables Taylor Machine Works, Inc. to assemble a maintenance manual withthe maintenance instructions enables Taylor Machine Works, Inc. to assemble a maintenance manual with
explicit instructions on the exact equipment installed on the machine.explicit instructions on the exact equipment installed on the machine.
No single rule in the booklet No single rule in the booklet can be followed to tcan be followed to the exclusion of others. he exclusion of others. Each rule must be consEach rule must be considered inidered in
light of the other rules, the knowledge and training of the man (operator), the limitations of the machine,light of the other rules, the knowledge and training of the man (operator), the limitations of the machine,
and the workplace environment.and the workplace environment.
Warnings and cautions are included to reduce the probability of personal injury, when performing mainte-Warnings and cautions are included to reduce the probability of personal injury, when performing mainte-
nance procedures which if improperly performed nance procedures which if improperly performed could be potentially hazardous. could be potentially hazardous. Failure to comply withFailure to comply with
these warnings and cautions can result in serious injury and possible death.these warnings and cautions can result in serious injury and possible death.
All circumstances and conditions All circumstances and conditions under which service will under which service will be performed cannot be performed cannot be anticipated. be anticipated. Do notDo not
perform any service if you are unsure that it can perform any service if you are unsure that it can be done safely. be done safely. Contact your TContact your Taylor Dealer or Taylor Dealer or Tayloraylor
Machine Works, Inc. if you have questions about the proper service techniques.Machine Works, Inc. if you have questions about the proper service techniques.
Operating this powered industrial truck when it is in need of repair can result inOperating this powered industrial truck when it is in need of repair can result in
death or serious injury to the operator or other personnel or cause severe property damage.death or serious injury to the operator or other personnel or cause severe property damage.
Machine checksMachine checksmust be performed daily:must be performed daily:
11..bbeeffoorreethe machine is placed in service,the machine is placed in service,
2.2. by qualiby qualified, tfied, trainedrained, and ski, and skilled perslled personnel whonnel who have propo have proper tools er tools and knowand knowledge, aledge, andnd
3.3. in accin accordancordance with e with the Opthe Operator’erator’s Guids Guide, Maine, Maintenanctenance Manuae Manual andl andSafety Check 2nd Edition booklet.Safety Check 2nd Edition booklet.
Maintenance ManualMaintenance Manual
!!
..
OperatorsOperators GuideGuide
!!..
Regularly ScheduledRegularly Scheduledmaintenance, lubrication, and safety inspections will help ensure a safe andmaintenance, lubrication, and safety inspections will help ensure a safe and
productive work life for the machine and the operator(s).productive work life for the machine and the operator(s).
Do not operate the truck if it is iDo not operate the truck if it is in need of repairn need of repair. . Remove the ignition key andRemove the ignition key and
attach a “Lock-out” tag.attach a “Lock-out” tag.
Do not attempt to perform maintenance procedures unless you have beenDo not attempt to perform maintenance procedures unless you have been
thoroughly trained and you have the proper tools.thoroughly trained and you have the proper tools.
https://www.forkliftpdfmanuals.com/

Intro-2
Intro-2 TX / TXH / TXB 180S - 400L (4/07)TX / TXH / TXB 180S - 400L (4/07)
Use only genuine TUse only genuine Taylor replacement parts. aylor replacement parts. Lesser quality parts may fail,Lesser quality parts may fail,
resulting in property damage, personal injury or death.resulting in property damage, personal injury or death.
Maintenance and / or service personnel who find it necessary to operate this machine, even for a shortMaintenance and / or service personnel who find it necessary to operate this machine, even for a short
period of time, must fully understand all operational literature including:period of time, must fully understand all operational literature including:
••OSHA operating rules found in 29 CFR 1910.178; Appendix A in Safety Check 2nd EditionOSHA operating rules found in 29 CFR 1910.178; Appendix A in Safety Check 2nd Edition
••ANSI B56.1 rules ANSI B56.1 rules for operating a for operating a powered industrial truck; powered industrial truck; Appendix B in Appendix B in Safety Check 2nd Safety Check 2nd EditionEdition
••The Operator’s Guide for the machineThe Operator’s Guide for the machine
••The manufacturer’s Safety BookletThe manufacturer’s Safety Booklet
••The manufacturer’s Safety VideoThe manufacturer’s Safety Video
••The manufacturer’s Service BulletinsThe manufacturer’s Service Bulletins
••The content and meaning of all machine decalsThe content and meaning of all machine decals
Know how to avoid slip and fall accidents such as those described in the Slip andKnow how to avoid slip and fall accidents such as those described in the Slip and
Fall Accidents Section of Safety Check 2nd Edition.Fall Accidents Section of Safety Check 2nd Edition.
https://www.forkliftpdfmanuals.com/

Safety
Safety
TTX X / / TTXXH H / / TTXXB B 118800S S - - 440000L L ((44//0077))SSaaffeettyy--11
Safety FirstSafety First
Important Safety InstructionsImportant Safety Instructions
Observe these Observe these rules. rules. They are They are recognized asrecognized as
practices that reduce the risk of injury to yourselfpractices that reduce the risk of injury to yourself
and others, or damage to the lift truck or load.and others, or damage to the lift truck or load.
This manual contains maintenance and serviceThis manual contains maintenance and service
procedures for filling, lubricating, removing, repair-procedures for filling, lubricating, removing, repair-
ing, and installing various components comprisinging, and installing various components comprising
a heavy duty a heavy duty industrial lift trucindustrial lift truck. k. Because of theBecause of the
size and weight of the lift truck, and high pres-size and weight of the lift truck, and high pres-
sures in some of the components and systems,sures in some of the components and systems,
improperly performing service on the truck can beimproperly performing service on the truck can be
dangerous.dangerous.
Warnings and cautions are included to reduce theWarnings and cautions are included to reduce the
probability of personal injury, when performingprobability of personal injury, when performing
maintenance procedures which if improperly per-maintenance procedures which if improperly per-
formed could formed could be potentially be potentially hazardous. hazardous. Failure toFailure to
comply with these warnings and cautions cancomply with these warnings and cautions can
result in serious injury and possible death.result in serious injury and possible death.
No single rule in the booklet can be followed toNo single rule in the booklet can be followed to
the exclusion of the exclusion of others. others. Each rule must Each rule must be con-be con-
sidered in light of the other rules, the knowledgesidered in light of the other rules, the knowledge
and training of the man (operator / maintenance),and training of the man (operator / maintenance),
the limitations of the machine,the limitations of the machine,and the workplaceand the workplace
environment.environment.
Report all mechanical problems to mechanics andReport all mechanical problems to mechanics and
supervisors.supervisors.
Proper Training:Proper Training:
TTaylor Machine Works, aylor Machine Works, Inc. publishes Inc. publishes SafetySafety
Check 2nd Edition, TMW-072 a booklet citingCheck 2nd Edition, TMW-072 a booklet citing
some safety precautions to observe during liftsome safety precautions to observe during lift
truck operation. truck operation. One copy is One copy is shipped with each shipped with each liftlift
truck; additional copies are available at a nominaltruck; additional copies are available at a nominal
fee from the authorized Taylor dealer from whichfee from the authorized Taylor dealer from which
the equipment was initially purchased.the equipment was initially purchased.
Minimum Required Personnel SafetyMinimum Required Personnel Safety
EquipmentEquipment
11..HHaarrd d HHaatt
2.2. SaSafefetty y ShShoeoess
3.3. SaSafefetty Gly Glasassseses
4.4. HeHeavavy y GlGlovoveses
5.5. HeHeararining Prog Protetectctioionn
6.6. ReReflflecectitive ve ClClotothinhingg
Failure to follow the safety precautions outlined inFailure to follow the safety precautions outlined in
this manual can create a dangerous situation.this manual can create a dangerous situation.
Some of the common ways this can occur are asSome of the common ways this can occur are as
follows:follows:
1.1. Use Use of hof hoisoistinting devg deviceices nos not cat capabpable ofle of
supporting the weight of the component beingsupporting the weight of the component being
lifted.lifted.
2.2. ImpImproproper ater attactachmehment of snt of slinlings to hgs to heaveavyy
components being hoisted.components being hoisted.
3.3. Use oUse of inaf inadeqdequatuate or rote or rotten tten timbimbers fers for supor sup--
port, or improper alignment of supportingport, or improper alignment of supporting
material.material.
4.4. FaiFailurlure to sece to secureurely bloly block thck the wheee wheels, wls, when dihen dis-s-
connecting or removing components that holdconnecting or removing components that hold
the lift truck stationary under normalthe lift truck stationary under normal
conditions.conditions.
5.5. FaiFailurlure to reae to read and und and underderstastand the snd the safeafetyty
precautions in this manual.precautions in this manual.
Know how to avoid accidentsKnow how to avoid accidents
such as those described in the Maintenance /such as those described in the Maintenance /
Service Accidents Section of Safety Check 2ndService Accidents Section of Safety Check 2nd
Edition:Edition:
Some Maintenance / Servicing AccidentsSome Maintenance / Servicing Accidents
Listed below:Listed below:
1.1. ImpImproproperlerly ry refuefuelieling tng the the trucruck.k.
2.2. ImproImproperly perly checkchecking fing for hyor hydraulidraulic lec leaks aks or for fueluel
leaks (gasoline, L.P. gas, or diesel).leaks (gasoline, L.P. gas, or diesel).
3.3. ImpImproproperlerly chey checkicking thng the engie engine cone cooliolingng
system.system.
4.4. ImpImproproperlerly checy checkinking battg battery flery fluid leuid levelvels ors or
“jump” starting engines.“jump” starting engines.
5.5. PutPuttinting air in a mg air in a multulti-pi-pieciece tire ae tire and rim and rim assessem-m-
bly without proper tools and training.bly without proper tools and training.
6.6. AttemAttempting pting to seto service rvice a mua multi-pilti-piece ece tire tire and rand rimim
assembly without proper tools and training.assembly without proper tools and training.
7.7. UsiUsing an ing an imprmpropeoperly srly suituited ched chain wain whilhilee
performing maintenance.performing maintenance.
8.8. Using Using the lthe lift tift truck ruck hydrauhydraulic slic system ystem as a as a sub-sub-
stitute for a fixed stand.stitute for a fixed stand.
9.9. RelRelyinying on jacg on jacks or hks or hoisoists to sts to suppoupport hert heavyavy
loads.loads.
10.10. Operating a truck Operating a truck that is damaged that is damaged or in needor in need
of repair.of repair.
11.11. Climbing on the masClimbing on the mast of a fork t of a fork lift, on the tlift, on the top ofop of
the cab, or other high places on the lift truck.the cab, or other high places on the lift truck.
https://www.forkliftpdfmanuals.com/

Safety-2
Safety-2 TX / TXH / TXB 180S - 400L (4/07)TX / TXH / TXB 180S - 400L (4/07)
12.12. Operating a lift truck Operating a lift truck which has been which has been modifiedmodified
without the without the manufacturer’s manufacturer’s approval. approval. ThisThis
includes the attachment, counterweight, tires,includes the attachment, counterweight, tires,
etc.etc.
13.13. Lifting people with Lifting people with a fork lift a fork lift not properlynot properly
equipped for elevating personnel.equipped for elevating personnel.
14.14. Improper maintenance Improper maintenance of lift of lift chains.chains.
15.15. Improperly blocking Improperly blocking and supporting and supporting mast,mast,
carriage, or attachment before repairing truck.carriage, or attachment before repairing truck.
16.16. Working in Working in an area not an area not properly vented forproperly vented for
toxic exhaust fumes.toxic exhaust fumes.
Maintenance / Service Personnel:Maintenance / Service Personnel:
1.1. Keep tKeep the trhe truck cuck clealean, frn, free of oiee of oil, grl, greasease, ane, andd
fuel.fuel.
2.2. Steam Steam clean clean / wa/ wash tsh the trhe truck uck prior prior to pto performerform--
ing mainting maintenance. enance. Wear Wear anti-slip footanti-slip footwearwear
when performing maintenance procedures.when performing maintenance procedures.
3.3. Use OUse OSHA aSHA apprpproveoved ladd ladderders and os and othether pror properper
cleaning accessories to access hard to reachcleaning accessories to access hard to reach
maintenance places.maintenance places.
4.4. Keep gKeep gratratingings fres free of ice of ice, die, dirt, art, and grand gravelvel..
5.5. RegulaRegularly rly inspeinspect ct and and replacreplace ane anti-slti-slip mip masticastic
on the vehicle as needed.on the vehicle as needed.
6.6. EnsEnsure alure all safl safety dety decaecals arls are in ple in place oace on then the
vehiclevehicle..
Mounting and Dismounting:Mounting and Dismounting:
1.1. Face tFace the lifhe lift trut truck whck when geten getting ting on or on or off off the lithe liftft
truck.truck.
2.2. One hOne hand aand and twnd two feo feet or et or two two hanhands ads and onnd onee
foot must be in contact with the lift truck at allfoot must be in contact with the lift truck at all
times (3 point contact).times (3 point contact).
3.3. Use hUse handandrairails anls and othd other grer grab poab pointints.s.
Serious falls and injuries canSerious falls and injuries can
result from improper mounting or result from improper mounting or dismountingdismounting
of the lift truck.of the lift truck.
Serious falls or injuries canSerious falls or injuries can
result from being thrown from the lift truck!result from being thrown from the lift truck!
Never allow riders on the lift truck or load.Never allow riders on the lift truck or load.
Lift Truck Lock-out / Tag-out:Lift Truck Lock-out / Tag-out:
The engine should be locked-out / tagged-out toThe engine should be locked-out / tagged-out to
prevent it from being inadvertently started beforeprevent it from being inadvertently started before
performing maintperforming maintenance or enance or repairs. repairs. The batteryThe battery
should be locked-out / tagged-out to prevent acci-should be locked-out / tagged-out to prevent acci-
dental activation of the starter and possible start-dental activation of the starter and possible start-
ing of ing of the engine. the engine. Refer toRefer to Lock-Out / Tag-OutLock-Out / Tag-Out
ProcedureProcedurein the back of this section for the pro-in the back of this section for the pro-
cedures to be followed to perform lock-out / tag-cedures to be followed to perform lock-out / tag-
out.out.
Do not start the engine if theDo not start the engine if the
ignition switch, or engine control panel hasignition switch, or engine control panel has
been locked-out / tagged-out by maintenancebeen locked-out / tagged-out by maintenance
personnel. personnel. Doing so Doing so can result can result in personalin personal
injury and / injury and / or damage to or damage to the equipment. the equipment. If inIf in
doubt, contact the doubt, contact the maintenance supervisormaintenance supervisor..
TICS Emergency Stop.TICS Emergency Stop.The The TICS TICS emergencyemergency
stop must be pulled to the out position to enablestop must be pulled to the out position to enable
the TICS controlled hydraulic functions of thethe TICS controlled hydraulic functions of the
truck. truck. Should a Should a TICS contTICS controlled operation rolled operation occuroccur
without an operator command, depress the TICSwithout an operator command, depress the TICS
emergency stop emergency stop to disable tto disable the function. he function. The TICSThe TICS
controlled functions that are disabled by the TICScontrolled functions that are disabled by the TICS
emergency stop include mast, carriage and at-emergency stop include mast, carriage and at-
tachment functionstachment functions. . Shut down the Shut down the truck as truck as soonsoon
as it is as it is safe to do safe to do so. so. Notify maintenance Notify maintenance person-person-
nel immediatelynel immediately. . Do not return Do not return the truck to the truck to serviceservice
until all faults have been corrected.until all faults have been corrected.
When the TICS emergencyWhen the TICS emergency
stop is depressed, the TICS display and for-stop is depressed, the TICS display and for-
ward and ward and back-up alarms back-up alarms are disabled. are disabled. Addi-Addi-
tionally, the parking brake will be automaticallytionally, the parking brake will be automatically
applied.applied.
Proper Training:Proper Training:
1.1. TTaylor aylor MachiMachine Wne Works, orks, Inc. Inc. publispublishes Safhes Safetyety
Check 2nd Edition, TMW-072 a booklet citingCheck 2nd Edition, TMW-072 a booklet citing
some safety precautions to observe during liftsome safety precautions to observe during lift
truck operation. truck operation. One copy One copy is shipped is shipped withwith
each lift truck; additional copies are availableeach lift truck; additional copies are available
at a nominal fee from the authorized Taylorat a nominal fee from the authorized Taylor
dealer from which the equipment was initiallydealer from which the equipment was initially
purchased.purchased.
https://www.forkliftpdfmanuals.com/

T
TX X / / TTXXH H / / TTXXB B 118800S S - - 440000L L ((44//0077))SSaaffeettyy--33
Remove all rings, watches,Remove all rings, watches,
chains, other jewelry, and all loose clothingchains, other jewelry, and all loose clothing
before working around moving parts!before working around moving parts!
If maintenance requires run-If maintenance requires run-
ning the engine indoors, ensure the room hasning the engine indoors, ensure the room has
adequate flow-through ventilation!adequate flow-through ventilation!
Do not operate the vehicle orDo not operate the vehicle or
attempt to perform maintenance on the vehicleattempt to perform maintenance on the vehicle
while under the influence of alcohol, drugs, orwhile under the influence of alcohol, drugs, or
any other medications or substances that slowany other medications or substances that slow
reflexes, alter safe judgement, or cause drows-reflexes, alter safe judgement, or cause drows-
iness.iness.
Never operate the lift truckNever operate the lift truck
without prowithout proper instructioper instruction. n. Ignorance Ignorance ofof
operational characteristics and limitations canoperational characteristics and limitations can
lead to lead to equipment damage, personal injury, orequipment damage, personal injury, or
death.death.
Maintenance and serviceMaintenance and service
personnel should never operate this lift truckpersonnel should never operate this lift truck
unless they are thoroughly familiar with Safetyunless they are thoroughly familiar with Safety
Check 2nd Edition, TMW-072 and the Opera-Check 2nd Edition, TMW-072 and the Opera-
tors’ Guide for this lift truck.tors’ Guide for this lift truck.
This equipment is not electri-This equipment is not electri-
cally insulatedcally insulated. . Contact with Contact with electricity canelectricity can
cause severe cause severe injury injury or death. or death. ElectrocutionElectrocution
can occur withcan occur without direct out direct contact. contact. Do not oDo not oper-per-
ate this lift truck in areas with energized powerate this lift truck in areas with energized power
lines or a polines or a power supplywer supply. . Check local, stateCheck local, state
and federal safety codes for proper clearance.and federal safety codes for proper clearance.
Use a groundman to ensure that there is prop-Use a groundman to ensure that there is prop-
er clearance.er clearance.
Use only genuine TaylorUse only genuine Taylor
replacement preplacement parts. arts. Lesser quality Lesser quality parts mayparts may
fail resulting in property damage, personalfail resulting in property damage, personal
injury, or death.injury, or death.
Electrical, mechanical, andElectrical, mechanical, and
hydraulic safety devices have been installedhydraulic safety devices have been installed
on this lift truck to help protect against person-on this lift truck to help protect against person-
al injury and / al injury and / or damage to or damage to equipment. equipment. UnderUnder
no circumstances should any attempt be madeno circumstances should any attempt be made
to disconnect or in any way render any ofto disconnect or in any way render any of
these devices these devices inoperable. inoperable. If you If you discover thatdiscover that
any safety device is malfunctioning, Do Notany safety device is malfunctioning, Do Not
operate the lift truck; notify appropriate main-operate the lift truck; notify appropriate main-
tenance tenance personnel immediatelypersonnel immediately..
Operating instructions,Operating instructions,
warnings, and caution labels are placed on thewarnings, and caution labels are placed on the
lift truck to alert personnel to dangers and tolift truck to alert personnel to dangers and to
advise personnel of proper operating proce-advise personnel of proper operating proce-
dures (of the dures (of the lift truck). lift truck). Do not remDo not remove orove or
obscure any obscure any warning, caution, danger, orwarning, caution, danger, or
instructional sign or label.instructional sign or label.
Keep all hydraulic com-Keep all hydraulic com-
ponents in good repair.ponents in good repair.
Relieve pressure onRelieve pressure on
hydraulic system before repairing or adjustinghydraulic system before repairing or adjusting
or disconnecting.or disconnecting.
Wear proper hand and eyeWear proper hand and eye
protection when protection when searching for searching for leaks. leaks. UseUse
wood or cardboard instead of hands.wood or cardboard instead of hands.
Turn the engine off andTurn the engine off and
remove the ignition key before entering the tireremove the ignition key before entering the tire
pivot area to prevent death or serious injurypivot area to prevent death or serious injury
from pivoting tires.from pivoting tires.
Deflate tires before removingDeflate tires before removing
them. them. Always remoAlways remove the ve the valve core valve core andand
exhaust all air from a single tire and both tiresexhaust all air from a single tire and both tires
of a dual assembly prior to removing any rimof a dual assembly prior to removing any rim
components or wheel components such ascomponents or wheel components such as
nuts and rinuts and rim clamps. m clamps. Run a pRun a piece of wireiece of wire
through the valve stem to make sure the valvethrough the valve stem to make sure the valve
stem is not damaged or plugged and all air isstem is not damaged or plugged and all air is
exhausted.exhausted.
Never park the lift truck onNever park the lift truck on
an incline. an incline. Always park the lAlways park the lift truck on ift truck on a levela level
surface; otherwise, the lift truck could possiblysurface; otherwise, the lift truck could possibly
roll resulting in possible injury to personnel orroll resulting in possible injury to personnel or
damage to the lift truck damage to the lift truck or other propertyor other property..
Battery Safety:Battery Safety:
Lighted smoking materials,Lighted smoking materials,
flames, arcs, or sparks may result in batteryflames, arcs, or sparks may result in battery
https://www.forkliftpdfmanuals.com/

Safety-4
Safety-4 TX / TXH / TXB 180S - 400L (4/07)TX / TXH / TXB 180S - 400L (4/07)
explosion.explosion.
1.1. Keep all mKeep all metaetal tool tools awls away fray from batom battertery tery termi-mi-
nals.nals.
2.2. BatterBatteries ies contacontain sin sulfurulfuric aic acid cid which which will will burnburn
skin on contact; wear rubber gloves and eyeskin on contact; wear rubber gloves and eye
protection when working with batteries.protection when working with batteries.
3.3. FluFlush eysh eyes or wes or wash sash skin wkin with with wateater and sr and seekeek
medical attention immediately in case ofmedical attention immediately in case of
contact.contact.
4.4. WhWhen en jujump mp ststarartiting:ng:
a.a. Do noDo not leat lean oven over the r the batbattertery whiy while male makinkingg
connection.connection.
b.b. TheThen, con, connennect thct the negae negativtive (-) tee (-) termirminal ofnal of
the booster battery to the engine or bodythe booster battery to the engine or body
ground (-). ground (-). Never Cross Never Cross Polarity ofPolarity of
Terminals.Terminals.
c.c. DisDisconconnecnect cabt cables in exles in exact react reververse ordse orderer..
Lock-Out / Lock-Out / TTag-Out Procedureag-Out Procedure
Purpose.Purpose. This procedure establishes the mini-This procedure establishes the mini-
mum requirements for lock-out / tag-out of energymum requirements for lock-out / tag-out of energy
sources that sources that could cause could cause injury to injury to personnel. personnel. AllAll
employees shall comply with the procedure.employees shall comply with the procedure.
Responsibility.Responsibility.The responsibilitThe responsibility for y for seeing thatseeing that
this procedure is followed is binding upon allthis procedure is followed is binding upon all
employees. employees. All employees All employees shall be shall be instructed ininstructed in
the safety significance of the lock-out / tag-outthe safety significance of the lock-out / tag-out
procedure by procedure by (designate individual). (designate individual). Each new Each new oror
transferred affected employee shall be instructedtransferred affected employee shall be instructed
by (designate individuals) in the purpose and useby (designate individuals) in the purpose and use
of the lock-out / tag-out procedure.of the lock-out / tag-out procedure.
Preparation for Lock-Out Preparation for Lock-Out / Tag-Out./ Tag-Out. Employees Employees
authorized to perform lockout / tagout shall be cer-authorized to perform lockout / tagout shall be cer-
tain as to which switch, valve, or other energy iso-tain as to which switch, valve, or other energy iso-
lating devices apply to the equipment beinglating devices apply to the equipment being
locked out locked out / tagged out/ tagged out. . More than one More than one energyenergy
source (electrical, mechanical, or others) may besource (electrical, mechanical, or others) may be
involved. involved. Any Any questionable identifquestionable identification ication ofof
sources shall be cleared by the employees withsources shall be cleared by the employees with
their supervisors. their supervisors. Before lock-out Before lock-out / tag-out / tag-out com-com-
mences, job authorization should be obtained.mences, job authorization should be obtained.
Sequence of Lock-Out / Sequence of Lock-Out / TagTag-Out -Out ProcedureProcedure
1.1. NotifNotify aly all afl affectfected emped employees loyees that that a locka lock-out -out //
tag-out is required and the reason therefor.tag-out is required and the reason therefor.
2.2. If thIf the eque equipmipment ient is opes operatratinging, shu, shut it dot it down bywn by
the normal stopping procedure.the normal stopping procedure.
3.3. OperatOperate the the swe switch, itch, valvevalve, or , or other other energy energy iso-iso-
lating device so that the energy source(s)lating device so that the energy source(s)
(electrical, mechanical, hydraulic, etc.) is dis-(electrical, mechanical, hydraulic, etc.) is dis-
connected or isolated from the equipment.connected or isolated from the equipment.
Stored energy, such as that in capacitors,Stored energy, such as that in capacitors,
springs, elevated crane members, rotating fly-springs, elevated crane members, rotating fly-
wheels, hydraulic systems, and air, gas,wheels, hydraulic systems, and air, gas,
steam, or water pressure, etc. must also besteam, or water pressure, etc. must also be
dissipated or restrained by methods such asdissipated or restrained by methods such as
grounding, repositioning, blocking, bleeding-grounding, repositioning, blocking, bleeding-
down, etc.down, etc.
4.4. Lock-oLock-out / ut / tag-outag-out tht the ene energy ergy isolatisolating ing devicdeviceses
with an assigned individual lock / tag.with an assigned individual lock / tag.
5.5. AftAfter ener ensursuring ting that nhat no perso personnonnel are eel are expoxposedsed
and as a check on having disconnected theand as a check on having disconnected the
energy sources, operate the push button orenergy sources, operate the push button or
other normal operating controls to make cer-other normal operating controls to make cer-
tain the equipment will not operate.tain the equipment will not operate.
Return operating controls toReturn operating controls to
neutral after the test.neutral after the test.
6.6. The eqThe equipuipmenment is not is now locw locked ouked out / tagt / tagged ouged out.t.
Restoring Equipment to ServiceRestoring Equipment to Service
1.1. WheWhen the jn the job is ob is comcompletplete and ee and equiquipmepment isnt is
ready for testing or normal service, check theready for testing or normal service, check the
equipment area to see that no one is exposed.equipment area to see that no one is exposed.
2.2. When eWhen equipmequipment is nt is all call clearlear, rem, remove aove all loll locks cks //
tags. tags. The energy The energy isolating devices isolating devices may bemay be
operated to restore energy to equipment.operated to restore energy to equipment.
Procedure Involving More Than One Person.Procedure Involving More Than One Person.
In the preceding steps, if more than one individualIn the preceding steps, if more than one individual
is required to lock-out / tag-out equipment, eachis required to lock-out / tag-out equipment, each
shall place his own personal lock / tag on theshall place his own personal lock / tag on the
energy isolating energy isolating device(s). device(s). One designated One designated indi-indi-
vidual of a work crew or a supervisor, with thevidual of a work crew or a supervisor, with the
knowledge of the crew, may lock-out / tag-outknowledge of the crew, may lock-out / tag-out
equipment for the whole crewequipment for the whole crew. . In such cases, In such cases, itit
shall be the responsibility of the individual to carryshall be the responsibility of the individual to carry
out all steps of the lock-out / tag-out procedureout all steps of the lock-out / tag-out procedure
and inform the crew when it is safe to work on theand inform the crew when it is safe to work on the
equipment. equipment. AdditionallyAdditionally, the , the designated indivdesignated individualidual
shall not remove a crew lock / tag until it has beenshall not remove a crew lock / tag until it has been
verified that all individuals are clear.verified that all individuals are clear.
Rules for Using Lock-Out / Tag-Out Procedure.Rules for Using Lock-Out / Tag-Out Procedure.
All equipment shall All equipment shall be locked out be locked out / tagged out / tagged out toto
protect against accidental or inadvertent operationprotect against accidental or inadvertent operation
when such operation could cause injury to person-when such operation could cause injury to person-
nel. nel. Do not attempt Do not attempt to operate any to operate any switch, valve,switch, valve,
or other energy isolating device bearing a lock /or other energy isolating device bearing a lock /
tag.tag.
https://www.forkliftpdfmanuals.com/

Major Components Locations
TX / TXH / TXB 180S - 400L (4/07)TX / TXH / TXB 180S - 400L (4/07)
HYDRAULIC TANKHYDRAULIC TANK
(Section 22)(Section 22)
MASTMAST
(Section 27)(Section 27)
TILT CYINDERSTILT CYINDERS
(Section 22)(Section 22)
CARRIAGECARRIAGE
(Section 28)(Section 28)
DRIVE AXLEDRIVE AXLE
(Section 14)(Section 14)
DRIVE SHAFTDRIVE SHAFT
(Section 11)(Section 11)
TRANSMISSIONTRANSMISSION
(Section 9)(Section 9)
FUEL TANKFUEL TANK
(Section 2)(Section 2)
STEER AXLESTEER AXLE
(Section 13)(Section 13)
ENGINEENGINE
(Section 1)(Section 1)
RADIATORRADIATOR
(Section 5)(Section 5)
https://www.forkliftpdfmanuals.com/

1-2
1-2 (Rev. 11/94)(Rev. 11/94)
https://www.forkliftpdfmanuals.com/

Contents
Contents
Maintenance ManualMaintenance Manual
SectionSection
IntroductionIntroduction
EEnnggiinnee11. . . . . . . . . . . . . . . . . . . . . . . . . . . . . . . . . . . . . . . . . . . . . . . . . . . . . . . . . . . . . . . . . . . .. . . . . . . . . . . . . . . . . . . . . . . . . . . . . . . . . . . . . . . . . . . . . . . . . . . . . . . . . . . . . . . . . . . .
FFuueel l SSyysstteemm22. . . . . . . . . . . . . . . . . . . . . . . . . . . . . . . . . . . . . . . . . . . . . . . . . . . . . . . . . . . . . . .. . . . . . . . . . . . . . . . . . . . . . . . . . . . . . . . . . . . . . . . . . . . . . . . . . . . . . . . . . . . . . .
Air Intake SystemAir Intake System 33. . . . . . . . . . . . . . . . . . . . . . . . . . . . . . . . . . . . . . . . . . . . . . . . . . . . . . . . . .. . . . . . . . . . . . . . . . . . . . . . . . . . . . . . . . . . . . . . . . . . . . . . . . . . . . . . . . . .
EExxhhaauusst t SSyysstteemm44. . . . . . . . . . . . . . . . . . . . . . . . . . . . . . . . . . . . . . . . . . . . . . . . . . . . . . . . . . . .. . . . . . . . . . . . . . . . . . . . . . . . . . . . . . . . . . . . . . . . . . . . . . . . . . . . . . . . . . . .
CCoooolliinng g SSyysstteemm55. . . . . . . . . . . . . . . . . . . . . . . . . . . . . . . . . . . . . . . . . . . . . . . . . . . . . . . . . . . .. . . . . . . . . . . . . . . . . . . . . . . . . . . . . . . . . . . . . . . . . . . . . . . . . . . . . . . . . . . .
EElleeccttrriiccaal l SSyysstteemm66. . . . . . . . . . . . . . . . . . . . . . . . . . . . . . . . . . . . . . . . . . . . . . . . . . . . . . . . . . .. . . . . . . . . . . . . . . . . . . . . . . . . . . . . . . . . . . . . . . . . . . . . . . . . . . . . . . . . . .
CClloosseed d CCiirrccuuiit t TTV V CCaammeerraas s aannd d MMoonniittoorrss66AA. . . . . . . . . . . . . . . . . . . . . . . . . . . . . . . . . . .. . . . . . . . . . . . . . . . . . . . . . . . . . . . . . . . . . .
TTrraannssmmiissssiioonn99. . . . . . . . . . . . . . . . . . . . . . . . . . . . . . . . . . . . . . . . . . . . . . . . . . . . . . . . . . . . . .. . . . . . . . . . . . . . . . . . . . . . . . . . . . . . . . . . . . . . . . . . . . . . . . . . . . . . . . . . . . . .
TTrraannssmmiissssiioon n CCoooolleerr99AA. . . . . . . . . . . . . . . . . . . . . . . . . . . . . . . . . . . . . . . . . . . . . . . . . . . . . .. . . . . . . . . . . . . . . . . . . . . . . . . . . . . . . . . . . . . . . . . . . . . . . . . . . . . .
TTrraannssmmiissssiioon n CCoonnttrroollss99CC. . . . . . . . . . . . . . . . . . . . . . . . . . . . . . . . . . . . . . . . . . . . . . . . . . . .. . . . . . . . . . . . . . . . . . . . . . . . . . . . . . . . . . . . . . . . . . . . . . . . . . . .
DDrriivve e SShhaafftt1111. . . . . . . . . . . . . . . . . . . . . . . . . . . . . . . . . . . . . . . . . . . . . . . . . . . . . . . . . . . . . . .. . . . . . . . . . . . . . . . . . . . . . . . . . . . . . . . . . . . . . . . . . . . . . . . . . . . . . . . . . . . . . .
SStteeeer r AAxxllee1133. . . . . . . . . . . . . . . . . . . . . . . . . . . . . . . . . . . . . . . . . . . . . . . . . . . . . . . . . . . . . . .. . . . . . . . . . . . . . . . . . . . . . . . . . . . . . . . . . . . . . . . . . . . . . . . . . . . . . . . . . . . . . .
DDrriivve e AAxxllee1144. . . . . . . . . . . . . . . . . . . . . . . . . . . . . . . . . . . . . . . . . . . . . . . . . . . . . . . . . . . . . . .. . . . . . . . . . . . . . . . . . . . . . . . . . . . . . . . . . . . . . . . . . . . . . . . . . . . . . . . . . . . . . .
BBrraakke e CCoonnttrrool l SSyysstteemm1155. . . . . . . . . . . . . . . . . . . . . . . . . . . . . . . . . . . . . . . . . . . . . . . . . . . .. . . . . . . . . . . . . . . . . . . . . . . . . . . . . . . . . . . . . . . . . . . . . . . . . . . .
WWeet t DDiissc c BBrraakkees s CCoooolliinng g SSyysstteemm1155CC. . . . . . . . . . . . . . . . . . . . . . . . . . . . . . . . . . . . . . . . . .. . . . . . . . . . . . . . . . . . . . . . . . . . . . . . . . . . . . . . . . . .
SStteeeerriinng g SSyysstteemm1166. . . . . . . . . . . . . . . . . . . . . . . . . . . . . . . . . . . . . . . . . . . . . . . . . . . . . . . . .. . . . . . . . . . . . . . . . . . . . . . . . . . . . . . . . . . . . . . . . . . . . . . . . . . . . . . . . .
TTiirrees s aannd d WWhheeeellss1177. . . . . . . . . . . . . . . . . . . . . . . . . . . . . . . . . . . . . . . . . . . . . . . . . . . . . . . .. . . . . . . . . . . . . . . . . . . . . . . . . . . . . . . . . . . . . . . . . . . . . . . . . . . . . . . .
CChhaassssiiss1188. . . . . . . . . . . . . . . . . . . . . . . . . . . . . . . . . . . . . . . . . . . . . . . . . . . . . . . . . . . . . . . . .. . . . . . . . . . . . . . . . . . . . . . . . . . . . . . . . . . . . . . . . . . . . . . . . . . . . . . . . . . . . . . . . .
CCaabb2200. . . . . . . . . . . . . . . . . . . . . . . . . . . . . . . . . . . . . . . . . . . . . . . . . . . . . . . . . . . . . . . . . . . .. . . . . . . . . . . . . . . . . . . . . . . . . . . . . . . . . . . . . . . . . . . . . . . . . . . . . . . . . . . . . . . . . . . .
https://www.forkliftpdfmanuals.com/

https://www.forkliftpdfmanuals.com/

Air Conditioning System
Air Conditioning System 20A20A. . . . . . . . . . . . . . . . . . . . . . . . . . . . . . . . . . . . . . . . . . . . . . . . . .. . . . . . . . . . . . . . . . . . . . . . . . . . . . . . . . . . . . . . . . . . . . . . . . . .
HHeeaattiinng g SSyysstteemm2200HH. . . . . . . . . . . . . . . . . . . . . . . . . . . . . . . . . . . . . . . . . . . . . . . . . . . . . . . . .. . . . . . . . . . . . . . . . . . . . . . . . . . . . . . . . . . . . . . . . . . . . . . . . . . . . . . . . .
HHyyddrraauulliic c SSyysstteemm2222. . . . . . . . . . . . . . . . . . . . . . . . . . . . . . . . . . . . . . . . . . . . . . . . . . . . . . . .. . . . . . . . . . . . . . . . . . . . . . . . . . . . . . . . . . . . . . . . . . . . . . . . . . . . . . . .
AccumulatorAccumulator 22E22E. . . . . . . . . . . . . . . . . . . . . . . . . . . . . . . . . . . . . . . . . . . . . . . . . . . . . . . . . . . .. . . . . . . . . . . . . . . . . . . . . . . . . . . . . . . . . . . . . . . . . . . . . . . . . . . . . . . . . . . .
MMaasst t AAsssseemmbbllyy2277. . . . . . . . . . . . . . . . . . . . . . . . . . . . . . . . . . . . . . . . . . . . . . . . . . . . . . . . . .. . . . . . . . . . . . . . . . . . . . . . . . . . . . . . . . . . . . . . . . . . . . . . . . . . . . . . . . . .
CCaarrrriiaaggee2288. . . . . . . . . . . . . . . . . . . . . . . . . . . . . . . . . . . . . . . . . . . . . . . . . . . . . . . . . . . . . . . .. . . . . . . . . . . . . . . . . . . . . . . . . . . . . . . . . . . . . . . . . . . . . . . . . . . . . . . . . . . . . . . .
AppendicesAppendices
https://www.forkliftpdfmanuals.com/

https://www.forkliftpdfmanuals.com/

Section 1
Section 1
EngineEngine
1-11-1TX / TXH / TXB 180S - 400L (Rev. 4/23/07)TX / TXH / TXB 180S - 400L (Rev. 4/23/07)
OILOIL
FILTERFILTER
DRAINDRAIN
PLUGPLUG
FILLERFILLER
CAPCAP
OILOIL
DIPSTICKDIPSTICK
Illustration 1-1. Illustration 1-1. Cummins Cummins QSB6.7 Engine QSB6.7 Engine Service PointsService Points
Introduction.Introduction.The CummThe Cummins QSB6.7 ins QSB6.7 engine isengine is
pressure lubricated. pressure lubricated. Oil pressure Oil pressure is supplied is supplied by aby a
gear-type lubricating oil pump and controlled by agear-type lubricating oil pump and controlled by a
pressure regulator. pressure regulator. The filter The filter bypass valve bypass valve ensur-ensur-
es that a supply of oil, in the event the filteres that a supply of oil, in the event the filter
becomes plugged, becomes plugged, is present. is present. One full One full flow oilflow oil
filter is incorporated in the lubricating system tofilter is incorporated in the lubricating system to
provide maximum cleansing and filtration of theprovide maximum cleansing and filtration of the
engine lubricating oil.engine lubricating oil.
Checking The Lubricating OilChecking The Lubricating Oil (Illustration 1-1)(Illustration 1-1)..
The engine lubricating oil should be checked dailyThe engine lubricating oil should be checked daily
on the oil dipstick to ensure that the engine hason the oil dipstick to ensure that the engine has
the proper amount of oil for operation.the proper amount of oil for operation.
Changing The Oil and Filter Changing The Oil and Filter ElementElement (Illustration(Illustration
1-1)1-1)..The engine The engine lubricating oil lubricating oil and filter and filter shouldshould
be replaced periodically (refer to thebe replaced periodically (refer to the PreventivePreventive
MaintenanceMaintenancechart in thechart in the AppendicesAppendicesfor oil andfor oil and
filter replacement filter replacement interval). interval). The oil The oil filter should filter should bebe
replaced each time the engine oil is changed.replaced each time the engine oil is changed.
Refer to theRefer to the Fuel and Lubricant SpecificationsFuel and Lubricant Specifications
chart in thechart in the AppendicesAppendicesfor the proper grade offor the proper grade of
oil to oil to use. use. Perform the Perform the following procedures following procedures toto
replace the oil and filter:replace the oil and filter:
Do not use ether to start anDo not use ether to start an
engine equipped with an electric heaterengine equipped with an electric heater
https://www.forkliftpdfmanuals.com/

TX / TXH / TXB 180S - 400L (Rev. 4/23/07)
1-21-2
starting aid. starting aid. Use of ether Use of ether to start an to start an engineengine
equipped with an electric heater starting aidequipped with an electric heater starting aid
may cause explosion and severe injury.may cause explosion and severe injury.
Death or serious injury couldDeath or serious injury could
result from result from a runaway truck. a runaway truck. Park the truck Park the truck onon
a hard, level surface, apply the parking brake,a hard, level surface, apply the parking brake,
block the wheels in both directions to preventblock the wheels in both directions to prevent
movement of the truck and Lock Omovement of the truck and Lock Out & Tag Outut & Tag Out
the truck.the truck.
Severe injury may occur fromSevere injury may occur from
burns. burns. Avoid Avoid touching exhaust touching exhaust componentscomponents
while changing the oil.while changing the oil.
Some state and federalSome state and federal
agencies in the United States have determinedagencies in the United States have determined
that used engine oil can be carcinogenic andthat used engine oil can be carcinogenic and
can cause reproductive toxicitycan cause reproductive toxicity. . Avoid Avoid inhala-inhala-
tion of vapors, ingestion and tion of vapors, ingestion and prolongedprolonged
contact with used engine oil.contact with used engine oil.
Dispose of oil and filter inDispose of oil and filter in
accordance with federal and local regulations.accordance with federal and local regulations.
Do not use a strap wrench toDo not use a strap wrench to
tighten the tighten the oil filteroil filter. . Mechanical over-tight-Mechanical over-tight-
ening may distort the threads or damage theening may distort the threads or damage the
filter gasket.filter gasket.
Never operate the engine withNever operate the engine with
the oil level below the ADD mark or above thethe oil level below the ADD mark or above the
FULL mark on the oil dipstick.FULL mark on the oil dipstick.
1.1. The enThe engingine shoe should be auld be at opert operatiating temng temperpera-a-
ture before the oil is changedture before the oil is changed..
2.2. PlacPlace a suite a suitable cable contontainainer under under the der the drairain plugn plug
of the oil of the oil pan. pan. Remove the drain Remove the drain plug (or openplug (or open
drain valve if equipped) to drain the oil.drain valve if equipped) to drain the oil.
3.3. When When the the oil hoil has cas compleompletely tely drainedrained, red, re-inst-installall
the O-ring and drain plug (or close drain valvethe O-ring and drain plug (or close drain valve
if equipped) on the Cummins engine and applyif equipped) on the Cummins engine and apply
a torque value of 59 ft-lbs (80 Na torque value of 59 ft-lbs (80 N⋅⋅m) to tightenm) to tighten
the drain plug.the drain plug.
4.4. UnscrUnscrew the ew the spin-ospin-off ff type type oil foil filter ilter (see (see IllusIllustra-tra-
tion 1-1). tion 1-1). It should be It should be possible to unscrew possible to unscrew thethe
oil filter by hand; however, a band type filteroil filter by hand; however, a band type filter
wrench may be wrench may be used if necessaryused if necessary. . Discard theDiscard the
used oil used oil filterfilter..
5.5. CleClean the aan the area of trea of the filhe filter bter base tase that what will coill con-n-
tact the gasket on the new oil filter.tact the gasket on the new oil filter.
6.6. Fill Fill the the new fnew filter ilter with with clean clean engine engine oil boil beforeefore
installation.installation.
7.7. ApplApply a ligy a light fiht film of elm of engingine oine oil on thl on the gase gasket oket off
the new filterthe new filter. . Screw the new fScrew the new filter onto theilter onto the
filter base until the gasket comes in contactfilter base until the gasket comes in contact
with the filter base and then tighten filter 1/2 towith the filter base and then tighten filter 1/2 to
3/4 turn by hand only.3/4 turn by hand only.
8.8. RemRemove tove the oil fhe oil fill caill cap and fip and fill crll crankankcascase wite withh
oil to the FULL mark on the oil dipstick (seeoil to the FULL mark on the oil dipstick (see
Illustration 1-1).Illustration 1-1).
9.9. StaStart trt the ehe engingine ane and and allollow tw to ido idle. le. ViVisuasuallylly
check the drain plug and oil filter for leaks.check the drain plug and oil filter for leaks.
10.10. Shut down tShut down the engine and he engine and wait approximatelywait approximately
10 minutes for the oil to drain back into the oil10 minutes for the oil to drain back into the oil
pan. pan. When the When the engine has engine has cooled, recheckcooled, recheck
the oil level and add oil as necessary to bringthe oil level and add oil as necessary to bring
the oil level to the FULL mark on the oil dip-the oil level to the FULL mark on the oil dip-
stick.stick.
Drive BeltsDrive Belts(Illustration 1-2)(Illustration 1-2)..Visually inspect theVisually inspect the
drive belt dailydrive belt daily. . Check the belt Check the belt for intersectingfor intersecting
cracks. cracks. Transverse Transverse cracks (across the cracks (across the belt width)belt width)
are acceptable. are acceptable. Longitudinal cracks Longitudinal cracks (direction of(direction of
belt length) that intersect with transverse cracksbelt length) that intersect with transverse cracks
are not are not acceptable. acceptable. Replace the Replace the drive belt drive belt if beltif belt
is frayed is frayed or has pieces or has pieces of material of material missing. missing. AdjustAdjust
drive belts that have a glazed or shiny surfacedrive belts that have a glazed or shiny surface
which indicates which indicates belt slippage. belt slippage. Correctly instCorrectly installedalled
and tensioned drive belts will show even pulleyand tensioned drive belts will show even pulley
and belt wearand belt wear. . After installation of After installation of a new drivea new drive
belt, check the tension and adjust if necessary.belt, check the tension and adjust if necessary.
NOTE:NOTE:Ensure each Ensure each rib of the rib of the drive belt is drive belt is proper-proper-
ly aligned in ly aligned in the corresponding the corresponding grooves of eachgrooves of each
pulley or damage to pulley or damage to the belt will occur.the belt will occur.
Drive belt damage can be caused by:Drive belt damage can be caused by:
Incorrect tensionIncorrect tension
Incorrect size or lengthIncorrect size or length
Pulley misalignmentPulley misalignment
Incorrect installationIncorrect installation
Severe operating environmentSevere operating environment
Oil or grease on the beltsOil or grease on the belts
Drive Belt Tension.Drive Belt Tension. Proper drive belt tension isProper drive belt tension is
automatically maintained by a belt tensionerautomatically maintained by a belt tensioner
supplied with supplied with the engine. the engine. Refer to Refer to the enginethe engine
https://www.forkliftpdfmanuals.com/

1-3
1-3TX / TXH / TXB 180S - 400L (Rev. 4/23/07)TX / TXH / TXB 180S - 400L (Rev. 4/23/07)
manufacturer’s operation and maintenancemanufacturer’s operation and maintenance
manual.manual.
Air Conditioning Drive Belt Air Conditioning Drive Belt TTensionension(if equipped(if equipped
with air conditioning)with air conditioning)..TTension on the air ension on the air condi-condi-
tioning drive belt should be such that a firm pushtioning drive belt should be such that a firm push
with the thumb at a point midway between the twowith the thumb at a point midway between the two
pulleys will deflect the belt about 3/8 to 1/2 inchpulleys will deflect the belt about 3/8 to 1/2 inch
(9.5 to 12.7 (9.5 to 12.7 mm). mm). If the defIf the deflection measured islection measured is
greater than the amount specified above, the drivegreater than the amount specified above, the drive
belt must be replaced.belt must be replaced.
Checking Engine Mounting Bolts.Checking Engine Mounting Bolts.The The engineengine
mounting bolts should be checked for themounting bolts should be checked for the
appropriate torque every 6 months or 1,500 hours,appropriate torque every 6 months or 1,500 hours,
whichever comes whichever comes first. first. If a lockIf a locknut requires retor-nut requires retor-
quing, remove and clean the bolt and locknut.quing, remove and clean the bolt and locknut.
Apply Apply LoctiteLoctiteto the threads of the bolt, andto the threads of the bolt, and
re-install the bolt re-install the bolt and locknut. and locknut. TTorque the locknutsorque the locknuts
on the Cummins engine mounting bolts to 200 -on the Cummins engine mounting bolts to 200 -
220 ft-lbs (270 - 300 N220 ft-lbs (270 - 300 N⋅⋅m). m). Inspect Inspect the the rubberrubber
mounts for deterioration and age hardening.mounts for deterioration and age hardening.
Replace any broken or lost bolts and damagedReplace any broken or lost bolts and damaged
rubber mounts.rubber mounts.
Illustration Illustration 1-2. 1-2. Drive Drive Belt InspecBelt Inspectiontion
Cummins QSB6.7 Engine General InformationCummins QSB6.7 Engine General Information
Oil PressureOil Pressure 30 - 55 psi30 - 55 psi
(210 - 280(210 - 280 kPakPa))
Oil CapacityOil Capacity
(includes filter change)(includes filter change)
15 Quarts15 Quarts
(14.2 Liters)(14.2 Liters)
LLoow w RRPPMMs s ((nno o llooaadd) ) 77550 0 rrppmm
NOTE:NOTE:Some special Some special applications applications may usemay use
engine speed settings that are different from theengine speed settings that are different from the
standards shown. standards shown. The proper The proper settings are perma-settings are perma-
nently stamped on nently stamped on a metal tag affixed a metal tag affixed to theto the
engine.engine.
Engine Repair.Engine Repair.If repair If repair of the of the engine is engine is needed,needed,
contact a Tcontact a Taylor Machine Works, Inc. aylor Machine Works, Inc. authorizedauthorized
dealer for service.dealer for service.
CUMMINSCUMMINS
PLUGPLUG
OEM (TAYLOR)OEM (TAYLOR)
PLUGPLUG
OEM (TAYLOR)OEM (TAYLOR)
PLUGPLUG
Illustration Illustration 1-3. 1-3. ECM ECM PlugsPlugs
https://www.forkliftpdfmanuals.com/
This manual suits for next models
6
Table of contents
Other Taylor Forklift manuals