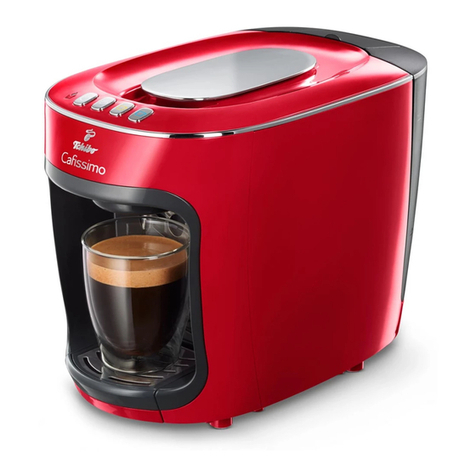
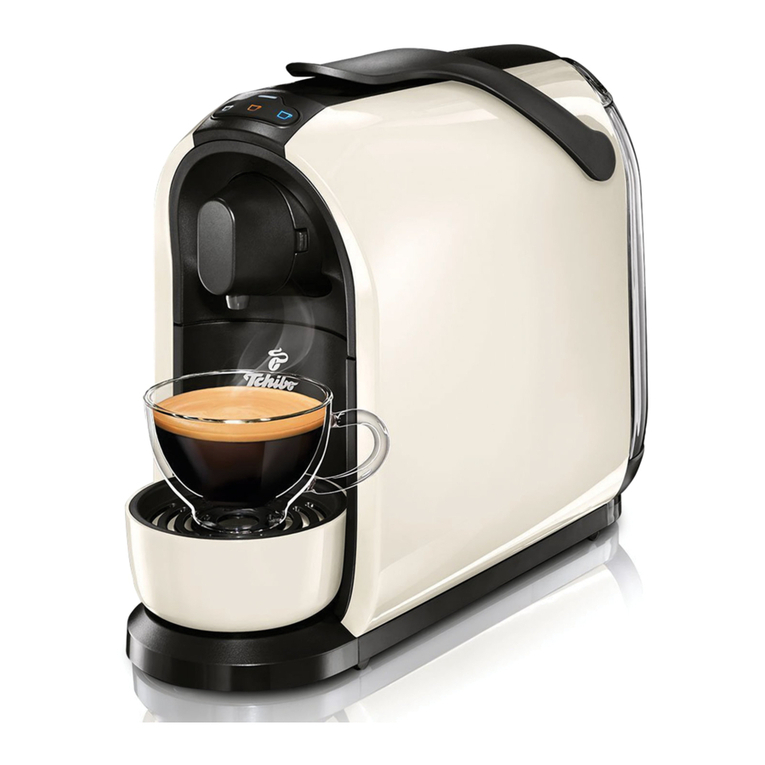
Tchibo 280997 User manual

nstructions for use and guarantee
for Cafissimo COMPACT
Find it only at Tchibo
Welcome to


Experience the world of coffee
with Cafissimo
Thank you for choosing Cafissimo. Only Cafissimo offers
you Tchibo’s supreme coffee quality in combination with
an easy-to-use capsule machine. You can now enjoy your
coffee when ever and however you like – with perfect
espresso, caffè crema and filter coffee.
Just press a button and your Cafissimo COMPACT will
take care of the rest. Our team of experts have perfectly
harmonised machine and capsules to bring out the full
aroma of your coffee.
Thank you for choosing us.
Your Cafissimo team

5 The features of your Cafissimo
C MPACT at a glance
6 The unique three pressure level
system
6 The Cafissimo aroma capsules
7 At a glance (features)
8 About these instructions
8 Intended use and location
9 Safety warnings
11 First-time use (Initial operation)
13 Rinsing the machine
14 The finest aroma –
the finest flavour
14 Drip grid height / Positioning a
large or small cup beneath the
spout
15 Brewing coffee
18 Standby mode
18 Releasing pressure
19 Adjusting the strength of the
coffee
19 Adjusting the strength for the
current brewing procedure
(without saving the setting)
19 Setting the strength permanently
(saving the setting)
19 Restoring factory settings
20 Cleaning
20 Cleaning the water tank
20 Cleaning the used capsule
container and drip tray/grid
20 Cleaning the casing
21 Descaling
21 Descaling agent
21 Descaling
23 Rinsing phase
24 After a long period of non-use
26 Fault / Remedy
28 Technical specifications
28 Disposal
29 Guarantee
Contents
4Cont nts

5Th f atur s of your Cafissimo COMPACT
Page
18
Page
29
Page
21
Page
19
Page
6
Page
17
The features of your Cafissimo C MPACT at a glance
•Unique three pressure level system:
ntelligent interaction between machine and capsule means
every coffee is automatically perfect, because each type of coffee
is prepared at the correct pressure.
•Automatic capsule ejection and integrated used capsule container:
When you lift up the lever after brewing, the capsule drops into
the container automatically.
•Individually programmable beverage size:
Adapt the strength of the coffee to your own personal
taste.
•Save energy with the standby mode
and descaling reminder
•We are there for you:
To show you that we are completely convinced
of the quality of our products, we provide
a full 40-month guarantee for our machines.

6Pr ssur l v l syst m / Th Cafissimo aroma capsul s
You will find the unique Tchibo Arabica quality in each
and every Cafissimo aroma capsule. Sealed airtight, the
capsules preserve their full aroma until they are brewed.
This means you can enjoy perfect coffee, cup after cup.
All capsules can be purchased from Tchibo.
The advantages of the capsules:
• the airtight seal ensures aromatic, fresh coffee
• a variety of different tastes
• individual portions
• quick and clean preparation
•
immediately ready for use (insert capsule just as it is)
n addition to the large variety offered in our permanent
range, why not try our Grand Classés? These limited,
exclusively selected espresso varieties are available
several times a year.
The Cafissimo aroma capsules
The unique three pressure level system
The Cafissimo COMPACT has a unique three pressure level
system, making it perfect for brewing your favourite type
of coffee. Using an individual brewing pressure allows the
respective types of coffee to unfold their full taste and
aroma.
The three coffee selection buttons each represent a differ-
ent brewing pressure. The colour of the cups matches the
colour of the capsules. You can tell by just the colour of
the capsule which button to press for the preparation:
white cup = espresso
yellow cup = caffè crema
blue cup = filter coffee

Us d capsul
contain r
Control pan l and
indicator lights
Drip grid
Wat r tank
Drip tray
Capsul compartm nt
Coff
spout
L v r for op ning and closing
th capsul compartm nt
At a glance
7At a glanc
Hing d
wat r tank op ning
On/Off switch

The coffee machine has been designed for the following
use:
• brewing filter coffee, caffè crema and espresso with
Tchibo capsules.
t is intended for use in households or similar environ-
ments such as
• staff kitchens in shops, offices or similar work areas,
• agricultural buildings,
• by customers in hotels, motels, bed and breakfast
establishments or other places offering accommodation.
Set up the machine in a dry indoor room. Avoid rooms
with high air humidity or high dust content.
8About th s instructions / Int nd d us and location
The machine is equipped with safety features. Never-
theless, read the safety warnings carefully and only use
the product as described in these instructions to avoid
accidental injury or damage.
Keep these instructions for future reference.
f you pass the machine on to someone else, remember to
give them these instructions.
Symbols in these instructions:
Signal words:
DANGER warns you of potential severe injury and
danger to life,
WARNING warns you of injury and severe material
damage,
CAUTI N warns you of minor injury or damage.
This symbol warns you of the danger of injury.
This symbol warns you of the danger of injury
caused by electricity.
This indicates additional information.
Intended use and locationAbout these instructions

9Saf ty warnings
DANGER to children and people with restricted
capability of operating appliances
• Childr n must not b allow d to play with th applianc .
K p th applianc and mains cord away from childr n
und r th ag of 8.
• This applianc can b us d by childr n ag d 8 and ov r,
or thos who lack th physical, s nsory or m ntal capa -
biliti s, or th xp ri nc and/or knowl dg , provid d
th y ar sup rvis d or hav b n train d in th saf us
of th applianc and und rstand th pot ntial dang rs.
• Childr n must not b allow d to cl an th applianc
unl ss th y ar ov r 8 y ars old and sup rvis d by an
adult. This applianc is maint nanc fr .
• S t up th machin out of th r ach of childr n.
• K p packaging mat rial out of childr n’s r ach. Th r
is a risk of suffocation!
DANGER due o elec rici y
• N v r imm rs th coff machin , mains plug or mains
cord in wat r, as this could caus an l ctric shock. N v r
touch th mains plug with w t hands. Do not us th
machin outdoors.
• N v r l av th machin to op rat unatt nd d.
• Only conn ct th machin to a prop rly install d,
ground d wall sock t. Th mains voltag must comply
with th r quir m nts stat d in th machin ’s t chnical
sp cifications.
•Th mains cord must not b kink d or squ z d. K p it
away from sharp dg s and sourc s of h at.
• Do not us if th machin , mains cord or mains plug is
damag d or if th machin has b n dropp d.
• Do not mak any modifications to th applianc , mains
cord or any oth r parts. El ctrical applianc s must only
b r pair d by qualifi d l ctricians, as improp r r pair
can caus consid rabl damag . Only hav r pairs car-
ri d out by a sp cialist workshop or th custom r car
s rvic .
• R mov th mains plug from th wall sock t, ...
... if a fault occurs,
... if th machin will not b us d for a long tim ,
... b for cl aning th machin .
Pull th mains plug, not th mains cord.
Safety warnings

10 Saf ty warnings
WARNING – risk of scalds/burns
• Do not touch th coff spout during or imm diat ly
aft r us . Avoid contact with coff m rging from th
spout.
• Do not rais th l v r whil th machin is b ing us d.
K p th capsul compartm nt op ning clos d and do
not pull out th us d capsul contain r.
CAUTION – risk of injuries or ma erial damage
• Only us original Tchibo capsul s. N v r us damag d or
misshap n capsul s. N v r fill capsul s with ground
coff or coff powd r.
• Only us th machin with th us d capsul contain r
and drip grid ins rt d.
• Always pour fr sh, cold drinking wat r into th wat r
tank (tap wat r may only b us d if it is potabl ). Do not
us carbonat d min ral wat r or any oth r liquid.
• D scal th machin as d scrib d in this bookl t as soon
as th machin indicat s that this is n c ssary.
• Th capsul compartm nt contains two capsul
punch rs. Th s pi rc both sid s of th capsul wh n
th l v r is pr ss d down. N v r r ach into th capsul
compartm nt. K p your fing rs and any obj cts away
from th capsul compartm nt whil pushing th l v r
down.
• Do not lift th machin by th l v r. To mov th
machin , hold it by th out r casing.
• Plac th machin on a solid, l v l surfac which is
wat r- and h at-r sistant.
• To nsur th casing do s not m lt, do not plac th
machin on a hob, imm diat ly n xt to a hot ov n,
radiator or anything similar.
• Lay th mains cord in such a way that it is not a trip
hazard.
• Th machin is quipp d with non-slip f t. Work sur-
fac s oft n hav varnish d or plastic finish s and ar
tr at d with a vari ty of substanc s. Som of th s
products may contain substanc s that r act adv rs ly
with th rubb r f t and soft n th m. If n c ssary, plac
a non-slip mat und r th machin .
• Th machin must not b xpos d to t mp ratur s
b low 4°C. R sidual wat r in th h ating syst m could
fr z and caus damag .

11 First-tim us (Initial op ration)
1. Setting up the machine
Place the machine on a solid, level surface that is
water- and heat-resistant.
Check that the used capsule container is pushed in as
far as it will go and that the drip grid is in place.
2. Filling the tank with water
Fill the water tank with fresh, cold tap water or drinking
water up to the MAX mark:
- Either pour the water into the water tank through
the hinged opening or
- pull the water tank upwards at an angle to remove it
and then fill it with water. When reinserting it, press
the water tank down slightly to ensure that the
valve in the base connects with the casing.
3. Pushing down the lever
The lever must be down. f necessary, push it down.
m
m
m
m
MAX
First-time use (Initial operation)

12 First-tim us (Initial op ration)
4. Positioning the cup
Place a cup beneath the coffee spout.
5. Connecting and switching on the machine
Plug the mains plug into an easily accessible wall
socket.
Press the On/Off switch to switch the machine on.
The coffee selection buttons will flash and the right-hand
indicator light will flash red.
6. Pressing the coffee selection button
Press any coffee selection button.
The pump will start. As soon as the pipes are filled with
water the pump will stop automatically. A small quantity of
water will run into the cup beneath the spout. The right-
hand indicator light will go off.
Only the three coffee selection buttons will continue to
flash and the machine will heat up to prepare the coffee.
m
m
m
m
=
=

13 First-tim us (Initial op ration) / Rinsing th machin
7. Rinsing the machine
Pour away the water that is in the cup and rinse the
machine twice as described in the next section. The
machine is then ready for use.
m
Rinsing the machine
After switching the machine on for the first time or if you
have not used the machine for more than two days, rinse
the machine by allowing two cups of water to flow through
it (without a capsule).
1. Fill the water tank with fresh, cold tap water or drinking
water up to the MAX mark.
2. Place an empty cup underneath the spout.
The lever must be down.
3. As soon as the three coffee selection buttons remain
permanently lit, press the middle one.
The pump will flush water through the pipes which will
then run into the cup underneath.
4. Pour away the water that is in the cup.
5. Repeat steps 2 to 4.
6. Finally, empty the drip tray. To do this, pull out the
entire unit and remove the grid.
MAX
+

14 Th fin st aroma - th fin st flavour / Drip grid h ight
Preheating the cup
Espresso tastes best when served in a preheated cup.
Fill the cup with hot water and pour it away shortly before
using the cup.
Coffee strength
Adjust the strength of the coffee to suit your personal
taste by changing the quantity of water. This is very easy
to do, and is described in the section “Adjusting the
strength of the coffee”.
ne capsule per cup
Each capsule is a single portion for one cup.
Full aroma
Only insert a capsule when you intend to use the machine.
The capsule is pierced as it is inserted. f it is not used
immediately, the aroma will fade.
For small cups, simply turn the drip grid over.
The proximity of the cup to the coffee spout will help to
avoid excessive splashing.
Drip grid height / Positioning a large or small cup beneath the spout
The finest aroma – the finest flavour

15 Br wing coff
1. Heating up the machine
Press the On/Off switch to switch the machine on.
f the machine is in standby mode (see “Standby
mode”), press a coffee selection button or move the
lever.
The three coffee selection buttons will flash as the
machine heats up. The machine loses pressure as it heats
up.
A little residual water may also escape from the coffee
spout at the same time.
f the right indicator light flashes (a signal will also
sound) fill the tank with water.
2. Positioning the cup
Place a cup beneath the coffee spout.
3. Insert a capsule and push the lever down
Push the lever back as far as it will go and insert a
capsule as illustrated with the lid facing forwards.
The capsule must be intact: do not pierce it and do not
remove the capsule lid or insert a misshapen capsule!
Push the lever fully down.
This action pierces the base and lid of the capsule.
m
m
m
m
Brewing coffee
=

16 Br wing coff
4. Pressing the coffee selection button
As soon as the three coffee selection buttons remain
permanently lit the machine is ready.
Press the coffee selection button that corresponds to
the capsule you have inserted.
The brewing procedure will start and stop automati -
cally.
Press the flashing button if you would like to stop the
brewing procedure prematurely.
Tip: You can adjust the strength of the coffee by adjusting
the quantity of water. Please refer to the section
“Adjusting the strength of the coffee” for information
on how to do this.
As with professional espresso machines, when pre-
paring espresso and caffè crema a small amount of
water is pre-brewed to ensure that the coffee can
develop its full aroma. This pre-brewing is indicated
by a short interruption when the brewing process
begins. Filter coffee is prepared without pre-
brewing as with standard coffee machines.
m
Caffè crema
= y llow capsul
= y llow coff s l ction button
Fil er coffee
= blu capsul
= blu coff s l ction button
Espresso
= black capsul
= whit coff s l ction button

17 Br wing coff
5. Ejecting a capsule
Before removing the cup, push the lever back as far as
it will go.
The machine loses pressure and a little more coffee will
escape. The capsule then falls into the used capsule con-
tainer.
6. Emptying the used capsule container and drip tray
After use ...
... pour away the water that is in the drip tray. Due to
the way the machine operates there will always be
water and a small residue of coffee grounds collected
inside the tray.
... empty the used capsule container daily or whenever
it is full. t can hold approx. 8 capsules.
m
m
m

18 Standby mod / R l asing pr ssur
Switching off completely
f you are not using the machine for any length of time,
e.g. overnight, switch it off completely using the On/Off
switch on the side of the machine. This means that it will
not use any electricity.
Releasing pressure
Always push the lever back after each brewing procedure:
the capsule will fall out and the pressure in the system will
subside. A little more coffee will drip from the spout.
Push the lever down again when you are not using the
machine in order to close the capsule compartment.
Standby mode
Standby
15 minutes after the brewing procedure the machine
automatically switches to standby mode. The three coffee
selection buttons go off. The machine now uses only a
very small amount of electricity but is ready for use at any
time.
Press one of the coffee selection buttons or move the
lever to reactivate the machine.

19 Adjusting th str ngth of th coff
Adjust the strength of the coffee to suit your personal
taste by adjusting the quantity of water. You can do this
for one single brewing procedure or save the setting.
Adjusting the strength for the current brewing
procedure (without saving the setting)
f the coffee is too weak, you can stop the water flow
prematurely by pressing the flashing coffee selection
button.
f the coffee is too strong, start the brewing procedure
again without inserting a new capsule. Press the button
as soon as sufficient water has run through.
Setting the strength permanently (saving the setting)
You can change the factory settings for the water flow
permanently. This enables you to make your favourite
coffee every time at exactly the strength you prefer.
You can customise the setting for each type of coffee:
D fault s ttings:
Espr sso approx. 40 ml
Caffè cr ma approx. 125 ml
Filt r coff approx. 125 ml
Th wat r quantity can b s t b tw n approx.
30 and 300 ml.
m
m
one setting for espresso (white cup), another for caffè
crema (yellow cup) and another for filter coffee (blue cup).
1. Proceed in the same way as for brewing coffee:
fill the water tank, insert a capsule and place a cup
beneath the spout.
2. Press and hold the relevant coffee selection button
until the required quantity of coffee has run into the
cup.
3. When you release the button, the machine will save
that quantity.
f the settings are not to your taste, simply repeat the
procedure to change them again.
Restoring the factory settings
You can restore the original settings for the water
quantity.
1. Press the On/Off switch to
switch the machine off.
2. Press and hold the upper
and lower coffee selection
buttons and switch the
machine on.
3. Release the buttons.
The factory settings for the water quantity have been
restored.
+
Adjusting the strength of the coffee

20 Cl aning
Press the On/Off switch to switch the machine off and
unplug the mains plug from the wall socket.
Cleaning the used capsule container and
drip tray/grid
Pull the unit out of the machine by the drip tray.
Take out the drip grid and used capsule container and
wash the individual parts with water and washing-up
liquid.
Dry the parts thoroughly.
The plastic parts are not dishwasher safe.
Only the drip grid can be cleaned in a dishwasher.
Cleaning the casing
Wipe the casing with a soft, damp cloth.
Also wipe the compartment for the used capsule
container with a soft, damp cloth as required.
m
CAUTI N
• Never use caustic chemicals, or aggressive or abrasive
products for cleaning.
m
m
m
m
m
Cleaning the water tank
The water tank should be cleaned once a week.
Wash the water tank with water and a mild washing-
up liquid.
Rinse it out thoroughly under running water and dry it.
The tank is not dishwasher safe.
m
Cleaning
Table of contents
Other Tchibo Coffee Maker manuals

Tchibo
Tchibo Cafissimo 370 635 User manual

Tchibo
Tchibo Cafissimo pure+ MCA21102 User manual

Tchibo
Tchibo Cafissimo CLASSIC User manual

Tchibo
Tchibo Esperto Caffe User manual

Tchibo
Tchibo Cafissimo PICCO User manual

Tchibo
Tchibo CAFISSIMO MINI Guide

Tchibo
Tchibo Cafissimo LATTE HD8603 User manual
Tchibo
Tchibo 377042 User manual

Tchibo
Tchibo Esperto Pro User manual

Tchibo
Tchibo Cafissimo Pure Dimensions and installation guide