TCL Q Series User manual

1
Hi! Let’s Get Started.
User Manual
Q-Series
Window Air Conditioner

2
Table of Contents
English
Register and Protect Your Purchase ................................................................................................. 3
Important Safety Information (Please Review Before Use) ..................................................... 4
What’s in the Box...................................................................................................................................... 7
Setup & Installation .................................................................................................................................. 8
TCL Home App Setup ............................................................................................................................. 13
How to Control Your AC......................................................................................................................... 14
Maintenance ............................................................................................................................................... 21
Warranty Information.............................................................................................................................. 22
Troubleshooting ........................................................................................................................................ 23
Specifications ............................................................................................................................................. 24
Español
Registre y Proteja Su Compra ............................................................................................................ 26
Información Importante Sobre Seguridad (revisar antes de usar el producto).............. 27
Contenido de la Caja.............................................................................................................................. 30
Configuración e Instalación................................................................................................................. 31
Configuración de la Aplicación TCL Home.................................................................................... 36
Cómo Controlar su A/C......................................................................................................................... 37
Mantenimiento .......................................................................................................................................... 44
Información Sobre la Garantía............................................................................................................ 45
Resolución de Problemas..................................................................................................................... 46
Especificaciones....................................................................................................................................... 47
Français
Enregistrez et Protégez Votre Achat............................................................................................... 49
Informations de Sécurité Importantes (à lire avant utilisation)............................................. 50
Contenu de la Boîte................................................................................................................................ 53
Configuration et Installation................................................................................................................ 54
Configuration de l’application TCL Home...................................................................................... 59
Comment Contrôler votre Climatiseur ............................................................................................. 60
Entretien ...................................................................................................................................................... 67
Informations Sur la Garantie ............................................................................................................... 68
Dépannage................................................................................................................................................. 69
Spécifications............................................................................................................................................ 70

3
Product Replacement
Free 1-time replacement if product cannot be fixed.
TCL Parts & Service
Genuine TCL parts & factory certified service.
No Deductible
$0 out of pocket expense.
Priority Service
Free shipping and rapid turn-around time.
Extended Manufacturer Coverage
Extended parts & labor coverage for manufacturer defects.
PROTECT PLUS
Thank you for choosing TCL. We want your ownership experience to bring you as much joy as
the product you purchased does, so we’re oering you a special price on TCL Protection Plans
when you purchase during registration. Add a TCL Protection Plan within your first 30 days of
ownership to receive the best value and we’ll make sure nothing gets in the way of you enjoying
your new product.
Add a TCL Protection Plan when you register your
product and be covered from life’s mishaps
Benefits & Description
Up To 4 Years
3-5 Days 3-5 Days
Up To 4 Years
Register easily with your smartphone
ext a photo of
the camera icon to 71403
Or register online at www.tclusa.com/register
Need help? Visit photoregister.com/help or text HELP to 71403
Register and protect your purchase
Accidental Damage Protection
Coverage for drops, breaks and spills starts after 30 days.
*Extended service plans (i.e., “Protect” and “Plus” plans) are only oered in the United States (US). All TCL
products continue to oer a limited consumer warranty in both the US and Canada. Please refer to the warranty
section in this guide for additional details on warranty information.
TCL-TTWAC

4
IMPORTANT SAFETY INSTRUCTIONS
Before installing and using your air conditioner, please read this owner’s manual carefully. Store this manual in a safe place for future
reference. Your safety and the safety of others is very important to us. Please pay attention to all safety messages outlined in this
owner’s manual.
WARNING: To reduce the risk of fire, electrical shock or injury when using your air conditioner, follow the following basic precautions:
ELECTRICAL REQUIREMENTS
The electrical ratings for your air conditioner are listed on the model and serial number label located on the front right hand side of the
unit (when facing the front).
REGISTER YOUR APPLIANCE
You can register your appliance online by going to register.tcl.com
Be sure to retain your original sales receipt. A valid proof of purchase is required for all warranty claims.
BATTERY WARNING STATEMENT
Do not mix old and new batteries and do not mix alkaline, standard (carbon-zinc) or rechargeable (ni-cad, ni-mh, etc.) batteries
Document your model and serial numbers here:
Model #___________________________________ Serial #___________________________________
You can locate your 20 digit serial number underneath the bar code (On the right hand side of the AC).
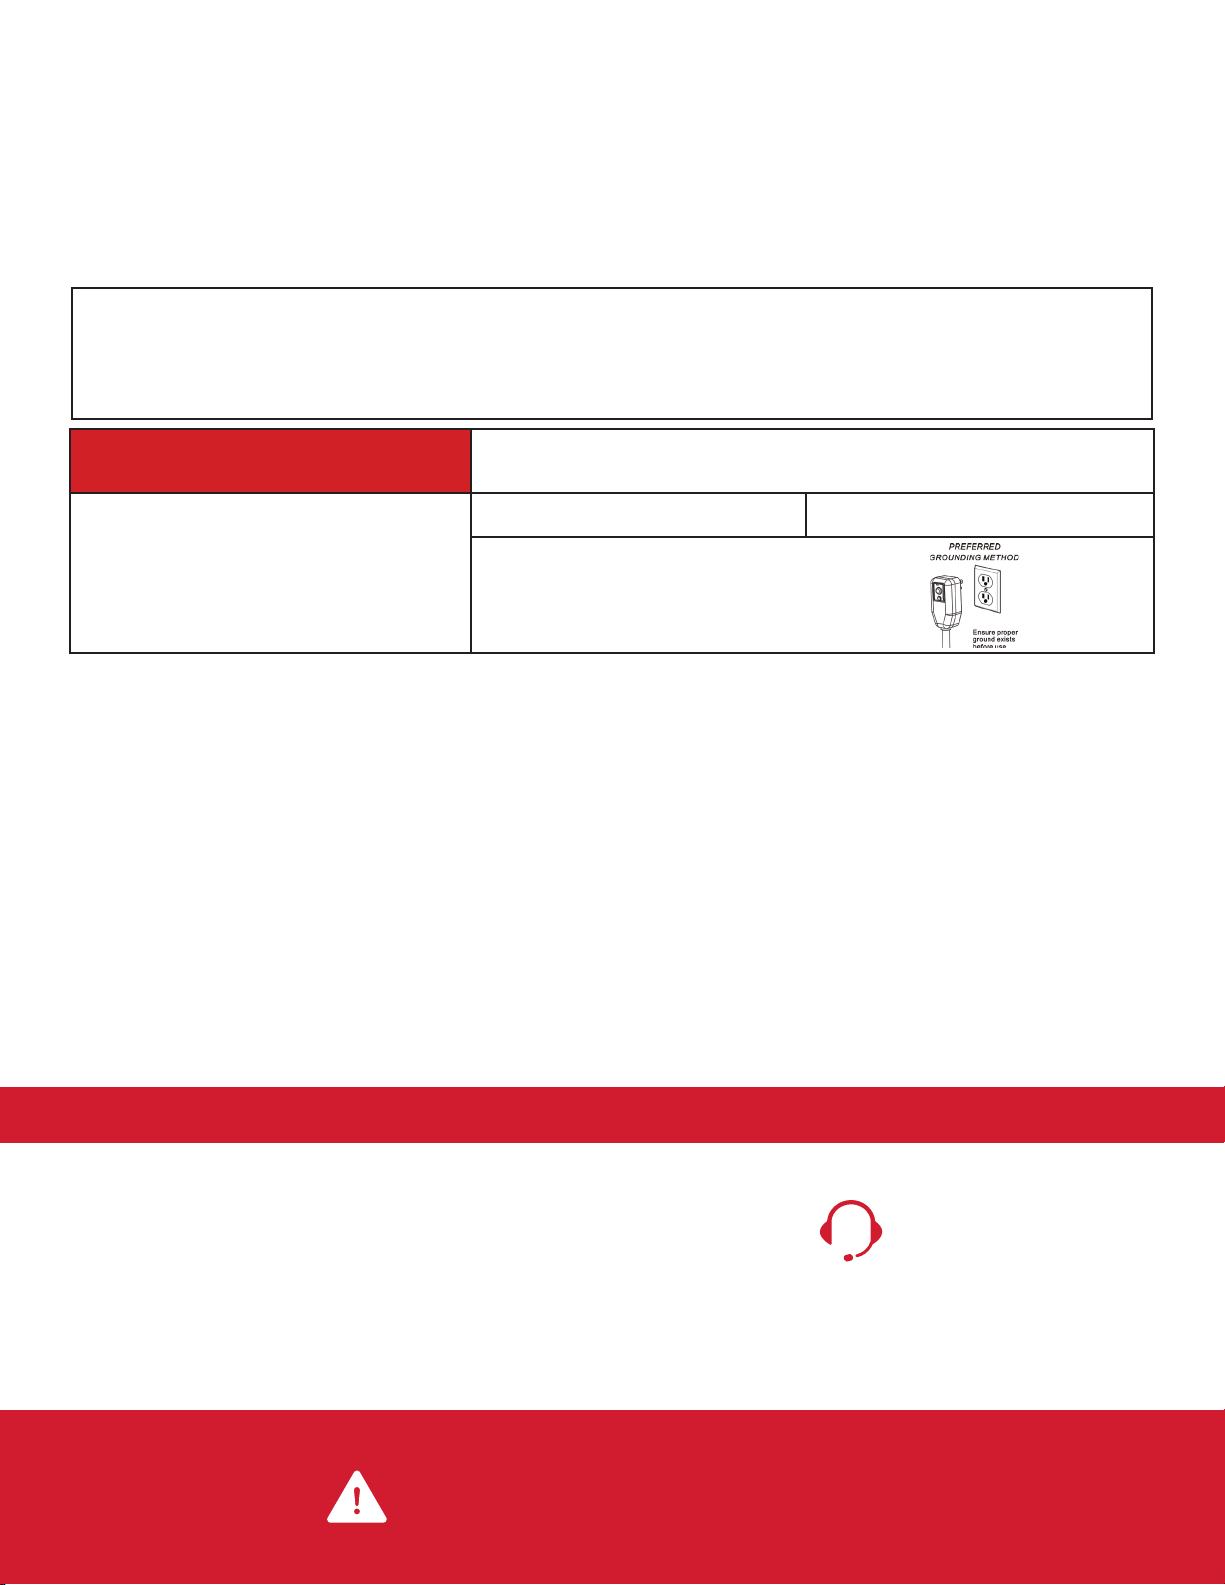
WARNING Specific electrical requirements are shown in the diagram below. Follow the
requirements below for the type of plug on the power supply cord.
Electrical Shock Hazard
Plug into a grounded 3 prong outlet.
Do not remove the ground prong.
Do not use an adapter
Do not use an extension cord.
Failure to follow these instructions can result in
death, fire, or electrical shock
Wiring Requirements Power Supply Cord
RECOMMENDED GROUND METHOD
For your personal safety, this air conditioner must be grounded. This air conditioner is equipped with a 3 prong power supply cord
with a grounded plug. To minimize the possibility of electrical shock, the cord must be plugged into a 3 prong outlet and grounded in
accordance with all local codes and ordinances. If a 3 prong outlet is not available, it is the customer’s responsibility to have a properly
grounded 3 prong outlet installed by a qualified electrician.
FCC CAUTION
This device complies with part 15 of the FCC Rules. Operation is subject to the following two conditions: (1) This device may not cause
harmful interference, and (2) this device must accept any interference received, including interference that may cause undesired operation.
Any Changes or modifications not expressly approved by the party responsible for compliance could void the user’s authority to operate
the equipment.
Note: This equipment has been tested and found to comply with the limits for a Class B digital device, pursuant to part 15 of the FCC
Rules. These limits are designed to provide reasonable protection against harmful interference in a residential installation. This equipment
generates uses and can radiate radio frequency energy and, if not installed and used in accordance with the instructions, may cause
harmful interference to radio communications. However, there is no guarantee that interference will not occur in a particular installation.
If this equipment does cause harmful interference to radio or television reception, which can be determined by turning the equipment o
and on, the user is encouraged to try to correct the interference by one or more of the following measures:
-Reorient or relocate the receiving antenna.
-Increase the separation between the equipment and receiver.
-Connect the equipment into an outlet on a circuit dierent from that to which the receiver is connected.
-Consult the dealer or an experienced radio/TV technician for help.
The distance between user and device should be no less than 20cm.
DO NOT RETURN TO STORE
TCL SUPPORT:
support.tcl.com/us
1-800-825-6747
contact us first
with any questions
WE ARE
READY TO
HELP
BE CAREFUL WHEN REMOVING
THE AIR CONDITIONING UNIT
• 115 Volt (103 min – 127 max)
• (5K-8K) (0-8 amps)
• (10K-12K) (0-12 amps)
• (5-8K) (10 amp time-delay fuse or circuit breaker)
• (10K-12K) (15 amp time-delay fuse or circuit breaker)
• Use on single outlet circuit only

5
INSTALLATION MANUAL---Important considerations
When compared with other refrigerants, R32 is more environmentally friendly. Please use this product
as instructed. This refrigerant is flammable and may combust under certain conditions, however when
this product is used as directed these risks are significantly reduced. Always consult with a trained
professional when maintaining or repairing an air conditioner.
Important Considerations
• The air conditioner you buy must be installed by professional personnel and
the “Installation manual” is used only for the professional installation personnel!
•The installation specifications should be subject to our after-sale service regulations.
•When filling the flammable refrigerant, please use caution to avoid serious injury.
•A leak test must be done after the installation is completed.
•It is a must to perform the safety inspection before maintaining or repairing an air conditioner
using flammable refrigerant in order to ensure that the fire risk is reduced to a minimum.
•Requirements for the total weight of filled refrigerant and the area of a room to be equipped
with an air conditioner (are shown as in the following Tables GG.1 and GG.2)
The maximum charge and the required minimum floor area
m1 = (4 m3) x LFL , m2 = (26 m3)) x LFL, m3 = (130 m3 )x LFL
Where LFL is the lower flammable limit in kg/ m3,R290 LFL is 0.038 kg/ m3,R32 LFL is 0.038 kg/ m3.
For the appliances with a charge amount m1 < M = m2:
The maximum charge in a room shall be in accordance with the following:mmax= 2.5 x (LFL)(5/4) x h0 x (A)1/2
The required minimum floor area Amin to install an appliance with refrigerant charge M (kg) shall be in accordance with
following: Amin = (M/ (2.5 x (LFL)(5/4) x h0)) 2
Where:
mmax is the allowable maximum charge in a room, in kg;
M is the refrigerant charge amount in appliance, in kg;
Amin is the required minimum room area, in m2;
A is the room area, in m2;
LFL is the lower flammable limit, in kg/m3;
h0 is the installation height of the appliance,in meters for calculating mmax or Amin, 1.8 m for wall mounted;
Warning
• Please read the manual before installing, using, or conducting maintenance.
•Do not use means to accelerate the defrosting process or to clean, other than those recommended by
the manufacturer.
•Be aware that refrigerants may not contain an odor.
•Do not pierce or burn the appliance.
•The appliance shall be stored in a room without continuously operating sources (for example: open flames, an
operating ignition gas appliance or an operating electric heater).
•Please contact the nearest after-sale service center when maintenance is necessary. At the time of maintenance,
the maintenance personnel must strictly comply with the Operation
•Manual provided by the corresponding manufacturer and any non-professional is prohibited to maintain the
air conditioner.
•It is necessary to comply with the provisions of gas-related federal, state, and local laws and regulations.
•It is necessary to clear away the refrigerant in the system when maintaining or recycling an air conditioner by a
trained professional.
Warning: flammable
& Dangerous
Read the user manual Read the installation
manual
Read the
service manual

6
Table GG.1 - Maximum charge (kg)
Category LFL
(kg/m3)
h 0
(m)
Floor area (m2)
4 7 10 15 20 30 50
R32 0,306
0,6 0,68 0,9 1,08 0,32 1,53 1,87 2,41
1 1,14 1,51 1,8 2,2 2,54 3,12 4,02
1,8 2,05 2,71 3,24 3,97 4,58 5,61 7,254
2,2 2,5 3,31 3,96 4,85 5,6 6,86 8,85
Table GG.2 - Minimum room area (m2)
Category LFL
(kg/m3)
h 0
(m)
Charge amount (M) (kg)
Minimum room area (m2)
1,224 kg 1,836 kg 2,448 kg 3,672 kg 4,896 kg 6,12 kg 7,956 kg
R32 0,306
0,6 29 51 116 206 321 543
1 10 19 42 74 116 196
1,8 3 6 13 23 36 60
2,2 2 4 0 15 24 40
Installation Safety Principles
1. Site Safety
Open Flames Prohibited Ventilation Necessary
2. Operation Safety
Open Flames Prohibited
3. Installation Safety
• Refrigerant Leak Detector
• Appropriate Installation Location
The left picture is the schematic diagram of a refrigerant
leak detector.
Please note that:
1. The installation site should be in a well-ventilated area.
2. The sites for installing and maintaining an air conditioner using Refrigerant R32 should be free from open fire or welding, smoking, drying
oven or any other heat source higher than 548 which easily produces open fire.
3. When installing an air conditioner, it is necessary to take appropriate anti-static measures such as wear anti-static clothing and/or gloves.
4. Installation or maintenance location should not be surrounded by obstacles or close to any heat source, flammable, and/or explosive
areas or objects.
5. If the product suers refrigerant leak during the installation, all personnel should go out till the refrigerant leaks completely for 15 minutes.
If the product is damaged, a professional must carry such damages product back to the maintenance station. It is prohibited to weld the
refrigerant pipe or conduct other operations on the contaminated site.
6. The air conditioner unit needs to sit on a flat even surface.
7. It is necessary to avoid the places where there are other electrical products, power switch plugs and sockets, kitchen cabinet, bed, sofa
and other valuables directly under the lines on two sides of the indoor unit.
8. Any ventilation openings of unit should be free from obstructions.
Mind Static Electricity Must wear protective clothing and
anti-static gloves
Don`t use mobile phone

7
What’s in the Box
Open the carton and remove the below parts.
APPEARANCE PART NAME QUANTITY
Window Air Conditioner 1
Remote Control 1
Long Foam Seal
(Non-Adhesive) 1
Long Foam Seal
(Adhesive) 1
Security Bracket 1
¾” Screw 4
½” Screw 3
Remote Control Battery 2
Modelling Material (Plasticene) 1
Note: Illustrations in this manual are for explanatory purposes only. Product design and
aesthetics may vary. Please search the entire package for the contents listed above as they
may be packaged on top or underneath the main AC unit.

8
Setup & Installation
Window Requirements
1. This air conditioner is designed to be installed in a standard single-hung or double-hung
window with a window width between 25” and 36” (645mm - 915mm).
2. The air conditioner can be installed without the side panels to fit in a narrow window opening.
See the window dimensions. If the air conditioner is installed on a window width of 25.39”-
28.35” (645-720mm), it must be installed to the right, and the right bracket must be touching
the air conditioner (not extended); otherwise, the air conditioner will not operate normally.
3. The lower sash (the lower part of the window that moves up and down) must allow for 14.5”
of vertical clearance when open.
4. All supporting parts must be secured to firm wood, masonry, or metal.
5. The electrical outlet must be within reach of the power cord. (Electrical outlets only, no power
strips or other outlets allowed.)
Suggested Tools for Installation (Not Included)
Note: Store the air conditioner in its product box while not in use.
CAUTION
Heavy object. Team handling is required during the installation process.
Phillips
Screwdriver
Scissors
or Knife
Tape Measurer
or Ruler
Pencil Drill and
1/8” Drill Bit
Level
25-36 inch
645-915 mm
14.5 inch
368 mm
Exterior
Wall
OsetStool
Sill
Interior
Wall

Getting Started
Step 1: Unboxing
Carefully remove all packaging and wraps from the air conditioner and its accessories.
Step 2: Testing
Before installing your AC, let’s test it to make sure it works properly, and your outlet has the proper
power level. First, place it on a flat surface, plug it directly into a wall outlet (never use a power
strip or other device), and turn it on. Next, use the Mode button on your control panel to change
the AC to Cool Mode and press the down arrow to set the temperature to the lowest setting. After
3 minutes, the AC should be blowing cool air. If so, please continue to the next step. If not, see
detailed troubleshooting tips at support.tcl.com/us.
Step 3: Applying the Adhesive Foam Seal
Measure the length of the upper window frame, trim the adhesive foam seal to the appropriate
length, and apply as shown below.
Step 4: Placing Inside an Open Window
Using team lift, carefully lift the air conditioner and place in the windowsill. Next, close the window,
making sure the air conditioner is centered and the bottom rail is flush against the windowsill.
CAUTION
Heavy object. Team handling is required during the installation process.
Note: The air conditioner should be tilted about 3° to allow for better drainage of condensate
and rainwater. Using a level, measure about 1/3 bubble for the correct slant.
Adhesive
Foam Seal
Outside Inside
Bottom
Rail
About 3”
CAUTION
Be careful to avoid cuts
from the sharp metal edges
and aluminum fins on the
front and rear coils!

10
Step 5: Securing the Side Brackets
Extend the side brackets from both sides of the air conditioner and secure them to the left and
right window frames using four ¾” screws as shown. Make sure to secure to upper screws before
securing the lower screws.
Step 6: Securing the Side Panels
Pull the side panels inward to align with the side brackets. Then, extend and snap the side panel
into place with the side brackets.
Step 7: Sealing Any Gaps with Modeling Clay (Plasticene)
Fill any gaps and crevices between the side brackets and panels with the included clay material.
3/4” Screws
X 4
Locking Pins
Jutting Points

11
Step 8: Securing the Screw into the Top Rail
Secure the ½” screw into the top rail of the air conditioner.
Step 9: Installing the Security Bracket (Recommended)
For security purposes, it is recommended to attach the security bracket to the top of the window
using two ½” screws to prevent opening the window from outside. However, the security bracket
can be removed to allow you to open the window when desired.
Step 10: Filling the Gap Between Sashes
Trim the non-adhesive foam seal to the appropriate length and insert it between the window
sashes as shown below.
1/2” Screw
X 1
1/2” Screw
X 2
Non-Adhesive
Foam Seal
WARNING
To open the window, the unit must be securely fixed using the four screws from
step 5. Please verify that the unit is reliably fixed before opening the window.

12
If AC is Blocked by Storm Window Frame
Add wood as shown above or remove store window frame/obstruction before installing the
window air conditioner.
If the Storm Window Frame must remain, be sure the drain holes or slots are not caulked or
painted shut. Accumulated rainwater or condensation must be allowed to drain out.
Window Requirements
CAUTION
When opening the window, be sure that the fixed screws are secured
properly in place without any objects aecting their attachment to the
side brackets and associated window frame to prevent the unit from
becoming unstable and falling.
SASH
INSIDE
1-1/2”min
(38mm)
Storm window
frame or other
obstruction Board thickness as
required, for proper
pitch to rear, along
entire sill.
Fasten with nails or
screws.
OUTSIDE

13
App Control Setup
Step 1: Download & Open the TCL Home App
Scan the QR code or use the following link https://tcl.link/homeplusapp
Step 2: Create an Account
Create and verify your account using your email.your accoun
t
us
i
ng your ema
Step 3: Add Your Device
Select the “Add Device” button and follow the in-app instruction to complete setup.
Device”
button
and
follow
the
p
i
ns
t
ruc
ti
on
t
o com
pl
e
t
e se
t
u
p

14
How to Control Your AC
Remote Control
For more information on how to use the remote and other functions of your air conditioning unit,
or to understand how each mode works, please refer to the next few pages.
Battery Replacement
The air conditioner comes with two batteries for the included remote control. Please be sure to
insert them correctly for proper use of the remote.
Tips for Using the Remote
1. The remote must be used within 26ft of the unit
2. The unit will make a sound when it receives the remote’s signal
3. Curtains, other materials, and even direct sunlight can interfere with the infrared signal
receiver.
4. Press “MODE” and “ ^” and hold for 3s to reset the wifi setting.
Note:
• Do not mix old and new batteries, or batteries of dierent types
• Do not leave batteries in the remote if you do not plan on using the device for more than 2
months
• Follow your local city ordinances for information on proper disposal of old and used batteries.
Do not dispose of batteries in unsorted municipal waste.
ECO MODE
Designed to save energy
while keeping your room
at the set temperature.
SWING
Start and pause vent
oscillation.
TIMER
Set a Timer to turn the air
conditioner on/o.
MUTE
Select Mute to lower the
operating volume to its
quietest setting.
POWER
Turn the device on/o
MODE
Cycle through Cool, Dry,
Fan, and Auto modes.
FAN SPEED
Adjust the fan speed (Low,
Medium, High, Auto)
SLEEP MODE
Designed to save energy
while your sleep.
UP/DOWN
Increased or decrease the
temperature/Timer.
DISPLAY
Turn on/o the device’s
display. Press and hold
for 5s to switch between
°F/°C.

15
Control Panel
Power Turn the AC on and o
Fan Speed Adjust the fan speed (Low, Med, High, Auto)
Note: Fan speed settings are available in Auto, Cool, and Fan
modes.
Swing/Oscillation Adjust the direction of airflow by swinging the vent
vertically.
Decrease Decrease temperature level
Increase Increase temperature level
Mode Selection Switch between Cool/Dry/Fan/Auto modes

16
LED Display
Indicates Cool, Dry, Fan, and Auto mode, respectively.
Indicates the unit is in Sleep mode.
Indicates that there is a WiFi connection
Indicates Low, Medium, High, and Automatic
fan speeds, respectively.

17
General Operations
Power Turn the AC on and o
Increase Press to increase the temperature by 1 °F/°C.
Decrease Press to decrease the temperature by 1 °F/°C.
Swing/Oscillation Press to make the vent swing up and down.
While moving, press again to stop the vent at a desired angle.
Press and hold for 3 seconds to turn on/o Eco mode.
Note: To adjust the airflow direction horizontally, manually move
the levers located on the top of the air outlet from side to side.
Also, do not adjust the large vertical vent by hand as it may
cause damage
Fan Speed Adjust Fan Speed
Press repeatedly to adjust the fan speed between Low, Medium,
High, and Auto.
Note: In Auto mode, the fan speed will adapt to the room’s temperature. In Dry mode, the fan
speed cannot be adjusted.
Filter
Fan Speed
Reset Filter
Press and hold for 5 seconds to reset the filter reminder.
To clean the filter, see the maintenance section of this manual.
FILTER

18
Mode Selection Press repeatedly to cycle through
Cool, Dry, Fan, and Auto modes.
Cool Mode
• The AC cools the room to the set temperature.
• Temperature and fan speed are adjustable.
Dry Mode
• The AC works as a dehumidifier to remove excess humidity in
the air. The fan runs constantly but at a low speed.
• Temperature and fan speed are not adjustable.
Fan Mode
• The AC circulates air like a normal fan. Remember to keep
the vent open during the fan function but closed during the
cooling function to maximize the cooling eciency.
• Fan speed can be adjusted to Low, Med, and High.
• Temperature cannot be adjusted.
Auto Mode
• The AC adjust between Cool and Fan modes automatically
based on the room’s temperature.
• Temperature and fan speed cannot be adjusted.
Timer
(On Remote Control)
When the air conditioner is on or in standby, press the Timer
button and its icon will flash on the LED display. During the
flashing process, press + or - to select a timer from 0 to 24
hours, then press the Timer button again to confirm the setting.
After the timer ends, the air conditioner will start/stop running
automatically.
Turning the air conditioner ON or OFF at any time or adjusting
the timer setting to 0.0 hour will cancel the timer program.
Eco
(On Remote Control)
In Eco mode, when the desired temperature is reached, the
compressor will turn o and the fan will continue to run for 3
minutes before turning o.
The fan will turn on for 1-minute at every 5-minute interval until
the room temperature is above the set temperature, at which
time the compressor turns back on and continues cooling.

19
Sleep
(On Remote Control)
In Sleep mode, the air conditioning temperature will increase
by 2 degrees in 1 hour (1 degree every 30 minutes), then the
temperature will remain constant for 7 hours at which the
temperature will return to the initial temperature.
NOTE: Button sounds are muted, and all display indicator lights
turn o after 15 seconds except for the Sleep mode indicator.
LED Display
(On Remote Control) Turn on/o the display
Press and hold for 5 seconds to switch between °F/°C.

20
Other Features
Filter Reminder
When the running time reaches 500 hours, the filter reminder will light up to indicate the filter
needs to be cleaned. Press and hold the Filter button for 5 seconds to reset the filter reminder.
Please see the maintenance section of this manual for filter cleaning instructions.
Display Auto O
• Display will dim after 30 seconds (or after 15 seconds in sleep mode)
• Wake up the display by pressing any button
Memory
If the air conditioner is turned o but stays connected to the power, it will resume the previous
settings (except the timer setting) when it is turned on again.
Drain Water
This unit was designed to collect moisture from condensation in a collection pan in the base of the
unit. The collected water is distributed by the rear fan on to the condenser coil. This aids in the
overall eciency of the unit.
It is normal to hear the water sloshing around when the fan is spinning.
If this behavior is not desired, the drain cap at the rear of the AC can be removed to drain a portion
of the water. Doing so may lessen the eciency of the AC. A minimal amount of water will still
remain in the drain pan.
Window Requirements
Other manuals for Q Series
3
This manual suits for next models
1
Table of contents
Languages:
Other TCL Air Conditioner manuals

TCL
TCL TWC-15CR/UH (ES) User manual

TCL
TCL TAC-07CS User manual

TCL
TCL H5P44W User manual

TCL
TCL TACM2O-28HIA User manual

TCL
TCL AC12000E User manual

TCL
TCL iQool-C2MS12K12K Operating manual

TCL
TCL 15K UM User manual

TCL
TCL W5WR1 User manual

TCL
TCL Inverter TAC-09CHSD/XAB1I User manual

TCL
TCL TAC-09CSD/XAB1 User manual
Popular Air Conditioner manuals by other brands

Samsung
Samsung MH18VP2-09 Owner's instructions

Frigidaire
Frigidaire FFRE153WA1 Use & care guide

Panasonic
Panasonic S-22MZ1H4A operating instructions

Allied Air
Allied Air 4SCU14LE SERIES Installation and maintenance instructions

Haier
Haier ESA412J-W Use and care guide

Fujitsu
Fujitsu Airstage Wall Series operating manual