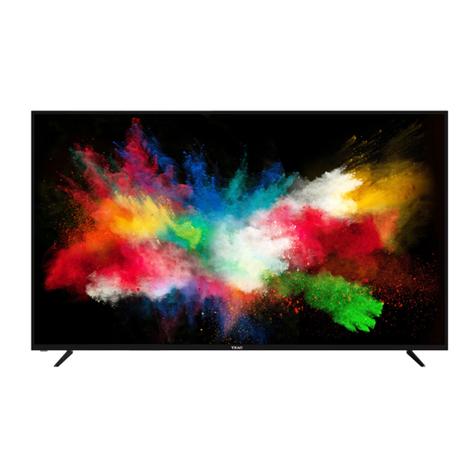
Teac LE4210FHD3D User manual

USER MANUAL
WARRANTY INFORMATION INSIDE. PLEASE READ
www.teac.com.au
IMPORTANT !
LE4210FHD3D
EDGE-LIT LED LCD 3D TV
Trademark of TEAC Corporation JAPAN
“ For Optimum picture and sound quality,
please use TEAC Audio/Video cables ”
TEAC High Performance Audio/Video cables and connectors have
been designed to enhance your home entertainment experience.

WARRANTY REGISTRATION
Please keep this information for your own records.
Please refer to the owner’s manual to ensure that you have followed the correct installation and operating
procedures.
1. Read owner’s manual carefully
2. If you require Warranty Service, please contact the TEAC Authorised Service Centre
3. Please have your purchase receipt as your proof of purchase and the following details completed for a valid
Warranty.
Owner’s Name
Owner’s Address
Postcode
Model Name/No. Serial No.
Dealer’s Name
Dealer’s Address
Postcode
teacservicesupport@awa.com.au
www.teac.com.au
Thank you for selecting a TEAC product
.
If you should require assistance with your product regarding its setup
or operation, or if you believe it is faulty, please first call us at the
TEAC Customer Support Hotline
1300 55
3
3315
I
In many cases, our Hotline has been able to solve suspected faults
o
over the phone.
before returning the product to the store where you purchased it.
This advice does not limit, override or alter your guaranteed rights under the Australian Consumer Law,
including remedies for any failure of the Consumer Guarantees, which may include repair or replacement,
or, if a Major Failure (as defined under the Australian Consumer Law) a replacement or a refund. These
guaranteed rights cannot be varied by TEAC or retailers of its products and have no set time limit.

WARRANTY REGISTRATION
Please read this warranty card.
Keep your purchase receipt to enable you to proceed quickly in the event of a Warranty Service.
Warranty Terms & Conditions
1. TEAC warrants to the original retail purchaser only, that this product is free from defects in material and
workmanship under normal domestic use and authorises free service during the warranty period at any TEAC
Authorised Service Centre only. TEAC warranty only applies to products purchased, used and serviced in Australia.
2. Subject to the terms herein, this warranty effectively covers the equipment as specified in the Warranty Periods
Table below from the date of purchase.
TEAC PRODUCT
WARRANTY PERIOD
LED/LCD TV 42” (106 cm) and above 1 Year (In-Home Service/ Pick up Available)*
LED/LCD TV 32” (80 cm) and above 1 Year (No In-Home Service)
All Televisions under 32”(80 cm) 1 Year (No In-Home Service)
Digital Set Top Boxes & Module 1 Year (No In-Home Service)
DVD & Module 1 Year (No In-Home Service)
DVD Recorder & PVR Module 1 Year (No In-Home Service)
Audio Systems 1 Year (No In-Home Service)
3. In Home Service/Pick up* will only be provided as part of this warranty if all the following conditions are met;
a) The product as indicated in the Warranty Period Table.
b) The product is within the warranty period.
c) The product is located within the normal service area of the local TEAC Authorised Service Centre.
In any other situation or circumstance, where an In Home Service/Pick up* call is made, a service fee will be
charged by the Service Provider including a travel fee if outside normal service area.
If TEAC determines that the product is not repairable on site, TEAC can complete the repair by taking the product to
a TEAC Authorised Service Centre.
Where In-Home service/Pick up* is not available, the purchaser is required to send the product to the nearest TEAC
Authorised Service Centre for repair. In this event, a copy of this warranty card and a copy of your receipt of
purchase must be enclosed to be a valid warranty. Such equipment or part must be sent freight prepaid to your
nearest TEAC Authorised Service Centre. After the repair, the product will be available for collection by or return to
the purchaser at purchaser’s cost. The warranty does not cover freight or insurance. In all cases of transit damage
or lost, a claim must be filed against the carrier by the purchaser, even if shipment is arranged by TEAC. TEAC in-
home service may also be available at a fee upon request.
4. Accessories, Remote, including power adaptors, AV box, TV tuners, etc, are warranted to be defect free for 1 year.
5. Replacement of spare parts under normal usage; except cabinet, front panel, knob, removable accessories, battery,
consumables, AC cord, connecting cord and other accessories, are warranted as specified in the Warranty Periods
Table, and will be repaired or replaced at the sole judgement of TEAC.
6. The warranties hereby conferred do not extend to, and exclude, any cost associated with the installation, de-
installation or re-installation of a product (be it in-home or otherwise), including costs related to the mounting,
demounting or remounting of any screen, (and any other ancillary activities), delivery, handling, freighting,
transportation or insurance of the product or any part thereof or replacement of and do not extend to, and exclude,
any damage or loss occurring by reason of, during, associated with, or related to such installation, de-installation,
re-installation or transit.
7. Normal customer maintenance as described in the owner’s manual is not covered by this warranty (such as
cleaning VCR heads etc.)
8. Service will be provided only during normal business hours and under safety conditions and circumstances.
9. This warranty does not apply to equipment showing abuse, damage or that it may have been tampered with, altered
or repaired outside any TEAC Authorised Service Centre. If so, the warranty will be void.
10. No one is authorised to assume any liability on behalf of TEAC or impose any obligation on it, in connection with the
sale of any equipment other than as stated in this warranty and outlined above.
11. In no event will TEAC be responsible or liable for indirect or consequential damages from interrupted operations or
other causes.
12. Warranty is not transferable to any subsequent purchaser if the product is sold during the warranty period.
13. LCD dead pixel policy, please contact TEAC Customer Support Hotline on 1300 553 315 for assistance.

TABLE OF CONTENTS
1 Safety Precautions
1.1 Power Supply 1
2
3
4
5
5-7
8
9
10
11
12
13
14
13-15
16
16
17
18
19
21
22
23
24
25
26
27
27
29
29
33
34-35
1.2 Installation
1.3 Use and Maintenance
1.4 Important Safety Instructions
2 TV Placement Setup
2.1 Accessories
2.2 TV Stand/Wall Mounting Assembly
3 Parts & Connections
3.1 Front View
3.2 Back View
4InitialSetup&InputSources
4.1 Initial Power On
4.2 Selecting an Input Source
5 Remote Control
5.1 Remote Control Buttons and Functions
5.2 Battery Installation
6 On-Screen Display (OSD) Menu
6.1 OSD Menu Overview
6.2 Menu Map
7 TV & Electronic Programme Guide
7.1 ATV/DTV Mode
7.2 Electronic Programme Guide (EPG)
7.3 Channel Customisation
7.4 Channel List and Favourite List
7.5 Password Lock for Channels and Programmes
8 Digital Video Recording (DVR)
8.1 Setting up for USB Recording
8.2 Instant Recording
8.3 Time Shift (Pause Live TV)
8.4 Scheduled Recording/Viewing Reminder
8.5 Using the Recorded File List
9 3D Video Playback
9.1 Watching 3D TV
9.2 3D Glasses
9.3 3D Settings
10 USB Multimedia Playback
10.1 Connecting the USB Storage Device
10.2 Playing Multimedia Files
11 Reference
11.1 Troubleshooting
11.2 Specifications

1. SAFETY PRECAUTIONS
1.1 Power Supply
It is the responsibility of
the user to make sure all
precautions and warnings
are heeded and followed.
DO NOT touch the power
plug with wet hands.
DO NOT bend the power cord
excessively or place heavy
objects on it.
DO NOT use a damaged
power cord or plug or a
loose outlet.
DO NOT plug several devices
into the same outlet.
Insert the power plug fully into
the outlet.
'RLQJVRPD\UHVXOWLQ
fire or electric shock.
$FRQJHVWHGRXWOHWPD\FDXVH
the outlet to overheat and start
a fire.
$loose or improperly
inserted power plug
may result in fire.
'RLQJVRPD\UHVXOWLQ
electric shock.
'RLQJVRPD\UHVXOWLQ
fire or electric shock.
When disconnecting the
power cord from an $&
outlet, always grasp it by
the plug.
3XOOLQJRQWKHFRUG
can damage the internal wire
and may result in a fire.
$OZD\VXQSOXJWKHXQLWEHIRUH
cleaning.
1RWGRLQJVRPD\UHVXOWLQ
fire or electric shock.
Safety PrecautionsParts & Connections
3D Video Playback
USB Multimedia
Playback
TV Placement
Setup
Initial Setup &
Input Sources
Remote Control
On-Screen DisplayTV & Electronic
Programme Guide
Digital Video
Recording (DVR) (OSD) Menu
Reference
1

6$)(7<35(&$87,216
,QVWDOODWLRQ
Disconnect this device from power by turning the power off at the AC power outlet and unplugging the AC plug.
Warning : Ignoring this precaution may result in death or serious injury.
Caution : Ignoring this precaution may result in injury or property damage.
DO NOT place a burning candle,
burning incense, or lighted
cigarette on top of the unit.
DO NOT place the unit near
any heat source such as a fire-
place or space heater.
DO NOT place the unit where
it is exposed to rain, excessive
moisture or grease.
DO NOT use or store flammable
or combustible materials near
the unit.
'RLQJVRPD\UHVXOWLQILUH
electric shock, malfunction,
or deformation.
'RLQJVRPD\UHVXOWLQILUH
or explosion.
'RLQJVRSRVHVDVHULRXVULVN
of overheating and a possible fire
outbreak.
DO NOT place the unit in a poorly
ventilated enclosure, such as a
cabinet.
DO NOT run power cords near
heat-producing appliances such
as radiators, stoves, or irons.
The excessive heat can melt
the insulation and expose live
wires, resulting in fire or electric
shock.
'RLQJVRSRVHVDVHULRXVULVN
of overheating and a possible fire
outbreak.
DO NOT place the unit on an unstable
surface, such as a sloped table, or any
stand with a contact area smaller than
the bottom surface of the unit stand.
3ODFLQJWKHXQLWRQDIODWVWDEOHVXUIDFH
can prevent accidents from happening.
Ignoring this precaution may result in the
unit toppling over and causing injury.
.
Install the antenna away from
high-voltage power lines and
communication cables. Make sure
it is installed securely.
,IWKHDQWHQQDWRXFKHVDSRZHUOLQH
contact with the antenna may result
in fire, electric shock, or serious injury.
Install the unit at an adequate
distance from the wall to ensure
sufficient ventilation.
Insufficient ventilation may result
in the unit overheating, which
may cause a possible fire
outbreak.
Do not cover the unit with a
tablecloth, curtain, or other
material.
,QVXIILFLHQWYHQWLODWLRQPD\
result in the unit overheating,
which may cause a possible
fire outbreak.
Be sure to place the unit on a
level surface.
The following precautions are divided into "Warnings" and "Cautions".
DO NOT place containers with
liquids such as vases, drink cans,
bottles or small metallic objects
on top of the unit.
,IOLTXLGHQWHUVWKHXQLWRUDQ\
metal object falls into the unit, it
may result in a shortcircuit, fire,
or electric shock.
Safety PrecautionsParts & Connections
3D Video Playback
USB Multimedia
Playback
TV Placement
Setup
Initial Setup &
Input Sources
Remote Control
On-Screen DisplayTV & Electronic
Programme Guide
Digital Video
Recording (DVR) (OSD) Menu
Reference
2

6$)(7<35(&$87,216
8VHDQG0DLQWHQDQFH
Although the LCD screen is made with high-precision technology and 99.99% or more of the pixels are effective,
black dots may appear or bright points of light (red, blue, or green) may appear constantly on the LCD screen.
This is a property of the LCD screen and is not a malfunction.
Disconnect the power cord from
the power source during a
thunderstorm.
• Not doing so may result in fire
or electric shock.
When not using the unit for
long periods of time, discon-
nect the power cord from the
wall outlet.
• If not cleaned, clogged dust
particles at ventilation holes
could cause the unit to heat up,
and ignite when switched on,
which may result in a fire
outbreak.
Always have two or more people
at hand to lift or move the unit.
• If the unit is dropped, it could
get damaged or otherwise
cause injury.
Wipe off any moisture, dirt, or
dust on the power plug pins
with a clean, dry cloth.
• Failure to do so may result in
fire or electric shock.
Always turn off the unit and
unplug the power cord when
cleaning the unit. Use a soft dry
cloth to clean the unit.
• Never clean with industrial
strength polish, wax, benzene,
paint thinner, air freshener,
lubricant, detergent, or other
such chemicals. Also, do not
clean with a damp cloth.
When moving the unit, be sure
to turn off the unit and unplug
the power cord from the wall
outlet.
• Moving the unit with the
power cord connected to the
outlet may cause damage to
the cord, resulting in fire or
electric shock.
If you notice any unusual odors
or smoke around the unit,
immediately disconnect the unit
from the outlet and contact the
service center.
• Failure to do so may result in
fire or electric shock.
When removing the batteries
from the remote control, make
sure children do not swallow
them. Keep the batteries out of
the reach of infants and
children.
• If a child has swallowed a
battery, seek medical attention
immediately.
DO NOT insert any metal
objects, such as a screwdriver,
paper clip, or a bent wire into
the ventilation openings or A/V
terminals.
• Doing so poses a serious risk
of fire or electric shock.
DO NOT allow children to climb
onto the unit.
• The unit could topple over
onto a child and result in
serious injury.
DO NOT dismantle or modify the
unit in any way. Do not attempt to
service the unit yourself.
• Doing so may result in fire or
electric shock. If the unit
requires repair, contact the
service center.
Do not display still images and partially
still images on the LED panel for more
than 2 hours as it can cause screen
image retention. This image retention is
also known as “screen burn”. To avoid
such image retention, reduce the
degree of brightness and contrast of the
screen when displaying a still image.
Watching the LED TV in 4:3 format for a
long period of time may leave traces of
borders displayed on the left, right and
centre of the screen caused by the
difference of light emission on the
screen. Playing a DVD or a game
console may cause a similar effect to
the screen. Damages caused by the
above effect are not covered by the
Warranty. Displaying still images from
Video games and PC for longer than a
certain period of time may produce
partial after-images. To prevent this
effect, reduce the ‘brightness’ and
‘contrast’ when displaying still images.
Safety PrecautionsParts & Connections
3D Video Playback
USB Multimedia
Playback
TV Placement
Setup
Initial Setup &
Input Sources
Remote Control
On-Screen DisplayTV & Electronic
Programme Guide
Digital Video
Recording (DVR) (OSD) Menu
Reference
3
6$)(7<35(&$87,216
,PSRUWDQWVDIHW\,QVWUXFWLRQV
:DUQLQJVDQG3UHFDXWLRQV
7RSUHYHQWDQ\LQMXULHVWKHIROORZLQJVDIHW\SUHFDXWLRQVVKRXOGEHREVHUYHGLQWKH
LQVWDOODWLRQXVHVHUYLFLQJDQGPDLQWHQDQFHRIWKLVGHYLFH3OHDVHUHDGWKLVPDQXDOFDUHIXOO\
DQGNHHSLWIRUIXWXUHUHIHUHQFH
5HDGWKHVHLQVWUXFWLRQV
.HHSWKHVHLQVWUXFWLRQV
+HHGDOOZDUQLQJV
)ROORZDOOLQVWUXFWLRQV
&OHDQRQO\ZLWKDGU\FORWK
'RQRWEORFNDQ\RIWKHYHQWLODWLRQRSHQLQJV,QVWDOOLQDFFRUGDQFHZLWKWKH
PDQXIDFWXUHU¶VLQVWUXFWLRQV
'RQRWLQVWDOOQHDUDQ\KHDWVRXUFHVVXFKDVUDGLDWRUVKHDWUHJLVWHUVVWRYHVRURWKHU
GHYLFHVLQFOXGLQJDPSOLILHUVWKDWSURGXFHKHDW
'RQRWGHIHDWWKHSXUSRVHRIWKHSRODUL]HGRUJURXQGLQJW\SHSOXJ$SRODUL]HGSOXJ
KDVWZREODGHVZLWKRQHZLGHUWKDQWKHRWKHU$JURXQGLQJW\SHSOXJKDVWZREODGHV
DQGDWKLUGJURXQGLQJSURQJ7KHZLGHEODGHRUWKHWKLUGSURQJLVSURYLGHGIRU\RXU
VDIHW\,IWKHSURYLGHGSOXJGRHVQRWILWLQWR\RXUSRZHURXWOHWFRQVXOWDQHOHFWULFLDQWR
UHSODFHWKHSRZHUVRFNHW
'RQRWEHQGWKHSRZHUFRUGH[FHVVLYHO\3UHYHQWWKHFRUGIURPEHLQJZDONHGRQRU
SLQFKHGE\ZHLJKWVSODFHGRQLW
2QO\XVHWKHDWWDFKPHQWVDFFHVVRULHVVSHFLILHGE\WKHPDQXIDFWXUHU
8VHRQO\ZLWKDFDUWVWDQGWULSRGEUDFNHWRUWDEOHVSHFLILHGE\WKH
PDQXIDFWXUHURUVROGZLWKWKHGHYLFH:KHQDFDUWLVXVHGXVH
FDXWLRQZKHQPRYLQJWKHFDUWDQGGHYLFH
8QSOXJWKLVDSSDUDWXVGXULQJOLJKWQLQJVWRUPVRUZKHQXQXVHGIRU
ORQJSHULRGVRIWLPH
5HIHUDOOVHUYLFLQJWRTXDOLILHGVHUYLFHSHUVRQQHO6HUYLFLQJLVUHTXLUHGZKHQWKH
DSSDUDWXVKDVEHHQGDPDJHGLQDQ\ZD\
L127(
7RSUHYHQWGDPDJHZKLFKPD\UHVXOWLQILUHRUKD]DUGVGRQRWH[SRVHWKHGHYLFHWR
UDLQRUOLTXLGV
'RQRWSODFHREMHFWVFRQWDLQLQJOLTXLGVVXFKDVYDVHVRQWKHGHYLFH,IGULQNVDQG
OLTXLGVKDYHEHHQVSLOOHGRQWKHGHYLFHXQSOXJWKHGHYLFHIURP$&SRZHU
LPPHGLDWHO\DQGFRQWDFWWKH7($&&XVWRPHU+RWOLQHIRUDVVLVWDQFH
6HUYLFLQJRIWKLVGHYLFHVKRXOGEHFRQGXFWHGE\TXDOLILHGDQGFHUWLILHG7($&VHUYLFH
SHUVRQQHO
7KHPDQXIDFWXUHUZLOOQRWEHKHOGUHVSRQVLEOHIRUDQ\GDPDJHFDXVHGE\
PRGLILFDWLRQVGRQHRQWKHGHYLFHZLWKRXWDXWKRULVDWLRQIURPWKHPDQXIDFWXUHU¶V
DXWKRULVHGVHUYLFHDJHQW
7KLVV\PEROLQGLFDWHVWKDWGDQJHURXVYROWDJHLQVWLWXWLQJDULVNRIHOHFWULF
VKRFNLVSUHVHQWZLWKLQWKLVGHYLFH
7KLVV\PEROLQGLFDWHVWKDWWKHUHDUHLPSRUWDQWRSHUDWLRQDQGPDLQWHQDQFH
LQVWUXFWLRQVLQWKHGRFXPHQWDWLRQDFFRPSDQ\LQJWKLVGHYLFH
Safety PrecautionsParts & Connections
3D Video Playback
USB Multimedia
Playback
TV Placement
Setup
Initial Setup &
Input Sources
Remote Control
On-Screen DisplayTV & Electronic
Programme Guide
Digital Video
Recording (DVR) (OSD) Menu
Reference
4

793/$&(0(176(783
$FFHVVRULHV
7KHDSSHDUDQFHRIWKHFRPSRQHQWVPD\ORRNGLIIHUHQWIURPWKHIROORZLQJILJXUHV
796WDQG:DOO0RXQWLQJ$VVHPEO\
7KLV79FRPHVUHDG\WREHVHWXSZLWKWKHSURYLGHG79VWDQG$OWHUQDWLYHO\RSWWRPRXQWWKH
79RQWKHZDOOE\REWDLQLQJDZDOOPRXQWEUDFNHWDQGPRXQWLQJH\HEROWVVFUHZVWKUHDGVL]H
0[IURP\RXUORFDOKDUGZDUHVWRUH)RUEHVWUHVXOWVZHUHFRPPHQGWKDWZDOOPRXQWLQJ
VKRXOGEHSHUIRUPHGE\DSURIHVVLRQDOLQVWDOOHU
L127(
7KH79VKRXOGEHOHYHOOHGRUDQJOHGGLUHFWO\DWWKHYLHZHU¶VH\H
$OORZDVSDFHRIFPDURXQGWKH79WRUHGXFHULVNRIRYHUKHDWLQJ
7KH79VWDQGDOORZVVLGHZD\VWXUQLQJRIWKH79WRDOLPLWHGGHJUHH'RQRWIRUFHLWWR
WXUQPRUHWKDQLWFDQDV\RXZLOOGDPDJHWKHVWDQG
&$87,21
0DNHVXUHWKH79LVFRPSOHWHO\GLVFRQQHFWHGDQGXQSOXJJHGIURPSRZHU
7RSUHYHQWGDPDJHWRWKH79VFUHHQDYRLGWRXFKLQJRUSUHVVLQJRQWKH
VFUHHQZLWKKDQGVRUREMHFWVDWDQ\WLPH'RQRWSUHVVRQWKHIURQWSDQHODV
LWPD\GDPDJHWKHVFUHHQ
7RSURWHFWWKH79IURPGDPDJHRUVFUDWFKLQJRQO\SODFHWKH79RQDVRIWIODW
VXUIDFHOLNHDWDEOHFRYHUHGZLWKDFRWWRQWRZHORUIRDPPDW
$VVHPEO\OLIWLQJDQGPRYLQJRIWKH79PXVWEHGRQHE\DWOHDVWSHRSOHWR
SUHYHQWXQLWGDPDJHRUSK\VLFDOLQMXU\IURPDFFLGHQWV
(QVXUHWKDWDOOVFUHZVDUHWLJKWDQGVHFXUHDIWHUDVVHPEO\VRWKDWWKHVWDQG
RUPRXQWLQJEUDFNHWLVVWDEOHHQRXJKWRSUHYHQWWKH79IURPIDOOLQJDQG
FDXVLQJSHUVRQDOLQMXU\RUSURSHUW\GDPDJH
0DNHVXUHWKDWWKH79LVQRWNQRFNHGRUSXOOHGGRZQIURPLWVSRVLWLRQ
3UHYHQWFKLOGUHQDQGSHWVIURPSOD\LQJZLWKRUFOLPELQJRQWKH79,IWKH79
IDOOVLWPD\FDXVHSHUVRQDOLQMXU\RUSURSHUW\GDPDJH
,IWKH79VWDQGRUZDOOPRXQWLQJEUDFNHWLVGDPDJHGGRQRWXVHLWWRVXSSRUW
WKH79&RQWDFW\RXUGHDOHULPPHGLDWHO\
User’s Guide Remote Control
Mains cable draCtcatnoCrettaBAAAx2 Quick Start Guidey
Parts & Connections
3D Video Playback
USB Multimedia
Playback
TV Placement
Setup
Initial Setup &
Input Sources
Remote Control
On-Screen DisplayTV & Electronic
Programme Guide
Digital Video
Recording (DVR) (OSD) Menu
Reference
5

2.TV PLACEMENT SETUP
Parts & Connections
3D Video Playback
USB Multimedia
Playback
TV Placement
Setup
Initial Setup &
Input Sources
Remote Control
On-Screen DisplayTV & Electronic
Programme Guide
Digital Video
Recording (DVR) (OSD) Menu
Reference
TV Stand Installation/Removal
1. Place the unit face down on a soft surface.
2. Gently position the glass base to the leg at the bottom of the TV.
3. Fasten the 4 provided screws (screw size B4x16F) to secure the stand to the TV
according to the diagram.
4. To remove the stand, reverse the steps above.
Fall Prevention
To prevent the TV from tilting forward and falling over to cause damage or injury, please
secure the TV to your table or wall using screws or eyebolts and strong cord (not provided).
An example on fixing the TV to a table is shown below
1. Install a wood screw or eyebolt into the table that is supporting the TV.
2. Fix a machine screw into a screw hole near the base in the back of the TV.
Alternatively, secure the TV to the wall directly behind it by fixing eyebolts to the wall and
tying them to screws fixed on the centre of the TV back panel.
3. Tie the wood screw or eyebolt to the machine screw with a strong cord.
6
Screws (4xB4X16F) Screw holes

2. TV PLACEMENT SETUP
100mm
100mm
100mm
100mm
Thread hole size ±M4 x 10 depth (TV Mounting Screw Size) on the TV.
Wall Mounting
1. Ensure thattheselected wall ismade of appropriate materialand cansupport the
weight of the TV. Make sure there are no pipesor cablesinside the wall on your
chosen position.
2. Obtain asuitable wall mounting bracket and mounting eyebolts(threadsize M4x10)
and screwsfrom yourlocalhardware store.
3. Place the unit face down on asoft surface.
4. Remove the attached leg atthebottom of the TV byremovingthe5screwson the
leg cover.
5. Refit the cover securely by replacing the 5 screwsinto their original positions.
6. Fasten 4 eyeboltsLQWRWKHIRXUVFUHZKROHVRQWKH79¶VUHDUpanel according to the
diagram.
7. Fasten the wall mounting bracket using screwsonto the wall.
8. Connect the eyeboltsand the wall bracket securely with strong rope
9. Carefully check thatall fasteningsare secure before releasing the TV.
Parts & Connections
3D Video Playback
USB Multimedia
Playback
TV Placement
Setup
Initial Setup &
Input Sources
Remote Control
On-Screen DisplayTV & Electronic
Programme Guide
Digital Video
Recording (DVR) (OSD) Menu
Reference
7

3$576&211(&7,216
)URQW9LHZ
INPUT: Display the input source menu.
MENU: Display/exit the OSD menu.
CH+/-: Scan through channels.
VOL+/-: Adjust the volume.
POWER: Turn on/standby the TV set.
INPUT MENU CH+CH-VOL+VOL-POWER
Parts & Connections
3D Video Playback
USB Multimedia
Playback
Initial Setup &
Input Sources
Remote Control
On-Screen DisplayTV & Electronic
Programme Guide
Digital Video
Recording (DVR) (OSD) Menu
Reference
8

3$576&211(&7,216
%DFN9LHZ
PC-IN
&$87,21
0DNHVXUHWKDWWKH79LVFRPSOHWHO\GLVFRQQHFWHGDQGXQSOXJJHGIURP
SRZHUEHIRUHPDNLQJRUFKDQJLQJFDEOHFRQQHFWLRQV
0DNHVXUHWKDWWKHSRZHURXWSXWIURP\RXUSRZHUVRXUFHPDWFKHVWKHSRZHU
LQSXWODEHOOHGRQWKH79DGDSWHU
Parts & Connections
3D Video Playback
USB Multimedia
Playback
TV Placement
Setup
Initial Setup &
Input Sources
Remote Control
On-Screen DisplayTV & Electronic
Programme Guide
Digital Video
Recording (DVR) (OSD) Menu
Reference
AC POWER IN
SWITCH
Part Name Function
Power Switch Turn on/off the power supply.
AC Power In Connect to the AC power supply
USB Connect to aUSB storage device for DVR (Recording) and USB
MultimediaPlayback
HDMI 1/2/3 Connect to the HDMI socket of yourDVDorsatellite box
YPbPr Connect to the component YPbPr output of externaldevices
PC IN PC audio input
VGA Connect to the PC VGA outputtodisplayPCgraphics
Video Connect to the composite video output of external devices
Audio L/R In Audio signalinputforAV(shared with YPbPr)
COAX Digitaloutput to AV receiver
Headphone Connect to headphones
RF Connect to antennaor cable source
9

,1,7,$/6(783,13876285&(6
,QLWLDO3RZHU2Q
:KHQWKH79LVWXUQHGRQWKHILUVWWLPHRXWRIWKHER[RUDIWHUDIDFWRU\VHWWLQJVUHVHWLWZLOO
SURPSW\RXWRUXQDXWRFKDQQHOWXQLQJ
&RQQHFWWKH79WR\RXUDQWHQQDZDOOVRFNHWXVLQJDFRD[LDO79FDEOH
$IWHUPDNLQJVXUHDOOFRQQHFWLRQVDUHVHFXUHSOXJLQWKHSRZHUFRUGDQGWXUQRQ$&
SRZHU
3UHVV RQWKHUHPRWHFRQWUROWRWXUQRQWKH79
7KH79ZLOOLQLWLDOLVHDQGSURPSW\RXWRFKRRVHEHWZHHQ+RPH0RGHDQG6KRS
0RGH+RPH0RGHLVUHFRPPHQGHGIRURSWLPDOHQHUJ\VDYLQJ&KRRVHZLWK
DQGSUHVV WRSURFHHG
1H[WDWXQLQJPHQXZLOOGLVSOD\$GMXVWWKHVHWWLQJVZLWKDQGSUHVV WR
VWDUWWXQLQJ
$IWHUWXQLQJLVFRPSOHWHWKH79ZLOOGLVSOD\SURJUDPPHVIURPGHWHFWHGFKDQQHOV
L127(,IQRFKDQQHOVDUHGHWHFWHGSOHDVHFKHFNWKHFRQQHFWLRQDQGFRQGLWLRQRI\RXU
H[WHUQDODQWHQQD
6HOHFWLQJDQ,QSXW6RXUFH
7RSOD\GLIIHUHQWPHGLDW\SHVDQGIURPDQ\FRQQHFWHG
H[WHUQDOGHYLFHFKDQJHLQSXWVRXUFHVWRDFWLYDWHWKH
GHVLUHGFRQQHFWLRQ
3UHVV WRGLVSOD\WKHOLVWRILQSXWVRXUFHV
3UHVVWRFKRRVHDQLQSXWVRXUFH
3UHVV WRFRQILUP
'7986%DQG+'0,FDQDOVREHDFFHVVHGXVLQJWKH
VKRUWFXWEXWWRQV DQG
7KLV79VWDUWVLQ'79PRGHE\GHIDXOWZKHQLWLVVZLWFKHG
RQIRUWKHILUVWWLPH6XEVHTXHQWO\LWZLOOVWDUWLQWKHPRVW
UHFHQWO\VHOHFWHGLQSXWPRGH
L127(3OHDVHPDNHVXUHWKHGHYLFHLVFRQQHFWHG
EHIRUHVHOHFWLQJWKHLQSXWVRXUFH
Input Source
Move Select Quit
OK EXIT
AV
YPbPr
3D Video Playback
USB Multimedia
Playback
Initial Setup &
Input Sources
Remote Control
On-Screen DisplayTV & Electronic
Programme Guide
Digital Video
Recording (DVR) (OSD) Menu
Reference
10

5(027(&21752/
7KHUHPRWHFRQWUROXVHV,QIUDUHGVLJQDOV3RLQWLWDWWKH,QIUDUHGVHQVRUDWWKHIURQWRIWKH79
L127(7KHUHPRWHFRQWUROPD\QRWZRUNFRUUHFWO\LILWLVRSHUDWHGRXWRIUDQJHRUDQJOH
RILIWKHUHDUHREMHFWVEORFNLQJWKHVLJQDO
5HPRWH&RQWURO%XWWRQVDQG)XQFWLRQV
POWER: Switch the TV on or off Standby mode.
DTV/USB: Switch to DTV/USB Mode.
3D: Access the 3D Setup Menu.
INPUT: Access the Input Source Menu.
HDMI: Cycle through HDMI Modes1-3.
P MODE: Cycle through preset picture profiles.
S MODE: Cycle through preset sound profiles.
MEDIA CENTER: Function not available.
MENU: Switch the TV on or off Standby mode.
SUBTITLE: Choose from available subtitles.
AUDIO: Choose from available audio tracks.
EPG: Access the Electronic Programme Guide.
DISPLAY: Display detailed information or controls.
:Directional navigation buttons.
OK: Confirm asetting.
CH+/-: Browse next/previous channel.
VOL+/-: Adjust volume level.
EXIT: Exit menuor return to last level.
MUTE: Toggle audio output muting.
Number Buttons: Key in numbersto view channelsor
other option inputs.
: Return to the most recently viewed TV channel.
CH.FAV: Show Channel List, then Favourite Channels
List.
DELETE: Delete filesfrom the Recorded File List.
REC. LIST: Display the Recorded File List.
SCH.LIST: Display the Schedule List.
SCREEN: 1. While playing music, turn off the screen.
2. In HDMI Mode, change between Video and
PC Modes.
3. In VGA Mode, auto-align the screen.
3D Video Playback
USB Multimedia
Playback Remote Control
On-Screen DisplayTV & Electronic
Programme Guide
Digital Video
Recording (DVR) (OSD) Menu
Reference
11

5(027(&21752/
%DWWHU\,QVWDOODWLRQ
7RRSHQWKHEDWWHU\FRPSDUWPHQWSUHVVRQWKHEDWWHU\FRYHUDQGVOLGHLWRXW
,QVHUW $$ EDWWHULHV PDNLQJ VXUH WR PDWFK SRODULWLHV DV PDUNHG LQ WKH
FRPSDUWPHQW
&ORVHWKHEDWWHU\FRYHU
&$87,21
7RSUHYHQWGDPDJHWRWKHUHPRWHFRQWUROPDNHVXUHWRLQVWDOOEDWWHULHV
FRUUHFWO\'RQRWPL[ROGDQGQHZEDWWHULHV
'LVSRVHRIEDWWHULHVVDIHO\DQGDSSURSULDWHO\&RQWDFW\RXUORFDODXWKRULWLHV
RUGHDOHUIRUDGYLFHRQEDWWHU\GLVSRVDO
.HHSEDWWHULHVRXWRIUHDFKRIFKLOGUHQ
(REC): Start recording when in DTV Mode.
REPEAT: Toggle Repeat optionsin USB Mode.
:No Function.
:Play/Pause playback, or toggle DTV Time Shift.
:Stop playback.
:Fast Rewind/Fast Forward up to 16x.
:Previous/next chapter/track.
:Function not available.
D.MENU: Function not available.
D.TOPTITLE: Function not available.
Teletext operation:
Teletext isan information system broadcasted by certain
channelsproviding news, weather forecasts, puzzlesas
well as subtitles. Subject to availability.
SUBPAGE: Toggle subpage.
HOLD: Hold or resume browsing the subpage.
SIZE: Cycle through page zoom-in views.
INDEX: Go to Index.
CANCEL: Cancel the Teletext Display.
REVEAL: Reveal any hidden text.
TV/TXT: Toggle Teletext viewing modes.
Colour buttons: Shortcut keysper on-screen hints.
D.SETUP: Function not available.
2nd AUDIO: Function not available.
BONUS VIEW: Function not available.
GOTO: Jump to aspecific point during playback.
A-B: Define PointsA and B for looping playback.
RANDOM: Function not available.
ASPECT: Cycle through different picture aspect settings.
ANGLE: Choose alternative cameraanglesif available.
SLEEP: Cycle through and set Timer Sleep settings.
3D Video Playback
USB Multimedia
Playback Remote Control
On-Screen DisplayTV & Electronic
Programme Guide
Digital Video
Recording (DVR) (OSD) Menu
Reference
12

216&5((1',63/$<26'0(18
26'0HQX2YHUYLHZ
7KH26'PHQXV\VWHPDFWVDVWKH0DLQ0HQXDQGDOORZVDFFHVVWRPDLQIHDWXUHFRQWUROV
DVZHOODVRSWLRQDOXVHUVHWWLQJV
L127(&HUWDLQPHQXVDUHDYDLODEOHRQO\LQWKHLUUHOHYDQWLQSXWPRGHV
1DYLJDWLQJWKH26'
3UHVV WRGLVSOD\WKH26'
8VHWRQDYLJDWHWRGLIIHUHQWPHQXVYLDWKHWDEVDWWKHWRS
8VHWRHQWHUDPHQXDQGVHOHFWDYDLODEOHVHWWLQJVRUVXEPHQXV
8VHRUSUHVV RQDVHOHFWHGLWHPWRDGMXVWVHWWLQJVRUHQWHUDVXEPHQX
3UHVV RUWRFRQILUPDVHWWLQJDQGFRQWLQXHEURZVLQJWKHPHQX,I\RXKDYH
HQWHUHGDVXEPHQXSOHDVHIROORZWKHKLQWVDWWKHERWWRPRIWKHVFUHHQRUUHIHUWRWKH
UHOHYDQWVHFWLRQVLQWKLVXVHUPDQXDOIRURSHUDWLRQGHWDLOV
3UHVV DJDLQWRH[LWWKHPHQXRU WRH[LWWKH26'FRPSOHWHO\
0HQX0DS
26'0HQX
&KDQQHO 3LFWXUH 6RXQG 7LPH 2SWLRQ /RFN
3D Video Playback
USB Multimedia
Playback
On-Screen DisplayTV & Electronic
Programme Guide
Digital Video
Recording (DVR) (OSD) Menu
Reference
13
Main menu
CHANNEL
PICTURE
SOUND
TIME
OPTION
LOCK
Submenu
(Channel menu
for example)
Hint---you should operate the OSD menu according to the hint.
Channel Edit

216&5((1',63/$<26'0(18
3D Video Playback
USB Multimedia
Playback
On-Screen DisplayTV & Electronic
Programme Guide
Digital Video
Recording (DVR) (OSD) Menu
Reference
Menu Option Description
CHANNEL
Auto ScanTune channelsautomatically. Thiswill overwrite any
previously saved channelsand channel settings.
DTV ManualTuning Tune digitalTVchannelsmanually.
ATV ManualTunin
g
Tune analo
g
uechannelsmanually.
Channel Edit Customize channel listdisplayand channel access.
Si
g
nalInformation Display detailed channel si
g
nalinformation.
Record Start Start recording the current DTV channel at once.
Recorded ListDisplay the Recorded File List.
Record Mode Schedule afuture recording.
Schedule ListDisplay the Schedule List.
Free Record Limit Set arecording limit between 1 ±6hours.
DVR File System Access the DVR File System Menu.
Select Disk Select aconnected USB storage device.
Check DVR
File System
Check if the selected USB storage device iscompatible.
USB Disk Show if the selected USB storage device iscompatible.
FormatFormattheselected USB storage device.
Time Shift
Size
Available datastorage space for Time Shift recording
USB Speed Showsthe speed of the selected USB stora
g
e device.
PICTURE
Picture Mode &KRRVHIURPSUHVHWSLFWXUHVHWWLQJVSURILOHV&KRRVHµ8VHU
for manualcustomisation.
ContrastAdjustpicture contrast.
Bri
g
htness Adjustpicture bri
g
htness.
ColourAdjustpicture colour.
Sharpness Adjustpicture sharpness.
Tint Adjustpicture tint. (NTSC formatonly)
ColourTemperature Adjustcolourtemperature.
Red AdjustRedcolour level.
Green AdjustGreencolour level.
BlueAdjustBluecolour level.
Aspect Ratio Adjustpicture aspect ratio.
NoiseReduction Adjustnoisereduction settin
g
s.
SCREEN PC Mode: Access the submenuto adjustthe
Horizontal/Verticalposition, Size or Phaseofthepicture.
Over ScanHDMI Mode: Choosebetween Video and PC.
3D Setup Access the 3D SetupMenu.
3D Detect Auto detect 3D for 3D Blu-raydiscs.
3D Type Off, Side by Side, Top Bottom, Frame Packin
g
,LinebyLine
Exchange 3D
L/R
Adjustthisif the 3D depth isreversed.
3D to 2D Toggle 3D to 2D video conversion.
14

216&5((1',63/$<26'0(18
6281'
6RXQG0RGH &KRRVHIURPSUHVHWVRXQGVHWWLQJSURILOHV&KRRVHµ8VHU
IRUPDQXDOFXVWRPLVDWLRQRI7UHEOHDQG%DVV
7UHEOH $GMXVWWKHUHODWLYHLQWHQVLW\RIKLJKHUSLWFKHGVRXQGV
%DVV $GMXVWWKHUHODWLYHLQWHQVLW\RISRZHUSLWFKHGVRXQGV
%DODQFH $GMXVWWKHEDODQFHRIWKH/HIWDQG5LJKWDXGLRWUDFNV
$XWR9ROXPH 7XUQRQRIIDXWRPDWLFSURJUDPPHYROXPHFRQWURO
6XUURXQG6RXQG 7XUQ6XUURXQG6RXQGRIIRQ
63',)0RGH 6HOHFWEHWZHHQ2II3&0DQG$XWR
7,0(
&ORFN 6HWWKHFXUUHQWWLPH,Q'790RGHWKHWLPHLVVHWDFFRUGLQJ
WREURDGFDVWHUVLJQDOVDQGFDQQRWEHFKDQJHG
2II7LPH 6HWDWLPHRIGD\DQGIUHTXHQF\IRUWKH79WRWXUQRII
2Q7LPH 6HWDWLPHRIGD\DQGIUHTXHQF\IRUWKH79WRWXUQRQ
6OHHS7LPHU 6HWWKH79WRWXUQRIIDIWHUDFHUWDLQDPRXQWRIWLPH
$XWR6OHHS 6HWWKH79WRWXUQRIIDIWHULWKDVQRWUHFHLYHGDQ\FRQWURO
VLJQDOVIRUDFHUWDLQDPRXQWRIWLPH
7LPH=RQH 6HOHFWWKHWLPH]RQH
237,21
26'/DQJXDJH 6HWWKHODQJXDJHIRUWKH26'0HQXV
$XGLR/DQJXDJHVW
QG
6HOHFWWKHVWQGSUHIHUUHGODQJXDJHWUDFNWREHVHOHFWHGLILW
LVDYDLODEOHIURPWKHEURDGFDVWHU
6XEWLWOH/DQJXDJH
VWQG
6HOHFWWKHVWQGSUHIHUUHGODQJXDJHWUDFNWREHVHOHFWHGLILW
LVDYDLODEOHIURPWKHEURDGFDVWHU
26''XUDWLRQ $GMXVWWKHWLPHQHHGHGEHIRUHWKH26'0HQXDXWRKLGHV
%OXH6FUHHQ 7XUQRQRIIWKHEOXHVFUHHQGLVSOD\GXULQJµ1R6LJQDO
&RXQWU\ 6KRZVFXUUHQWFRXQWU\WKDWZDVVHWGXULQJ$XWR7XQLQJ
$XWR6RIWZDUH
8SGDWH
7XUQDXWRPDWLFVRIWZDUHXSGDWHRQLI\RXZLVKWKH79WR
DXWRPDWLFDOO\VFDQIRUQHZILUPZDUHXSGDWHVDWQLJKW
5HVWRUH)DFWRU\
'HIDXOW
5HVHWDOOVHWWLQJVWRIDFWRU\GHIDXOWV$OOFKDQQHOVDQG
SHUVRQDOLVHGVHWWLQJVZLOOEHHUDVHG
%DFNOLJKW $GMXVWEDFNOLJKWVHWWLQJV
/2&.
/RFN&KDQQHO 6HWFKDQQHOSURJUDPPHORFNLQJRQRIIZLWKDSDVVZRUG
6HW3DVVZRUG &KDQJHWKHSDVVZRUG
%ORFN3URJUDP 3DVVZRUGORFNDOOSURJUDPPHVIURPFKRVHQ79FKDQQHOV
3DUHQWDO*XLGDQFH 3DVVZRUGORFNDOOSURJUDPPHVDWDQGEH\RQGDFKRVHQ
SURJUDPPHUDWLQJ
3D Video Playback
USB Multimedia
Playback
On-Screen DisplayTV & Electronic
Programme Guide
Digital Video
Recording (DVR) (OSD) Menu
Reference
15

79(/(&7521,&352*5$00(*8,'((3*
$79'790RGH
6WDUWZDWFKLQJ79E\SUHVVLQJ WRVZLWFKWRWKH$79$QDORJXH79RU'79'LJLWDO
79LQSXWVRXUFH)RUGHWDLOHGVWHSVRQFKDQJLQJLQSXWVSOHDVHVHHWKH,QSXW6RXUFH
VHFWLRQ
$79DQG'79GHSHQGVRQWKHEURDGFDVWLQJVHUYLFHVDYDLODEOHLQ\RXUORFDOLW\7KHTXDOLW\RI
UHFHLYHGFKDQQHOVGHSHQGVRQWKHVWUHQJWKRIWKHVLJQDOUHFHSWLRQLQ\RXUORFDWLRQ:H
UHFRPPHQGXVLQJDQH[WHUQDODQWHQQDFRQQHFWLRQWRUHFHLYHFKDQQHOV
7XQHWR79FKDQQHOVXVLQJ$XWR6FDQRU0DQXDO7XQLQJ
$XWR7XQLQJ
5XQDFRPSOHWHVFDQIRUFKDQQHOVDQGVDYHDOOGHWHFWHGFKDQQHOVLQWRWKH&KDQQHO/LVW
3UHVV DQGQDYLJDWHWR
WKH&+$11(/0HQX
8VHDQG WRVHOHFWWKH
$XWR7XQLQJRSWLRQ
8VHWRDGMXVW&RXQWU\
DQG7XQH7\SHRSWLRQV
3UHVV WRVWDUWVFDQQLQJ
L127(
$XWR7XQLQJZLOORYHUZULWHDOOSUHYLRXVO\VDYHGFKDQQHOVDQGFKDQQHOVHWWLQJV
,IWKH$79'79RSWLRQLVVHOHFWHGWKHILUVWRIWKHVFDQUHSUHVHQWV$79WXQLQJ
ZKLOHWKHRWKHUUHSUHVHQWV'79WXQLQJ
3UHVV LI\RXZLVKWRVWRSWXQLQJKDOIZD\WKURXJKWKHSURFHVV
'790DQXDO7XQLQJ
6FDQDVSHFLILF'79IUHTXHQF\DQGVDYHGHWHFWHGFKDQQHOVLQWRWKH&KDQQHO/LVW
3UHVV DQGQDYLJDWHWRWKH&+$11(/
0HQX
8VHDQG WRVHOHFWWKH'790DQXDO
7XQLQJRSWLRQ
8VHWRVHOHFWD'79FKDQQHO
3UHVV WRVWDUWVFDQQLQJ
$790DQXDO7XQLQJ
6FDQDVSHFLILF$79IUHTXHQF\DQGVDYHGHWHFWHG
FKDQQHOVLQWRWKH&KDQQHO/LVW
3UHVV DQGQDYLJDWHWRWKH
&+$11(/0HQX
8VHDQG WRVHOHFWWKH$790DQXDO
7XQLQJRSWLRQ
8VHWRDGMXVWVFDQQLQJRSWLRQV
3UHVV WRVWDUWVFDQQLQJ
3UHVV WRVDYHDQ\FKDQJHV
3D Video Playback
USB Multimedia
Playback
TV & Electronic
Programme Guide
Digital Video
Recording (DVR)
Reference
16
Table of contents
Other Teac LED TV manuals

Teac
Teac LE43A718UHD User manual

Teac
Teac LE4688FHD User manual

Teac
Teac LES6572F3D User manual

Teac
Teac LEV32A121 User manual

Teac
Teac L Series User manual

Teac
Teac DLE5089FHD User manual

Teac
Teac LE65A4E3UHD User manual

Teac
Teac LES4272F3D User manual

Teac
Teac LEV40A119 User manual

Teac
Teac LE65A521 User manual

Teac
Teac A5 Series User manual

Teac
Teac LEV3294HD User manual

Teac
Teac LE23A84HD User manual

Teac
Teac E Series User manual

Teac
Teac LE50A521 User manual

Teac
Teac LED1901FV User manual

Teac
Teac LEDV19U83HD User manual

Teac
Teac A1 Series User manual

Teac
Teac LEV3992FHD User manual

Teac
Teac LE58A521 User manual