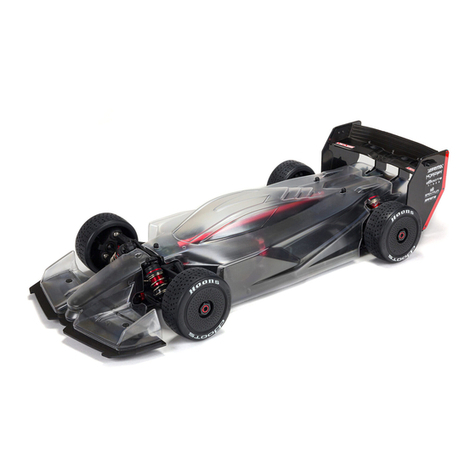
Team Magic B8RS User guide


Thank you for choosing the Team Magic B8RS. Before you start building the B8RS, we suggest you read
though the instruction manual first. Be sure to check all assembly and performance tips before you
start. We hope you enjoy the fine building processes.
General Building Tips:
Read the instruction manual before building.
Clear a work area and try to work on a light color towel to avoid missing dropped parts.
Don't forge the thread lock. Be certain to use thread-lock on all the machine screws that thread into metal. Put it
on the screws that are secured with locknuts and the setscrews that secure the linkage stops, too. Don't skimp on
the thread-lock or you'll be searching in the dirt for screws that vibrated loose.
Don't over-tighten fasteners. Many assembly problems are caused by over-tightening screws or nuts. Don't use too
large a grip. Please go slowly and feel the resistance build. Just snug it up.
As you put more time and runs on the car, the suspension arms, and basically anything else that moves, can stretch
and wear. Though we have a very rigorous quality control program and make every effort to ensure that the parts
have the best possible fit when you get them. Unfortunately there is very little, or nothing we can do to prevent
these parts from wearing out. When the arms begin to wear you will notice that some slop develops between the
carrier or hub and the arms. This slop can be taken out by shimming the arm, hub or carrier. If you take a look at
any of the factory driver's cars you will definitely find that they use shims to take up some of the slop that occurs over
a period of time. The shims can also be used on the inside of the suspension arms in the same manner. When
shimming the parts, care must be taken not to add too many shims. The parts must still move freely without binding.
When it doesn't fit, please double check. If an assembly is not going together correctly, then either there really is a
bad fit (e.g. a part is damaged or defective) or a mistake in assembly. Always re-read the instructions when there
are any problems. If you cannot figure out what's wrong, always ask dealer, distributor or Team Magic. Don't use
force beyond what the instructions call for.
Using the right tools makes assembly much easier. The instructions below finely indicate you what tools to get to
make things easier. We don't want to scare you by saying that all these tools are required, but you will have an
easier time if you have them. Borrow them from a friend to check if necessary.
The assembly is arranged so that you will open the bag and finish that bag before you go on to the next bag.
Sometimes, you will have parts remaining at the end of a bag. These will become part of the following bags.
A Good Dealer Is Extremely Important!!
A good hobby dealer can help you with most assembly problems you might encounter. This is the main reason why
you should buy your kits from a good dealer rather than from the cheapest dealer. Bring your problematic parts to
the dealer and, most likely, you'll walk away soon thereafter with the problem solved. If you think that you really
don't have the mechanical skills to complete the assembly, you may pay your dealer to finish the job for you. We
can recommend good dealers to you if you need. Please send us mails for more information. Email:
DIGITALPROPORTIONAL
RADIO CONTROL SYSTEM
BATTERYLEVEL
STEERING D/R
ST.EPA-TH.EPA
SERVO REV.SW
LOW FULL
2 Channel Radio Set
(Read the instruction manual provided
with your radio system before using it)
Plug
THE POWER OF TEAM MAGICTHE POWER OF TEAM MAGIC
1Additional Items Needed For Operation
21 Class Off-road Engine Receiver Battery Pack
(Make sure the size is within
L86xW30xH23mm). We recommend
6v-800mah Ni-MH Lightweight
Rectangle Receiver Pack (AAA size)
#114045
IB 6v-1400mah Ni-MH Receiver
Pack (Turbo 35 approved)
#114052
Pipe Set
Tires
Body Paint
800
2

Helpful Items (suggested)
Extra Stuff Needed
Needlenose Pliers
Caliper Double Sided TapeHobby Knife
(Warning!! This knife cuts
nylon parts and fingers with
equal ease. Be careful.)
TM Black HC Carb Tuning Slotted
Screw Driver (4mm)
#117023
TM Black HC Hex Wrench
Metric Size 1.5mm
#117002-1M
TM Black HC Hex Wrench
Metric Size 2.0mm
#117002-2M
TM Black HC Hex Wrench
Metric Size 2.5mm
#117002-3M
1/8 Buggy Cambertoe
Setup Gauge
#H7105
TM 1/8 Setup Board (500x480mm)
#116052
Tongue and Groove Pliers
Thread Lock
Instant AdhesiveBody Scissors
(for body cutting)
#116006
TM Black
HC Body Reamer
(0~18mm)
#117030
TM Black HC Nut Driver
5.5mm (for 3mm nut)
#117010
2.5mm 2.0mm 1.5mm
10
10
0
55
5.5mm
4
5
TM Black HC Push Type
Clutch Nut Driver 10mm
#117013
10mm
2
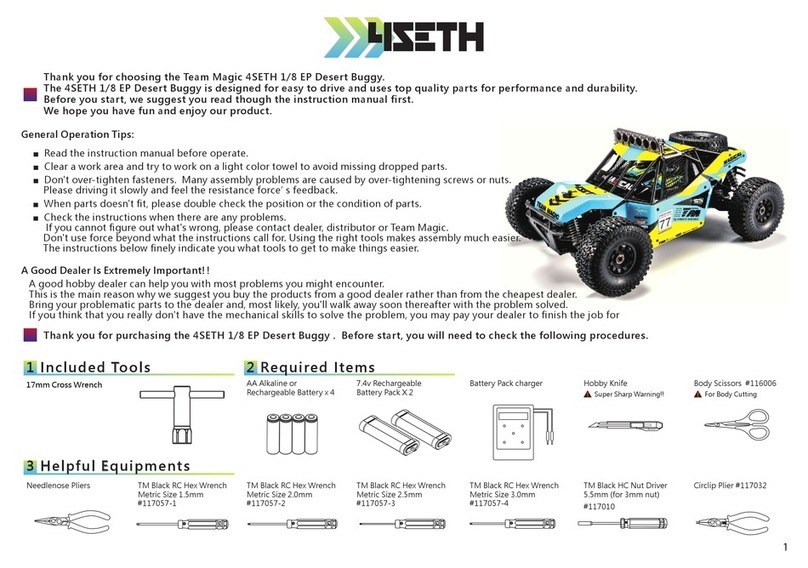
H5S Starter Box off-Road
#H6515F
3Tools & Items Supplied
Differential Silicone Oil #7000
#560107
H.A.R.D 500cc Speed
Fuel Bottle
#H1036
Black Magic Glow Starter
#114203
Fuel
# 7000
Differential Silicone Oil #1000
#560108
TM Black HC Flare Nut Wrench
(2.6, 3.5, 4.5 & 6mm)
#117101
# 1000
Shock Silicone Oil #300
#560203
Cross Wrench
(4, 5, 5.5 & 7mm)
#116043
# 300
Additional Items Needed For Engine Starting
Cross Wrench
(7, 8, 10, 12 & 17mm)

#116025
5mm Allen Key
4.5
3.5
2.6
6
2
Shock Silicone Oil #400
#560276
# 400

Example ( Learn how to read the manual here )
The assembly is arranged so that you will open and finish that bag before you go on to the next bag.
Sometimes you will have parts remaining at the end. These will become part of the following step.
Cool Items ( It would be good to have these items with the M8 )
TM Racing Cap (Black)
#119222
TM Transmitter
Bag (Black)
#119206
www.teammagic.com.tw
Team
TM Racing T Shirt (Orange)
#119223
TM Racing T Shirt (Black)
#119224
UP
TEAM
MA
GICDRIVER
G4
EVOLUTION
TheP
ow
erof
T
eamMagic
6
www.teammagic.com.tw
Team
TM Starter Box Bag -
Large (Black)
#119213
TM New Formula 8 (F8)
Car Bag (for 1/8 cars)
#119220
3
The drawings below are 1:1
actual size drawings.
Place your part on top of the
drawing and compare it so it
does not get confused with
a similar part.
Place your part on top of the drawing and compare it so it does not get confused with a similar part.
7
Icon ( The tool and action needed )
1.5 2.0 2.5
5.0
5.5 17
5.0 5.5
The manual that comes with the M8 is complete. However as development is acontinuous process, up-to-date information about the M8 in
provided on our web site: www.teammagic.com.tw Here you will find the very latest information about the M8, including reports by team racers
and other experts with the latest tips, FAQ, set-ups, etc. So make sure to visit Team Magic site frequently. The parts inside the kit may vary
because of the new development. We reserve the right to change any specification without prior notice.
Clockwise
C.A
1.5mm
Hex
Wrench
4mm
Flat
Screw Driver
Actual
Size
Make It
Twice
Make It
Four
Times
Assemble
Both
Sides
Instant
Adhesive
Lubricate
2.0mm
Hex
Wrench
2.5mm
Hex
Wrench
5.0mm
Hex
Wrench
5.0mm
Nut
Driver
5.5mm
Nut
Driver
10
10mm
Nut
Driver
4.5mm
Nut
wrench
6mm
Nut
wrench
2.6mm
Nut
wrench
Anti
Clockwise
Turn
Upside Down
Thread
Lock
5mm
Allen
Key
Needlenose
Pliers
Cutting
Pliers
Scissors Tongue &
Groove Pliers
#116043
Cross Wrench
(4,5,5.5&7mm)
#116025
Cross Wrench
(7,8,10,12&17mm)
4.0 1:1 X2 X4
180
8
3.5mm
Nut
wrench
5.0
2.6
6.04.53.5
FutabaKo/Sanwa/JR
(Not Included)
2.0
2.0
111003
126312
111003
126312
126308C
2.5
126310
3x10mm
Steel FH Screw
126308C
3x8mm
Steel Cap Screw
111003
3mm
Washer
126312
3x12mm
Steel FH Screw
Item number, from
bag number shown
on the above right
The tool
needed
Which parts you will
use for those steps

01 Front Gear Differential Oil Filling
4
Lossen the screws
for diff oil filling.
#7000
560107
#1000
560108
80%
1
4 2
3
130101
13.2x15.9x0.2mm
Shim
126310
3x10mm
Steel FH Screw
561302
3x12mm
Steel FH Screw
123510BU
3.5x10mm
Steel Cap Screw
123516BU
3.5x16mm
Steel BH Screw
Holding the diff. case upright , fill with
half #7000 silicone oil and half #1000
silicone oil to have the basic set up.
Apply a small amount of grease
on the bevel gears to ensure
that they work smoothly.
Fill the oil to 80% capacity.
When tighten the 4 long screws, make
sure that you are following the right
procedures 1-2-3-4. Tighten equally to
get average down force to prevent the
differential from leaking.
561302
130101
2.0
126310
123516BU
123510BU
123516BU
2.5
2.0
5.5

02 Rear Gear Differential Oil Filling
130101
13.2x15.9x0.2mm
Shim
126310
3x10mm
Steel FH Screw
561302
3x12mm
Steel FH Screw
123510BU
3.5x10mm
Steel Cap Screw
123516BU
3.5x16mm
Steel BH Screw
5
Lossen the screws
for diff oil filling.
#1000
560108
80%
1
4 2
3
Apply a small amount of grease
on the bevel gears to ensure
that they work smoothly.
Holding the diff. case upright, fill with
#1000 silicone oil to have the basic
set up.
Fill the oil to 80% capacity.
When tighten the 4 long screws, make
sure that you are following the right
procedures 1-2-3-4. Tighten equally to
get average down force to prevent the
differential from leaking.
126310
561302
130101
123516BU
123510BU
2.5
2.5
2.0
2.0
6.0

03 Center Gear Differential Oil Filling
126310
3x10mm
Steel FH Screw
561302
3x12mm
Steel FH Screw
123510BU
3.5x10mm
Steel Cap Screw
6
2.1mm
#7000
560107
80%
1
4 2
3
Holding the diff. case upright, fill with
#7000 silicone oil to have the basic
set up.
Fill the oil to 80% capacity.
When tighten the 4 long screws, make
sure that you are following the right
procedures 1-2-3-4. Tighten equally to
get average down force to prevent the
differential from leaking.
Make sure you get the amount
shown below to have the basic
setup.
Long distance then tighter the rear brake.
Short distance then tighter the front brake.
126310
123510BU
2.0
2.5
561302 2.0

04 Transponder Holder
7
FutabaKo/Sanwa/JR
126310
3x10mm
Steel FH Screw
126308C
3x8mm
Steel Cap Screw
111003
3mm
Washer
(Not Included)
126312
3x12mm
Steel FH Screw
126310
2.0
2.0
2.0
111003
126312
111003
126312
126308C
2.5

7
126312
3x12mm
Steel FH Screw
111003
3mm
Washer
126305S
3x3mm
Set Screw
126206C
2x6mm
Steel Cap Screw
126308C
3x8mm
Steel BH Screw
(Not Included)
(Not Included)
Please collect the wire as the direction
126312
111003
126308C
126308C
126305S
126308C
126206C
2.0
1.5
1.5
2.0
2.0
2.0

130105
5x9x0.15mm
150510ST
5x10x4mm
Steel Bearing
561352
3mm
Washer
561352
Clutch Nut
561352
Clutch Collet
17
10
05 Clutch Set
Put thread-lock on the
clutch nut before you
tighten the flywheel.
These nuts are notorious
for loosening.
561352 560186
560187
561352
561352
Engine
(Not Included)
11
2.5
130105
150510ST
116226
130105
130105
183602-14
561352
116226
3.1x4.8x0.5mm
Shim
561352
3.1x4.8x0.3mm
Shim
561352
3x8mm
Steel FH Screw
Here we use Novarossi Plus21-7B as
an example to install the clutch system.

06 Engine Mount & Pipe Assembly
126312C
3x12mm
Steel Cap Screw
126412EN
4x12mm
Steel Flat Round Engine Mount Screw
561366
3mm
Steel Flanged Nut
561366
3x25mm
Steel FH Screw
Bend the wire appropriately
Now we set the main gear to
pinion gear spacing, known
as gear mesh. Make sure
you can still slide your
engine, then mesh the clutch
bell pinions with the main
gear. The correct gear
spacing is when the pinion is
close to the main gear, but if
you hold the clutch bell, you
should still be able to rock
the main gear back and forth
slightly with light pressure.
Roll the gears and check the
mesh in several different
locations on the main gear.
Then, tighten the four motor
screws. For more
information, please check
Gear Ratio setup page.
12
Pipe
(Not Included)
126312C
126412EN
561366
2.5
2.5
5.5

126303NL
3x3mm
Set Screw
07
Futaba Hitech Ko/Sanwa/JR
58mm
5.5mm
Basic setup data. Adjust to practical situation if needed.
561342
126303NL
561342

7
1mm 1mm
126308C
3x8mm
Steel BH Screw
Neutral Position ( Idle) Full speed throttle position Brake throttle position
Basic setup data. Adjust to practical situation if needed.
126308C
2.5

08 Shock Absorber Oil Filling
14
Shock Oil Filling
Front
#400
560276
Rear
#300
560203
561356
6.8mm
Alum Ball
(Short) (Long)
Slowly move the shaft up and
down several times. Let the oil
settle and allow the air to
escape. Refill with oil to the
top of the body. Install the
shock cap assembly onto the
shock body assembly.
Fill with #300 shock silicone oil
to the top of the shock body.
Fill with #400 shock silicone oil
to the top of the shock body.
Slowly tighter the shock upper
cap and let the surplus oil flow
out from the hole.

09 Front & Rear Shock Installation
14
101Fuel Tube
FRONT
REAR
26.5cm28cm
561356
3.5x18mm
Steel FH Screw
Use adjuster & Fuel Tube to adjust the oil capacity.
( adjstment range : 0~2c.c )
2cc
1cc
561356
3.5mm
Flat Locknut
561356
561356
561356
561356
2.5
2.5
6.0
6.0

14
11 Air Filter
Use stripes for air filter
installation to the engine.
560287
560287
560287
K6401-1
2.0
560287
Usage: working oil into foam air filter element and squeezing out the excess.
1 2 3
126308
3x8mm
Steel FH Screw

560220
Foam
(Not Included)
Tire
(Not Included)
14
12 Tire
X4
1
3
2
4
8
6
75
C.A
Only wheels are included.
Use CAto glue the tire and
wheel.
560123
17mm
Alum Nut
560123
560123

14
13 Body
1. Before paining, use a neutral detergent to remove any oil residues
and dirt.
2. Please put on window masks on each windows.
3. Please choose your favorite color to paint the main color or refer to
the pictures on the box for color scheme.
(Paint the body shell from the inside using RC Body Paint.)
4. After painting, remove the protective film from the body shell.

Try to ask and learn
Length: 503mm
Width: 304mm
Wheelbase: 318-326mm (depends on caster angle)
Weight: 3290g (racing status w/o fuel)
Gear Ratio: 11.98 : 1
Before start to setup the car, please always keep the following principles in mind.
We are not born to know all the setup knowledge. Always read, ask and learn more from dealers,
web sites, expert drivers and magazines. After you have some basic knowledge, you can judge the
problems. Driving skills, assembly quality and tuning ability all can affect the car performance. It's
important to evaluate what's the problem first.
If you follow all the steps on the instruction manual, you should get a B8RS with the basic setup. This
is the also the basic setup we suggest you to start from. With the basic setup, the B8RS should work
properly on most off-road tracks and proper terrains. If you need more from the B8RS, please learn
all the information and setup procedures below.
Every part functions properly
Always make sure that suspension and transmission systems are free without additional play and
binding. It's quite often that a poor handling car is caused by mechanical problems, instead of
poor setting. In addition, please always check when every part is still of good shape. Normally,
some parts get damaged or bent after crashes. These broken or bent parts can generate the most
unpredictable car. No setup can compromise these problems. If you cannot judge the problems,
please always ask help from dealers or experts.
Feel and use time counter
Feeling is helpful, but may cheat you. Sometimes, you feel the car is getting faster, but actually it's
slower. Always use time counter to check your lap time if you are at a track.
Make only one change every time
If you make many setup changes at a time, then you don't know which change make the
difference. This is extremely important. To help better judge the difference, a large change can be
helpful. For example, instead of add 0.5 degree to the toe setting, you may try 2 degree. Also,
don't forget to write down all these experiment results. You can always check the record to better
evaluate what changes should be made when you need better lap times.
Compromise
Things are not perfect. When you need more rear toe-in to have a stable car, you probably lose
some high-end speed. Always find the best compromise. What is the best compromise?Better
handling and faster lap times can help you to make decisions.
B8RS Setup & Tuning Guide
B8RS Specification
Basic Principles
Check the track layout and surface
It's good to walk and feel every part of the track. Then, you can know the bumpy area and find
good racing lines. It's normal that you cannot find these things on the driver stand.
It's always good to start from our basic setup or your own basic setup when you are at a new track.
Before start to drive the car, always do following things first:
Where To Start The Setting?
B8RSB8RS

Check what other drivers are doing
Please try to find out the current best lap times. These are good benchmarkers. Check the setup
from other good drivers who drive the same car as you. You can save some try and error time.
Listen and see where good drivers apply throttle and brakes, also find out their racing lines.
Choose right tires
Tires are the only contact between the car and ground. Without a good set of tires, your car is
going no where. You can always check what tires are used the most at the track. This is always a
good starting point.
45
B8RSB8RS
Table of contents
Other Team Magic Motorized Toy Car manuals

Team Magic
Team Magic E4D User guide

Team Magic
Team Magic Trooper II EP E6 User manual

Team Magic
Team Magic 507007 User guide

Team Magic
Team Magic M8ER User guide

Team Magic
Team Magic E4DMF Pro User manual

Team Magic
Team Magic 4SETH User manual

Team Magic
Team Magic E4RSII User manual

Team Magic
Team Magic g4rs User guide

Team Magic
Team Magic 6SETH User manual

Team Magic
Team Magic E5 User manual