Tecdesk Smart 5500 User manual
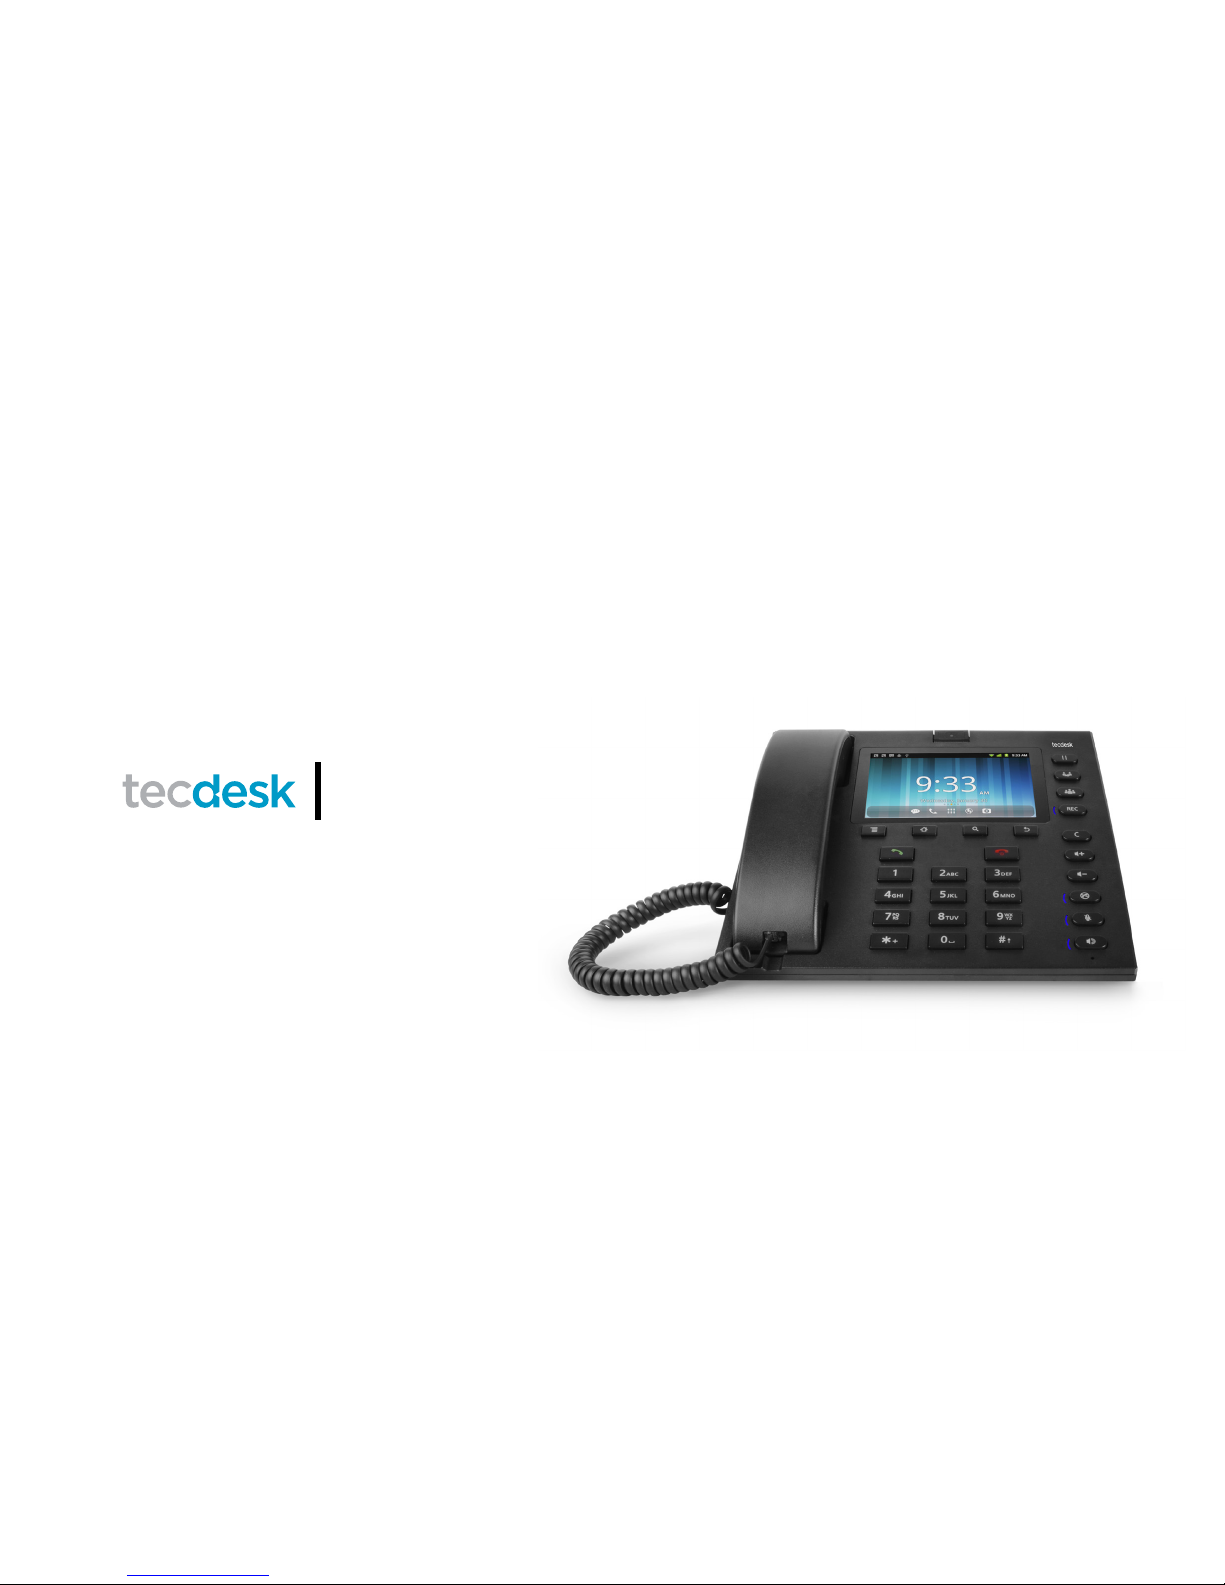
Smart 5500 - 3G Desktop Phone
User Manual


Page: 3
Introduction 4
Safety Instructions 4
Section 1: Getting Started 5
Contents in the box 5
USIM card 6
Battery 7
SDcard 8
Section 2: Getting to Know Your Phone 9
Function of buttons 9
Finger Gestures 11
Home Screen 11
Applications 12
Status icons 13
Section 3: Power ON/Off 14
Section 4: Text Entry 14
Section 5: Call Functions 15
Making Calls 15
Answering/ Ending a call 17
Section 6: Contacts 18
Section 7: Messages 19
Creating and Sending Messages 19
Settings 20
Section 8: Browser 21
Section 9: Music 24
Section 10: Camera 25
Taking Pictures 25
Section 11: Video Player 26
Section 12: Gallery 27
Section 13: Calendar 27
Section 14: Clock 28
Section 15: Settings 28
Theme settings 28
Wireless & networks 28
Call settings 29
Sound 30
Display 30
Battery 31
Location & security 31
Applications 32
General sync settings 32
Privacy 33
Storage 33
Language & keyboard 33
Date & time 34
About phone 34
Section 16: Tecdesk Smart 5500 Expansion Module (Optional) 34
Section 17: Trouble Shooting 36
Section 18: Legal Information 38
Section 19: Health and safety 39
Section 20: Declaration of conformity 42
Contents

Page: 4
Introduction
Thank you for purchasing the Tecdesk Smart 5500 3G Desktop Phone. This phone is designed for use with GSM 900/1800/850/1900
and UMTS 900/2100 MHz networks. You will require a valid SIM card from your network operator. Please refer to your network operator
for more information.
Safety Instructions
Please read the following instructions carefully before starting to use the Tecdesk 5500 3G Desktop Phone.
• Always read the safety instructions carefully.
• Keep this User Guide for future reference.
• Keep the phone away from humidity.
• Place the phone on a reliable at surface before setting it up.
• If any of the following situations arise, have the unit checked by a service technician.
– Has been exposed to moisture.
– Has been dropped and damaged.
– Has obvious signs of breakage.
• Do not place the phone in a damp room at a distance of less than 1.5m from a water source. Keep water away from the
device.
• Do not use the device in environments where there is a risk of explosions.
• Maintain the desktop phone in an environment-friendly manner.

Page: 5
Section 1: Getting Started
Contents in the box
Please check the box includes the following components. If there are any items missing please contact your supplier.
a. Tecdesk Smart 5500 3G Desktop Phone
b. USB data cable
c. User manual
d. AC/DC Power Adapter
e. Li-ion rechargeable battery
f . CD PC suite
r's
d e f
b
Use
guide
ca

SIM
USIM card
Ensure a valid SIM card is inserted correctly into the desktop phone.
Page: 6

Battery
The phone is powered by a rechargeable, standard Li-Ion battery. It comes with a USB Charger to charge your phone. The battery is
under a removable cover on the back of the phone. Ensure the polarity of the battery is aligned correctly with the connectors on the
device before inserting the battery into the device.
Page: 7

SDcard
Your phone supports removable microSD™ memory cards of up to 32GB capacity, to store your music, pictures, and other les.
Page: 8

Section 2: Getting to Know Your Phone
Function of buttons
1. Options button
Press to display options for the current screen.
2. Home button
Press to display the Home screen.
3. Search button
Press to enable Google search, search contacts and search messages.
4. Back button
Press to revert to the previous screen or to go back to home screen.
5. Dial button
Press to dial or answer a call.
6. End button
Press to terminate a call or power ON/OFF.
7. Alphanumeric keypad
Page: 9

Page: 10
When entering usernames/ passwords or writing messages, you can press the buttons to toggle between numbers (123), lowercase
(abc) characters, and uppercase (ABC) characters. Use this buttons to dial the phone numbers you want to call.
8. Hold button
1. Press the button and the current call will be placed on hold.
2. If you receive a new call while you are already on a call, you can press the button to switch between the two calls.
3. While you are on a call, you can make another call, press the button to switch between the two calls.
9. Transfer button
During an active call, press the button to put caller 1 on hold. Using the keypad dial the contact number of the second caller
and press the [Dial] button. When the call is answered, press the button and replace the handset. Caller 1 will be transferred
to caller 2. Replace the handset when the call is nished.
10. Conference button
During an active call, press the button to put caller 1 on hold. Using the keypad to dial the contact number of the second caller
and press the button. When the call is answered press the button to put caller 1 and 2 and yourself on a conference call.
Replace the handset when the call is nished.
11. Rec button
Press the button during an active call to record your voice.
12. Volume up or Volume down button
From the Home screen press the button to adjust the Ringer Volume. When playing music or during an active call press
to adjust the volume.
13. Cancel button
Press the button to delete an incorrect number entry or text, when editing a text message or typing a number into the dial pad.
14. Mute button
Press the button to enter into Silent Mode. This temporarily silences all the sounds your phone makes except for media
playback and alarms.
15. Silent button
Press the button during an active call to mute/silent your phone.
16. button
Press the button to enable or disable the speakerphone. In Speakerphone mode, Press the button to terminate a call.

Page: 11
Finger Gestures
Touch
Touch items to select or launch them. For example:
• Touch the screen keyboard to enter characters or text.
• Touch a menu item to make a selection.
• Touch an application icon to launch the application.
Touch and Hold
Activate onscreen items by touching and holding them. For example:
• Touch and hold a widget on the home screen to move it.
• Touch and hold an application to display a pop-up menu of options.
Swipe, Flick or Slide
Swipe, ick or slide your nger vertically or horizontally across the screen. For example:
• To unlocking the screen
• To scroll through the Home screen or a menu.
Home Screen
The Home screen is the starting point for using your phone.
Notication Bar
Primary Shortcuts

Page: 12
1. Notication Bar: Display network status, battery power, system time and connection details.
2. Home screen: The starting point for using your phone. Place icons, widgets and other items to customize your Home Screen page.
3. Primary Shortcuts: Shortcuts to your phone’s common features. (Message/Phone/Applications/Google/Camera)
Applications
The Application’s screen holds all applications installed on your device. Applications that you download and install from Android Market
or from the web are also added to the Applications screen.
1. From the Home screen, touch the Applications icon.
2. Slide your nger up or down to scroll through the Applications.
3. Touch an icon to launch the application.
Brightness Set the default screen brightness.
Browser Access the internet.
Calculator Perform mathematical calculations.
Calendar Daily, weekly or monthly view. Create events and
check your agenda.
Camcorder Record videos.
Camera Take pictures.
Clock Keep track of time with Alarm, World clock,
Stopwatch and Timer features.
Contacts Save and manage contact information of your
friends and colleagues. Appears in the Primary
Shortcuts by default.
Downloads View the details of your downloads
Email Send and receive emails.
Extend
Unit
Store contacts to the Cordless-Telephone. The
maximum number of contacts to be added is 20.
File
Explorer
View the system file. Manage SD memory card.
Gallery View and manage pictures/videos stored on your
phone, or on an optional installed memory card.
Messaging Send and receive messages. Appears by default
in the Primary Shortcuts.
Music Play music stored on optional installed memory
card.
Phone Make and answer calls. Appears by default in
Primary Shortcuts.
Portable
hotspot
Share your phone’s mobile data connection via
USB or as a portable WLAN hotspot.
Profile
Manager
Set up personal ringtone and relevant prompt
tone of the phone for different scenarios.
Search Launch Quick Search, search the web and your
phone.
Settings Configure your phone to your preferences.
Sound
Recorder
Record your voice or other sounds, and share
recordings via Bluetooth, Messaging, or Email.
Videos Play and manage videos stored on an installed
memory card.

Page: 13
Status icons
Signal Strength: Current signal strength.
Battery Level: Display battery capacity.
New Message: One or several new text messages.
Voice Call: A voice call is in progress.
Missed Call: Displays when there is a missed call.
3G Connection Active: Phone is active on a 3G system
USB Connected: The phone is connected to a computer using a USB cable.
Alarm Set: An alarm is active.
Silent mode: All sounds except media and alarms are silenced.
Airplane Mode Active: All wireless communications are disabled.
Bluetooth Active: Bluetooth is turned on.
Bluetooth Connected: The phone is paired with another Bluetooth device.
WLAN Active: WLAN is connected, active, and communicating with a Wireless Access Point (WAP).
3G
Page: 14
Section 3: Power ON/Off
Before powering ON the phone, make sure the phone is charged and the SIM card is inserted correctly.
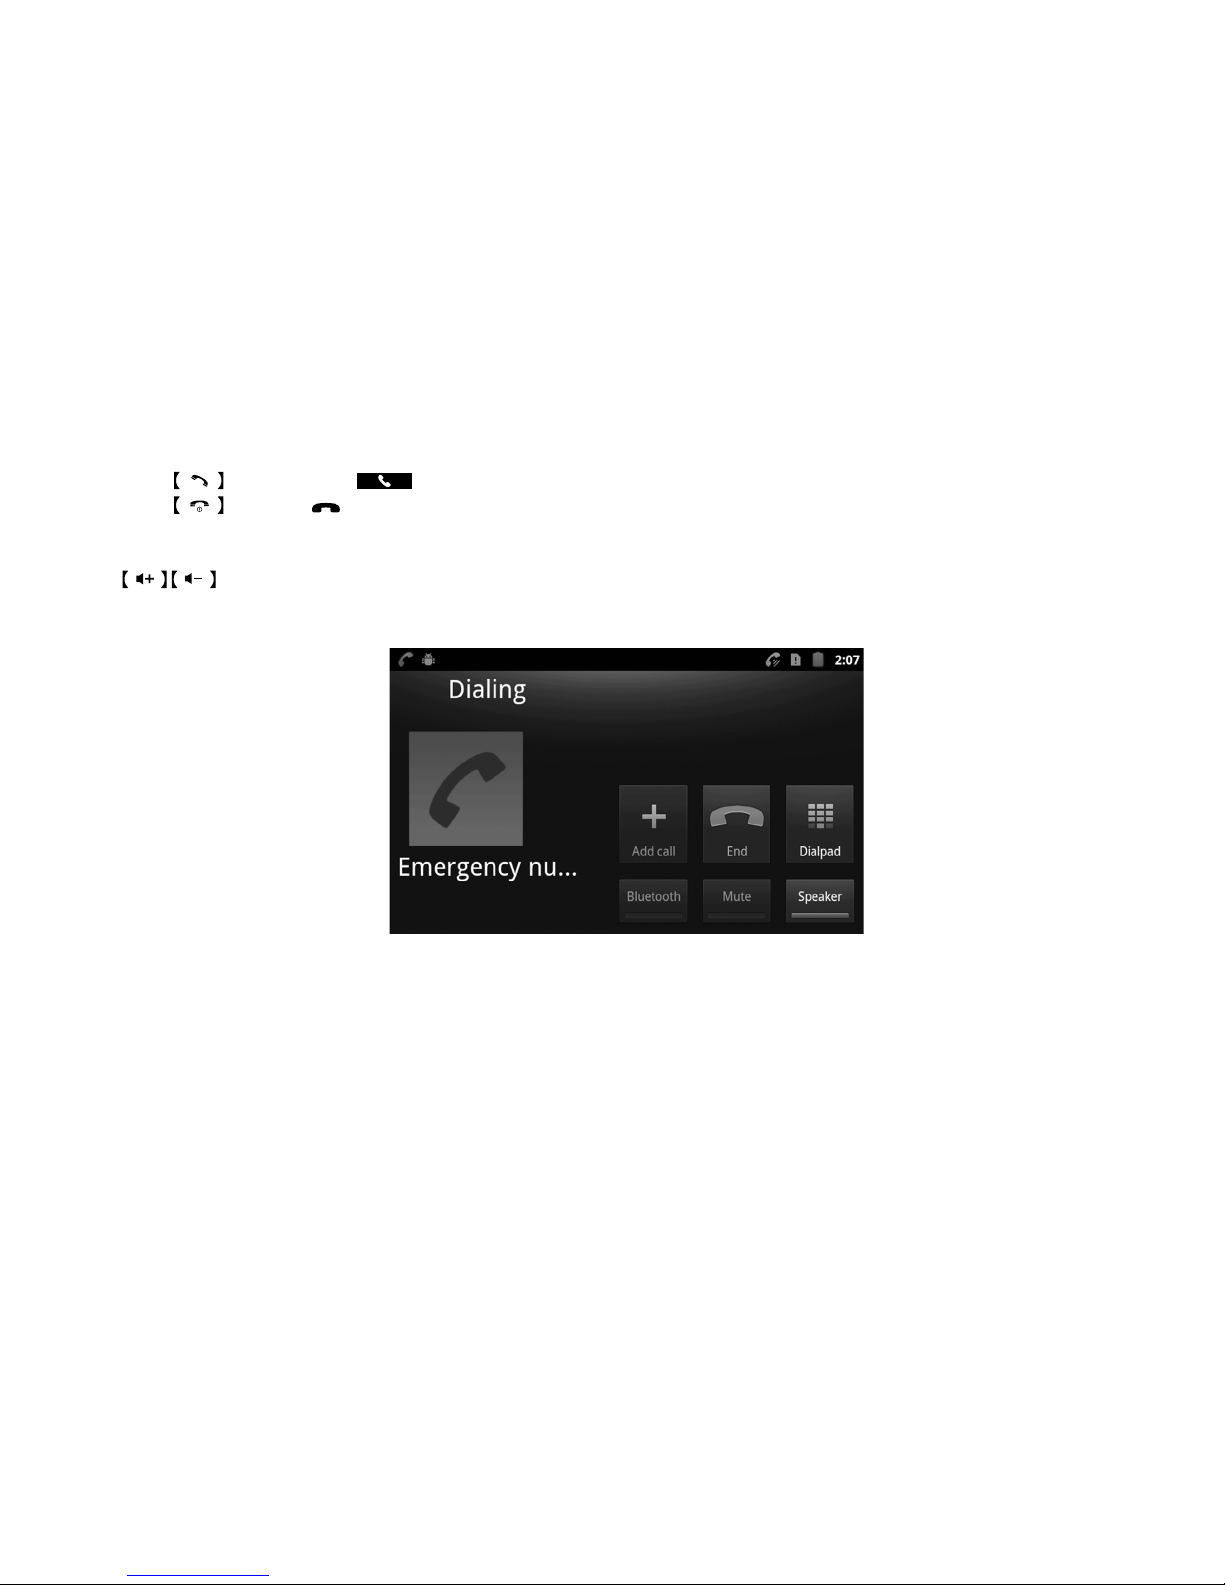
If the phone is powered ON without a SIM card, the screen displays a SIM card insertion message and the phone can only make calls to
the emergency services. To call the emergency services, input the emergency service number and press the button to call.
The phone can be powered ON during when it is being charged. Once the phone has displayed the startup information, it can be
powered ON.
If the phone automatically turns OFF, the battery level is low. The start-up information will be displayed after 30 minutes of charging.
Press and hold the button and the phone will turn ON/OFF.
Section 4: Text Entry
Text input method:
This section describes how to enter words, letters, punctuation and numbers.
Entering Upper and Lower Case Letters:

Page: 15
The default case is lower case (abc). Touch the button to change to Uppercase mode before inserting a character with the
keyboard. Use the button to toggle between the upper and lower case.
Entering Symbols and Numbers:
To enter common symbols, touch to switch to symbol mode, and then touch the corresponding button on the keyboard.
To enter less-common symbols, touch > , then touch the corresponding button on the keyboard.
Enter numbers by touching , then touch the corresponding button on the keyboard.
Section 5: Call Functions
Making Calls
Your phone offers multiple ways to make calls:
Making phone call by dialing a number
1. In the Home screen, enter the phone number using the alphanumerical keypad, and press the button to make the call.
2. To end the call, press the button.
Making phone calls using the Phone Dialer

Page: 16
1. From the Home screen, touch .
2. Touch the digits of the telephone or speed dial number on the Dialer keypad. When dialing, use these following options:
Touch Menu Add to Contacts to add the number to a new contact, or to update an existing contact.
Touch Menu Add 2 sec pause to insert a 2-second pause in the telephone number.
Touch Menu Add wait to insert a waiting/pause feature after the main number is dialed. For example: when calling a company
and you need to input an extension number. After dialing the main number it will pause and t hat allows you to enter the extension
number).
Touch Menu Speed dial settings to dial or set Speed Dials.
Touch to make the call.
Making phone call using contacts
1. From the Home screen, select (Applications) Contacts.
2. Find the contact and touch it to open the Contact details.
3. Touch to dial the default number for the Contact.
Making Calls using Favorites
1. From the Home screen, touch (Phone).
2. Touch (Favorites) to display your favorites.
3. Find the contact and touch it to open the Contact entry.
4. Touch to dial the default number of the Contact person.
Making phone call using call log
To return a call, or call a number from a recent call stored in the Call log.
1. From the Home screen, touch (Phone).
2. Touch (Call log) to display your recent calls.
3. Find the number of the contact you require, and then touch Call to dial the number.
Page: 17
Answering / Ending a call
Answer or silence an incoming call
1. Press the button or touch .
2. Press the button or button to reject the call.
Adjusting the receiver volume
Press button to increase or decrease the volume on the handset during a call.
In-Call Options
During an active call, you can use the following features:
Add call: Display the Dialer to set up a multi-party call.
End call: Terminates the current phone call.
Dial pad: Display a keypad to enter digits.
Bluetooth: Switches the call to be taken on a Bluetooth headset.
Mute: Mute or unmute your voice on the call.
Speaker: Enable or disables the speakerphone.

Page: 18
Ending a Call
Touch or button to terminate the current call.
Section 6: Contacts
This section explains how to manage your Contacts. Touch to access the contacts menu in the main menu.
Creating Contacts
Creating Contacts from the Contacts
Create a new contact from the Contacts.
1. In the Contacts menu, touch New contact.
2. Touch an account where you want to save the contact (Phone / SIM).
Creating Contacts from the Phone Dial status
Enter a phone number with the Phone Dialer keypad, touch Add to contacts then save the entry.
Creating Contacts from the Call log
Save a phone number from a recent call record to create a new contact, or update an existing one.
Groups
Assign a contact to Groups to search for contacts faster, or to call or send messages quickly to group members.
In the Contacts menu, touch Groups.
Favorites
Favorites are displayed on the Favorites tab in the Phone Dialer, for fast dialing or messaging, and are indicated by the in Contacts.
Touch and hold on a contact, then select Add to favorites from the pop-up menu to mark the selected contacts with a star.

Page: 19
Section 7: Messages
This section explains how to send and receive messages, and other features associated with messaging.
Your phone supports these types of messages:
SMS Text messages: Send and receive simple messages containing text to other mobile phones or email addresses.
MMS Multimedia messages: Send and receive text messages with pictures and/or sound les to other mobile phones or email
addresses.
Email: Send and receive email from your email accounts.
Gmail: Send and receive emails from your Google account.
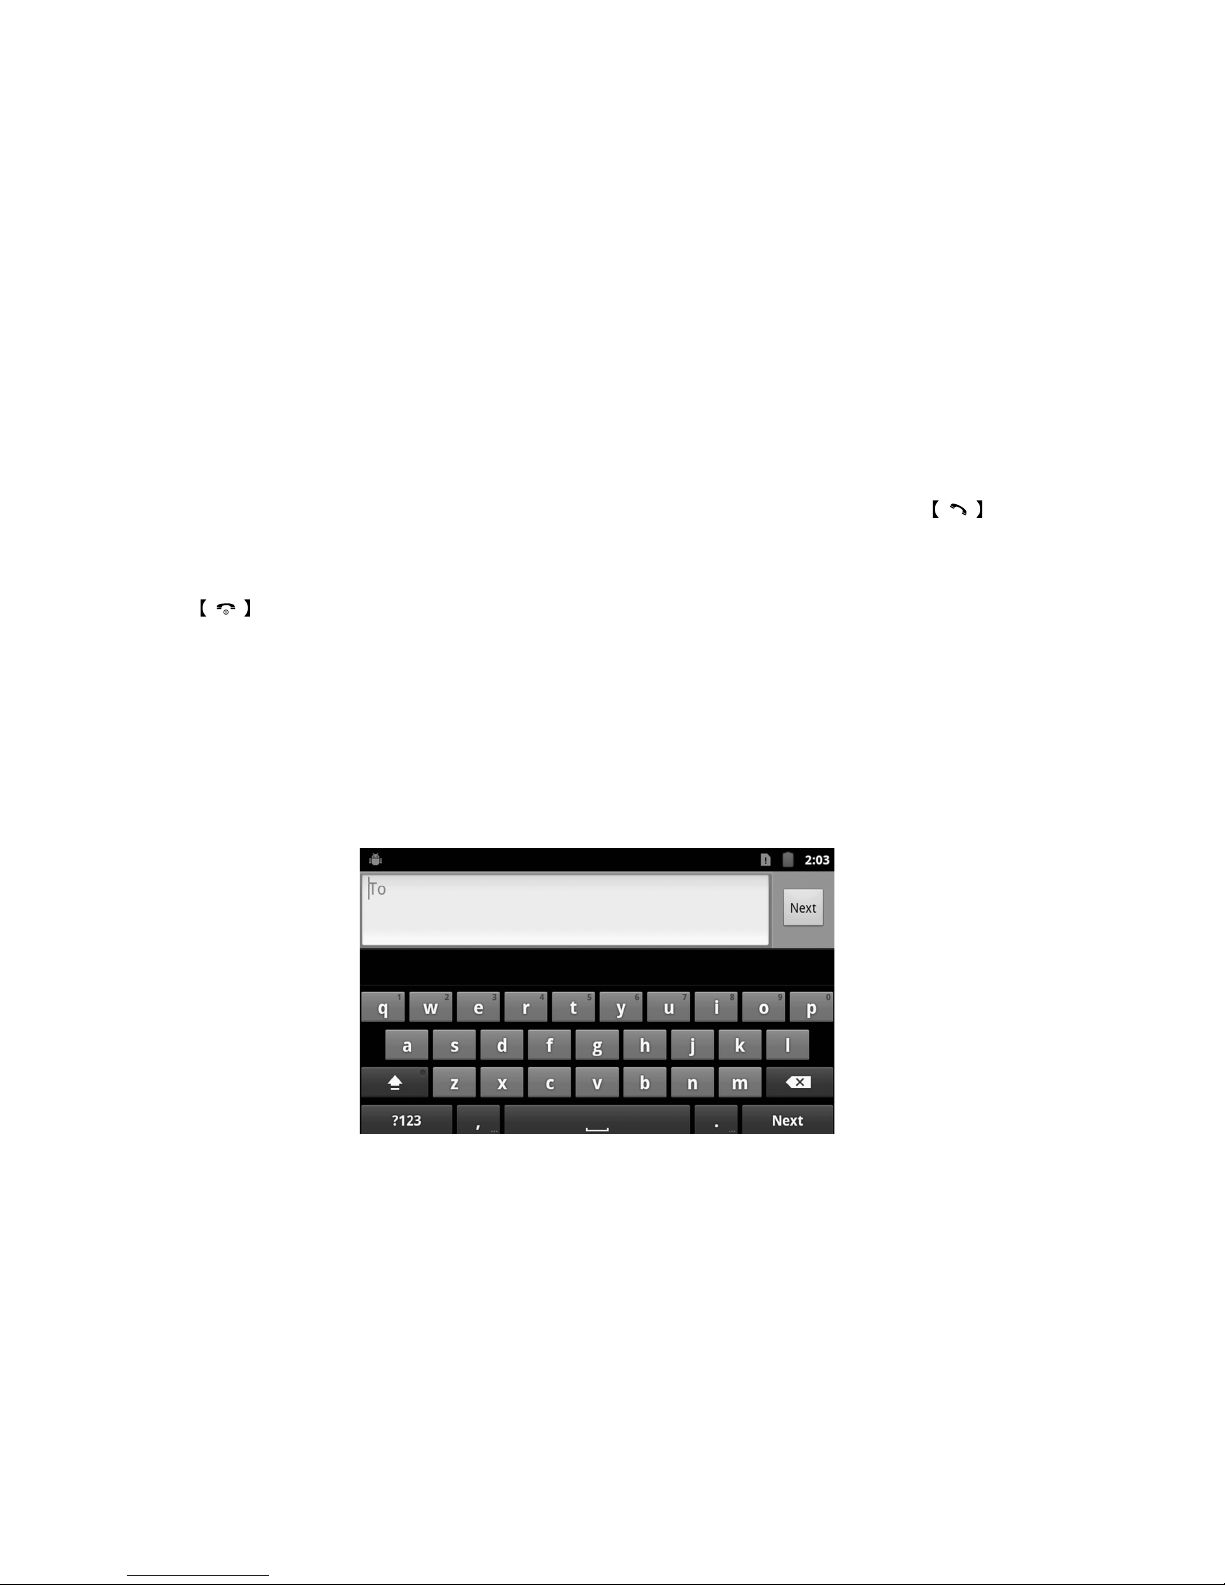
Creating and Sending Messages
1. From the Home screen, touch (Messaging).
2. Touch Menu for the following options:
Compose: Create a new message.
Search: Enter characters to search messages and recipient lists.
Settings: Congure message settings.
Delete threads: All threads will be deleted.
3. Touch the To eld and enter the recipient’s name, phone number or email address.
4. Touch the Type to compose eld, or touch Next to write your message. While composing a message, touch Menu for the
following options:
Add subject: Add a subject eld to the message and enter the subject title. This option converts the message to MMS.
Attach: Add content to the message to convert it to MMS.
Pictures: Add a picture.
Capture picture: Take a new picture.
Videos: Add a video.
Capture video: Record a new video.
Audio: Add a sound clip.
Record audio: Create a new audio clip.
Slideshow: Add a slideshow of pictures to this message.
Insert smiley: Add a text emoticon to the message.
Discard: Discard the message.
All threads: all messages.
5. Touch to send the message
Note: As you enter a name, phone number or email address, matching contacts will appear on the screen. Touch a Contact to add it to
the list, or continue entering characters.

Page: 20
Settings
Conguring message settings:
1. From a Home screen, touch (Messaging).
2. Touch Menu Settings to set:
Storage settings
Delete old messages: Touch to enable or disable automatic erasure of messages when storage reaches its default limits. When
this function is disabled, you will be prompted to delete old messages when the limit capacity is reached.
Text message limit: Touch to set a limit for the number of text messages per thread.
Multimedia message limit: Touch to set a limit for the number of multimedia messages per thread.
Text message (SMS) settings
Delivery reports: Select to receive a delivery report for each message you send.
Message template: Create/edit message templates.
Manage SIM card messages: Manage messages stored on your SIM card.
SMS signature
SMS signature: Touch to disable/enable SMS signature.
Edit SMS signature: Touch to edit SMS signature.
Multimedia message (MMS) settings
Delivery reports: Touch to receive a delivery report for each message you send.
Read reports: Touch to request a read report for each message you send.
Auto-retrieve: Touch to enable or disable automatic retrieval of MMS messages. When enabled, MMS messages will download
automatically. When disabled, the phone prompts to download new MMS messages manually.
Roaming auto-retrieve: Touch to enable or disable automatic retrieval of MMS messages when Roaming. When enabled, MMS
messages download and display automatically. When disabled, the phone prompts you to download new MMS messages.
Restricted Mode: Touch to disable image resizing and to check image resolution.
Notication settings
Notications: Touch to enable or disable alerts in the status bar.
Select ringtone: Touch to select a ringtone for message alerts.
Broadcast Messages: Touch to allow to receive Cell Broadcast SMS broadcast message.
Other manuals for Smart 5500
2
Table of contents
Other Tecdesk Telephone manuals

Tecdesk
Tecdesk 5500i User manual

Tecdesk
Tecdesk 1000V User manual

Tecdesk
Tecdesk 5 User manual

Tecdesk
Tecdesk 8000 User manual

Tecdesk
Tecdesk 3500 User manual

Tecdesk
Tecdesk Smart 5500 User manual

Tecdesk
Tecdesk 3500 User manual

Tecdesk
Tecdesk Smart 5500 User manual

Tecdesk
Tecdesk 1000 User manual

Tecdesk
Tecdesk Connect 100 User manual


