manuals.online logo
Brands
  1. Home
  2. •
  3. Brands
  4. •
  5. Techly
  6. •
  7. Rack & Stand
  8. •
  9. Techly ICA-LCD 482-T User manual

Techly ICA-LCD 482-T User manual

www.techly.it
MULTIPLE DESKTOP MONITOR ARM WITH CLAMP
ICA-LCD 482-T
Istruzioni installazione
Installation Instruction
Istruzioni disimballaggio
•Aprire il cartone con cura, rimuovere il contenuto e
distenderlosuuncartoneoaltromaterialeprotettivo
perevitaredanni
•Vericarecheilcontenutodellaconfezionecorrispon-
da alla lista delle parti nella pagina successiva per
assicurarsichetuttiicomponentisianopresentienon
sianodanneggiati.Nonutilizzarepartidifettoseodan-
neggiate
•Leggereattentamente leistruzioniriportate nelpre-
sentemanualeprimadiprocedereall’installazione
•Teneresemprequestomanualeperfutureconsulta-
zioni.
Importanti informazioni sulla sicurezza
•Installareeutilizzarequestoprodottoconcura.Leg-
gerecortesemente le istruzioni prima dicominciare
l’installazioneeseguirescrupolosamentetuttelein-
dicazionicontenutequi.Utilizzareadeguatidispositivi
disicurezzadurantel’intallazione.
•Contattare del personale qualicato per effettuare
l’installazione se non avete compreso le indicazioni
contenuteinquestomanualeoavetedeidubbiinme-
ritoallasicurezzadell’installazione
Nonutlizzate il prodottoper unoscopo oin unacon-
gurazione non espressamente specicata in queste
istruzioni.Sideclinaqualsiasiresponsabilitàperdanni
derivantidaunerratoassemblaggio,erratomontaggio
ousononcorrettodelprodotto.
Alterminedelleoperazionidimontaggioassicurarsiche
iltuttosiastatoeffettuatoaregolad'arte.
Unpacking Instructions
•Carefullyopen the carton, remove contents and lay
outoncardboardorotherprotectivesurfacetoavoid
damage.
•Checkpackage contents against the Supplied Parts
Listin the nextpageto assure thatall components
werereceived undamaged.Do not use damaged or
defectiveparts.
•Carefully read all instructions before attempting
installation.
•Please keep the instruction manual for next
consultations.
Important Safety Information
•Installandoperatethisdevicewithcare.Pleaseread
thisinstructionbeforeinstallation,andcarefullyfollow
all instructions contained herein. Use proper safety
equipmentduringinstallation.
•Pleasecallaqualiedinstallationcontractorforhelp
ifyoudon'tunderstandthesedirectionsorhaveany
doubtsaboutthesafetyoftheinstallation.
Do not use this product for any purpose or in any
congurationnotexplicitlyspeciedinthisinstruction.
We hereby disclaims any and all liability for injury or
damage arising from incorrect assembly, incorrect
mounting,orincorrectuseofthisproduct.
Attheendofthexingcarethatthesupportisinstalled
inthecorrectway.
MULTIPLE DESKTOP MONITOR ARM WITH CLAMP
ATTREZZATURA RICHIESTA:
CacciavitePhilips
Gentile Cliente,
grazie per aver scelto un prodotto Techly.
Dear Customer,
thanks for choosing a Techly product. Enjoy the using.
ATTENZIONE: Questo supporto per monitor da scrivania deve essere posizionato sulla
scrivaniainmodosicuro.Seilmontaggiononèstatoeffettuatoinmodocorrettoestabile,
ciòpotrebbecausarelacadutadelsupporto,determinandolesioniodanniacoseepersone
MULTIPLE DESKTOP MONITOR ARM WITH CLAMP MULTIPLE DESKTOP MONITOR ARM WITH CLAMP
CAUTION:Thismonitordesktopmountmustbesecurelyattachedtothehorizontaldesk.Ifthe
mountisnotproperlyinstalleditmayfall,resultinginpossibleinjuryand/ordamage.
TOOLS REQUIRED:
PhillipsScrewdriver
LISTA DELLE PARTI FORNITE | SUPPLIED PARTS LIST
(1)Tubodisupportoda48mm-a
(1)48mmTubeSupport-a
(1)Morsetto-b
(1)Disconnected
“C”Clamp-b
(1)PlaccaVESAconbraccioassemblato-c
(1)VESAPlatewithArmAssembled-c
(12)M4x12vite–d
(12)M4x12Bolt-d
(12)M4x30vite–e
(12)M4x30Bolt-e
(24)M4rondella-f
(24)M4Washer-f
(12)M4distanziatori-g
(12)M4Space-g
(2)M8x10vite-h
(2)M8x10Bolt-h
(2)M10x15vite–i
(2)M10x15Bolt-i
(1)Chiaveabrugola-j
(1)AllenKey-j
(2)Elementodicopertura-k
(2)SparePlasticCover-k
www.techly.it
MULTIPLE DESKTOP MONITOR ARM WITH CLAMP
STEP 1 Installare il morsetto a C a seconda dello spessore della scrivania
Install the “C” Clamp According to the Desktop Thickness
Laprofonditàdelmorsettoa“C”può
essere modicata in tre posizioni.
Scegliere la profondità adeguata
allo spessore della vostra scrivania.
Fissare il morsetto usando 2 viti
M10x15(i) e lachiave a brugola(j)
fornita.
The depth of “C” clamp can be
changedinthreepositions.Choose
theproperdepth according tothe
thicknessofyourdesktop.Connect
it by 2pcs M10x15 bolts(i), using
thesuppliedAllenKey(j).
STEP 2 Installare il braccio per i monitor al tubo di supporto | Install Arm to the Tube Support
Installare il braccio sul tubo di
supporto, assicurandovi che le
clip fermacavi siano rivolte verso il
basso. Stringere la viti utilizzando il
cacciavite.
Installarmtothetubesupport,
pleasemakesurethewireclip
inthedownside.Fastenthe
boltbyscrewdriver.
a
i
j
b
h
c
STEP 3 Montaggio del monitor alla placca VESA | Mount the Monitor to VESA Plate
4
T h a n k s f or c ho o s ing o u r p r o d u c ts , e n joy t he u s in g .
d
f
e
f
g
Permonitorconretropiatto
ForFlatBackMonitor
4
T h a n k s f or c ho o s ing o u r p r o d u c ts , e n joy t he u s in g .
d
f
e
f
g
Permonitorconretrocurvo
ForCurvedBackMonitor
STEP 4 Regolazioni e gestione dei cavi
Do Necessary Adjusting & Manage the Wires
4
T ha nk s f or c ho o s in g o u r p r o du c ts , e n joy t he u s ing.
d
fe
f
g
4
T h a n k s f or c hoo s in g o u r p r o d uc ts , e n jo y t he u s i n g.
d
fe
f
g

Other Techly Rack & Stand manuals

Techly ICA-TR22 User manual

Techly

Techly ICA-TR22 User manual

Techly ICA-TR19 User manual

Techly

Techly ICA-TR19 User manual

Techly ICA-PM 100 User manual

Techly

Techly ICA-PM 100 User manual

Techly ICA-PLB 180L User manual

Techly

Techly ICA-PLB 180L User manual

Techly ICA-LCD 35TS User manual

Techly

Techly ICA-LCD 35TS User manual

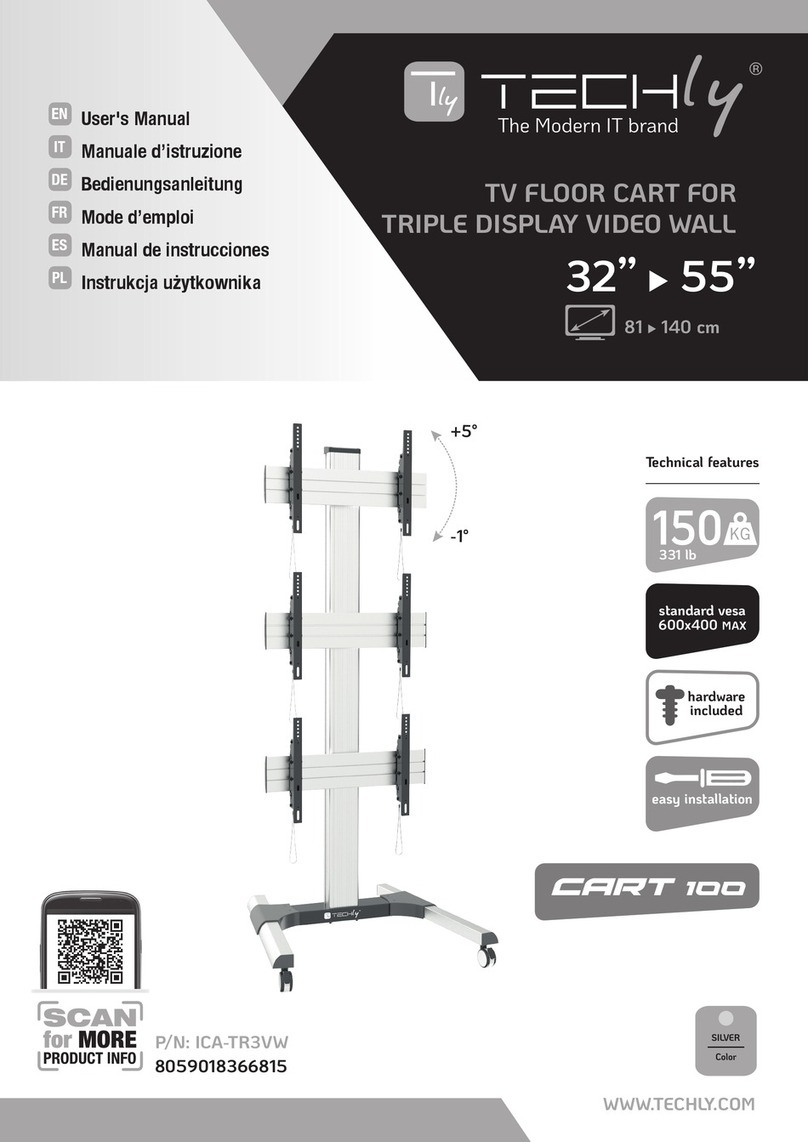
Techly ICA-TR3VW User manual

Techly

Techly ICA-TR3VW User manual

Techly ICA-LCD 114 User manual

Techly

Techly ICA-LCD 114 User manual

Techly ICA-TR12 User manual

Techly

Techly ICA-TR12 User manual

Techly ICA-LCD 217 User manual

Techly

Techly ICA-LCD 217 User manual

Techly ICA-LCD 483-D User manual

Techly

Techly ICA-LCD 483-D User manual

Techly Office Series User manual

Techly

Techly Office Series User manual

Techly ICA-LCD 2533 User manual

Techly

Techly ICA-LCD 2533 User manual

Techly ICA-TR30 User manual

Techly

Techly ICA-TR30 User manual

Techly ICA-LCD 2923E User manual

Techly

Techly ICA-LCD 2923E User manual

Techly ICA-MS 401 User manual

Techly

Techly ICA-MS 401 User manual

Techly ICA-PLB 162M User manual

Techly

Techly ICA-PLB 162M User manual

Techly ICA-LCD 923B User manual

Techly

Techly ICA-LCD 923B User manual

Techly ICA-LCD 2602 User manual

Techly

Techly ICA-LCD 2602 User manual

Techly ICA-TR40 User manual

Techly

Techly ICA-TR40 User manual

Techly IcA-LcD 382-Q User manual

Techly

Techly IcA-LcD 382-Q User manual

Techly ICA-TR6 User manual

Techly

Techly ICA-TR6 User manual

Techly ICA-TR13 User manual

Techly

Techly ICA-TR13 User manual

Techly ICA-LCD 105BK User manual

Techly

Techly ICA-LCD 105BK User manual

Techly ICA-PLB 102S User manual

Techly

Techly ICA-PLB 102S User manual

Popular Rack & Stand manuals by other brands

Mountup MU0029 Installation instruction

Mountup

Mountup MU0029 Installation instruction

CHIEF PLP Series installation instructions

CHIEF

CHIEF PLP Series installation instructions

progressive automations TY-01 user manual

progressive automations

progressive automations TY-01 user manual

hillvert HT-LSS-200 user manual

hillvert

hillvert HT-LSS-200 user manual

Sanus Systems HTSAT manual

Sanus Systems

Sanus Systems HTSAT manual

Stell SHO 7000 SLIM manual

Stell

Stell SHO 7000 SLIM manual

StarTech.com RACKCONV1701 instruction manual

StarTech.com

StarTech.com RACKCONV1701 instruction manual

AXA RK 8U quick start guide

AXA

AXA RK 8U quick start guide

Gembird MS-D2-01 user manual

Gembird

Gembird MS-D2-01 user manual

Sealey ES900F.V2 instructions

Sealey

Sealey ES900F.V2 instructions

Clenergy PV-ezRack SolarRoof IS-SR265/111 installation guide

Clenergy

Clenergy PV-ezRack SolarRoof IS-SR265/111 installation guide

AmazonBasics B082L6KJ2J manual

AmazonBasics

AmazonBasics B082L6KJ2J manual

Singercon CON.LS3000E1.03 user manual

Singercon

Singercon CON.LS3000E1.03 user manual

Wolfcraft MASTER 750 ERGO Translation of the original operating instructions

Wolfcraft

Wolfcraft MASTER 750 ERGO Translation of the original operating instructions

Rubbermaid 2143454 Assembly instructions

Rubbermaid

Rubbermaid 2143454 Assembly instructions

Sealey AS12.V2 manual

Sealey

Sealey AS12.V2 manual

Sanus Systems PFV59S Assembling instructions

Sanus Systems

Sanus Systems PFV59S Assembling instructions

KSL WM449T Quick installation guide

KSL

KSL WM449T Quick installation guide

manuals.online logo
manuals.online logoBrands
  • About & Mission
  • Contact us
  • Privacy Policy
  • Terms and Conditions

Copyright 2025 Manuals.Online. All Rights Reserved.