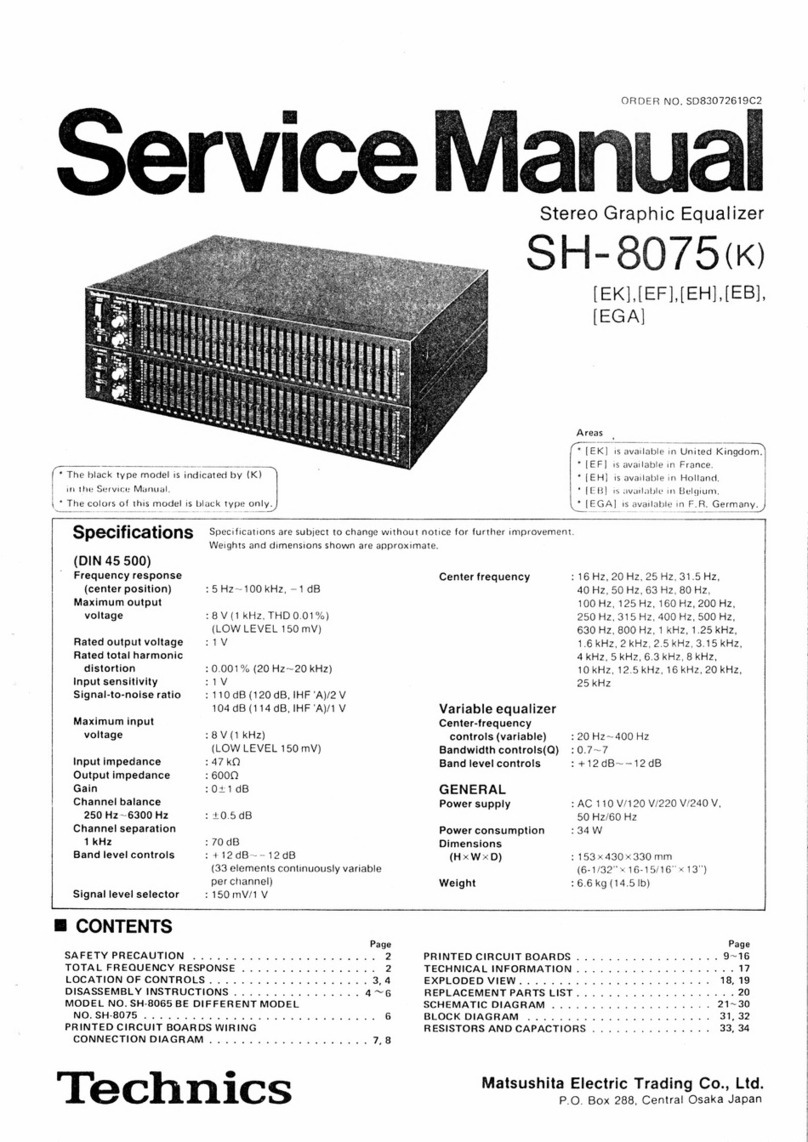
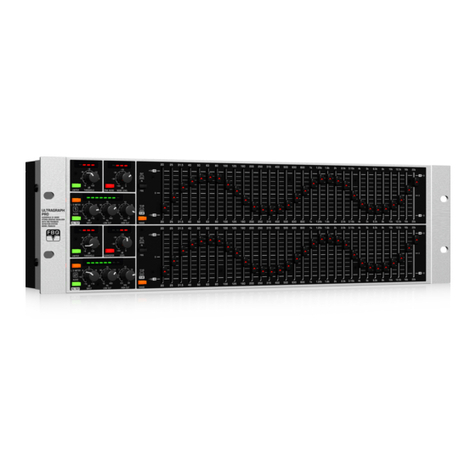
Technics SH-GE70 User manual

•
A
,
,
StereoGraphicEqualizer
SH-GE70
OPERATING
INSTRUCTIONS
•
1B1
[GNl
Notes:
•Specifications
differ
according
tothe
area
code.
•The
"EB"areacode,
for
example,indicates
United
Kingdom
specifica-
tions.
•The
"EB"indication
is
shown
onthe
packingcase
and
serialnumbertag.
Before
operating
this
unit,
please
read
these
instructions
completely.

We
want
to
thank
youfor
selectingthisproduct
andto
welcome
youtothe
growingfamily
of
satisfied
Technicsproductownersaround
the
world.
We
feelcertain
you
will
get
maximumenjoymentfrom
this
new
addition
to
yourhome.
Pleasereadtheseoperatinginstructionscarefully,
andbe
sure
to
keepthemhandy
for
convenient
reference.
Contents
•
For
UnitedKingdom
2
•Suggestions
for
Safety
3
•Accessories
4
•Connections
4
•Front
PanelControls
and
Functions
5
•Operation
7
•TroubleshootingGuide
11
•Maintenance
11
•Technical
Specifications
11
For
UnitedKingdom
("EB"
areacodemodelonly)
The
"EB"indication
is
shown
onthe
serialnumbertag.
Important
THE
WIRES
IN
THISMAINSLEAD
ARE
COLOURED
IN
ACCOR-
DANCE
WITH
THE
FOLLOWINGCODE.
BLUE:NEUTRAL
BROWN:
LIVE
Thisapparatus
was
produced
toBS
800.
As
the
colours
ofthe
wires
inthe
mainslead
of
thisapparatus
may
not
correspondwith
the
colouredmarkingsidentifying
the
terminals
in
yourplugproceed
as
follows.
The
wirewhich
is
colouredBLUE
must
be
connected
tothe
terminalwhich
is
markedwith
the
letter
N
or
colouredBLACK.
The
wirewhich
is
colouredBROWNmust
be
connected
tothe
terminalwhich
is
markedwith
the
letter
Lor
colouredRED.
Under
no
circumstancesmusteither
ofthe
abovewires
be
connected
tothe
earthterminal
ofa
three
pin
plug.
-2-

Suggestions
for
Safety
„
*'
•Usea
standard
AC
walloutlet
1.
Use
from
anAC
powersource
of
highvoltage,such
asfor
an
air
conditioner,
is
verydangerous.
There
isthe
possibility
that
a
fire
might
be
caused
by
making
such
a
connection.
2.
A DC
powersourcecannot
be
used.
Be
sure
to
check
the
powersourcecarefully,especially
ona
ship
or
otherplacewhere
DCis
used.
•
Grasp
the
plugwhendisconnecting
the
power
supplycord
1.
Wet
hands
are
dangerous.
A
dangerouselectricshock
may
result
ifthe
plug
is
touched
by
wet
hands.
2.
Neverplaceheavyitems
ontopofthe
powersupplycord,
and
neverforce
itto
bendsharply.
•AC
outlet
on
rearpanel
(not
equipped
for
some
countries)
1.
Any
equipmentconnectedhereshouldhave
the
specified
power
consumption
or
less.
Thisoutlet
is
exclusively
forthe
connection
of
otheraudio
equipment,such
asa
tapedeck.
Be
sure
the
powerconsump-
tiondoes
not
exceed
the
wattagespecifiednear
theAC
outlet.
2.
Neverconnectotherelectricalappliances,such
asan
iron
or
toaster.
If
appliancewith
a
largepowerconsumption
is
connected,
an
accidentmightoccur
asa
result
of
overheating.
•
Place
the
unitwhere
it
will
be
wellventilated
Place
thisunit
at
least
10
cm
(4")awayfromwallsurfaces,etc.
•
Avoid
places
such
asthe
following:
In
directsunlight
orin
otherplaceswhere
the
temperature
is
high.
In
placeswherethere
is
excessivevibration
or
humidity.
Such
conditionsmightdamage
the
cabinetand/orothercompo-
nent
parts
and
therebyshorten
the
unit'sservicelife.
CAUTION!
DO
NOT
INSTALL
OR
PLACE
THIS
UNIT
INA
BOOK-
CASE,
BUILT
IN
CABINET
ORIN
ANOTHER
CONFINED
SPACE
IN
ORDER
TO
KEEPWELLVENTILATEDCON-
DITION.
ENSURETHATCURTAINS
ANDANY
OTHER
MATERIALS
DONOT
OBSTRUCT
THE
VENTILATION
CONDITION
TO
PREVENTRISK
OF
ELECTRICSHOCK
OR
FIREHAZARD
DUETO
OVERHEATING.
.
•Be
sure
to
place
the
unit
ona
flat,levelsurface
If
the
surface
is
inclined,
a
malfunction
may
result.
•
Neverattempt
to
repair
or
reconstructthisunit
A
serious
electric
shock
might
occur
if
this
unit
is
repaired,
disassembled
or
reconstructed
by
unauthorizedpersons,
orifthe
internal
parts
are
accidentallytouched.
•
Takeparticularcare
if
children
are
present
Never
permitchildren
toput
anything,especiallymetal,inside
this
unit.
A
seriouselectricshock
or
malfunctioncouldoccur
if
articles
such
as
coins,
needles,
screwdrivers,etc.
are
inserted
through
the
ventilationholes,etc.
of
thisunit.
•If
water
is
spilled
onthe
unit
Be
extremelycareful
if
water
is
spilled
onthe
unit,because
a
fire
or
seriouselectricshockmightoccur.Immediatelydisconnect
the
power
cordplug,
and
consultwithyourdealer.
•
Avoidspray-typeinsecticides
Insecticidesmightcausecracks
or
"cloudiness"
inthe
cabinet
and
plasticparts
of
thisunit.
Thegas
used
in
suchspraysmight,
moreover,
be
ignitedsuddenly.
•
Never
use
alcohol
or
paintthinner
These
and
similarchemicalsshouldnever
be
used,becausethey
mightcauseflaking
or
cloudiness
ofthe
cabinetfinish.
•
Disconnect
the
powersupplycord
ifthe
unit
will
notbe
used
fora
long
time
If
the
unit
is
left
fora
longtimewith
the
power
ON,
thiswill
not
only
shorten
its
usefuloperationlife,
butmay
alsocauseothertroubles.
•If
troubleoccurs
If,
duringoperation,
the
sound
is
interrupted
or
indicators
no
longer
illuminate,
orif
abnormalodor
or
smoke
is
detected,immediately
disconnect
the
powercordplug,
and
contactyourdealer
oran
AuthorizedServiceCenter.
NORSK
ADVARSEL!
APPARATET
MA
IKKE
PLASSERES
I EN
BOKHYLLE,
ET
INNEBYGGET
KABINETT
ELLER
ET
ANNETLUK-
KET
STEDHVORVENTILASJONSFORHOLDENE
ER
UTILSTREKKELIGE.
S0RG
FORAT
GARDINERELLER
LIGNENDEIKKEFORVERRERVENTILASJONSFOR-
HOLDENE,
SA
RISIKO
FOR
ELEKTRISKSJOKKELLER
BRANN
FORARSAKET
AV
OVERHETING
UNNGAS.
SUOMI
VAROITUS!
ALA
ASENNA
TAI
LAITA
TATA
LAITETTA
KABINET-
TITYYPPISEEN
KIRJAKAAPPIIN
TAI
MUUHUN
SULJETTUUN
TILAAN,
JOTTA
TUULETUS
ONNISTUI-
Sl.
VARMISTA,
ETTAVERHO
TAI
MIKAAN
MUU
MATE-
RIAALI
El
HUONONNATUULETUSTA,JOTTA
VALTETTAISIIN
YLIKUUMENEMISESTA
JOHTUVA
SAHKOISKU-
TAI
TULIPALOVAARA.
-3-

Accessories
.
•
Stereoconnectioncables
.2
•AC
powersupply
cord
1
Note:
The
configuration
oftheAC
powersupplycorddiffersaccording
to
area.
Connections
Make
connections
inthe
numberedsequence
by
using
the
includedcables
|T1
Connect
the
stereo
connectioncables.
The
illustrationbelowshows
an
example
of
connectionsmade
whenthisunit
is
combinedwith
a
Technicselectroniccomponent
system,
and
showsonly
the
connections
tobe
made
toand
from
thisunit
in
thatcombination.
\2\
Connect
theAC
power
supply
cord.
TotheAC
outlet
ofthe
audioequipment,
or
household
AC
outlet.
Note:
The
configuration
ofAC
powersupplycorddiffersaccording
to
area.
Q
Connectthiscordonly
after
all
othercables
and
cordshave
been
connected.
If
the
cord
istobe
connected
tothe
household
AC
outlet,
cutoff
and
dispose
ofthe
plug
and
replacewith
a
suitable
plug.
(Refer
to
"ForUnited
Kingdom".)
@Fita
suitableplug
toanAC
powersupplycord.
/
Household
AC
[7r\l
,'X
^
outlet
EZl
*??~
Amplifier
(notincluded)
MONITOR
AC
OU
I-TAPE1T
r-j-
REC
PLAY
I—
—
OUT
BACK
0
I
<a
TLET
T|
P
Thisunit
|1
I
Stereo
connection
A
A
cables(included)
r
TAPE
-i
•1
REC
OUT
PLAYBACK
|L)
@-,
H
©-
-t
LINE
(fl
IN
)
-o
LINE
(
OUT
5)
-O
•
—
|
1
o
1
o |
V
vL—
HI
Stereoconnection
Tape
deck
^T^T
cables
<not
included)
(not
included)
((
5)
d
1
4
a
LINE
IN
LINE
OUT
(3
(3
4-

Front
Panel
Controls
and
Functions
;
fbdunicS
SlBreo
Gra^ic
equalizer
SH-GE70
II
1,1
i-^n
Control
section
Power
"standby
c!)/on"
switch
(power
JL
standby
(!)
-.
on)
Thisswitchswitches
ONandOFFthe
secondary
circuit
power
only.
The
unit
isinthe
"standby"conditionwhenthisswitch
is
set
tothe
standby
(!)
position.Regardless
ofthe
switch
setting,
the
primarycircuit
is
always
"live"
as
long
asthe
power
cord
is
connected
toan
electricaloutlet.
•"Power-through"
function
Discs,
radiobroadcasts,etc.
canbe
heardeven
ifthe
power
of
thisunit
is
switched
to
standby.
Note,
however,that
the
powerplugshould
be
left
connected
totheAC
outlet.
Equalizer
level-control
buttons
(equalizer
levelcontrol)
Thesebuttons
are
used
for
adjustment
ofthe
equalization
level
ofthe
left
channel
and
rightchannelsimultaneously.
Upper
row:Thesebuttons
are
used
to
increase
the
level
of
eachsoundrange(frequencyrange).
Lower
row:Thesebuttons
are
used
to
reduce
the
level
of
eachsoundrange(frequencyrange).
Memory
mode-selectbutton
(memo
mode)
This
button
is
used
to
select
the
equalizationmemorymode
to
be
used.
manual:
Select
thismode
to
program
a
desired
curve
to
the
unit'smemory
orto
retrieve
a
curvethat
you
have
programmed.
fixed:
Selectthismode
to
retrieve
a
curvethat
was
originally
pre-programmed
tothe
unit'smemory.
Memory
button(memory)
This
button
is
used
to
program
the
equalizationcurveinto
the
memory.
Equalization
mode-selectbutton
(EQ
on/off)
This
button
is
used
to
switch
the
equalizationcorrection
function
"EQon"and
"off".Eachtime
a
button
is
pressed,
the
modechangesalternately
tooneorthe
other
ofthe
following
modes.
EQ
on:
Selectthismode
to
make
an
equalizationcorrec-
tion.
EQ
off:Selectthismode
ifno
equalizationcorrection
is
desired.
Note
that
the"EQon"
mode
is
automatically
selected
ifa
preset-memorybutton
oran
equalizerlevel-controlbutton
is
pressedwhilethisbutton
issettothe"EQ
off"mode.
[6]
Reverse
button
(reverse)
This
button
is
used
to
reverse
the
equalizationcurveshown
in
the
display.
[7]
Display
mode-select
buttons
(display
mode)
These
buttons
are
used
to
select
the
equalization-level
displaymode
andanyofthe
threetypes
of
spectrumdisplay
modedescribedbelow.
•
Equalization-level
display
mode
EQ
level:Selectthismodewhen
you
want
to
display
the
equalizationlevel.
•
Spectrumdisplay
modes
(spectrum
analyzer)
bar:Selectthismodewhen
you
want
a
bar-type
display.
dot:Selectthismodewhen
you
want
a
dot-type
display.
peakhold:Selectthismodewhen
you
want
the
peak
to
be
held
inthe
display.
Preset-memory
buttons
([Tj-H)
These
buttons
are
used
to
program
an
equalizationcurveinto
the
memory,
orto
retrieve
a
curveoriginallyprogrammedinto
the
unit'smemory.
Recording
mode
selector
(EQrec
M.
off
m.
on)
on:
Setto
this
position
to
make
a
taperecording
ofa
radio
broadcast
ora
discwhilecontrolling
the
frequency
response.
off:
Setto
this
position
to
record
without
equalizer
correc-
tion.
Input
selector
(A
source
.•.
tape)
source:
Setto
thisposition
to
listen
tothe
radio
ora
compactdisc,etc.
tape:
Setto
thisposition
to
listen
toa
tapedeck
connected
tothe
back
of
thisunit.
-5-

Front
PanelControls
and
Functions
(continued)
full
range
displays
the
combinedlevel
of
allofthe
frequency
ranges.
Display
section
Equalization/Spectrumdisplay
The
followingequalization-leveldisplay
and
threetypes
of
spectrum
display
are
possible.
•
Equalization-leveldisplay
The
amount
of
correction
is
displayed
bya
series
of
lines
(=)
for
eachsoundrange(frequencyrange).
•
Spectrumdisplays
Bar-type
display
Thisdisplay
canbe
used
to
show
the
outputstrength
for
each
soundrange(frequencyrange),
andto
show
the
output
strength
of
sound
forall
ranges(fullrange)
bya
bar-type
display.
Dot
display
Only
the
upper
two
parts
ofthebar
display
are
shown,thus
making
the
strength
ofthe
sound
for
eachsoundrangeeven
easier
to
see.
Peak-hold
display
The
peaksoundvalue
of
eachsoundrange
is
held
onthe
display
for
about
two
secondsafter
it
occurs.
+«
96-
-
ii
Note:
If
an
equalizationlevel-control
orthe
memory-modeselector
or
a
preset-memorybutton
is
pressedduring
any
displayother
than
the
equalization-leveldisplay,
the
equalization-level
display
will
be
shown
for
about
five
seconds,
afterwhich
the
former
displaywillreturn.
\B\
Equalization-presetindicators
(H]-®)
The
indicatorcorresponding
tothe
pressedpreset-memory
buttonwillilluminate.
manual:Indicates
an
equalizationcurvethat
you
program-
med
into
the
memory.
fixed:Indicates
oneofthesix
equalizationcurvesthat
were
originallyprogrammedinto
the
memory.
lC\
Equalization-memoryindicator(memory)
Thisindicatorilluminateswhen
the
memorybutton
is
pressed,
thusindicatingthat
an
equalizationcurve
canbe
programmed
into
the
memory.
\D\
Memory-modeindicators
fixed:
Indicatesthat
oneofthe
equalizationcurvesthat
were
originallyprogrammedinto
the
memory
can
be
retrieved.
manual:Indicatesthat
an
equalizationcurvethat
you
programmedinto
the
memory
canbe
retrieved.
[E]
Equalization-modeindicators
EQ
on:
Indicatesthat
the
equalizationeffect
has
been
switched
ON.
EQ
off:Indicatesthat
the
equalizationeffect
has
been
switchedOFF.
[F]
Reverseindicator(reverse)
Thisindicatorilluminateswhen
the
reversebutton
is
pressed,
thus
indicating
that
an
equalizationcurve
is
reversed.Note,
however,
thattherewill
beno
illumination
ifthe
equalization
curve
is
flat.
-
-
-
6-
Operation
Technics
si.
Equalization-modeindicator
Recording
mode
selector
1
>
1
~
5
6
To
adjust
tothe
desiredtonequality
1
Switch
the
amplifier
ONand
Reduce
the
volumelevel
of
the
amplifier.
Set
the
amplifier'stonecontrols
tothe
centreposition,
and
set
the
superbassswitch
(if
equipped)
totheoff
position.
Adjust
tothe
desired
sound.
When
the
equalizerlevel-controlbuttoncorresponding
to
the
frequency
tobe
adjusted
is
pressed,
the
equalization
levelchanges
in2 dB
steps.
Setthe
tape-monitorselector
ofthe
amplifier
to
"Tape"
position.
(Refer
to
note)
(Refer
tothe
operatinginstructions
ofthe
amplifier
for
furtherdetails.)
Switch
ONthe
powerswitch.
Press
the
Inputselectorbutton.
source:
Setto
thisposition
to
listen
tothe
radio
ora
compactdisc,etc.
tape:
Setto
thisposition
to
listen
toa
tapedeck
connected
tothe
back
of
this
unit.
Switch
ONthe
equalizationmode-selectbut-
ton.
(The
"EQ
on"
equalization-modeindicatorwillilluminate.)
Press
the"EQ
level"buttons.
(The
equalization-leveldisplaywillappear.)
8
Adjust
the
volumelevel
ofthe
amplifier.
After
completing
the
adjustmentselect
the
desireddisplay
by
pressing
the
displaymode-selectbutton:
"bar",
"dot"
or
"peak
hold".
Notes:
•To
listen
or
recordwithout
the
equalization
effect,
either
press
the
equalizationmode-selectbutton
(tothe
"EQ
off"setting)
or
switch
OFFthe
power
ofthe
graphicequalizer.
•Donot
attempt
to
adjust
the
equalizationlevelduringrecording.
Recording
modeselector
on:Setto
thisposition
to
make
a
taperecording
ofa
radio
broadcast
ora
discwhilecontrolling
the
frequency
response.
off:
Setto
thisposition
to
recordwithoutequalizercorrection.
Note:
The
equalizationswitchmust
besettothe
"on"position
and
then
the
inputselectormust
besettothe
"source"
position,
otherwise
the
frequencyresponsecannot
be
controlled.
This
onlyworks
for
tapedecksconnected
to
thisunit.
Notes:
•Ifthe
amplifier
hasa
recording
mode
selector
andan
input
selector:
(Adjust
setting
as
shown
inthe
figure.)
O
O O D
ODD
D O
(rec
selector)
phono
or
tuner
•
If
your
amplifier
has
terminals
(GRAPHICEQ/EXTERNAL)
for
connection
of
other
equipment,
useofthe
recording
selector
is
unnecessary.
-7-

Operation
(continued)
1
1
Equalization-preset
Mai
indicators
•
"echrucs
DOWW
i
|
-
»
;
i
—
i
—
i
-
i
"•-
i
-
l—l — l - l
"•"•
l
•>-
^,,
_J
1
1
1
;
i
•
S
-•
USfcH,
l^*-^
1
EOOC.B3B
I
rw*»
1
€Q
Ml
1
<
Reverse
button
2
C
yj
lual
Rever
1
Equalization-memory
indicator
f
1
£Z
•
i
.
i
.
_j
9
Mefncry
Resets
]
„«,
se
indicator
5
1
1
To
program
an
equalization
curve
into
the
memory
As
many
assix
curves
canbe
programmedinto
and
retained
by
the
memory
of
thisunit.
Itis
convenient
to
programthosecurves
that
are
frequentlyused.
1
Adjust
tothe
desired
equalization
curve.
(Adjust
by
following
the
steps
in"To
adjust
tothe
desired
tone
quality"
on
page
7.)
2
Press
the
"memory"button.
(The
equalization-memory
indicator
will
illuminate.)
•To
cancel
memory
programming,
press
the
memory
button
once
again.
3
Press
oneofthe
preset-memorybuttons
(Q]-[6]),
whichever
istobe
used
to
make
the
programming
tothe
memory.
(The
correspondingequalization-presetindicator
will
illu-
minate,
andthe
programmingwill
be
made.)
Note:
If
a new
curve
is
programmed
fora
number
for
which
a
curve
is
alreadyprogrammed
inthe
memory,
the
previouslyprogrammed
curvewill
be
erased.
•To
produce
a
reversed
equalization
curve
This
feature
canbe
used,
for
example,
to
listen
tothe
original
soundcharacteristics
ofa
tapethat
has
beenrecordedwithspecial
equalizationeffects
by
using
the
graphicequalizer.
First,
display
the
curve
usedwhen
the
recording
was
made.
O
Then
press
the
"reverse"button.
The
reverseindicatorwillilluminate.
M
In
thisway,
youcan
instantlyproduce
a
curvethat
isthe
opposite
of
the
curve
being
displayed.
The
playbacksoundwillthen
be
corrected
by
thiscurve,
and
will
become
a
flatcharacteristic.
•When
this
button
is
pressed
again,
the
curvereturns
to
previous
condition.
-
-8-

Equalization-preset
indicators
Memory-mode
indicators
(
I
1
Technics
CZ3
s»,«,
I
Graphic
Equalizer
SH-GE70
.1111.
—
_.
1
^
I
^
1
™
j
nm'Jt
sw
1
I
i
i
i
;
IP=
—
'
1
-
B
-
m
- -
-1
-|-|-..-l-
:
o*»,
\
\
™
I—
—
—
•—
—
"^—
—
—
—
—
——
——
—
—
—
—
—
—
—
—
—
———————
—
—
—
—
1
i
i
-
™-|
, |
,
| ,
~
1
EOon/oH
1
mwH
1
EOWM
f
•
1
>
T
I,,,,
**
^~,
e
SMemav
Piesets
EZZD
£==11
J
To
retrieve
equalization
curves
from
the
memory
This
unit
has
beenpre-programmedwith
six
types
of
typical
equalizationcurveswhich
are
applicable
to
certainstyles
of
music.
1
Press
the
"memomode"button.
manual:Selectthismodewhen
you
want
to
retrieve
a
equalizationcurvethat
you
haveprogrammed
intomemory.
fixed:
Selectthismodewhen
you
want
to
retrieve
a
equalizationcurvethat
was
originallyprogram-
med
intomemory
asa
permanent("fixed")curve.
(Thememory-mode
indicator
willindicate
the
selection
made.)
Press
oneofthe
preset-memorybuttons,
whichever
corresponds
tothe
curve
tobe
retrieved.
(The
correspondingequalization-presetindicatorwill
illu-
minate.)
•While
inthe
"fixed"mode,
ifoneofthe
equalizerlevel-control
buttons
is
pressed,
the
unit
willautomaticallyswitch
tothe
"manual"
mode.
Note:
Curves
programmedinto
the
memorywill
be
retained
for
about
two
weeks
iftheAC
powersupplycord
is
unplugged.
If
curves
are
erased,theymust
be
programmedagain.Note,however,that
curves
originallyprogrammedbeforehandinto
the
unit'smemory
as
permanentcurves(the"fixed"curves)will
notbe
erased.
•
"MOSTRECENT"(recall)memory
The
lastposition
oftheEQ
levelcontrols(whether
in
memory
or
adjusted
manually)will
be
automaticallyenteredinto
the
memory
when
the
power
is
switchedOFF.When
the
power
is
switched
ON,
these
positionswill
be
recalled.
-9-

Operation
(continued)
^
.
"echoic
Dowef
L_
s
Stereo
Qfaphic
Equetoe,
SH-SE70
'*
1
1
II
•
;
:
:
:•.•_•-
1.1
B.
:
~
I
~
I
—
I
-
l
"»
l
—
l
-
l
~
I
-~
l - l
'-
I
—
l
i
SpBCPU"!
M»tft»
'*••
:
memo
moot
1
..
1
I
.l.l
1
'
1
'
1
'
|
«,,,„
|
_,
|
«..
:
:•:
:
.m.m.
:
•
l
>
l
.,
i
.
i
fcwo"
6oT
ww
0»W
IV*I
12
Memory
Besets
li
1
c=—
ii
1
1
Preset-memory
buttons
Equalizationcurvespre-programmed
to
thisunit
Thiscurve
canbe
used
toadd
"punch"
to
rock
and
other
music.
*1
X
-
,
«"»
._
.
_ . - - - -
:
; ;
=
;
=
"
~
:
"
~_
:
;
—
;
m,
no*.
4»»,
,.«.
J5m.
»H,
us.,.,
un.
i
Thiscurve
canbe
used
to
clarify
the
treblerange
of
jazz.
etc.
This
curve
canbe
used
to
listen
to
backgroundmusic,
etc.
ata
low
volumelevel.
|4|
Thiscurve
canbe
used
to
clarify
vocalmusic.
Thiscurve
canbe
usedwhenmakingtapes
to
listen
to
throughheadphones-stereounits.
Thiscurve
canbe
usedwhenmakingtapes
to
listen
to
through
a car
stereo.
-10-

Troubleshooting
Guide
Before
requestingservice
for
thisunit,check
the
chartbelow
fora
possiblecause
ofthe
problem
youare
experiencing.Somesimplechecks
ora
minor
adjustment
on
yourpart
may
eliminate
the
problem
and
restoreproper
operation.
If
youarein
doubtaboutsome
ofthe
checkpoints,
orifthe
remediesindicated
inthe
chart
donot
solve
the
problem,
refer
tothe
directory
of
Authorized
ServiceCenters(enclosedwiththisunit)
to
locate
a
convenientservicecenter,
or
consultyourTechnicsdealer
for
instructions.
Problem
No
sound.
Correction
isnot
possible
at
playback
(includingrecording.)
Probable
cause(s)
Incorrectconnection.
The
equalizationmode-selectbutton
issetto
"EQoff".
The
recordingmodeselector
ofthe
equalizer
is
set
tothe
"off"position.
The
input
selector
ofthe
equalizer
issettothe
"tape"
position.
Suggested
remedy
Refer
to
page
4 andtothe
Operation
Instructions
ofthe
amplifier.
Set
to
"EQ
on".
Set
ittothe
"on"
position.
Set
ittothe
"source"
position.
Maintenance
To
cleanthisunit,
usea
soft,
dry
cloth.
If
the
surfaces
are
extremelydirty,
usea
soft
cloth,dippedinto
a
soap-and-watersolution
ora
weakdetergentsolution.
Wring
the
clothwellbeforewiping
the
unit.
Wipe
onceagainwith
a
soft,
dry
cloth.
Never
use
alcohol,paintthinner,
or
benzine,
nora
chemically
treated
cloth
to
cleanthisunit.
Suchchemicals
may
damage
the
finish
of
yourunit.
Technical
Specifications
Frequencyresponse
(centerposition):
Maximum
output
voltage:
Ratedoutputvoltage:
Maximuminputvoltage:
Inputsensitivity:
Rated
totalharmonic
distortion:
Signal-to-noiseratio:
Inputimpedance:
Gain:
5Hz~100kHz(-3dB)
8V(1
kHz,
THD
0.03%)
1V
8V
(1kHz)
1V
0.005%
(20
Hz~20
kHz),
at
1 V
output
0.003%
(1
kHz)
at1 V
output
98dB/1
V,
DIN
45
500
47
kO
0±1dB
Equalization-level
controls:
Center
frequencies:
GENERAL
Power
supply:
Powerconsumption:
Dimensions(WxHXD):
Weight:
+
12dB—12dB
(7
frequency
ranges,
in2 dB
steps)
63
Hz,
160
Hz,
400
Hz,1
kHz,
2.5
kHz,
6.3
kHz,
12.5kHz
(For
UnitedKingdom)
AC
50/60
Hz,
230-240
V
(For
others)
AC
50/60
Hz,240V
11
W
(with
powerswitch
"standby";
6.5W)
430x102x280
mm
2.9kg
-11-

MatsushitaElectricIndustrialCo.,Ltd.
Osaka542-8588,Japan
RQT0527-2B
F0590B3078
Table of contents
Other Technics Stereo Equalizer manuals

Technics
Technics SH-8058 User manual

Technics
Technics SH-8075 User manual

Technics
Technics SH-8066 User manual

Technics
Technics SH-GE50 User manual

Technics
Technics SH-Z200 User manual

Technics
Technics SH-9010 User manual

Technics
Technics SH-8016 User manual

Technics
Technics SH-8020 - SERVICE User manual

Technics
Technics SH-9010 User manual

Technics
Technics SH-8066 User manual