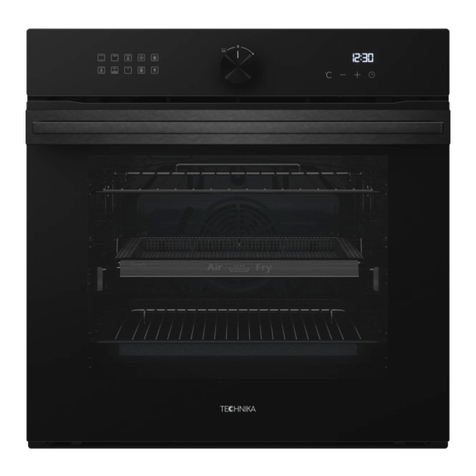
Technika T45COG Operation manual

Instructions for Use and Installation
Multifunction Oven
T45COG

CONTENTS
1. SAFETY PRECAUTIONS ................................................................................................................................ 3
2. WARNINGS...................................................................................................................................................... 4
3. DISPOSAL ....................................................................................................................................................... 5
4. HOW TO USE YOUR OVEN ........................................................................................................................... 5
5. STRUCTURE DIAGRAM ................................................................................................................................. 6
6. DESCRIPTION OF FRONT PANEL CONTROLS ........................................................................................... 6
7. PROGRAMM AND FUNCTIONS..................................................................................................................... 7
7.1 Time Setting.......................................................................................................................................... 7
7.2 Setting the current time......................................................................................................................... 7
7.3 Selecting the oven function ................................................................................................................... 7
7.4 Delay time ............................................................................................................................................. 7
7.5 Pause in the process of cooking ........................................................................................................... 7
7.6 Demo function ...................................................................................................................................... 8
7.7 Child lock............................................................................................................................................... 8
7.8 unlock ................................................................................................................................................... 8
7.9 Cooling fan system ............................................................................................................................... 8
7.10 lamps .................................................................................................................................................. 8
7.11 Other................................................................................................................................................... 8
8. OVEN FUNCTIONS ......................................................................................................................................... 9
8.1 Convection mode “ ” 1050-1250W............................................................................................... 9
8.2 Multi-cooking mode “ ” 2400-2850W ............................................................................................ 9
8.3 PizzaMode “ ” 2050-2450W ....................................................................................................... 9
8.4 Fast Cooking Mode “ ” 2400-2850W ............................................................................................ 9
8.5 Top heating element + Fan Mode “ ” 1400-1650W....................................................................... 9
8.6 Convection Mode “ ” 2350-2850W ............................................................................................ 10
8.7 Top heating element “ ” 1400-1650W ......................................................................................... 10
8.8 Defrost Mode “ ” 1050-1250W .................................................................................................... 10
9. CLEANING AND MAINTENANCE ................................................................................................................ 10
9.1 How toremove the oven door..............................................................................................................10
9.2 Replacing the oven Lamp....................................................................................................................11
10. INSTALLATION ............................................................................................................................................ 11
10.1 Before the Installation .......................................................................................................................11
10.2 Installation.........................................................................................................................................11
10.3 Installation of Built-in Ovens .............................................................................................................11
11. APPLIANCE CONNECTIONS ..................................................................................................................... 14
12. TECHNICAL SPECIFICATION .................................................................................................................... 15

We recommend that you read the instructions in this owner’s manual carefully before use for
the best performance and to extend the life of your appliance. It will provide you with all the
information you need to ensure its safe installation, use and maintenance. Retain this owner’s
manual for future reference.
1. SAFETY PRECAUTIONS
When handling the appliance, we recommend you always use the handles recessed into
the sides of the oven to prevent personal injury or damage to the appliance.
To ensure your safety, all electrical appliances must be installed or service by qualified
persons. If the supply cord is damaged, it must be replaced by the manufacturer, its
service agent or a similarly qualified person in order to avoid a hazard.
DO NOT use harsh abrasive cleaners or sharp metal scrapers to clean the oven door glass
since they can scratch the surface, which may result in shattering of the glass.
When the oven is not in use please make sure the oven door has been closed and the
the knobs are in the OFF position.
Only use the appliance to cook food and nothing else.
To maintain the efficiency and safety of this appliance, we recommend that you do the following:
Always call the Technika service department if there are any faults with your appliance.
Always use original spare parts available from Technika.
This appliance is designed for non-commercial, household use and it must not be altered in
any way.
This appliance can only be used safely when it is correctly connected to an efficient earthing
system in compliance with current electrical safety standards.
During use, the appliance becomes hot. Care should be taken to avoid touching heating
elements inside the oven. WARNING: Accessible parts will become hot when in use.
To avoid burns and scalds, children should be kept away.
This appliance is not intended for use by persons (including children) with reduced physical,
sensory or mental capabilities, or lack of experience and knowledge, unless they have been
given supervision or instruction concerning use of the appliance by a person responsible for
their safety.
Young children should be supervised to ensure that they do not play with the appliance.
DO NOT use a steam cleaner to clean the appliance.
Packaging items such as plastic bags, polystyrene, nails, etc. are potentially dangerous,
and therefore appropriate measures must be taken to prevent children and the disabled
from coming into contact with them.
Always grip the oven door handle in the centre.
Disconnect the appliance from the electrical mains if it is not functioning properly and
before cleaning or performing maintenance. Allow it to cool completely before cleaning.
Use oven gloves to place cookware in the oven or when removing it.
Check that the appliance has not been damaged immediately after it has been unpacked.
Technika will not accept any liability as a result of any damage due to incorrect installation
or improper use.
An authorised person must be contracted to replace the temperature probe if it is damaged.
The probe is part of the thermostat. Only use the temperature sensing probe recommended
for this oven.
Install the appliance according to these installation instructions and any local requirements.

2. WARNINGS
Accessible parts may become hot during use, children should be kept away.
In order to avoid electric shock, please make sure the oven has been shut off before
replacing the lamp.
Only use original accessories.
Do not touch the appliance with wet parts of the body.
Do not use the oven while barefoot.
Do not pull and push oven or supply cord, this may cause the socket to be disconnected.
Improper or dangerous operations are forbidden.
Never obstruct vents provided for ventilation and heat dispersal.
Do not let the power cord of other appliances touch the heated parts of oven.
The oven should not be exposed to rain or direct sunlight.
Do not use the oven for storage purposes
Do not use flammable liquids or aerosols near the oven.
For dealers and users who fail to comply with these instructions and warnings and replace
oven parts without using original accessories causing personal injury or property damage,
the manufacturer will not be responsible for any legal liability.
Once installed do not allow the supply cord to touch hot parts of the oven or come into
contact with other heated appliance.
In order to avoid electric shock, do not immerse supply cord, plug or other parts into water.
In order to avoid fire or explosion, combustibles (curtains, cloth, wallpaper and others),
packaging and aerosols should be removed from the vicinity of the appliance.
Do not place paperboard, plastic or other similar items in the oven. When the oven is not
being used, everything should be removed except provided accessories.
Do not cover the drip tray or other parts with foil since it can result in overheating.
In order to avoid electric shock, never use a wire brush to clean the oven since pieces of
metal can touch live parts.
Turn off and unplug the oven when it is not going to be used for an extended period.
The oven has an impact resistant, safety glass door which can resist more impact than
common glass. If the toughened glass is shattered, other parts may have sharp edges.
Avoid hand contact with the broken glass and metal edges of the door. Please contact
your local service agent for a replacement door.
Do not lean on the opened oven door. This may damage the oven, especially in the hinge
area. The door can bear a maximum weight of 8 kg.
Technika Service Department must be contacted...
If in doubt about the operation of the appliance.
If in doubt about the soundness of the appliance after removing it from its packaging.
If the power supply cable has been damaged or needs to be replaced.
If the appliance requires a service.
If you need spare parts.

3. DISPOSAL
4. HOW TO USE YOUR OVEN
4.1 The first time you use your appliance, we recommend that set the thermostat to the
highest setting and leave the oven on for about half an hour with nothing in it, with the oven
door shut. Then open the oven door and let the room air in. The odor that is often detected
during this initial use is due to the evaporation of substances used to protect the oven
during storage and until it is installed.
4.2 Place the dripping pan provided on the bottom shelf of the oven to prevent any sauce
and/or grease from dripping onto the bottom of the oven only when grilling food or when
using the rotisserie (only available on certain models). For all other types of cooking, never
use the bottom shelf and never place anything on the bottom of the oven when it is in
operation because this could damage the enamel. Always place your cookware (dishes,
aluminum foil, etc. etc.) On the grid provided with the appliance inserted especially along
the oven guides.
4.3 After cooking food contains sugar and salt, please clean your oven promptly, or these will
attach to the pan surface.
4.4 You can place the shelf in two side guide rail .Put a slice of bread directly on the rack
(From down to third rail); Place specific small pan on the rack, food in the pan
4.5 Use pan to roast high temperature food such as meat, poultry, fish, others. Place shelf on
the pan, when using both pan and grill.
By ensuring this product is disposed of correctly, you will help prevent potential
negative consequences for the environment and human health, which could otherwise
be caused by inappropriate waste handling of this product.
The symbol on the product indicates that this product may not be treated as household
waste. Instead it shall be handed over to the applicable collection point for the recycling
of electrical and electronic equipment.
Disposal must be carried out in accordance with local environmental regulations for
waste disposal.
For more detailed information about treatment, recovery and recycling of this product,
please contact your local city council office.

5. STRUCTURE DIAGRAM
6. DESCRIPTION OF FRONT PANEL CONTROLS
PT1 This button is used to setup time, choose cooking time length, high and low temperature.
PT2 This knob is for setting operation and the start and end of programmer.
DSP1 This displays the time of programmer executing and clock
DSP2 This displays temperature and types of foods.
DSP3 Functions indication, which displays all the optional functions.
DSP4 Symbol indication, which displays all the optional symbols.
Functions Description
Convection Defrost
Top and bottom heating elements Convection Clock
Bottom heating element+ Convection Mode Child Lock
Top and bottom heating elements+ circulation fan Working Time
Top heating element+circulation fan Delay Time
Top and bottom heating elements Heat up
1. Control Panel
2. Lamp
3. Grill
4. Baking tray
5. Door

Top heating element Temperature Reached
7. PROGRAMM AND FUNCTIONS
7.1 Time Setting
:
Turn PT1 set hour clock, set hours later, click the PT1 set minutes, rotating PT1 set clock
minutes, then click on the PT1 confirmation.
7.2 Setting the current time
In standby state, press PT1 until DSP1 scintillation display has set the clock, repeat 7.1
operation modification clock
7.3 Selecting the oven function
In standby state, press the PT2, DP3 will light, turn PT2 to left and right to choose a mode.
Cooking and temperature reached symbol light, The screen displays
30:00 and 180 ℃.
,the appliance will switch to select roast time mode, turn PT1 to left and
right to select roast time ,89 hours 59 minutes can be set as maximum.
temperature mode, turn PT1to left and
right to decrease or increase temperature, You can choose from 110℃to 250℃
Press PT1 again after selecting roast time and temperature ,it will switch to select delay time
mode, the delay time symbol light(For further information about delay time setting see
After pressing PT2(start/pause key),the oven starts working, and baking time countdown
displays, the :light, select functions symbol and heating up symbol is flashing.
7.4 Delay time
When PT1 is pressed to define a delayed start time the corresponding light starts to
change the delayed start time. Press PT2 to validate the delayed start time.
Press PT2 for 3 seconds if you want to cancel the selected function.
7.5 Pause in the process of cooking
You can stop the cooking process at any time by pressing PT2, if you wish, at this time you
can:
Adjust cooking time, temperature and functions
Cancel the process by pressing PT2 for 3 seconds
Modifying Parameters
The operating parameters (time, temperature.) can only be modified when the cooking process
has been interrupted. Proceed as follows:
Turn PT2 to the right or left to change the function.
Press PT1 to activate the parameter modification mode indicator starts to blink. Turn
PT1 to the right or left to change the remaining cooking duration
Press PT1 to validate and the next parameter light starts to blink. Proceed as described in
the active function chapter to modify the remaining parameters.
Press PT2 to continue the cooking process.
stop, the buzzer will ring

flashing. The oven will go into
standby mode after 5 minutes.And you can also press PT2 let the oven into standby mode.
7.6 Demo function
Oven in OFF (closed) mode, don't show the c
PT1 until DSP1, appear ON the DSP2 OFF SHO, namely demo function inactive, rotate PT1
activation demo function ON SHO, the press PT2 determine activation demo function
Demo function (banned all heating components work, only furnace lamp, cooling fan work),
normal use steam furnace, to set up OFF SHO
Activate demo function (ON SHO), steam furnace in any function of cooking is started, the
screen will display ON SHO and the current setting function display flashing display, every 5
seconds a flashing
Note: Demo function has the memory function, the power in the circumstances, to power
on safety lock function or continues to work.
7.7 Child lock
Oven in OFF (closed) mode, don't show the clock, show only clock mark
hold PT1 until DSP1, appear on the DSP2 OFF SHO, then click the PT1 until DSP1, appear on
the DSP2 OFF bLOC.
Turns PT1 can choose safety lock activation function ON bLOC and closing OFF bLOC,
when DSP1, DSP2 display ON bLOC, press the PT2 confirm activation child lock, DSP4 display
then return to the interface of the before.
7.8 unlock
Temporary release: hold PT1 DSP4 until the symbol sappear, at this time can
undertake any function operation and parameter modification, 2 minutes later, and into the safety
lock mode. Temporary release 2 minutes no matter in standby state or working status, 2 minutes
right after automatic into safety lock mode
Permanent unlock: into the safety lock mode, in accordance with this chapter introduces the
operation method, carries on the permanent unlock
7.9 Cooling fan system
The attached cooling system of a small oven, but start small oven function, the system is
fixed on the top plate temperature of 65 degrees after operation. Fan run of airflow along the top
of the door out, even shut down the small oven, the system will continue to work for a moment.
Note: when the top plate temperature below 65 ℃tubular fan to stop working.
7.10 lamps
The furnace lamp always light when the oven is operation except pause.
7.11 Other
With selecting or pause status, if there is no operation in continuous 3 minutes, the oven will
go to standby status automatically.
Shut off status: indicators including functions, DSP1, DSP2, will go out, clock symbol only
light.
Standby status: functions symbol go out, lock indicator only light, DSP1 show the current
time
Waiting to choose functions status: functions symbol go out, lock indicator only light, DSP1

show the current time
Choose functions status: the function symbol you choose will light, and corresponding
indicator light, DSP1, DSP2 show default parameters under function you choose.
Modifying Parameters status: function symbol is not flashing, and corresponding indicator
lights, DSP1 and DSP2 are flashing
Operation status:Corresponding function is flashing,DSP1 and DSP2 are not flashing.
End status: function symbol, DSP1, DSP2 flashing, corresponding indicator light.
Rules of button: if there is pressing keys operations whether effective or not, the key will
light .It will go out if you stop operations after 5 seconds.
8. OVEN FUNCTIONS
8.1 Convection mode 1050-1250W
The temperature can be adjusted between 110℃and Max and the longest time is 90 minutes.
The back heating elements and fan will come on to ensure the heat remains constant uniform
throughout the oven. The model is suitable for cooking delicate food, such as cream puff, sweet
biscuit, sponge cake, etc.
8.2 Multi-cooking mode 2400-2850W
The temperature can be adjusted between 110℃and Max. and the longest time is 90
minutes. The top 、bottom and back heating elements, as well as the fan ,will come on
alternately .Since the heat remains constant and uniform throughout the oven ,the air cooks and
browns food uniformly over its entire surface. so food can be put in different level to roast, The
model is suitable for cooking bread or other foods which need long time to cook, such as lasagna,
panettone, chicken and potatoes.ect.In addition, this mode will turn down the temperature to
avoid water losses and make barbecue more fragrant crisp. This heating mode is particular
suitable for cooking fish You can add right amount of condiment to keep fish tasted great.
8.3 Pizza Mode 2050-2450W
The temperature can be adjusted between 110℃and Max. And the longest time is 90
minutes. The bottom and back heating elements, as well as the fan, will come on. The
combination of these functions can make the oven temperature lifts quickly since the oven will
provide a lot of energy, the bottom and back heating elements will come on alternately when
keeping warm status, the pizza mode is ideal for foods requiring high temperatures to cook, like
pizzas and large roasts.
8.4 Fast Cooking Mode 2400-2850W
The temperature can be adjusted between 110℃and Max. And the longest time is 90
minutes. The top 、bottom and back heating elements, as well as the fan ,will come on
alternately ,guaranteeing constant heat distributed uniformly throughout the oven. This mode is
especially recommended for cooking pre-packed food quickly (as pre-heating is not necessary),
such as for example: frozen or pre--.
8.5 Top heating element + Fan Mode 1400-1650W
The temperature can be adjusted between 110℃and Max and the longest time is 90 minutes.
The top elements and the fan will come on. The combination of these functions can heat the
oven through the air circulation and improve unidirectional heat divergence effect. This is help to
avoid burning the surface of food and to let energy into food internal. This mode is recommended
for cooking shish kebab, sausage, sibs, lamb chop, etc.This mode must close oven door to cook.

8.6 Convection Mode 2350-2850W
The temperature can be adjusted between 110℃and Max and the longest time is 90 minutes.
The top and bottom heating elements come on .This is the classic ,traditional type of oven which
has been perfected ,with heat distribution and reduced energy consumption .The convection
oven is still unequalled when it comes to cooking dishes made up of ingredients , For example:
cabbage with ribs ,Spanish style cod ,Ancones style stockfish ,tender veal strips with
rice ,etc .Excellent results are achieved when preparing veal or beef-based dishes as well
(braised meats ,stew ,goulash, wild game ,ham etc. )which need to cook slowly and basting or
the addition of liquid .It remains the best system for baking cakes as well as fruit and cooking
using covered casserole dishes for oven baking .When cooking in convection mode ,only use
one dripping pan or cooking rack at a time ,otherwise the heat distribution will be uneven .Using
the different rack heights available, you can balance the amount of heat between the top and the
bottom of the oven .Select from among the various rack heights based on whether the dish
needs more or less heat from the top .
8.7 Top heating element 1400-1650W
The temperature can be adjusted between 110℃and Max and the longest time is 90 minutes.
The extremely high and concentration toleration will make your food crisp outside and soft inside.
We recommend that this mode is suitable for cooking food need high temperature to heat food
surface, like: steak, veal, steak, fillet, hamburger, etc.
8.8 Defrost Mode 1050-1250W
The fan located on the bottom of the oven makes the air circulate at room temperature
around the food .This is recommended for the defrosting of all types of food ,but in particular for
delicate types of food which do not require heat ,such as for example :ice cream cakes ,cream or
custard desserts ,fruit cakes .By using the fan ,the defrosting time is approximately halved .In the
and setting the temperature to 45℃-75℃.
9. CLEANING AND MAINTENANCE
Before cleaning your oven, or performing maintenance, disconnect it from the power
supply.
To extend the life of your oven, it must be cleaned frequently, keeping in mind that:
The enameled or stainless steel parts should be washed with lukewarm water without using
any abrasive powders or corrosive substances which could ruin them ;Stainless steel could get
stained .If these stains are difficult to remove, use special products available on the market. After
cleaning, it is advisable to rinse thoroughly and dry.
The inside of the oven should preferably be cleaned immediately after use, when it is still
warm, with hot water and soap; the soap should be rinsed away and the interior dried
thoroughly. Avoid using abrasive detergents (for example cleaning powders, etc) and
abrasive sponges for dishes or acids (such as lime scale
damage the enamel .If the grease spots and dirt are particularly tough to remove, use a
special product for oven cleaning, following the instructions provided on the packet. Never
use a steam cleaner for cleaning inside of oven.
Never line the oven bottom with aluminum foil, as the consequent accumulation of heat could
compromise the cooking and even damage the enamel.
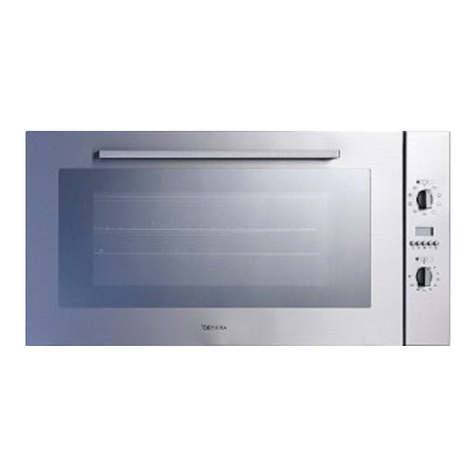
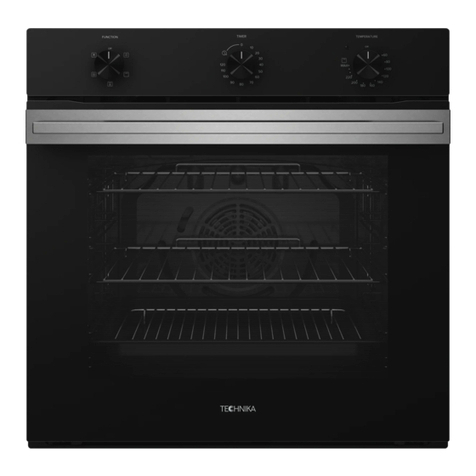
Clean the glass door using non-abrasive products or sponges and dry it with a soft cloth.
9.1 How to remove the oven door
For a more thorough clean, you can remove the oven door.
Proceed as follows:
1)Open the door fully.
2)Lift up and turn the small levers situated
On the two hinges.
3)Grip the door on the two external sides; shut it slowly but not completely.
4)Pull the door towards you ,pulling it out of its seat ;
Reassemble the door by following the above procedures backwards.
9.2 Replacing the oven Lamp
1) Disconnect the oven from the power supply by means of the Omni polar switch used to
connect the appliance to the electrical mains ;or unplug the appliance if the plug is
accessible ;
2)Remove the glass cover of the lamp-holder ;
3)Remove the lamp and replace with a lamp resistant to high temperatures (300℃)
With the following characteristic.
Voltage:220-240V
Wattage:25W
Type:E14
5)Replace the glass cover and reconnect the oven to the mains
Power supply
10. INSTALLATION
10.1 Before the Installation
Please check the products shell and make sure that there is no traces caused by striking or
heavy load.
The oven door is level, and you can close door flexibly.
Parameter on the nameplate is in compliance with the relevant regulations
When the oven working in a abnormal way, it must be stopped and unplug the power supply
until it has been repaired by a competent person from local agency or factory authorized service.
It is hazardous for anyone other than a competent person to carry out any service or repair
operation
10.2 Installation
Only a qualified person in compliance with the instructions provided must install the
appliance .manufacturer declines all responsibility for improper installation, which may harm
persons and animals and damage property.
Important: - The power supply to the appliance must be cut off before any adjustments or
maintenance work is done on it;
- Air duct is supposed to use in Ventilation.
10.3 Installation of Built-in Ovens
If we put the oven into cabinet, the material cabinet should be insulated, and the clearance
between the edge of the cabinet and the oven should be over 100mm for ventilation.

400*
546
594
455
550 21
90*
* Ventilation: provide cut out at
rear for wall oven installation only
90mm x 400mm
Ventilation cutout in
cavity base 380mm x 380mm
in all cases
Ventilation cutout in
cavity base 380mm x 380mm
in all cases
Flush Fit
We recommended that our
600mm electric ovens be installed
as flush fit only
600 min
21
A
600 min
21
A
596
456
456
596
A: Fixing Cleet (Both sides)
452mm(H) x 100mm(W) x 22mm(D)
444
5 min
30
In order to fix the oven in the cabinet, please open the oven door and insert four wood screws
into the four holes around frame and fix them.

Note: the installation and handling, please do not use the handle for stress point

The panels of the adjacent cabinets must be made of heat-resistant material.In particular ,
cabinets with a veneer exterior must be assembled with glues which can withstand temperatures
of up to 100℃.
In compliance with current safety standards, contact with the electrical parts of the oven must
not be possible once it has been installed.
All parts, which ensure the safe operation of the appliance, must be removable only with the
aid of a tool.
11. APPLIANCE CONNECTIONS
11.1 Fitting on a Power Supply Cable
Those ovens equipped with a three-pole power supply cable are designed to operate with an
alternating current .The wire for earthling the appliance is yellow-green in color.
Opening the terminal board:
· Using a screwdriver ,prize the bolt on the side tabs of the Terminal board cover;
·Unscrew the bolt, pull open the cover of the terminal board .
To install the cable, proceed as follows:
·Remove the wire clamp screw and the three contact screws L-N -
·Fasten the wires beneath the screw heads using the following color scheme :Blue (N) Brown (L)
Yellow-Green
·Fasten the supply cable in place with the clamp and close the cover of the terminal board.
·The ac power supply should be 220-240 v, 50/60 Hz, the minimum 15A distribution circuit fuse,
or at least 16 a distribution circuit breaker.
11.2 Connecting the supply cable to the mains
Install a standardized plug corresponding to the load indicated on the data plate. When
connecting the cable directly to the mains, install an Omni polar circuit breaker with a minimum
contact opening of 3 mm between the appliance and the mains .The Omni polar circuit breaker
should be sized according to the load and should comply with current regulations (the earth wire
should not be interrupted by the circuit breaker).
The supply cable should be positioned so that it does not reach a temperature of more than
50℃with respect to the room temperature ,anywhere along its length , or protected by insulation
sleeping having an appropriate rating.
Before making the connection, check that:
·The electrical safety of this appliance can only be guaranteed if the cooker is correctly and
efficiently earthed ,in compliance with regulations on electrical safety. Always ensure that the
earthling is efficient; if you have any doubts call in a qualified technician to check the system .The
manufacturer declines all responsibility for damage resulting from a system which has not been
earthed.
·Before plugging the appliance into the mains ,check that the specifications indicated on the date
plate (on the appliance and /or packaging )correspond to those of the electrical mains system of
your home .
·Check that the electrical capacity of the system and sockets will support the maximum power of
the appliance ,as indicated on the data plate .If you have any doubts, call in a qualified
technician.
·If the socket and appliance plug are not compatible ,have the socket replaced with a suitable
model by a qualified technician . The latter, in particular, will also have to ensure that the cross
sections of the socket cables are suitable for the power absorbed by the appliance. The use of

adapters, multiple sockets and /or extensions, is not recommended. If their use cannot be
avoided, remember to use only single or multiple adapters and extensions which comply with
current safety regulations .In these cases, never exceed the maximum current capacity indicated
on the single adapter or extension and the maximum power indicated on the multiple
adapter .The plug and socket must be easily accessible.
12. TECHNICAL SPECIFICATION
CAPACITY
45L
VOLTAGE
220-240V
FREQUENCE
50/60Hz
CIRCUIT BREAKER(A)
15
POWER(W)
Max2850
PRODUCT DIMENSION(mm)
594X571X455
PACKAGE SIZE(mm)
675X666X525
GROSS/NET WEIGHT(Kg)
36/32
Notice:
(1)Product Dimension is approximate number, the sequence is wide, deep, high.
(2)Package Size is peripheral package size of the box.
(3)Physical parameters may be different from label because of our products is in continuous
improvement, so please refer to physical parameters to make sure definite size

TECHNIKA PTY LTD ACN 069 686 326
77 FILLO DRIVE SOMERTON VIC 3062
General : 1800 649 969 - Service : 1800 333 244
TOMORROWS TECHNOLOGY TODAY
Technika After Sales Service - P.O. Box 543 SOMERTON VIC 3061
Version 1 Revision 20140501
Table of contents
Other Technika Oven manuals

Technika
Technika TGO910TBK User manual

Technika
Technika T45SOG Operation manual

Technika
Technika Professional Series User manual

Technika
Technika TU958TDM Specification sheet

Technika
Technika HE65FRSS-3 Operation manual

Technika
Technika BELLISSIMO Operation manual

Technika
Technika TGO65ES User manual

Technika
Technika TO66PSS-5 User manual

Technika
Technika TGDO84TBK User manual

Technika
Technika Professional Series TGO614ABK User manual