7
INSTALLATION & GROUNDING
6
10 Pinterest.com/GinnysBrand
Ginnys.com • 800.544.1590
6 7
Carafe
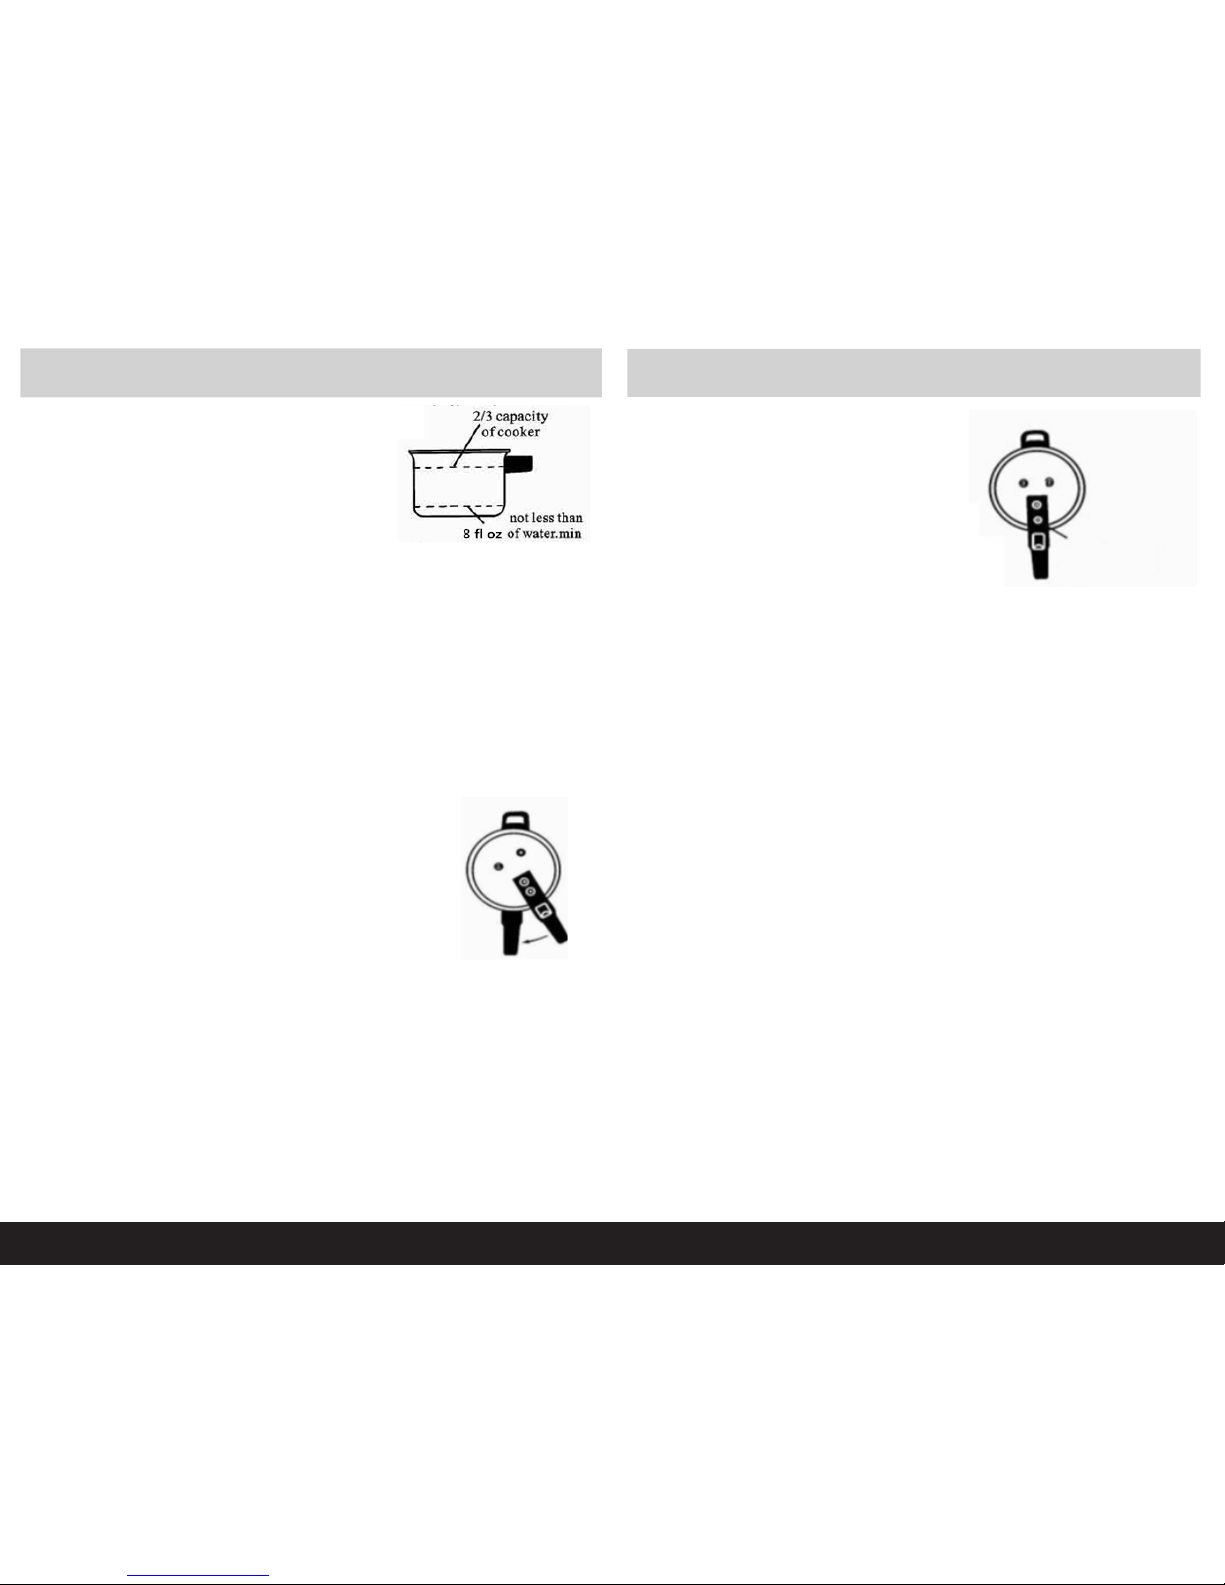
HOW TO OPERATE
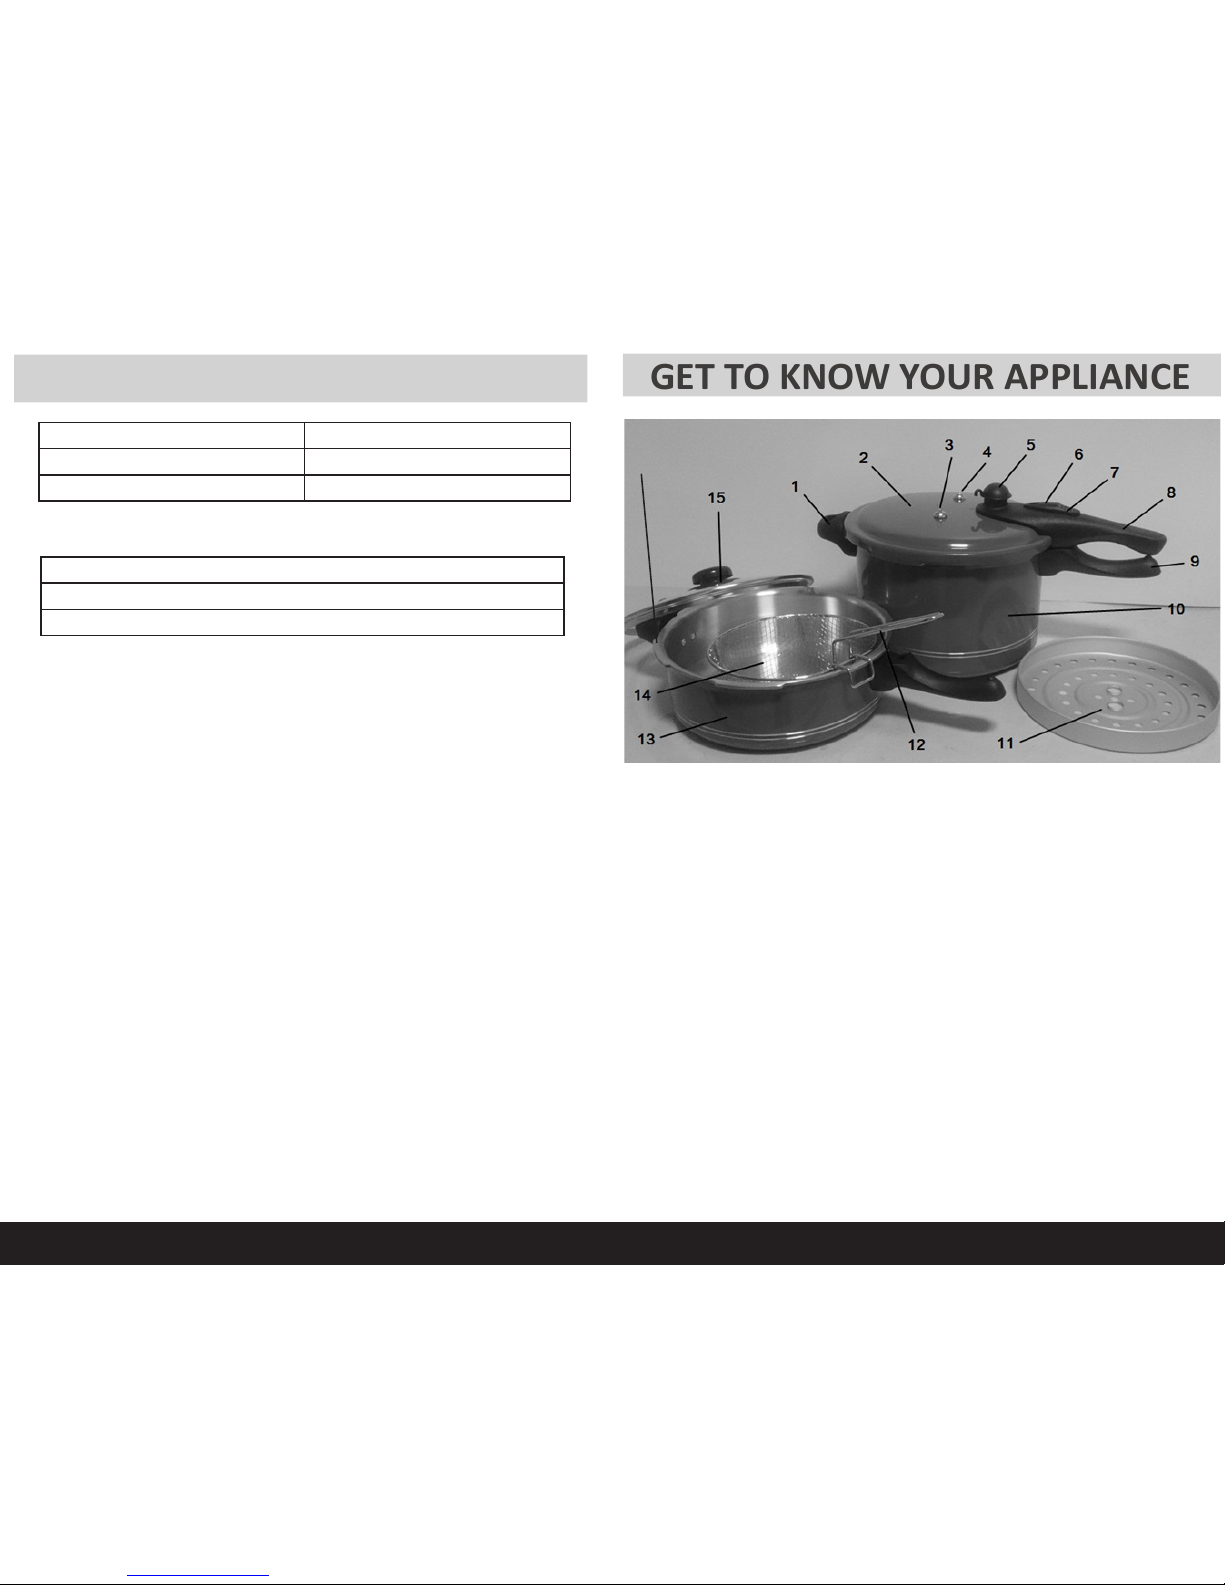
GET TO KNOW YOUR APPLIANCE
Tips:
1. To help make the cover easier to open and close, a very light
application of cooking oil may be applied to the boom of the lugs
on the pressure cooker pot. Using a piece of cloth or your nger-
tips, apply a small amount of oil to the bottom of the lugs, making
sure to remove any excess. Never apply cooking oil to the top of the
lugs or to the cover gasket.
2. You can brown or sear meats and poultry prior to adding liquid
for the pressure-cooking process. (Browning helps lock in avor.)
Using the pressure cooker pot, add a small bit of cooking oil to pre-
vent the food from sticking. When browning is nished, add the
liquid and other ingredients, and proceed with pressure cooking.
3. Dried vegetables and legumes (beans, whole peas, lentils, etc.)
MUST be presoaked to avoid foaming during the cooking process.
See package details for soaking instructions.
4. When not in use, store your pressure cooker in a dry place with
the cover inverted on the body. This will extend the life of the cover
gasket.
5. Avoid striking the rim of the pressure cooker pot with metal
cooking utensils, as this could cause nicks in the rim and prevent
the pressure cooker from forming a good seal.
HOW YOUR PRESSURE COOKER WORKS:
A pressure cooker is a pot with a special cover that locks securely into
place. As the pressure cooker is heated, the dry air is eliminated and
the moist, heated air is sealed inside, increasing the pressure within the
cooker. When the opmum pressure is reached, internal temperatures
in the cooker are raised above the normal boiling point of water, causing
foods to cook faster. The higher pressure and temperature speeds cooking
and tenderizes meats naturally. Here are some of the key components of
the pressure cooker:
The COVER SEALING GASKET (18) ts around the inside rim of the COVER
(2) and forms a pressure-ght seal on the pot.
The PRESSURE SAFETY VALVE (6) rises as you begin heang the pressure
cooker. As pressure builds, this valve will lock the cover in place. The
PRESSURE SAFETY VALVE will be in the up posion when the cooker
is pressurized and you will not be able to open the cover. When the
PRESSURE SAFETY VALVE is in the down posion, the unit is depressurized
and safe to open.
The PRESSURE REGULATOR VALVE CAP (5) ts onto the PRESSURE
REGULATOR VALVE. When the proper operang pressure (15 lbs/sq.in.) is
reached, the PRESSURE REGULATOR VALVE CAP will rock gently and control
the pressure inside the cooker. The gentle rocking moon is an indicaon
that the proper cooking pressure is being maintained.
The SPRING VALVE (3) works with the PRESSURE REGULATOR VALVE (5)
to release any excess pressure. If these two valves become blocked, the
FUSIBLE VALVE (4) will vent and release the excess pressure. The FUSIBLE
VALVE will let out a hissing sound to alert you that other valves are blocked.
Note: This pressure cooker is compable with all stovetops, except
inducon stoves.